Featured Blog | This community-written post highlights the best of what the game industry has to offer. Read more like it on the Game Developer Blogs or learn how to Submit Your Own Blog Post
Building a Simple System for Persistence with Unity
A quick overview of building a system to support saved game files in Unity for games requiring level persistence. Explores unique ID creation and management, data storage, and serialization.

Note: This post was originally published on our studio's development blog. We're a small student team based in Ontario, Canada working on our first commercial project.
I've been working pretty in-depth with Unity for almost two years now, and along the way I've discovered just how powerful the engine can be - but ultimately, it's up to developers to extend its functionality according to their needs, through the use of custom plugins, editor utilities, inspectors, and game subsystems. Building a simple system for saved games was one of the most interesting adventures I've had in Unity so far, and I hope that sharing it with the community will help other developers just starting out to get an idea of how such a system is constructed. I'll try to keep this brief, without posting too many code snippets, though if you are interested in seeing more of the code or technical hurdles involved, please reach out and I'd be happy to share.
For context, over the past few months, our team has been working on prototyping Spirit, a game about a little ghost on a mission to save his friends. I developed the system discussed here to support our needs for this project, but it should be easily generalizable to any game requiring saved states beyond simple metrics like highscores and player settings.
Since we’re designing Spirit with revisitable levels, persistent collectibles, and a simple system for player abilities, players will be able to save their progress in the world and return to their adventure later, picking up where they left off. Putting together a skeleton system for this functionality seemed like a pretty straightforward task - tap into Unity’s persistent object ID system, and serialize each dynamic object’s transformation info to a file alongside an ID for later retrieval.
Naturally, Unity has no persistent object ID system, and Unity’s Transform class can’t be serialized. Done and done. It’s perfect.
Hold on, I know what you’re thinking - “But what about the GetInstanceID function?” - which is all fine and well, but Unity regenerates these IDs every time your application is run, so while using instance IDs to identify objects between runs in the editor might very well just work, the next time you launch Unity (or eventually, your player restarts the application) - you’ll be confronted with a mass of data and virtually no means of identifying its context.

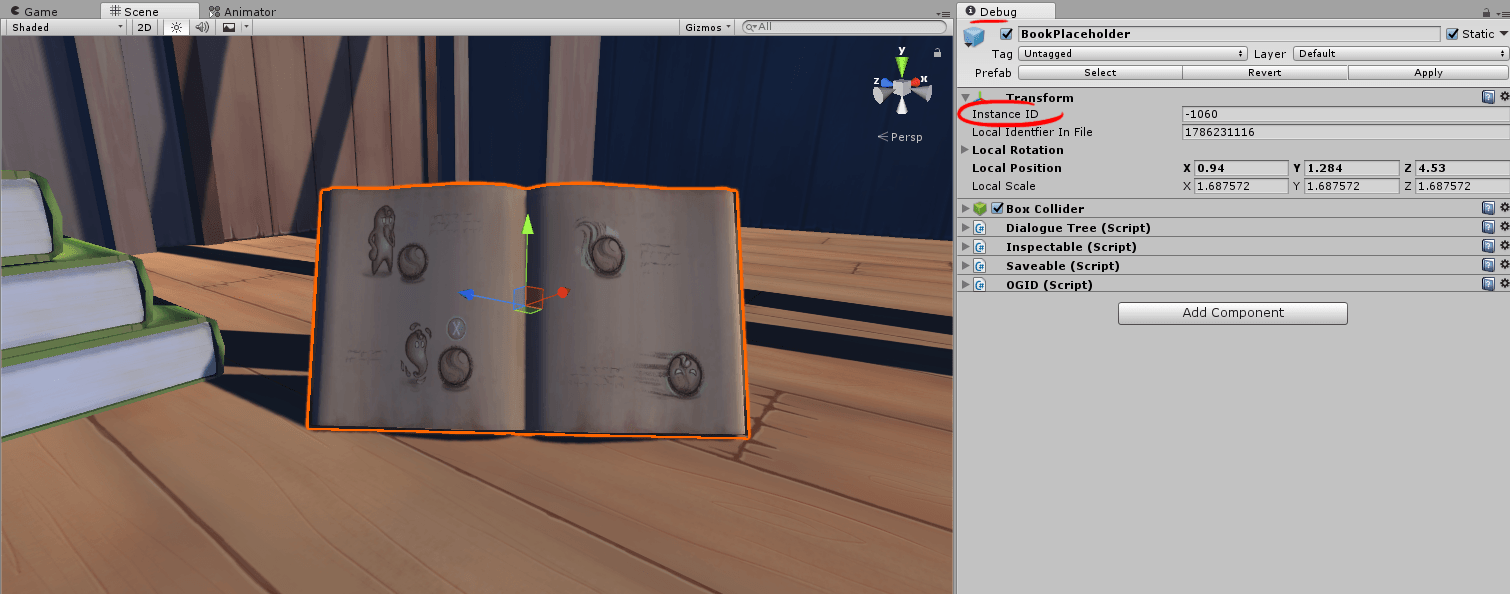
If you set your Inspector to Debug mode, you can view an object's Instance ID - but unless you expect players to keep their computers on with your game running in the background 24/7, you'll be out of luck trying to use this for saving purposes.
A number of tutorials exist on the subject of overcoming this unfortunate little roadblock, exercising options from the mundane to the ridiculous. For saving basic data and configurations, Unity offers the PlayerPrefs utility, a nifty tool for things like persisting in-game options in the form of little data chunks. However, I’m fairly certain that if you attempted to use PlayerPrefs for saving an entire game state, someone would find you and hit you over the head with a spatula in a last-ditch effort to knock some sense into you.
C# offers a myriad of options for file IO, but without some method of identifying objects uniquely and automatically, we’re left with a number of unappealing options:
Identifying GameObjects in the hierarchy by name or tag, which is horribly unadvisable as objects can be renamed/retagged and this process is manual.
Re-instantiating most of the dynamic things in your level/world from prefabs based on your saved file, which requires labyrinthian save structures for anything remotely complex and reduces your designers’ ability to move things about without ruining your save system.
Buying a pint of ice cream and drowning your sorrows whilst redesigning your game to not require a save system.
The fourth, and far less demoralizing option, is to write our own persistent, automatic ID system with a centralized manager. Following this, we can write some simple serializable data structures to store basic information (e.g. transformations), associate each object’s data with its ID, and write the lot to a file that we can reread to restore the game state at a later time. (As a sidenote, I highly recommend Joshua Smyth’s blogpost on automatic IDs in Unity, linked at the end of this post, which was an invaluable reference while working on this.)
Our first step is the matter of choosing a method to generate our IDs - a hash based on the time of creation would be suitable, but luckily, C# has a built-in GUID class that can generate a guaranteed-unique string for us in a single line:
id = System.Guid.NewGuid().ToString();
To associate our ID with a particular object, we’ll need a global manager class - which is really nothing more than a singleton with a couple of containers for key lookup (Dictionaries, most likely, assuming we’re working in C#). Depending on any extra functionality you want from the manager, you can build in some basic initialization/setup into an Awake function (updating your script execution order to ensure that the manager precedes the id scripts themselves, if necessary). At any rate, you’ll probably want two main lookups - one for mapping ID to instance ID (for checking duplicates, as noted below) and one for mapping ID directly to GameObject (for finding the objects based on ID while loading a file).
For our ID script, we need to generate the ID automatically on object creation and persist between runs. We’ll need to keep a few key things in mind when writing our script:
Store the id in a public string variable, so that it will be saved with the object and persist between launches when Unity saves and reloads our scene. (To display the value as read-only in the inspector, we can use a custom property drawer - this should be very straightforward for anyone familiar with Unity property drawers, and the post I’ve linked at the end has a helpful tutorial for the uninitiated.)
Generate the id in Awake() if it is null or invalid*, and register it with our manager.
De-register the key from the manager in OnDestroy(), to prevent us from accidentally finding a null reference if we iterate through our lookup list later on.
*We can check if a key is “valid” to avoid duplicates by seeing if the object’s instance ID matches the one the manager has “on file” for our custom ID. If it doesn’t, we generate a new custom ID. Why does this happen? If we instantiate an ID’d prefab or duplicate a GameObject with an ID, Unity will also copy our once-unique ID, and there’s no way to tell in Awake() (or anywhere else) whether or not this has happened. However, our manager will have the ID on file if we’ve set it up properly, so we can simply check in the lookup to see whether or not our key is an impostor, and remedy the situation if this is the case.
Lastly, make sure to tag the ID and manager scripts with [ExecuteInEditMode] to make sure our utility will actually run while we are editing our scene.
After the manager and ID scripts are set up properly, we can simply add an ID component to any object we want to be able to identify for loading data later on - to reduce bloat, I suggest only adding the script to objects you’ll actually need to restore - no need to tag every static piece of décor with a GUID.

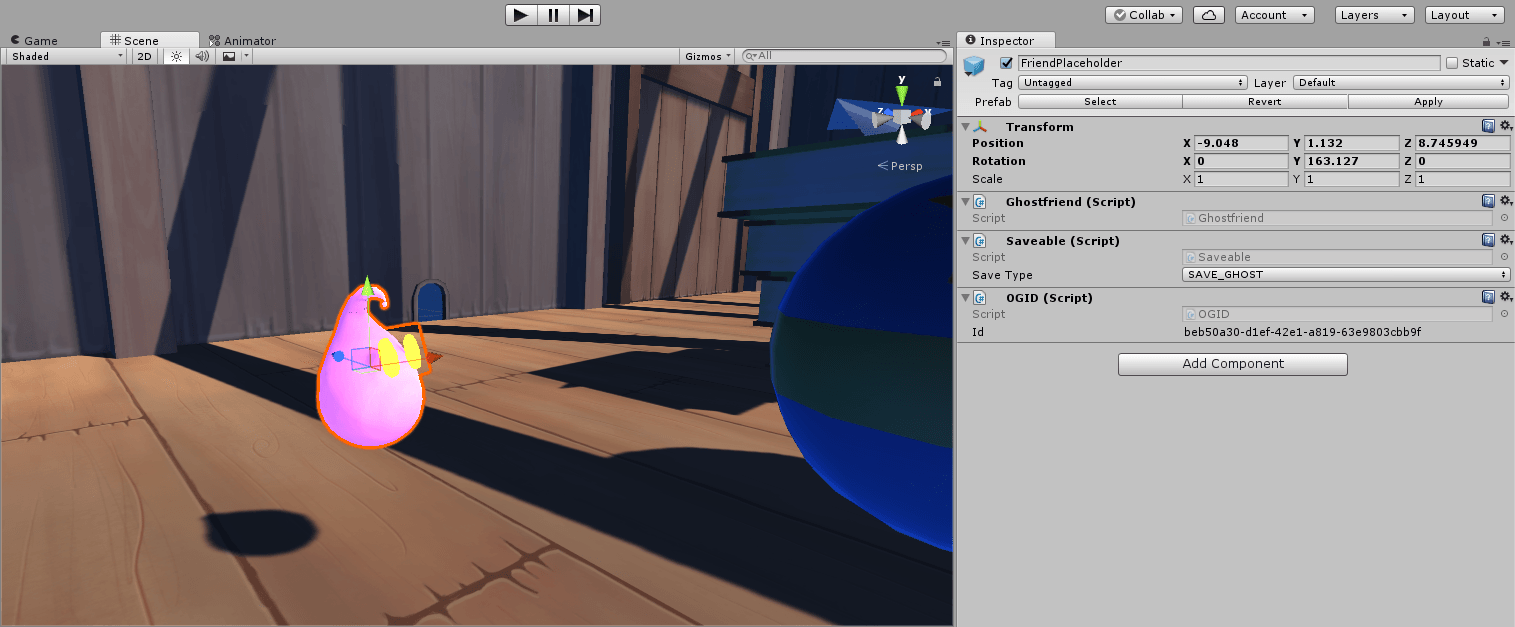
Here, I've used the OGID script to tag the object with a unique ID - the Saveable script is another little utility written purely for data storage - internally it builds a structure (tagged with the [System.Serializable] attribute) to store the data needed to load the object's state later on - for example, position and orientation.
The rest of the process for creating a saved-game system is fairly straightforward - using built-in path variables and C#’s directory utilities, getting a basic file system manager off of the ground is a breeze. I’m a fan of using C#’s DateTime utility for generating save IDs, as it’s a great way to create a human-readable and unique (at least, unique to the system the app is running on, assuming no time travel shenanigans) tags for identifying saved games.
Saving and loading the data itself is actually the simplest part of the process - create a few custom classes for storing an object’s transformation and any other data you’d like to save, write functions to copy the data to and from GameObjects, and stick them on any ID’d objects you’d like to save. From here, you could choose to write a custom file format for your data - or tag everything with the System.Serializable property, make another serializable class with arrays of your custom containers, copy over references to your data containers in your save function, and then use just four lines to scribble the whole thing to a file:
System.IO.Stream s = new System.IO.FileStream(filepath, System.IO.FileMode.Create, System.IO.FileAccess.Write);
System.Runtime.Serialization.IFormatter formatter = new System.Runtime.Serialization.Formatters.Binary.BinaryFormatter();
formatter.Serialize(s, saveGame);
s.Close();
You can choose to use a binary or XML serializer to encode your data. While I’m by no means an expert in making the choice, here’s a quick rundown of my understanding of the pros/cons on either side:
Binary - harder to read/edit as a text file (not great for development but might be a plus to avoid player trickery), slightly faster to read/write, slightly more prone to corruption.
XML - easier to read/edit as a text file, slightly slower to read/write, less prone to corruption/easier to “fix” a savefile if something goes horribly wrong.
I’ve gone with binary for now, because there’s something oddly satisfying about opening your savefile to see it come out as a string of gobbledygook that magically turns back into a game state upon loading:
System.IO.Stream s = new System.IO.FileStream(filepath, System.IO.FileMode.Open, System.IO.FileAccess.Read);
System.Runtime.Serialization.IFormatter formatter = new System.Runtime.Serialization.Formatters.Binary.BinaryFormatter();
SaveGame saveGame = (SaveGame) formatter.Deserialize(s);
s.Close();
After you’ve deserialized your savefile, you can call your own custom routines to copy data back from your containers to your GameObjects (using your ID lookup to reference the appropriate object as a matter of course) - presto, you’ve successfully loaded your game! Assuming you build your file by iterating through ID’d objects, new objects will add to your savefiles automatically, and you’ll only need to go back to your code if you need to save additional data types or you want to tinker with file management.

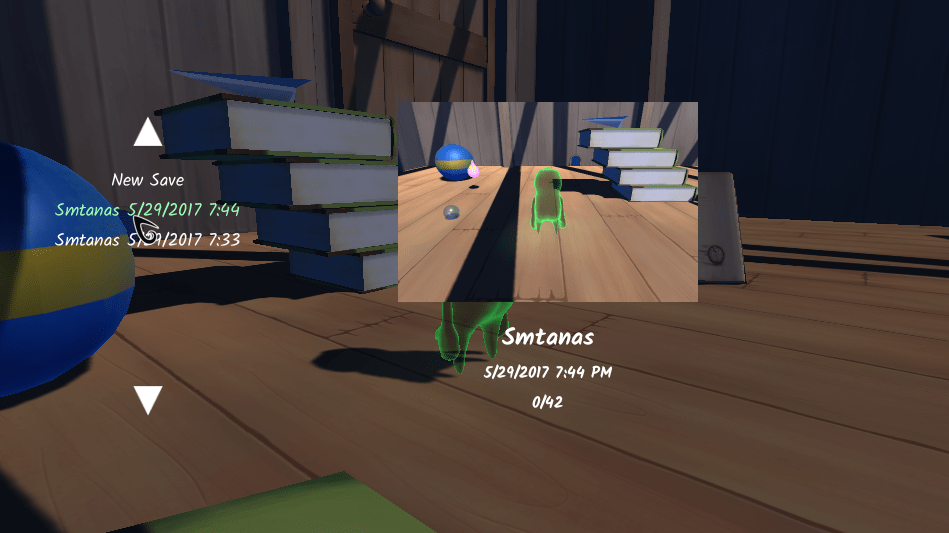
And with a bit of finagling with Unity's UI Canvas, a custom screenshot utility, and some layout tweaks - you can create a nifty little save/load menu that can decode your savefile's name and/or custom metadata - I use a hash of player ID and timestamp - to display some info at-a-glance for the player's saved files.
And that’s just about it for some basic, but fairly robust, persistence in Unity.
If you’re interested in developing your own system for saved games using Unity, I highly recommend these pages as follow-up reads:
MSDN’S documentation on serialization in C# (skimmable for code examples)
That’s it for today, thanks for reading, and feel free to reach out if you have any questions.
Read more about:
Featured BlogsAbout the Author
You May Also Like


