

Daily news, dev blogs, and stories from Game Developer straight to your inbox
Sponsored By
100 Day of VR: Day 13 Attacking Enemies, Health System, and Death Animation in Unity
Today we’re going to go on and implement the shooting logic for our player and to fix the annoying bug where the player would be perpetually moving after they come in contact with any other colliders.
7 Min Read

Welcome back to day 13 of the 100 days of VR! Last time we created enemy motions that used the Nav Mesh Agent to help us move our enemy Knight.
We added a trigger collider to help start the attack animations when the enemy got close to the player.
Finally, we added a mesh collider to the body of the knight so when it touches the player during its attack animation we’ll be able to use the damage logic.
Today we’re going to go on and implement the shooting logic for our player and to fix the annoying bug where the player would be perpetually moving after they come in contact with any other colliders.
Fixing the Drifting Problem
My first guess at what the problem is that something must be wrong with our Rigid Body component of the player.
If we recall, the Rigid Body is in charge Unity’s physics engine on our player.
According to the documentation for RigidBody, the moment that anything collides with our player, the physics engine will exert velocity on us.
At this point we have 2 options:
Set our velocity to be 0 after any collision
Make our drag value higher
What is drag? I didn’t really understand it the first time we encountered it either, but after doing more research, specifically reading it here in Rigidbody2D.drag drag is how long it takes for an object to slow down over friction. Specifically, the higher the faster it is for us the faster for us to slow down.
I switched the drag value in the RigidBody from 0 to 5.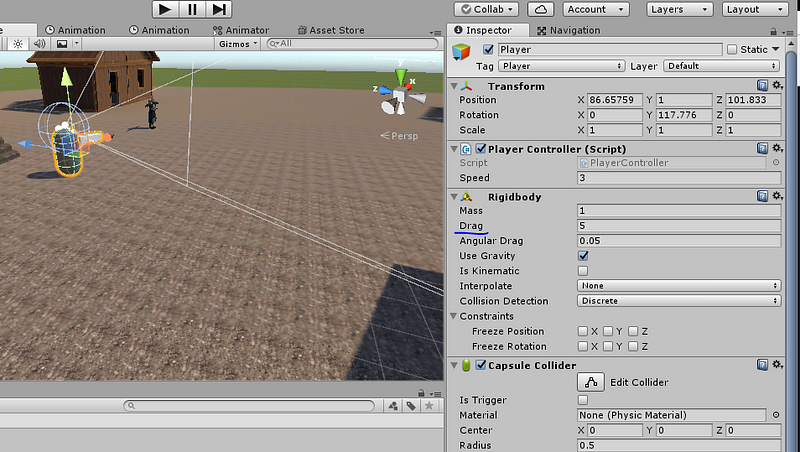
I’m not sure what the value represents, but before our velocity never decreased from friction because of our drag value, but after we added one in, we’ll start slowing down over time.
Adding the Enemy Shooting Back into the Game
After solving the drag problem, we’re finally going back to the main portion of the game: shooting our enemy.
There will be 2 places that we’re going to have to add our code in: EnemyHealth and EnemyMovement.
EnemyHealth:
using UnityEngine;
public class EnemyHealth : MonoBehaviour
{
    public float Health = 10;
private Animator _animator;
    void Start()
    {
        _animator = GetComponent<Animator>();
    }

    public void TakeDamage(float damage)
    {
        if (Health <= 0)
        {
            return;
        }
        Health -= damage;
        if (Health <= 0)
        {
            Death();
        }
    }
    private void Death()
    {
        _animator.SetTrigger("Death");
    }
}
Here’s the new flow of the code we added:
In Start() we instantiate our Animator that we’ll use later to play the death animation
In TakeDamage() (which is called from the PlayerShootingController) when the enemy dies, we call Death().
In Death(), we set death trigger to make the Knight play the death animation
Next, we need to make a quick change to EnemyMovement to stop our Knight from moving when it dies.
using UnityEngine;
using UnityEngine.AI;
public class EnemyMovement : MonoBehaviour
{
    private NavMeshAgent _nav;
    private Transform _player;
    private EnemyHealth _enemyHealth;
    void Start ()
    {
        _nav = GetComponent<NavMeshAgent>();
        _player = GameObject.FindGameObjectWithTag("Player").transform;
        _enemyHealth = GetComponent<EnemyHealth>();
    }

    void Update ()
    {
        if (_enemyHealth.Health > 0)
        {
            _nav.SetDestination(_player.position);
        }
        else
        {
            _nav.enabled = false;
        }
    }
}
Here’s the code flow:
In Start() we grab the EnemyHealth script so we can access the knights health.
In Update() if the knight is dead, we disable the Nav Mesh Agent, otherwise it continues walking like normal.
Now when we play the game, the knight enters the death state when defeated, like so: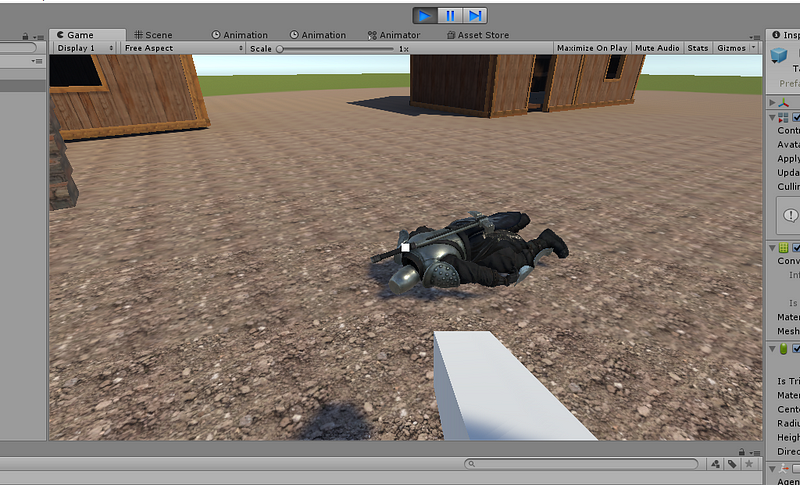
Improving Shooting Mechanics
At this point you might notice a problem….
…Okay, I know there are many problems, but there are two specifics problems I’m referring to.
The knight dies almost instantly whenever we shoot
When we shoot, we don’t really have anything happen to the enemy to make us feel we even shot them
So we’re going to fix these problems
Adding a shooting delay
Right now, we always shoot a raycast at the enemy knight whenever Update() detects that our mouse is held down.
So, let’s add a delay to our Player Shooting Controller script.
using UnityEngine;
public class PlayerShootingController : MonoBehaviour
{
    public float Range = 100;
    public float ShootingDelay = 0.1f;
    private Camera _camera;
    private ParticleSystem _particle;
    private LayerMask _shootableMask;
    private float _timer;
    void Start () {
        _camera = Camera.main;
        _particle = GetComponentInChildren<ParticleSystem>();
        Cursor.lockState = CursorLockMode.Locked;
        _shootableMask = LayerMask.GetMask("Shootable");
        _timer = 0;
    }

    void Update ()
    {
        _timer += Time.deltaTime;
        if (Input.GetMouseButton(0) && _timer >= ShootingDelay)
        {
            Shoot();
        }
    }
    private void Shoot()
    {
        _timer = 0;
        Ray ray = _camera.ScreenPointToRay(Input.mousePosition);
        RaycastHit hit = new RaycastHit();
        if (Physics.Raycast(ray, out hit, Range, _shootableMask))
        {
            print("hit " + hit.collider.gameObject);
            _particle.Play();
            EnemyHealth health = hit.collider.GetComponent<EnemyHealth>();
            if (health != null)
            {
                health.TakeDamage(1);
            }
        }
    }
}
Here’s the logic for what we added:
We created our time variables to figure out how long we must wait before we shoot again
In Update() if we waited long enough, we can fire again
Side note: I decided to move all of the shooting code into Shoot()
Inside Shoot() because the player fired, we’ll reset our timer and begin waiting until we can shoot again.
Adding Player Hit Effects
Setting up the Game Objects
When we shoot our enemy knight, nothing really happens. He’ll just ignore you and continue walking towards you.
There are a lot of things we can do to make this better:
Add sound effects
Add damage blood effects
Push him back
All of the above
1) will be added in eventually, 2) might be done, but 3) is what I’m going to implement.
Every time we shoot the knight, we want to push it back. This way if a mob of them swarm at us, we’ll have to manage which one to shoot first.
This little feature took a LONG time to resolve.
The problem
Whenever we shoot an enemy, we want to push them back, however, the Nav Mesh Agent would override any changes we tried. Specifically, the knight will always continue moving forward.
The solution
We write some code that changes the velocity of the Nav Mesh Agent to go backwards for a couple of units.
However, when I did that, the knight continued running forward!
Why?
That’s a good question, one that I’m still investigating and hopefully find a solution by tomorrow.
End of Day 13
For the first time ever today, I started on a problem, that I couldn’t solve in a day.
I’m expecting this to become more common as we start jumping deeper and deeper.
With that being said, today we fixed the player’s drifting problem by using drag and adding an enemy death animation when they run out of health.
Tomorrow I’ll continue investigating how I can push the enemy back.
See you all on Day 14! Or whenever I can figure out this knockback problem!
Original Day 13
Visit the main 100 Days of Unity VR Development page
Visit my homepage
Read more about:
BlogsAbout the Author(s)
You May Also Like


.jpeg?width=700&auto=webp&quality=80&disable=upscale)


