Daily news, dev blogs, and stories from Game Developer straight to your inbox
Sponsored By
Deep Dive: How to achieve the cozy papercraft style of Paper Cut Mansion
A step-by-step demonstration showing how the high-texture papercraft visuals in this roguelite were achieved with software.
5 Min Read

Game Developer Deep Dives are an ongoing series with the goal of shedding light on specific design, art, or technical features within a video game in order to show how seemingly simple, fundamental design decisions aren’t really that simple at all.
Earlier installments cover topics such as how art director Olivier Latouche reimagined the art direction of Foundation, how the developer of the RPG Roadwarden designed its narrative for impact and variance, and recreating the the real-life diorama-based experience with the art of LEGO Bricktales.
In this edition, Gabriele Caruso, creative director at Space Lizard Studio, gives us a detailed walkthrough of how the papercraft-based aesthetic of Paper Cut Mansion came together with what he calls the Reverse UV method.
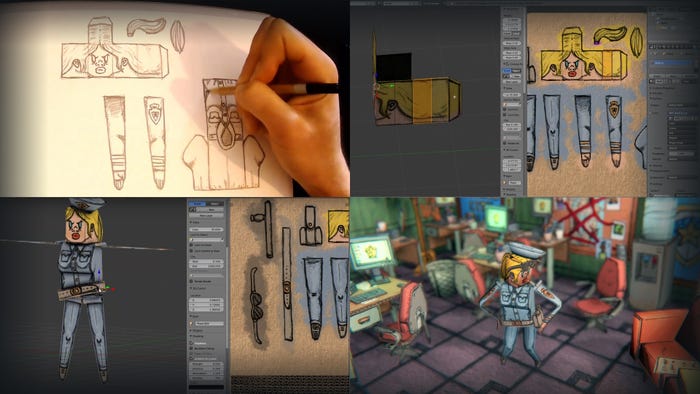
I’m Gabriele Caruso, creative director at Space Lizard Studio, a three-man team behind Paper Cut Mansion, a roguelite where you enter a strange and spooky mansion and work to uncover its secrets. What makes Paper Cut Mansion incredibly unique is its papercraft art style. Every character, every environment, and even the menus are hand drawn with real pencils on real paper, then transcribed into the game engine and brought to life.
The process starts with a pencil sketch that defines the shapes of the cutout paper models, but this sketch is not thrown away. Instead, it’s enhanced with more details, a face, two arms, a torso, two legs, some shading, and so on.
The drawing is complete once the paper model has all its parts defined, including the lines and edges where it folds and the tags where the body parts are supposed to be glued together as if it was going to become a real papercraft model. The artist then scans the sheet of paper and imports it into Photoshop to digitally color the flat drawing and turn it into a texture. This texture is then imported into Blender, where the disparate sections are “cut out” into planes and then “folded” into 3D sections/parts, which can then be assembled to create a 3D model.
Essentially, this technique mimics the creation of a true papercraft model but uses digital software to create the final product (in fact, you could take this very texture, print it out, and make your own real papercraft).

After inventing this technique and sharing it online, it has now been dubbed the “Reverse UV Method.” Once complete, the model can be rigged and animated using Blender and Unity. The final result is a beautiful set of dark fantasy dioramas made of cardboard and paper, which set the mood for a spooky Tim Burton-esque adventure unlike anything seen before.
The Reverse UV method
Let me walk you through how you use the Reverse UV method so you can try it for yourself (there’s also a handy video tutorial if you’d like to check that out).
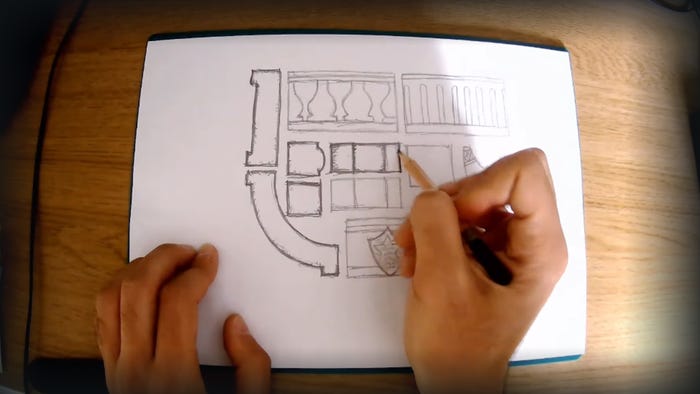
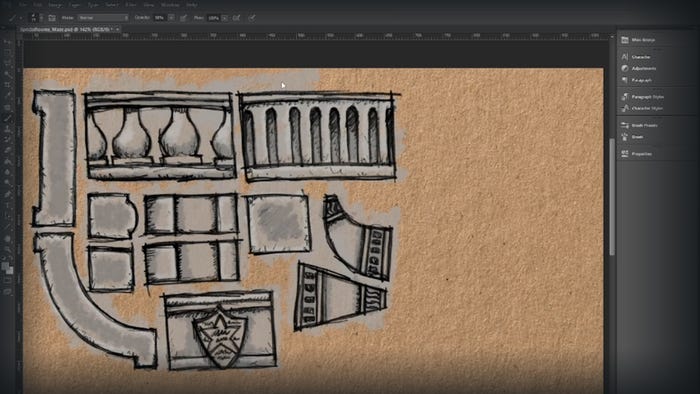
Take a sheet of paper and draw out your character shapes, environments, or whatever else you want to create, taking into consideration where they are supposed to fold and “glue” to each other.
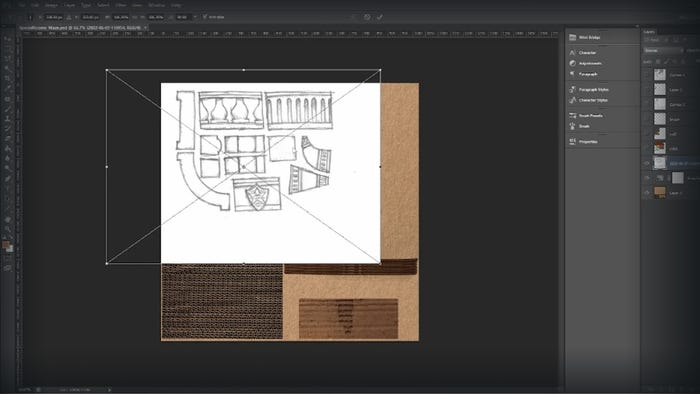
Scan your drawing with a scanner and import the image into Photoshop. I have a cardboard texture loaded in the background in another layer so my goal is now to make my drawing lines show without a white paper background.
In order to do so, I am setting the drawing layer to “Multiply” and change the “Curves” to make the lines darker and adjust contrast so it looks like the drawing was done straight on my cardboard texture.
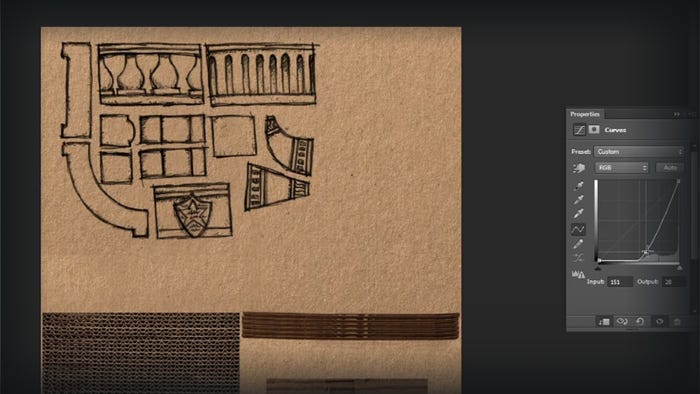
Once the drawing is fairly visible, I am ready to add another layer for color. Coloring should be rough, not super detailed and it should look like it was done in a rush. I usually go for a wet brush or watercolor effect with some transparency.
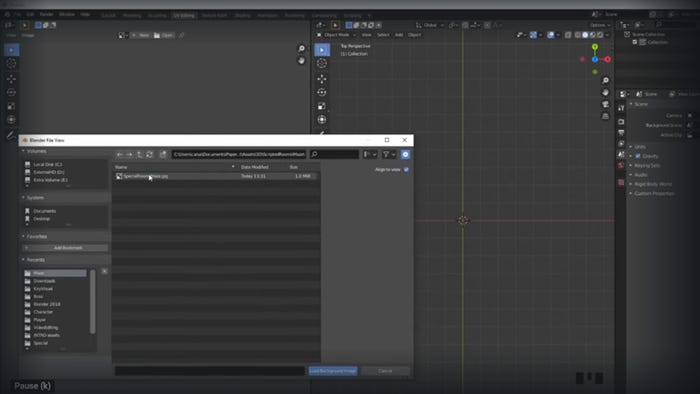
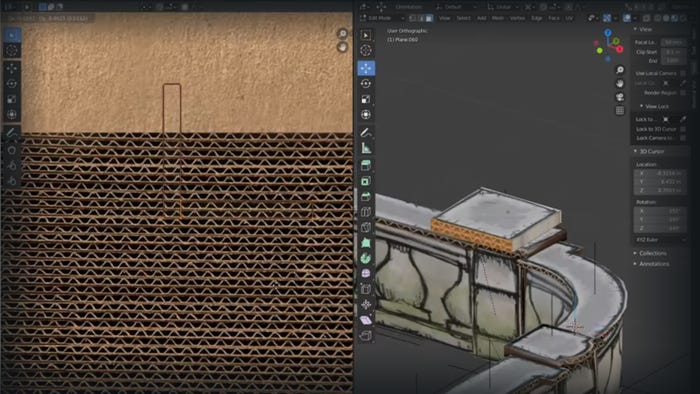
After adding color and saving my texture as a .jpg or .png, I then go to a 3D software application called Blender and start the 3D process. I need to first add my texture as a “Background Image” straight in the 3D Viewport.
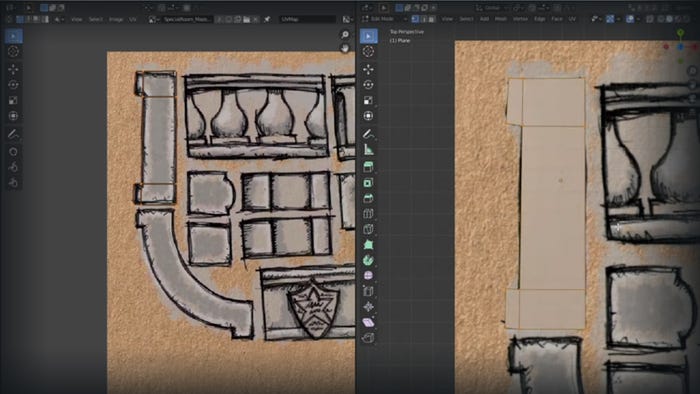
I will add a UV Editor tab and start “cutting” shapes out of my background image in the 3D Viewport. Starting with creating a Plane, I add vertices simply by following the drawing lines of my texture. Then I select all vertices and click “Unwrap” to finally see my unwrapped shape appearing on the UV Editor.
Now it’s time to add thickness to your cardboard piece using a modifier called “Solidify.” This modifier will allow me to extrude my shapes and add that cool corrugated detail on the side of my paper cutouts.
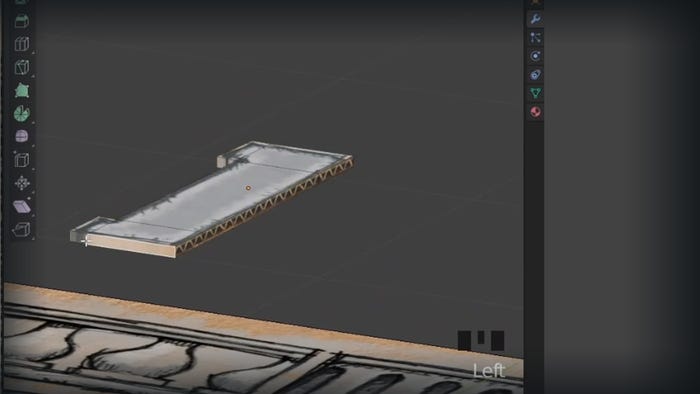
Eventually, I will end up with all the cutout parts that were meant to be glued together to build the final model as it was intended.
If I am making a character or a model in general that needs an armature for animations, I would create a set of armature bones and start animating the character in Blender. Otherwise, if it’s just an environment or a piece of furniture you can interact with, I would extract the model and import it into Unity.
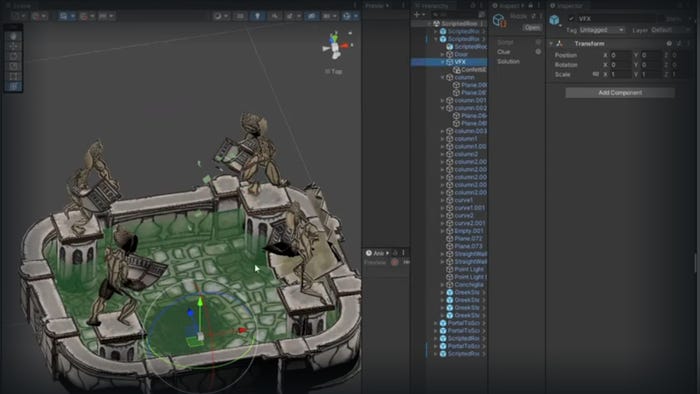
In Unity, I can add the final touches, add particle effects, animations, and sounds, modify the materials, and add scripts and components to finalize the model, getting it ready to be part of the mysterious mansion.
And there you have it. A “real” paper model made in-game. I hope you’ll agree that this innovative process really gives Paper Cut Mansion a handcrafted feel and plays a big role in generating the game’s atmosphere, and I hope you try it yourself.
About the Author(s)
You May Also Like


.jpeg?width=700&auto=webp&quality=80&disable=upscale)


