Featured Blog | This community-written post highlights the best of what the game industry has to offer. Read more like it on the Game Developer Blogs or learn how to Submit Your Own Blog Post
Working with Pixel Art Sprites in Unity: Importing Assets
A how-to series about importing, animating, and placing 2D sprites in Unity while using the actual Unity editor as little as possible. First up is the complicated world of importing assets into your Unity project.

Welcome to a series of blog posts that will reveal my workflow for importing, animating, and placing 2D sprites in Unity while using the actual Unity editor as little as possible. I’ve taught myself how to navigate Unity’s API by the process of actually making a game, and I figured my long hours of scrambling in the dark could benefit other developers.
Before we can begin animating, we need art to animate with. Welcome to the surprisingly complicated world of simply importing your art assets into Unity
Part 1. Importing Assets for 2D Pixel Sprite Games
Unity was not meant for 2D games. Especially not pixel art sprite and tile-based 2D games. The headache of importing a sprite sheet and slicing it up, especially coming from other more straightforward frameworks, was incredibly disheartening. Imagine importing a sprite sheet into your project only to discover that you had to manually change half-a-dozen attributes each and every time? Or that, instead of slicing up a sprite sheet by simply defining a couple parameters, you had to manually slice up each frame? Well guess what, you don’t have to imagine it, that’s just how Unity works.

I desperately needed a solution that would return this process to the completely trivial category that it belongs in. And then I learned that my salvation lay in editor scripts.
Certain editor scripts execute automatically every time a certain Unity function is performed. Importing assets is one of those functions. To make an editor script, you must first simply create a new script in a directory called “Editor” somewhere inside the “Assets” directory of your project. This should be a class that extends AssetPostprocessor. The code listed in the OnPreprocessTexture and OnPostprocessTexture methods will change the behavior of how your assets are imported into your project.
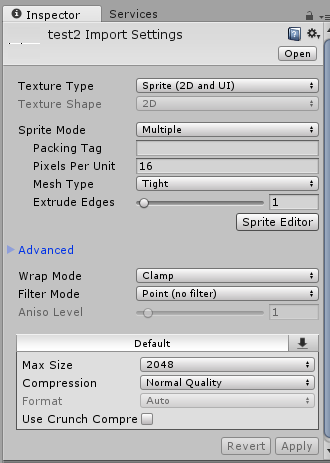
So instead of manually editing all of these properties every time you import a sprite:

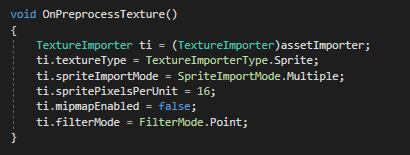
You could just edit this in script, once:

Now I don’t have to manually change filterMode to Point on every single sprite I import! Score. (FilterMode.Point keeps your texture art sharp, which is ideal for pixel art. Unity assumes you were importing a large texture to be used in a high-verisimilitude 3D game, in which case, a bilinear/trilinear filter might be better.) However, these properties will probably change from project to project, so don’t assume the code I’ve posted here is canon.
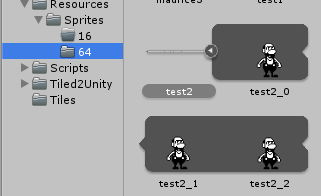
Next we’ll use the OnPostprocessTexture() method to slice up our script for us by iterating through the texture and storing the slices in an array on the metadata of the asset (you can see the code on GitHub if you want the details). The problem, however, was in deciding how to determine the dimensions of the sprites that needs to be sliced, and which of the imported assets should even be sprites in the first place. I didn’t want to have to repeatedly determine these properties in some editor window pop-up every single time I imported a sprite (that would defeat the entire purpose of this exercise). Eventually I settled on an auto-magical solution. Simply drag your asset into a folder named after an integer somewhere in your project’s “Resources” directory (eg. a directory named “16”), and the editor script will assume you want that asset sliced up as a sprite sheet with 16 by 16 pixel sprite dimensions.
I mean just look at this brilliant, sliced sprite:

In general auto-magic solutions make me slightly nervous. I decided to add a little pop-up window telling the user that the sprite was sliced, so the user was aware that something just happened.

And that’s about it! If you think this script could be useful for your project feel free to grab it on GitHub.
In my next post, I’ll share some of the things I learned defining and playing sprite animations in script rather than via the Unity editor. Until then, be good!
Read more about:
Featured BlogsAbout the Author(s)
You May Also Like


.jpeg?width=700&auto=webp&quality=80&disable=upscale)


