

Daily news, dev blogs, and stories from Game Developer straight to your inbox
Sponsored By
Featured Blog | This community-written post highlights the best of what the game industry has to offer. Read more like it on the Game Developer Blogs or learn how to Submit Your Own Blog Post
Unity Builds Scripting: Basic and advanced possibilities
Generating builds manually is never a good idea. Let's see how we can make this process painless in Unity and explore the possibilities that scripting opens for more advanced operations.
14 Min Read

(This blog entry is a translation and merge of two blog posts previously published in MareaIndie's Spanish blog)
Not long after programmers start using Unity, we learn that we can add new entries to the editor menus easily. It's something as simple as creating a parameterless static method (return type is not relevant) in an editor class (inside any directory called Editor) and use the MenuItem attribute:
[MenuItem("Custom/Scripted Ops")]
public static void ScriptedOps() {
  // Do something
}
From these menu items we can run all kinds of processes, from the simplest to the most complex: validate assets or configurations, generate localization reports, open a new window for a tool...
The best use I've found for this, however, is to simplify the burdersome task of generating builds. And that's because the standard build generation steps are:
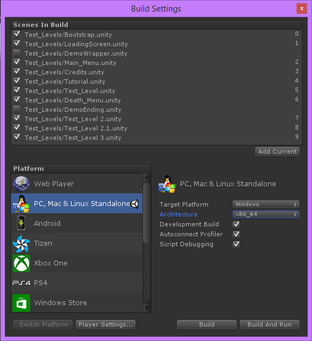
File->Build settings...
Ensure all relevant scenes are selected and the first one is the boot scene.
Check and set the platform (and sub-platform and architecture, if relevant).
Check and set the right options for the build (development, null, checks...).
(Optional) Verify that platform specific settings in Player settings... are properly set.
Press Build.
Select output directory (or create a new one) and executable name.
Accept.
Wait.
Test the build.
If something failed, go back to 2.
If you need to create several builds for different platforms, after waiting you'll need to repeat the same steps. The more platforms you switch between, the longer the process is, and the higher the chances of making a mistake.
Taking advantage of MenuItem, we can create static methods to make builds with preset configurations, saving ourselves a few mistakes and mishaps. At this point, it is important to note that almost any option required to configure builds, no matter the platform, can be set via scripts on Unity. The most common entry points to this functionality are UnityEditor.PlayerSettings and EditorBuildSettings, each including access to platform specific settings.
Heart&Slash is (or will shortly be) available for Windows, Linux, MacOS X, PS4, Xbox One and Tomahawk F1 (a Chinese Android console codenamed Fuze). Even with that wide spectrum of targets, I haven't found an option I needed which could not be set from scripts somehow. But, truth be told, some options require a little more trial and error than I enjoy, until you decypher their meaning and possibilities.
[MenuItem("Builds/Win 64bits/DRM Free")]
public static void BuildWin64NoDRM() {
  string[] levels = new string[] {
    "Assets/Test_Levels/LoadingScreen.unity",
    "Assets/Test_Levels/Main_Menu.unity",
    "Assets/Test_Levels/Credits.unity",
    "Assets/Test_Levels/Tutorial.unity",
    "Assets/Test_Levels/Test_Level.unity",
    "Assets/Test_Levels/Death_Menu.unity"
  };

  UnityEditor.PlayerSettings.runInBackground = false;
  string message = BuildPipeline.BuildPlayer(
    levels,
    "../Builds/DRMFree/Win64/GameTitle.exe",
    BuildTarget.StandaloneWindows64,
    BuildOptions.ShowBuiltPlayer);

  if (string.IsNullOrEmpty(message))
    UnityEngine.Debug.Log("Win64 build complete");
  else
    UnityEngine.Debug.LogError("Error building Win64:\n" + message);
}
Once we have an entry in the menu, the steps required to have a new build are:
Builds->Win 64bits->DRM Free Worldwide
Wait.
Test the build.
If something went wrong, check the project. If changes to anything related to the build code was changed recently, check it's alright. Back to 1.
Of course, nowadays many Unity developers are used to Cloud build, which is pretty much as simple as this. The way it works is similar, with the added benefit of outsourcing the build itself to another machine. Unfortunately, Cloud Build is not available for exotic platforms, mainly consoles.
Most of the things I'll comment in this post can either be done directly from Cloud Build, or executed from there calling static methods.
Some simple things we can do from scripts:
Configure the path in which the build will be generated to include the current date and time.
Configure BuildOptions for development builds (BuildOptions.development | BuildOptions.AllowDebugging).
Include different scenes for demo/release/test build.
And, one of my favourite, we can also create static methods to call some of the others, creating several builds at once:
[MenuItem("Builds/PC All Platforms/DRM Free")]
public static void BuildAllPCNoDRM() {
  BuildWin32NoDRM();
  BuildWin64NoDRM();
  BuildMacOSNoDRM();
  BuildLinuxNoDRM();
}
Now, if we need to create several builds at once, we just need to select the right options and let the PC do it's job. Meanwhile, we can keep working on something else, check twitter or the mail. Remember to check Unity from time, to make sure things are progressing nicely, and once it's finished, check the builds.
The Cloud Build equivalent to that would be running several targets at once.
One other important aspect to take into account is that these static methods can be used from Jenkins or any other Continuous Integration system you use (even if it's just a few batch files). Editor static methods can be invoked as pre-build, build or post-build commands using Unity's command line arguments:
"C:\Program Files\Unity\Editor\Unity.exe -quit -batchmode -executeMethod BuildWin64NoDRMWorldwide"
Cloud Build lets us configure methods to call before and after starting to work on the build, so this approach can be used, too.
There are some other tasks which are a little harder to integrate into Cloud Build, but most are still usable as commands. We'll check some of them in the next pages.
For what's coming next, I first need to give a little bit of context. Heart&Slash currently has:
7 platforms: Win32, Win64, Linux, MacOS X, PS4, Xbox One and Tomahawk F1.
10 text languages: English, French, Italian, German, Spanish, Russian, Simplified Chinese, Traditional Chinese, Korean and Japanese
1 language with localized images: Simplified Chinese
3 store-related builds for PC: Steam, GOG and what I call DRMFree. These should probably count as platforms.
Demo versions with specific scenes for Tomahawk F1, Win32, Win64, Linux and MacOS X. These are store independent.

It's easy to see that generating these many builds from Build settings... is out of the question. It was a good thing, then, that before the project grew into such nightmare, we had already integrated a system pretty much like what I explained in the previous page. For each new platform or configuration, it was just a matter of figuring out how to properly make builds for it (the hard part) and then add new methods to reproduce those steps. After testing the builds ran correctly, it was done.
From the moment we knew how to create a properly working build manually for a platform, it took at most 1 day to have it scripted. Most of that time was spent reading docs or forum entries about documented or undocumented options, generating, deploying and testing the builds.
Afterwards, the most complex platforms have required at most 1-2 more days of work. We made improvements to how we managed them, added new functionality (i.e. patch builds or script only builds) or fixed stuff we learnt we were not using properly.
Adding new configurations to already scripted platforms could take from 1 to 3 hours, most of them dedicated to testing.
Now, let's get our hands dirty. Even if most of the tricks I'll explain from here on are extremely useful in projects with this many targets, smaller projects can still take advantage of them.
Configuration prefabs
Because of the huge amount of possible combinations of languages per build, we needed to use several tricks.
The first and basic one is keeping a list of references to language configurations in a prefab. This prefab was called LanguageLoader.prefab and had the ingenuously named script LanguageLoader. Each referenced language is another prefab which includes the list of text files which contain its translations, localized texture atlases, dynamic and static fonts, etc.
But then, because there are many possible combinations of languages, we needed to configure LanguageLoader for each build, removing languages as needed (and reverting the prefab afterwards; thank you for existing, VCSs!). After doing it like that twice and getting it wrong the third time (in this case, two out of three is very bad, my dear Meat Loaf), I decided to find another way.
After discussing it with a friend and exposing some of the alternatives I had come up with, we agreed on a good enough solution: I'd keep one LanguageLoader prefab per platform/region/language combination and overwrite the LanguageLoader the build actually uses from the build script.
[MenuItem("Builds/Win 64bits/DRM Free Worldwide")]
public static void BuildWin64NoDRMWorldwide() {
  string[] levels = new string[] {
    "Assets/Test_Levels/LoadingScreen.unity",
    "Assets/Test_Levels/Main_Menu.unity",
    "Assets/Test_Levels/Credits.unity",
    "Assets/Test_Levels/Tutorial.unity",
    "Assets/Test_Levels/Test_Level.unity",
    "Assets/Test_Levels/Death_Menu.unity"
  };

  // Overwrite LanguageLoader
  System.IO.File.Copy("Langs/LanguageLoader_NoDRM_WorldWide.prefab", "Resources/Langs/LanguageLoader.prefab", true);
  // Reimport the prefab, because otherwise Unity will use the "Library" imported version.
  AssetDatabase.Refresh();

  UnityEditor.PlayerSettings.runInBackground = false;
  string message = BuildPipeline.BuildPlayer(
    levels,
    "../Builds/DRMFree/Win64/GameTitle.exe",
    BuildTarget.StandaloneWindows64,
    BuildOptions.ShowBuiltPlayer);

  if (string.IsNullOrEmpty(message))
    UnityEngine.Debug.Log("Win64 build complete");
  else
    UnityEngine.Debug.LogError("Error building Win64:\n" + message);
}
This can also be of help for people who need to generate region restricted builds.

If you intend to soft launch your Android game in Brazil, but don't want it to leak into other markets, you can easily generate builds with only Portuguese Brazilian in them. Meanwhile, you can still generate builds with all languages for internal purposes.
You can be worried that your Steam game might be purchased in China, sold outside for much less than its $/€/£ price and activated in other regions. Generate China exclusive keys and grant the access to builds with nothing but Simplified Chinese.
Display only platform relevant menu entries
With that many possible configurations, in the end we have 40 menu items displayed under Builds. That's counting catch-all entries like "PC_GOG_AllPlatforms", "PS4_AllRegions" or special dev builds. No matter how well organized your menu hierarchy is, 40 entries cannot be easily managed.
Add to that the little problem that mistakenly clicking on a different platform will trigger Unity's asset reimporting madness. In our game it might take from 15 to 60 minutes, including reverting to the platform you originally intended to click on. You might try to cancel the reimport, reset the project and trust Unity to take everything back to the original platform, but I've always found that a bit scary.

While I was starting to get mad at this, I talked to my friend @cookingsource about a related problem (to be explained below). Part of the solution he proposed could be easily applied here, so I modified all [MenuItem] entries so that they'd be surrounded with platform related #if:
#if UNITY_STANDALONE
 [MenuItem("Builds/Win 64bits/DRM Free Worldwide")]
#endif

#if UNITY_PS4
 [MenuItem("Build/PS4/Package SCEE")]
#endif
And done. Now, the builds menu only displays from 4 to 10 options, all of them relevant to the current Unity target platform. Making a mistake is now harder and a lot less time consuming.

Copy files into the build
Once a build is finished, there might be some cases in which you need to copy files into it. I do this for changelog files and Open Source licences. Some platforms might require this approach, too. For example, for a while, we needed to overwrite some dlls and signed files from the apk and regenerate it with a new signature.
System.IO.Directory.CreateDirectory("../Builds/DRMFree/Win64/GameTitle_Data/Licenses");
System.IO.File.Copy("Licences/LicenseFile.txt", "../Builds/DRMFree/Win64/GameTitle_Data/Licenses");
Delete files from the build
Since Unity 5.0 (or 5.1, I'm not sure) it's possible to select which platform a dll/so/dylib applies to. That's great, but it can sometimes be too little. In PC, for example, you might have Steam and GOG dlls around. And you don't want to send GOG a build with Steam.dll in it.
You might also have some files in StreamingAssets which are only used in some platforms. But everything in StreamingAssets is always copied into the build.
In these cases, you might need to delete files after Unity completed the build process:
// We're making a platform independent build, so no store dll should be in it.
System.IO.File.Delete("../Builds/DRMFree/Win64/GameTitle_Data/Plugins/Steam.dll");
System.IO.File.Delete("../Builds/DRMFree/Win64/GameTitle_Data/Plugins/GOG.dll");
Store related compilation directives
This specific case might be of less use for others, but for us it is quite relevant. Also, this is the problem which @cookingsource helped solve.
As mentioned before, Heart&Slash will be available for Steam. GOG and other virtual PC stores (I refer to them as DRMFree, but GOG is DRM free too, and Steam could mostly be if they ditched the on-line installation). Steam and GOG, in particular, have specific APIs to manage achievements, languages, users, input, etc.
Because Unity does not discriminate dlls beyond platform and architecture, we have the problem that it is a bit hard to ensure your build is not using Steam functionality, even when it shouldn't. The solution, as always in these cases, was to use compilation directives: STEAM_BUILD and GOG_BUILD would help us select which code ran in each case:
#if UNITY_STANDALONE
#if STEAM_BUILD
 // Steam specific code
#elif GOG_BUILD
 // GOG specific code
#else
 // Store independent code
#endif
#endif
But modifying compilation directives in Unity is really bothersome. So we decided we could create new menu items to switch from one store to another. And, event better, we can display build entries for the current store only.
#if UNITY_STANDALONE && !STEAM_BUILD
  [MenuItem("Build/Switch to Steam")]
#endif
  public static void SwitchToSteam() {
    string defines = PlayerSettings.GetScriptingDefineSymbolsForGroup(BuildTargetGroup.Standalone);
    defines = AddCompilerDefines(defines, "STEAM_BUILD");
    defines = RemoveCompilerDefines(defines, "GOG_BUILD");

    UnityEngine.Debug.Log("Compiling with DEFINE: '" + defines + "'");
    PlayerSettings.SetScriptingDefineSymbolsForGroup(BuildTargetGroup.Standalone, defines);
  }

#if UNITY_STANDALONE && !GOG_BUILD
  [MenuItem("Build/Switch to GOG")]
#endif
  public static void SwitchToGOG() {
    string defines = PlayerSettings.GetScriptingDefineSymbolsForGroup(BuildTargetGroup.Standalone);
    defines = AddCompilerDefines(defines, "GOG_BUILD");
    defines = RemoveCompilerDefines(defines, "STEAM_BUILD");

    UnityEngine.Debug.Log("Compiling with DEFINE: '" + defines + "'");
    PlayerSettings.SetScriptingDefineSymbolsForGroup(BuildTargetGroup.Standalone, defines);
  }

#if UNITY_STANDALONE && (STEAM_BUILD || GOG_BUILD)
  [MenuItem("Build/Switch to No Platform")]
#endif
  public static void SwitchToNoPlatform() {
    string defines = PlayerSettings.GetScriptingDefineSymbolsForGroup(BuildTargetGroup.Standalone);
    defines = RemoveCompilerDefines(defines, "STEAM_BUILD", "GOG_BUILD");

    UnityEngine.Debug.Log("Compiling with DEFINE: '" + defines + "'");
    PlayerSettings.SetScriptingDefineSymbolsForGroup(BuildTargetGroup.Standalone, defines);
  }

  private static string AddCompilerDefines(string defines, params string[] toAdd){
    List<string> splitDefines = new List<string>(defines.Split(new char[] { ';' }, System.StringSplitOptions.RemoveEmptyEntries));
    foreach (var add in toAdd)
      if (!splitDefines.Contains(add))
        splitDefines.Add(add);

    return string.Join(";", splitDefines.ToArray());
  }

  private static string RemoveCompilerDefines(string defines, params string[] toRemove){
    List<string> splitDefines = new List<string>(defines.Split(new char[] { ';' }, System.StringSplitOptions.RemoveEmptyEntries));
    foreach(var remove in toRemove)
      splitDefines.Remove(remove);

    return string.Join(";", splitDefines.ToArray());
}
Now you can delete Steam's dlls from your project and if GOG compiles properly, you're safe. Or Steam and GOG's dlls, and check the DRMFree builds.
Configure text fields using the contents of a file
In one specific platform of which I cannot say much (NDA), there's a text field whose contents depend on the region the build is for. It is easy to forget to change that, and you will only realize once the build fails at the very end.
The text to include in that field is also kind of sensitive. To the point that I don't feel comfortable having it uploaded to the repository. So I keep these region specific files right besides the project, in region specific directories.
And with a little bit of code we can read the required file and write its contents into the field:
string path = "../PlatformConfigs/" + region + "/signature.txt";
UnityEditor.PlayerSettings.NDAPlatform.secretField = System.IO.File.ReadAllText(path);
This idea of keeping region specific configurations in sibling directories is one I use quite often. It makes choosing which one to use depending on the build requested very easy.
Anything else you might want to automate
Many of these processes can be also run from any scripting language. Maybe not setting fields and such, but definitely copying, deleting, renaming, etc. What's important is understanding that making tasks like these easy to invoke and replicate will help you erase potential problems or, at the very least, transform them into small nuisances.
Choosing a proper tool (or the only one available, in some cases) and reducing the number of steps you need to remember for any given task will always be an improvement.
Do you use any other tricks or scripted solutions to different problems? Feel free to comment them, so all of us can sleep a little more in the future.
Edit: In the end, Heart&Slash has not been approved for GOG, so we could have saved ourselves part of the work. Still, it wasn't that much work in the end, as most of it was still needed for the DRM Free builds.
Read more about:
Featured BlogsAbout the Author(s)
You May Also Like


.jpeg?width=700&auto=webp&quality=80&disable=upscale)


