

Daily news, dev blogs, and stories from Game Developer straight to your inbox
Sponsored By
Featured Blog | This community-written post highlights the best of what the game industry has to offer. Read more like it on the Game Developer Blogs or learn how to Submit Your Own Blog Post
Technical Breakdown: You Will Be Found
At the beginning of July 2021 I released a short, fast-paced and semi-online game called You Will Be Found. In this article I provide a technical breakdown of some key systems: client-server link; client and server side balancing; and, the visual effects.
24 Min Read

At the beginning of July 2021 I released You Will Be Found, a short, fast-paced and semi-online game. The game places you in an environment where you are not welcome and need to evade detection for as long as possible. Inevitably though you will be detected and then you will be actively hunted. The game has two modes: online and offline.
In the online mode the state of your game world is influenced by other recent players. The paths they have taken will make those sections of your world more hazardous just as you in turn make your path more hazardous for others. The game involved a number of technical challenges ranging from both the online side (with realms supporting hundreds of players); the visual feedback required; and, the need to balance for wildly different scenarios. In the sections that follow I’ll break down many of these areas and provide code snippets where possible.
Building a semi-online game
Before getting into the details the first question is likely “what do I mean by a ‘semi-online’ game?” You Will Be Found (YWBF) has both an ‘online’ and an ‘offline’ mode. In this case we’re talking exclusively about the online mode. In that mode a number of key things happen:
When you start a new game the server assigns you to a realm. Each realm has an upper limit on the number of active players and the server will assign you automatically.
Your path through the world is tracked and periodically sent to the server by the game.
The server will periodically collate all of the paths from players and update it’s own representation of the world state. Areas that players have been will become more corrupted.
The server will also repair/heal the corruption periodically at a rate which adjusts dynamically based on the number of active players (more on that in the balance side).
The client periodically retrieves the realm state and applies that to the current game world.
The end result is that in online mode you never directly interact with another player but their presence will make your game more challenging just as you will make their game more challenging.
Tracking a player's movement (Unity client stage)
The client side for sending updates to the server was straightforward. Most of the heavy lifting is done by the server. As the player is moving through the level the game client is continually keeping track of the player’s location. That location information is quantised into a grid (each grid cell is 3x3 m and corresponds to an individual block in the game). Alongside storing where the player has been the game also tracks how much the player has corrupted that location.
This set of ‘player tracks’ is represented as a map with the location (a Vector2Int) and corruption added (a float ranging from 0 to 1). This made it easy to update and to query. The map is reset every time data is sent to the server and then starts to accumulate again until the next upload to the server. The upload interval was an important decision here. Longer intervals would result in larger uploads which would also increase the peak workload on the server due to having more data to process. Smaller intervals would mean smaller upload sizes but also potentially create a high ambient/baseline load on the server. With some testing I settled on 30s as the synchronisation rate (for the client and the server).
The amount of data needing to be sent would also vary depending on the length of the player path. The more a player has moved then the larger the amount of data which will need to be sent. As the game itself pushes the player to continually move it was likely the paths would tend to be fairly long. In the worst case scenario of a player continually sprinting they could cover roughly 450 metres (150 blocks). That would result in 150 entries that would need to be uploaded.
While not a large amount of data it is enough to warrant consideration of how the information is being uploaded. The server side is built on similar approaches to ones I’ve used before where there is a layer of PHP between the client and a MySQL database. For previous games the size of data being transferred was quite small so I relied upon encoding the data within the URL (ie. using GET). That could have been made to work in this case but it would have been quite messy so I decided to use POST (ie. encode the data in the body of the request).
The process of sending POST data through Unity is fairly straightforward and the code below shows how this can be approached
IEnumerator ServerRequest_SendData(Dictionary<Vector2Int, float> playerTracks, List<Vector2Int> playerWilhelms)
{
    using(UnityWebRequest sendDataRequest = new UnityWebRequest(SendDataURL, "POST"))
    {
        ServerMessage_PlayerData playerData = new ServerMessage_PlayerData(playerTracks, playerWilhelms);

        byte[] encodedPlayerData = System.Text.Encoding.UTF8.GetBytes(JsonUtility.ToJson(playerData));

        sendDataRequest.useHttpContinue = false;
        sendDataRequest.uploadHandler = (UploadHandler)new UploadHandlerRaw(encodedPlayerData);
        sendDataRequest.downloadHandler = (DownloadHandler)new DownloadHandlerBuffer();
        sendDataRequest.SetRequestHeader("Content-Type", "application/json");
        sendDataRequest.timeout = 5;
        yield return sendDataRequest.SendWebRequest();

        // go offline if there was a failure
        if (sendDataRequest.result == UnityWebRequest.Result.ConnectionError || sendDataRequest.result == UnityWebRequest.Result.ProtocolError)
        {
            State = ELinkState.FailedToRegister;
        }
        else
        {
        }
    }

    yield return null;
}
Some key things with this:
The code to work with the UnityWebRequest is wrapped within a using statement. This is to avoid a memory leak warning which was a known issue in the version of Unity being used.
The data is encoded into JSON and converted to a byte array so that it can be attached to the request (this is how we provide the post data).
useHttpContinue is turned off (this is recommended for sending blocks of data)
An important thing to be mindful of here, and that can cause hard to diagnose issues, is to ensure that the URL you are using does not require any redirects. Information passed via GET (ie. in the URL) is preserved with a redirect. Information passed via POST is not preserved with a redirect. I mistakenly used http (rather than https) at first for the URL and this resulted in some of the data coming through (the GET passed data) but not the POST data.
Tracking a player's movement (PHP-based server stage)
On the PHP side reading the POST data (in particular JSON-based POST data) is handled differently to form data. As seen in the code below you need to read from a specific filestream and then you can convert that received data into objects which can then be processed.
// connect to the database
$databaseConnection = YWBFServer_Connect();
if ($databaseConnection == null)
    return;

// extract the player data
$jsonPlayerData = json_decode(file_get_contents('php://input'), true);

// check the structure of the data
if (!array_key_exists("Track_Locations", $jsonPlayerData) ||
    !array_key_exists("Track_Values", $jsonPlayerData)    ||
    !array_key_exists("PlayerWilhelms", $jsonPlayerData))
{
    echo json_encode(["Result" => "failure"]);
    return;
}

// extract the data
$trackLocations = $jsonPlayerData["Track_Locations"];
$trackValues    = $jsonPlayerData["Track_Values"];
$playerWilhelms = $jsonPlayerData["PlayerWilhelms"];

// check that the track data matches
if (count($trackValues) != count($trackLocations))
{
    echo json_encode(["Result" => "failure"]);
    return;
}
Once the data was received and extracted it’s necessary to then pass it on to the server. It wasn’t possible to directly pass an array or dictionary to the database so a different approach was needed. There were options such as constructing a comma separated string in PHP and then deconstructing that on the database side to then process the data. That would have involved a lot of messy, and error prone, data manipulation to transform the data into the (and out of) the comma separated format.
Instead, I opted for issuing multiple commands (one per entry in the received data). On the server side it maintains a table of queued updates and has a stored procedure to add entries to that table. The PHP code reads every entry in the uploaded data and executes the stored procedure to enqueue each update. That resulted in significantly simpler code and that simplicity also resulted in code with solid performance.
Tracking a player's movement (MySQL database stage)
At this point the server now has a table of queued updates and also has access to a table per realm that maintains the state of that realm. The server needed to periodically process (and then clean out) all of the queued updates. That actual logic for the update was quite straightforward, in pseudocode it would (for each location) look like this:
Cell Value = Clamp (Cell Value + Cell Delta, Min Cell Value, Max Cell Value)
The Cell Delta is the change to apply to a location (ie. comes from the queued updates). The Min/Max Cell Value constrained the cell values to be within a set range.
While the maths is straightforward there may be multiple entries for the same cell (due to multiple players traversing the same area). Initially, I went for a very simple approach where it would process each queued update individually and apply that to the table. Initially, I also entirely forgot about setting up indices for the table. With small sets of data it wasn’t noticeable but then when I tested with larger chunks of data the update time was very poor. A few hundred updates (equivalent to 5-10 players) would take several seconds. Which was somewhat less than a viable level of performance.
I wanted to comfortably support hundreds of players which meant I needed it to easily handle very large (100,000+) updates in a couple of seconds at most. With the current setup that would take far too long. I used two approaches to improve the performance. The first part of the solution was to collapse multiple updates for the same location into a single entry. The solution for that was to create a temporary table in memory. MySQL allows for a temporary table to be created based on a query of another table. In this case the query extracted queued updates for the realm being processed and collapsed them so there was one entry per included location. It also, for security, excluded any data that was not from a known active player. That temporary table had fewer entries which in turn reduced the amount of work needing to be done to update the realm itself which sped up that process.
The second improvement was, unsurprisingly, to do what I should have done from the start and setup indices. I added an index to both the realm and the queued updates tables. In both cases the index was the cell location and it was configured to be generated automatically. Indices make a huge difference in how queries are processed, in particular ones where you are retrieving/updating specific rows. Without indices the database needs to search for each row. With indices it is able to look up the row (typically via a tree structure) rather than search. In this case the cell location was used to control which rows were updating so using that index provided a substantial improvement. Combined with the temporary table it was possible to process over 150,000 updates in under a second.
Now that the update process could run rapidly the final area to support was the client retrieving the latest copy of the realm. Similar to the update handling I did not want to have this place a high load on the server by generating it every time it is requested. Instead, what happens is that as part of the maintenance process which runs regularly for every realm it also generates and stores a realm snapshot. When a client requests the current realm map it is sent that snapshot which requires very little processing on the server side to pass on.
With those pieces in place the client-server communications were working reliably and robustly. However, the server side also needed to repair/heal the cell values and to do so proportional to the number of players active (to try and keep the realm playable). Which leads on to the next key area: dynamic balancing.
Dynamic Balancing
During the development of the game a major concern and consideration was balancing the experience for the player. In particular with having both an online and an offline mode the potential for very divergent player experiences was high. The game needed to balance dynamically depending on the circumstances and that balancing needed to happen both on the client side and the server side to achieve the desired player experience.
Client Side Balancing
Regardless of whether the player is playing the offline or the online mode there are two key mechanics that they will run into: corruption and detection.
The player’s presence in the world has a corrupting effect on any locations that they stand. The corruption is represented as a percentage (ie. 0% to 100%). The corruption for a location never goes down, it can only increase and the player is intentionally given no tools to permanently clear or decrease the corruption.
When the player is in a location that has any level of corruption above 0% they start to be detected. The detection is also represented as a percentage (0% to 100%). The rate at which detection builds is not fixed and is instead proportional to the level of corruption in the location. This means that if a player stands still they will very rapidly fully corrupt the location and then shortly after be fully detected.
Unlike corruption though, I wanted the player to have the means to reduce their level of detection. What I chose was to have the detection level recover at a fixed rate. Providing the player is moving to relatively uncorrupted areas they will be able to fully reset their detection level during the early part of the game. This creates a pressure on the player to always be moving and in particular to be moving to new areas.
If the game had only those mechanics though they would be able to very easily delay the moment of being fully detected for an excessively long time (hours rather than minutes). I wanted the experience to be shorter than that though so I needed a way to control the duration of the game. This was also essential for the online mode. The game would play very differently if you had 1 player vs 100 and I wanted to try and reduce just how much that difference could be.
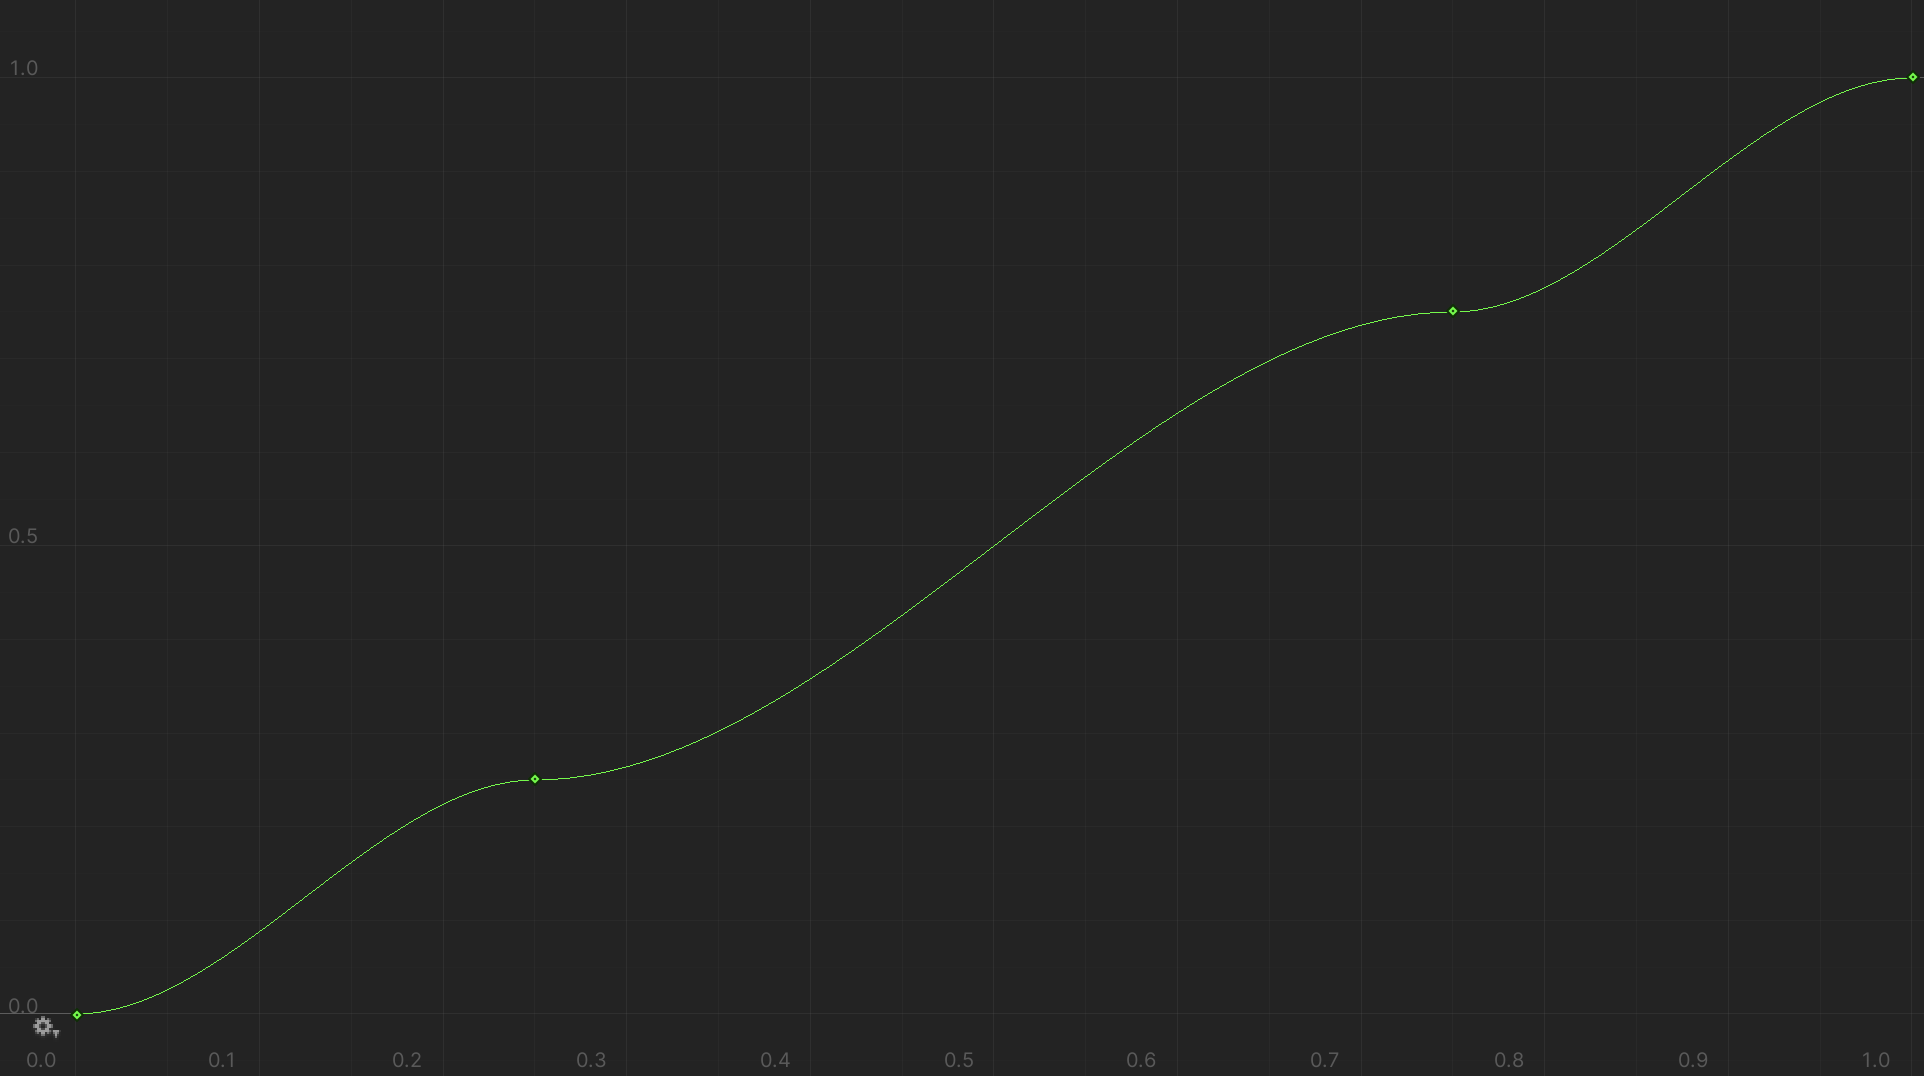
The solution I came up with was a ‘rising tide’ mechanic. The idea was that the corruption of a location would then be composed of three elements: local player induced; remote player induced (in online mode); and, the rising tide. The tide would increase over time and eventually force every location to be fully corrupted. The time for the tide to hit 100% corruption is then able to directly control how long the playtime will be. The game tracks how far (as a percentage) the player is through that time. That time isn’t directly fed in as the corruption though. Instead it is passed through an animation curve so that the tide can stay low early on and then ramp up rapidly towards the end to try and create a higher feel of intensity.
Server Side Balancing
Just having the tide on it’s own wasn’t enough though. If there were a lot of other players the remote player induced corruption could be quite high. If the tide was layered on top of that without any further consideration then it could drastically shorten the games. To mitigate that the game keeps track of the average corruption and has a curve to control the expected average corruption with time. The contribution of the tide is scaled so that it never pushes the corruption above that average. This means in a quiet game the tide has a high contribution and will push the end game to trigger at the required time. However, in a busy game the tide will contribute very little and the timing of the end game is more driven by the actions of the remote players. The net effect is that the end game phase will tend to begin at a similar time for the majority of players.
There is however still a potential for significant variation in the remotely tracked world state. If there are 100 players then they could very rapidly fully corrupt a realm. However, a small handful of players would only be able to corrupt a small portion of the world. The server is already tracking the number of players and also stats such as the minimum, maximum and average corruption in a realm. As part of it’s normal process the server already erodes/heals any corruption regularly. The amount of change there isn’t fixed. Instead, it is tied to the rate at which the world is being corrupted. The greater the amount of corruption, the greater the recovery rate. That helps to ensure the realm doesn’t become overwhelmed when there are a lot of players. The recovery rate settings are all controlled on the server side so they can also easily be adjusted without needing updates to the client game itself.
In combination the client and server side systems help to ensure the game plays out in a fairly consistent way regardless of the number of other people playing or if the game is played in offline or online mode. The systems for the balancing also tie very closely into the visual feedback provided to the player.
Visual feedback
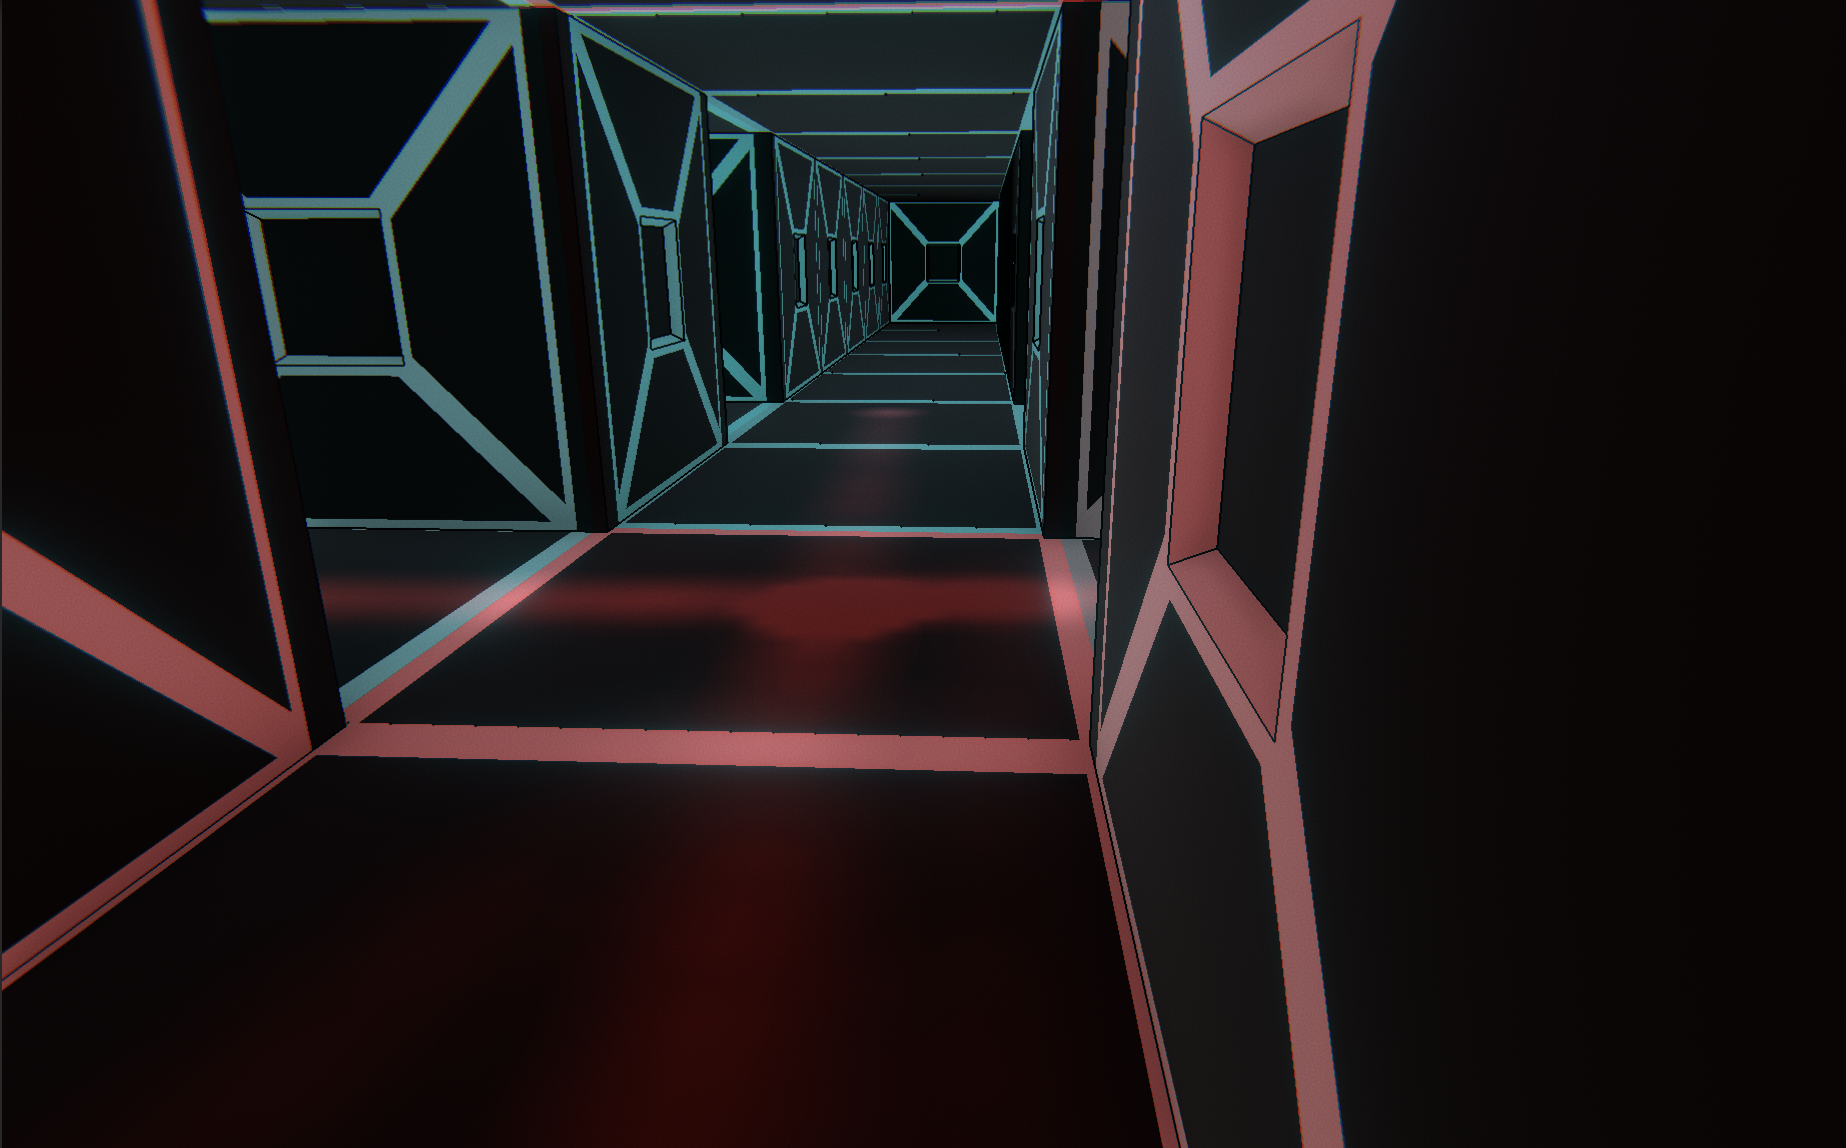
Player feedback is an important element and there were a number of things that the player needed to be aware of. Some of these were simple things (eg. how ‘detected’ the player currently is) others were more complicated (eg. where the player had been and current block corruption). The player knowing where they had been was helpful to provide a mechanism to orient themselves within the maze. The block corruption was particularly important for two reasons.
Firstly, the more corrupted a block was the faster the player would be detected while in that block. Secondly, when playing online the receipt of new remote data could cause nearby blocks to be corrupted so the player would need to know to move away from that area to survive for longer. For this reason when new remote data is received it is not applied immediately. That allows the game to use the delay before applying to provide feedback to the player to indicate what changes are about to take place.
All of the visuals rely heavily on shaders and in some cases on data generated CPU side and then passed to the shader. Where possible though the majority of the heavy lifting was kept GPU side to improve performance.
Drawing the player's path through the environment
The footstep handling was a particular challenge from a performance point of view. The goal for the system was to be able to draw a trail on the floor indicating where the player had walked. The intensity of the trail needs to vary with the intensity increasing the longer a player spends in a location. To be useful and not feel disjointed the location needed to match well to the player’s location. The trail also needed to persist for the duration of the play session so it couldn’t be localised to just the player’s immediate vicinity.
On the CPU side the game was already keeping track of the player’s location and turning that into a texture (more on that later). That was however at a very low resolution (1 pixel = 3x3 metres). For the footsteps the resolution needed to be at least 1-2k (1 pixel = 0.13 to 0.26 metres square). That kind of resolution is a challenge performance wise if done on the CPU side due to the overhead of updating that size of texture. The solution was to move it over to the GPU side but that presented challenges in and of itself. In particular the need for the texture to be updated (ie. the new version is based on the previous version with new data added).
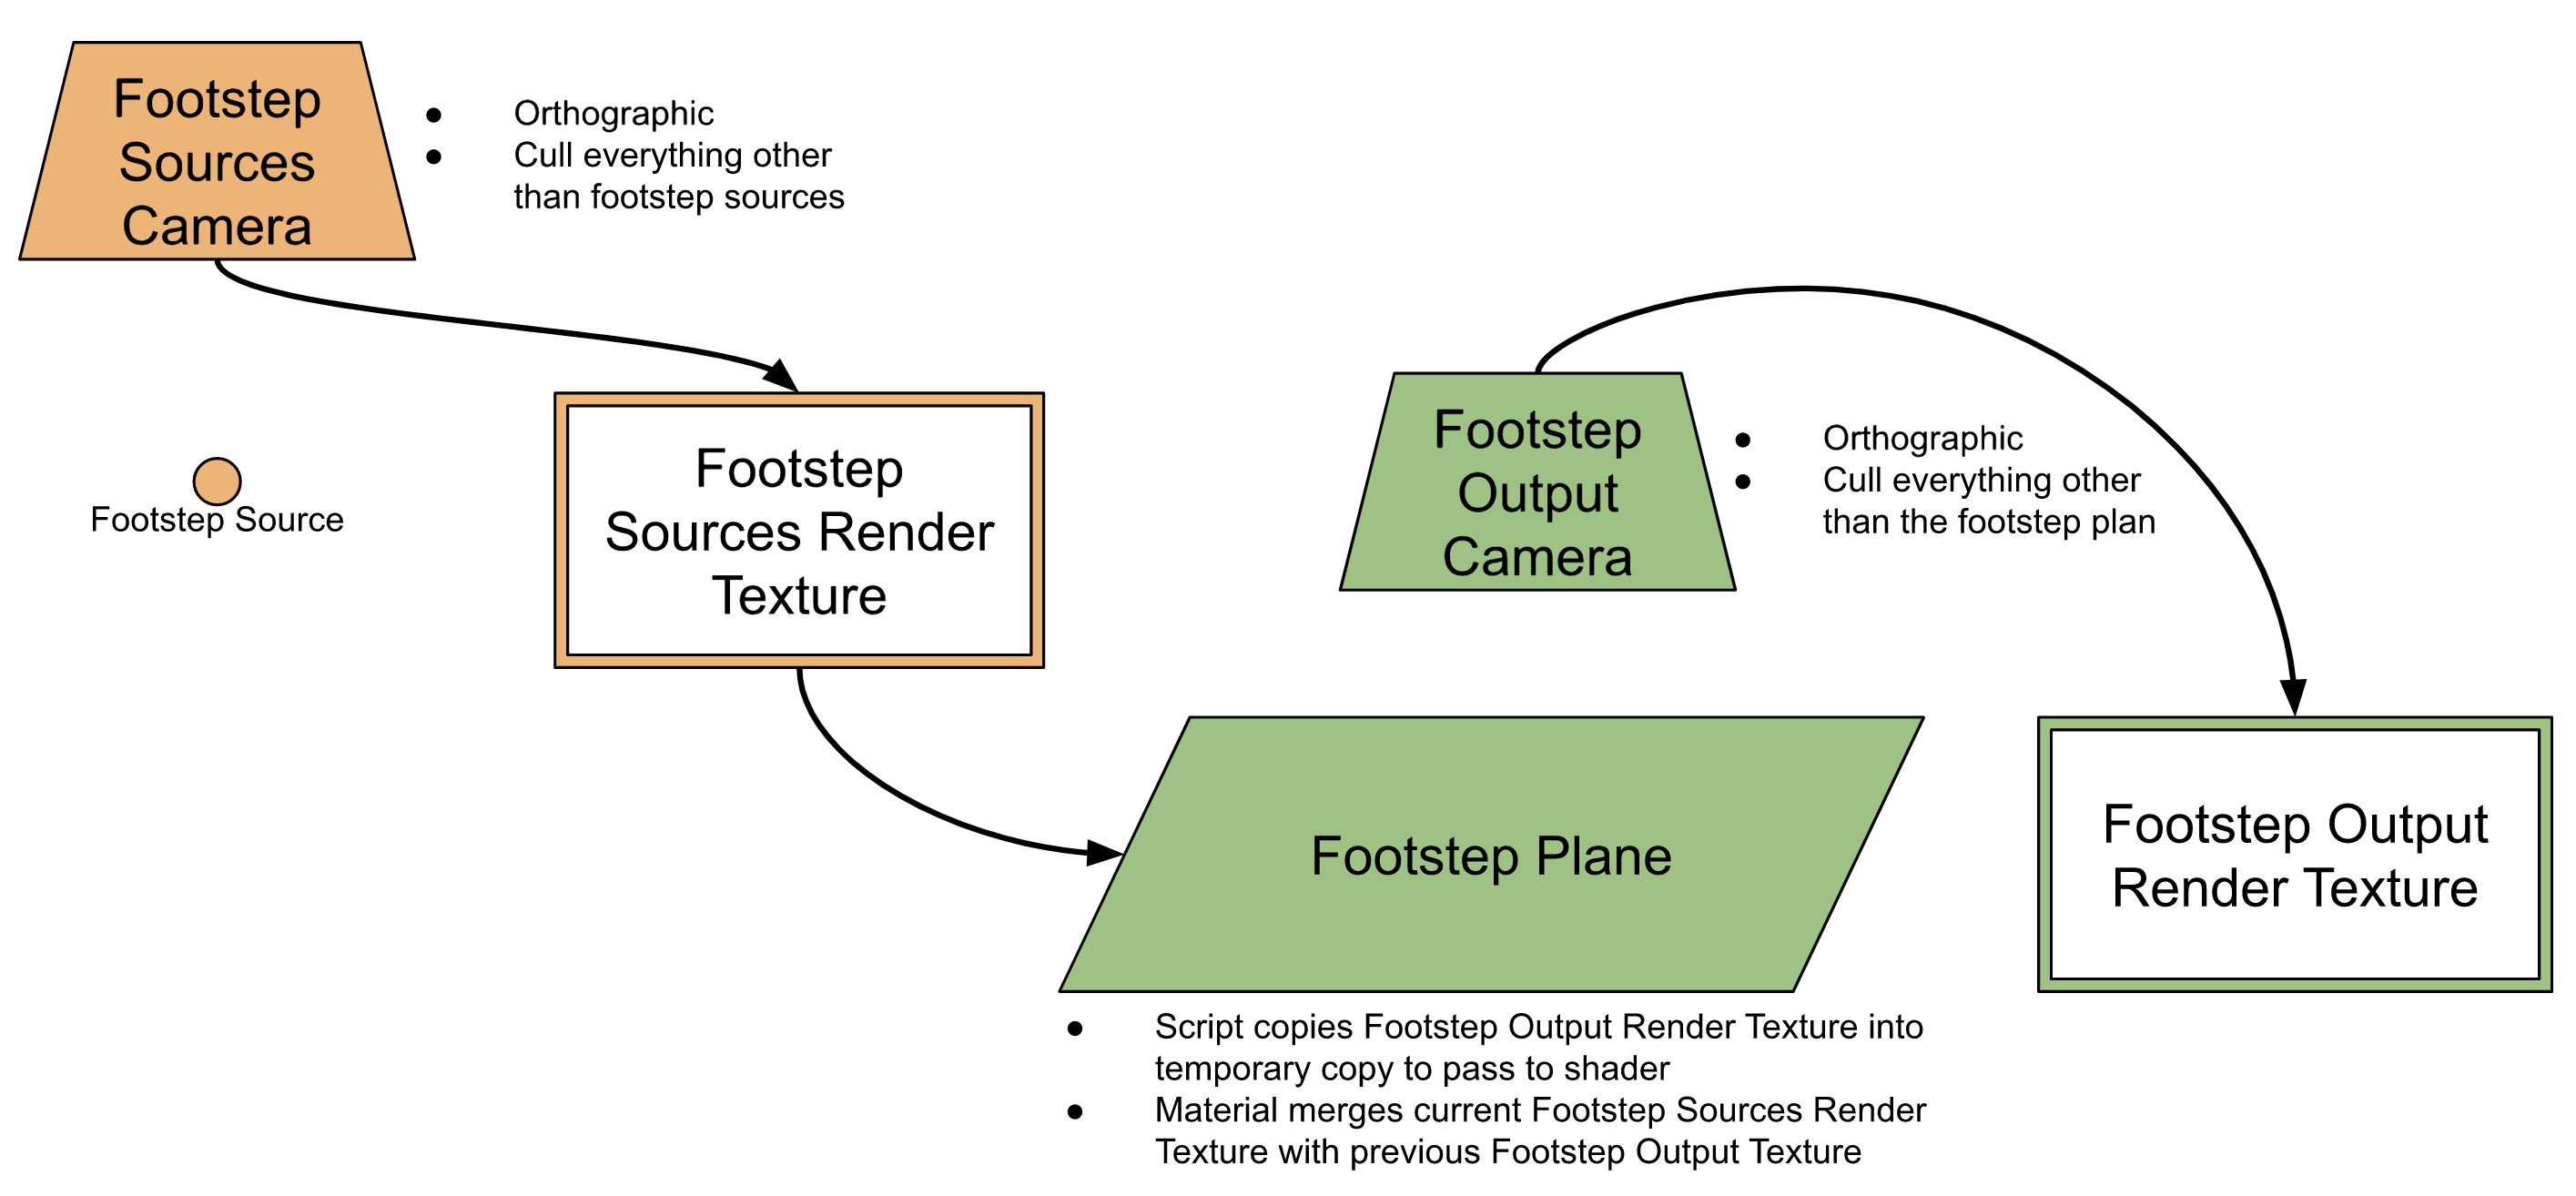
The solution involved using multiple cameras, render textures, and a plane as the output surface. The key components and how they link together were:
An object in an isolated layer (eg. Footstep Source) that provides the visual representation for a footstep.
One orthographic camera set to only capture objects in the Footstep Source layer
This camera is set to output to a Footstep Sources render texture
A second orthographic camera set to only capture objects in the Footstep Plane layer
This camera is set to output to a Footstep Plane render texture
An output plane in an isolated layer (eg. Footstep Plane) with a custom shader.
The custom shader on the plane takes in two inputs:
The Footstep Sources render texture
The previous frames version of the Footstep Plane render texture (generated by a small script)
A small script that (in Update) uses Graphics.CopyTexture to copy from the Footstep Plane render texture to a temporary texture which is then passed to the custom shader applied to the Footstep Plane.
The output from the system is in the Footstep Plane texture which can be passed to other materials to draw the footsteps.
Using multiple Cameras does have performance implications but to minimise those the key things were:
Turning off lighting and shadows for the Footstep Source and Footstep Plane
Turning off anti-aliasing for the footstep cameras
Setting the render texture to 8 bits per pixel as we only need a single 0 to 1 value for any pixel.
With those adjustments the performance impact was quite low (< 5%) even on low specced hardware for the 2K texture and was also viable at 4K. The resulting grayscale texture was then able to be used by the level block (or other shaders) as needed.
Level Block drawing
The Level Block shader makes use of the footstep texture but that is the simplest aspect of what it does. The Level Block shader performs a number of tasks:
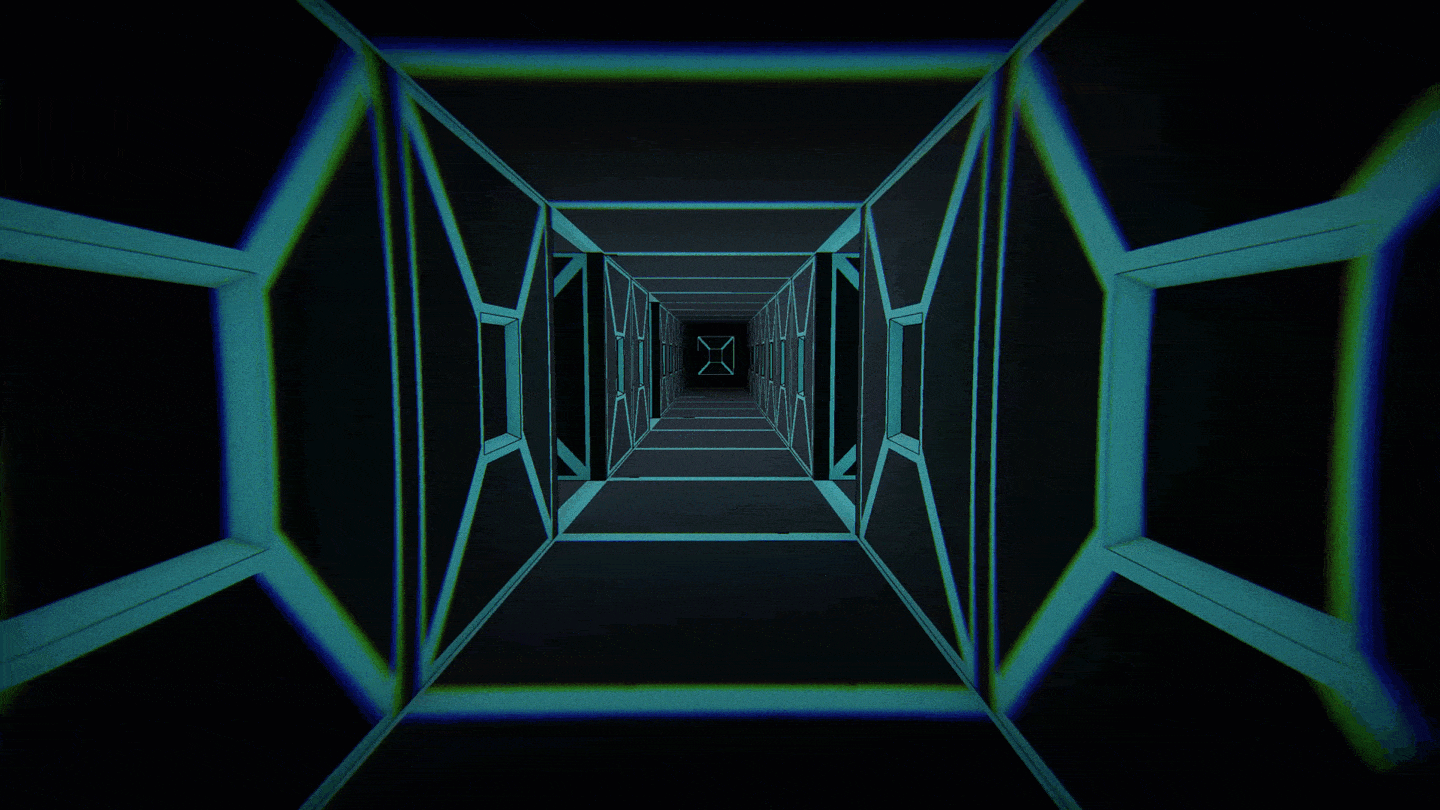
Apply a slowly moving texture to create a sense of movement. The direction of movement continually changes intentionally to prevent it being used as a means of navigation.
Change the colour of the accents in a block based on the current corruption level for that location (corruption is per block).
During the synchronisation period indicate if a block is about to become more corrupted, become less corrupted, or remain the same. That indication needed to smoothly ease in and out.
The slowly moving texture is achieved by changing the UV coordinates that we are using with an ‘ambient modulation’ texture. This was achieved by wrapping a sinusoidal wave around a circle. This is achieved by having the radius vary using a sine wave and then converting that modulated radius with the angle (which sweeps fully 0 to 360 degrees) to get the new UV offset.
float2 GetModulationLookupOffset()
{
    float modulationAmplitude    = 0.5 * (1 + sin((_TimeOffset + _Time.y) / _AmbientModulationPeriod));
    float modulationAngle        = (_TimeOffset + _Time.y) / _AmbientModulationSweepPeriod;

    return modulationAmplitude * float2(cos(modulationAngle * two_pi), sin(modulationAngle * two_pi));
}

float GetModulation(float2 normalisedPos)
{
    return lerp(0, _AmbientModulationStrength, tex2D(_AmbientModulationTex, normalisedPos + GetModulationLookupOffset()).r);
}
This provides a base level of modulation which is further augmented by checking the corruption for a block. The current corruption for a location comes from a CPU side generated texture where each pixel corresponds to an individual block. The CPU tracks the player location continually and generates a new version of the corruption texture every frame which is then passed to the shader.
The corruption texture itself provides just a 0 to 1 value indicating the level of corruption from none (0) to full (1). The indication of the corruption itself is done by colour with the corruption value used as the progress parameter for a lerp from the uncorrupted to fully corrupted colours. In combination with the modulation this gives us accents which will change faintly (due to the ambient modulation) and where the colour indicates the level of corruption for that location.
The final element is the synchronisation stage. During this stage the game needs to indicate (per block) the state: increasing corruption; decreasing corruption; or, no change in corruption. To handle this the CPU side actually passes through two textures. One is the current corruption texture. The other is the future corruption texture. When new data is received from the server the future corruption texture is updated.
From a player’s perspective pulses are used to indicate an imminent change in corruption. If the pulses are going up then the corruption will increase. If the pulses are going down then the corruption will decrease. If there are no pulses then the corruption is not changing. The shader compares the values retrieved from both the current and future corruption textures. A small deadband is used for if the values are very close so the visual indicator only happens if the change is above a minimum threshold. The resulting shader function is below and will return -1, 1 or 0 depending on the change in corruption that will happen.
float GetPulseDirection(float2 normalisedPos)
{
    float delta = tex2D(_SyncNextWorldTex, normalisedPos).r - tex2D(_SyncCurrentWorldTex, normalisedPos).r;

    if (_PulseOverride > 0.5)
        return -1;

    return (step(_SyncMinimumDelta, delta) * -1) + (1 - step(-1 * _SyncMinimumDelta, delta));
}
To generate the pulse itself I use the cubicPulse method from here by Iñigo Quiles. The direction is combined with the current time to generate a 0 to 1 value that corresponds to the pulse intensity as shown in the function below. To have the pulse’s ease in and out during the synchronisation period there is an overall intensity modifier which is driven by the CPU side of the game during that synchronisation period.
//  Function from Iñigo Quiles
//  www.iquilezles.org/www/articles/functions/functions.htm
float cubicPulse( float c, float w, float x )
{
    x = abs(x - c);
    if( x>w ) return 0.0;
    x /= w;
    return 1.0 - x*x*(3.0-2.0*x);
}

float GetSyncPulseIntensity(float2 normalisedPos, float vertexHeight)
{
    float pulseDirection = GetPulseDirection(normalisedPos);

    float pulseTime = fmod(1 + fmod(vertexHeight + _SyncPulseSpeed * pulseDirection * (_TimeOffset + _Time.y), 1), 1);

    return _SyncPulseIntensity * abs(pulseDirection) * _SyncPulseAmplitude * cubicPulse(0.5, _SyncPulseWidth, pulseTime);
}
Assembling all of the elements together the pulse intensity is used to effect both the albedo and emission for the accents of the level blocks. The level blocks also use vertex colours to control which areas the shader will tint. The final surface shader function is below.
void surf (Input IN, inout SurfaceOutputStandard o)
{
    float2 normalisedPos    = NormaliseWorldPos(IN.worldPos);
    float pulseIntensity    = GetSyncPulseIntensity(normalisedPos, IN.worldPos.y) * (1 - step(0.9f, abs(IN.worldNormal.y)));
    float corruptionLevel   = GetCorruptionLevel(normalisedPos);

    // determine the modulation for this location
    half modulation = GetModulation(normalisedPos);

    fixed3 workingAlbedoColour = IN.vertColour.rgb * lerp(fixed3(0,0,0), _CorruptionColour.rgb, corruptionLevel) * _OverallIntensity;

    o.Albedo        = workingAlbedoColour.rgb * (1 - modulation) * (1 + pulseIntensity);
    o.Metallic      = _Metallic;
    o.Smoothness    = _Glossiness;
    o.Alpha         = 1; // no transparency

    fixed4 workingEmissionColour = lerp(_EmissionColour, _CorruptionColour, corruptionLevel);

    // adjust the emission based on the ambient texture modulation and the pulses
    half baseVertexIntensity = (IN.vertColour.r + IN.vertColour.g + IN.vertColour.b) / 3;
    o.Emission = baseVertexIntensity * (_OverallIntensity + _PulseOverride * pulseIntensity) * workingEmissionColour.rgb * _EmissionStrength * (1 - modulation) +
                    workingEmissionColour.rgb * baseVertexIntensity * _EmissionStrength * pulseIntensity;

    // apply the footstep colour (if this is a surface pointing up)
    float footstepIntensity = GetFootstepIntensity(normalisedPos) * step(0.9f, IN.worldNormal.y);
    o.Albedo.rgb += footstepIntensity * _FootstepColour.rgb;
}
This combines the ambient modulation texture, the corruption tinting, the pulses for corruption changes and the footstep texture to create the desired visual style. By doing a lot of the logic within the shader it minimises the CPU overhead needed to achieve the required effects.
Where to from here?
This was a project that involved a lot more technical challenges than originally expected but the solutions are ones that I’ll be able to use in future projects as well. The server logic for managing large amounts of player updates efficiently has a lot of potential for custom analytics for debug/testing builds. And the camera and shader setup to feed the output of a shader into other shaders has a lot of potential for efficient ways to generate data based on the location of a player (or other entities) within the game world.
If you’d like to check out the game then you can find it here.
Read more about:
Featured BlogsAbout the Author(s)
You May Also Like


.jpeg?width=700&auto=webp&quality=80&disable=upscale)


