Featured Blog | This community-written post highlights the best of what the game industry has to offer. Read more like it on the Game Developer Blogs or learn how to Submit Your Own Blog Post
Surface Shaders for the Recently Deceased
In this post, we'll look at creating a custom surface shader that uses normal mapping, emission, rimlighting, and depth pre-pass to create a ghostly character effect.

Note: This post was originally published on our studio's development blog. We're a small student team based in Ontario, Canada working on our first commercial project.
Over the past few weeks, our artist has been fleshing out the details of our final character model and starting on animations. And so, the time had come - no more placeholder shaders for the little guy. Time to sit down and take a crack at a custom surface shader for our poltergeist friend, and we already had a few key features we wanted in mind. Since the beginning, we’d had something in mind similar to the ghosts from Luigi’s Mansion: Dark Moon :

In particular, take a look at the little green guy - he was a big inspiration for Spirit’s character design and shows off some of what we’d like to achieve with our visual effects.
Let’s break down the visual features of the model:
Base colour (green)
Glowing eyes/mouth
Surface detail (bumps/pores)
Edge/rim lighting (white/green)
Exterior glow (green halo)
Additionally, we wanted Spirit to have adjustable partial alpha, so that he’d appear semi-transparent, for maximum spookiness. Most of what we want to accomplish (aside from the exterior halo, which we’ll add in post-processing) can be done with a standard surface shader in Unity. Here’s a list of the components we’ll need to integrate for each feature:
Depth pre-pass and alpha intensity
Albedo map and tint
Emission map
Normal map, intensity, and smoothness
Rimlighting map, intensity, and tint
And here’s the texture maps we’ll be using to achieve the final effect:

Unity’s built-in CG features make writing this shader pretty easy if you know which tools to use - for our final effect, we started from the standard surface shader template, which already includes our albedo map, base tint, and smoothness:
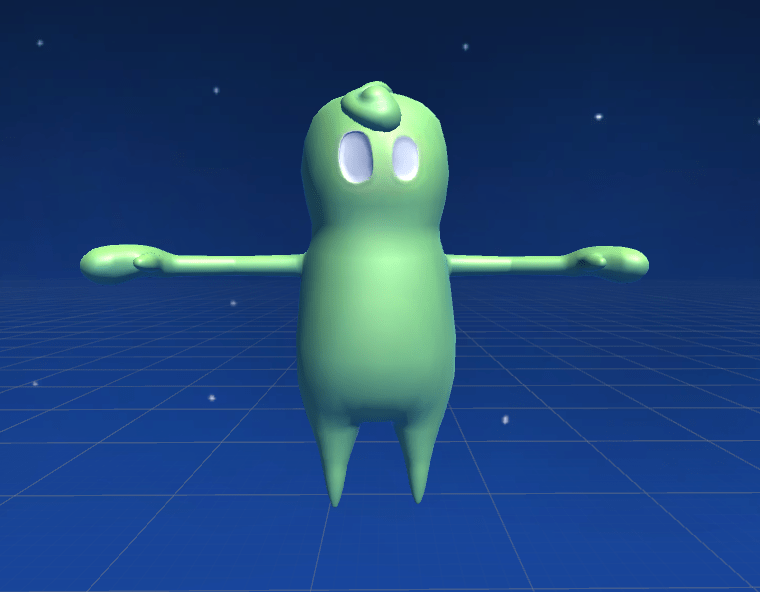
The albedo is there, but this hardly looks like a ghost - more like a plastic toy. Let’s add a bit of texture first with our normal map. Shader veterans will be happy to hear that Unity will do all of the tangent-space conversions for us, if you’ve imported your texture with the “Normal Map” texture type selected. All you need to do is use the UnpackNormals function. If you’d like to adjust the intensity of your normal map, just employ one of the worst-kept secrets in computer graphics - multiply the result of your normal map read by a colour with your desired intensity factor plugged into the red and green channels, while leaving the blue channel at 1:
o.Normal = fixed4(_BumpIntensity, _BumpIntensity, 1.0, 1.0)
           * UnpackNormal(tex2D(_BumpMap, IN.uv_BumpMap));
So here’s what Spirit looks like with some detail, because real ghosts have pores (slightly enhanced for demonstration):
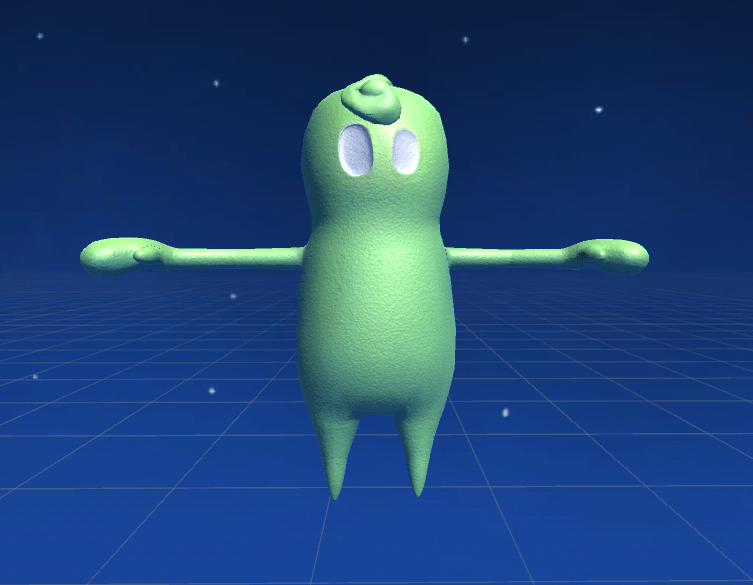
The material texture is closer to correct now, but he still looks like a regular plastic object without any glow. Let’s start by adding our emission map, which will make his eyes glow, by simply setting the Emission property of our output structure to read from our emissive texture:
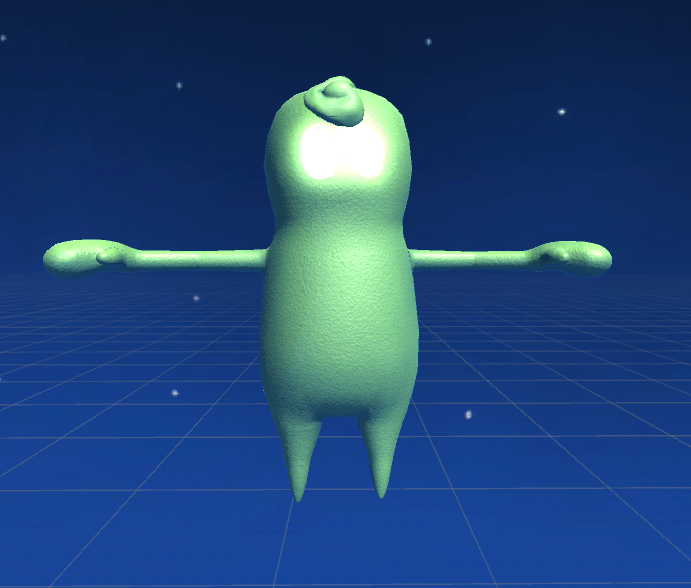
While it’s a little too satanic for our purposes, we’re starting to see a promising glow - unfortunately, when combined with our full-force smooth albedo, which happens to be a bright base colour, the result is less “mischievous ghost” and more “irradiated cyclops”. Let’s fix this by toning down our albedo map with a darker tint colour and letting most of Spirit’s apparent colour come from our rimlight map, which is a toned-down modification of our base colour map. Rimlighting works by comparing the angle of the viewer’s eye (i.e., the camera view direction vector) with the surface of the object (i.e., our final surface normal). We want the edges of the object to glow, meaning that if the two vectors are perpendicular, the glow should be maximized. Therefore, we’ll use the dot product, clamp it, and subtract the result from 1 to give us our base rimlight intensity, which we can then modify using a custom intensity variable, tint colour, and our rimlight map. For our purposes, we'll add the resulting colour to our emissive output:
half rimTerm = 1.0 - saturate(dot(normalize(IN.viewDir), o.Normal));
o.Emission = tex2D(_EmissiveTex, IN.uv_EmissiveTex)
             + _RimColor * tex2D(_RimTex, IN.uv_RimTex)
             * smoothstep(0.0, 1.0, rimTerm * _RimIntensity);
After tweaking the colours to our liking, we’ve got something like this:
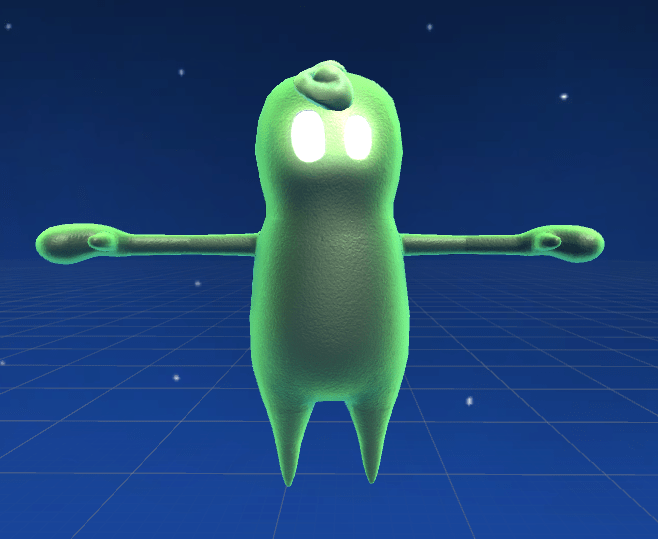
Finally, that looks quite a bit more like what we’re going for. Now, for one last feature - our partial alpha. The tricky part here is getting the depth buffer to behave properly. Here’s what happens if we add an alpha slider and flag the shader as transparent using tags:
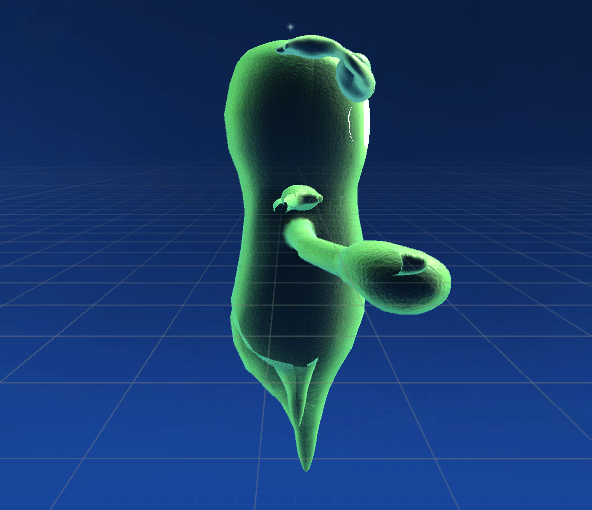
Ouch. Not what we want at all - we want to be able to see the background through our little guy, but not his disembodied limbs - note the horrible clipping effect that’s happening as well. Resolving this is surprisingly easy - we complete a pre-pass to fill the depth buffer with an empty colour mask, ensuring that our final render will only deal with the bits of the surface closest to the camera, disregarding all that back geometry. Here’s the code for our pre-pass, which is painfully short:
//First pass.
Pass
{
    ZWrite On
    ColorMask 0
}

//Set up our next pass.

Cull Back
ZWrite On
Blend SrcAlpha OneMinusSrcAlpha

//CPROGRAM begins here...
Now let’s have a look at the little guy with some stuff behind him:

There we go! While we’ve got some texturing and post-processing tweaks we can make to improve the effect, there’s our surface shader, now with 100% fewer disembodied limbs. For reference, here’s our final list of properties in the surface shader, and the adjustment panel:
Properties
{
    _Color ("Color", Color) = (1,1,1,1)
    _Alpha ("Base Alpha", Range(0,1)) = 1.0
    _MainTex ("Albedo (RGB)", 2D) = "white" {}
    _Glossiness ("Smoothness", Range(0,1)) = 0.5
    _BumpMap("Normal Map", 2D) = "bump" {}
    _BumpIntensity("Normal Intensity", Float) = 1.0
    _EmissiveTex("Emission Map", 2D) = "black" {}
    _RimColor("Rimlight Color", Color) = (1,1,1,1)
    _RimTex("Rimlight Texture", 2D) = "white" {}
    _RimIntensity("Rimlight Intensity", Range(0.0, 2.0)) = 0.0
}

Finally, here’s a family portrait with our old model on the left, with standard shading, and our new and improved shaded model on the right:
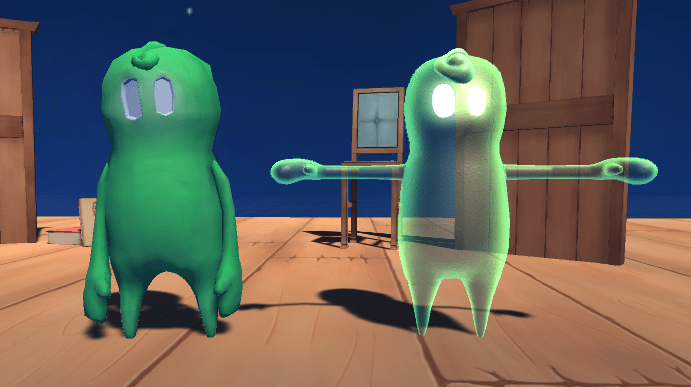
And there we have it - our little friend is ready to wreak havoc in style.
Read more about:
Featured BlogsAbout the Author(s)
You May Also Like



.jpeg?width=700&auto=webp&quality=80&disable=upscale)
