

Daily news, dev blogs, and stories from Game Developer straight to your inbox
Sponsored By
Featured Blog | This community-written post highlights the best of what the game industry has to offer. Read more like it on the Game Developer Blogs.
Shader deep-dive #3: Obtaining an animated look from a hand-drawn image
This shader breakdown will explain step-by-step how to transform a static image into an animated, hand-drawn sketch.
11 Min Read

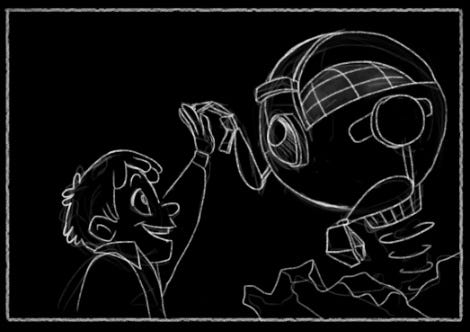
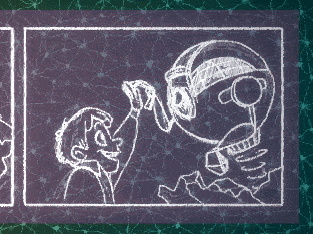
In case the story in your game is more on the minimal side, here’s a technique to make it look just a bit different. In this article, we’ll go from this:
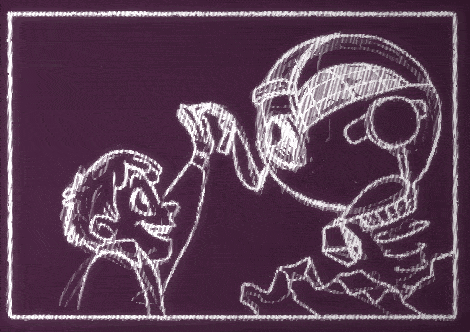
to this:
First of all, credit is due to A-ha and the video of “Take On Me” that somewhat inspired this approach (https://www.youtube.com/watch?v=djV11Xbc914&t=94).
My game Semispheres features an organic/fluid art style where everything is slightly moving so I felt just dropping in a plain image would clash with its existing art style:
If you’re interested in how to achieve that look, check out my previous two shader deep-dives here and here.
Now onto this shader. Similar to my previous articles, we’ll go step by step and see how everything combines together into the final result. All of this code will work in Unity and the concepts will translate to other shader dialects.
First off, we’ll start with a plain shader that just does a texture lookup, where the fragment function looks like this:
fixed4 frag_mult(v2f_vct i) : SV_Target{
    return tex2D(_MainTex, i.texcoord);
}
This will return an example similar to the first image in the article.
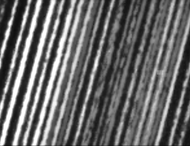
Now let’s replace the hand-drawn lines. For that, we’ll use an additional hatch texture. You can just pick one by image-searching for “hatch texture”. Always be mindful about the image’s license depending on the type of project you’re using it in. It may help if the texture is seamless, meaning it won’t show stitching artifacts if you tile it.
Once you’ve located a hatch texture and added it to your project, you can add this to your “Properties” group at the top of the shader:
_HatchTex("Hatch Tex", 2D) = "white" {}
And the corresponding variable:
sampler2D _HatchTex;
If in doubt, just find your main texture and follow that as an example (in our example _MainTex).
Now we can sample this texture to change the output
return tex2D(_HatchTex, i.texcoord);
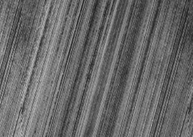
This is where choosing a seamless texture comes in handy. In the end result it will not matter much though. Assuming the texture is set to repeat, we want to make the lines more dense, so let’s try this:
return tex2D(_HatchTex, i.texcoord * 10);
This will have an effect of making the lines 10 times denser. The way it works is that instead of having the texture coordinates go from 0 to 1, they will go from 0 to 10 – effectively meaning that instead of fitting your original hatch image in the sprite, it will fit it in 10 times.
Here’s how that looks:
That’s a bit too dense, so let’s settle on somewhere in the middle using 3 instead of 10:
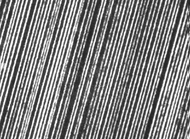
That’s very much acceptable. A brief aside, when playing with values inside a shader, try to follow the “Double or halve” rule to make sure you’re noticing the change and understanding the effect of your tweaks (http://www.gamasutra.com/view/news/114402/Analysis_Sid_Meiers_Key_Design_Lessons.php).
So while this is what we wanted for now, it’s not very useful, now is it? In order to get something nicer out of it, let’s combine the two images. We do this by alpha-compositing (or alpha-blending) the two images: https://en.wikipedia.org/wiki/Alpha_compositing.
You can find various variants on the formula, but here’s a function that I’m currently using:
fixed4 alphaBlend(fixed4 dst, fixed4 src) {
    fixed4 result = fixed4(0, 0, 0, 0);
    result.a = src.a + dst.a*(1 - src.a);
    if (result.a != 0)
        result.rgb = (src.rgb*src.a + dst.rgb*dst.a*(1 - src.a)) / result.a;
    return result;
}
With this function added to the shader, we can change our fragment function to the following:
fixed4 original = tex2D(_MainTex, i.texcoord);
fixed4 hatch = tex2D(_HatchTex, i.texcoord*3);
return alphaBlend(original, hatch);

Let’s segment the image a bit based on the original. This will vary a bit on how your image is stored (whether the black background is baked into the image or there is a transparent background). We want to output the hatch only if there is something in the original image.
We’ll use the alpha of the original pixel to determine what we should draw on it, let’s take this step by step:
fixed4 original = tex2D(_MainTex, i.texcoord);
fixed4 output = fixed4(0, 0, 0, 1);
fixed4 hatch;
if (original.a > .1) {
    hatch = tex2D(_HatchTex, i.texcoord * 7);
    output = alphaBlend(output, hatch*.8);
}
return output;
This will output the hatch texture wherever there was something (with alpha greater than 0.1) in the original image.

Before we move on, let’s dig into some of these numbers to make sure we understand what their contribution is.
The .1 in "original.a > .1" determines the cutoff, let’s use another value, for example .5:

Notice how less of the image is being drawn.
The 7 in "i.texcoord * 7" determines the frequency of the lines as described before, using a smaller value like 3 yields this:

And the last value of .8 in "hatch*.8" determines what the contribution of this will be, higher values will mean output is more intense. Here’s what using 1.3 looks like:

Now that we understand how all of these things work, let’s layer things a bit up. Adding another layer for alpha greater than .4, with a different line frequency (9) and higher contribution (1.2):
if (original.a > .4) {
    hatch = tex2D(_HatchTex, i.texcoord * 9);
    output = alphaBlend(output, hatch*1.2);
}
Looks like this:

Ok, starting to look better. One more segment like this:
if (original.a > .8) {
    hatch = tex2D(_HatchTex, i.texcoord * 1.2);
    output = alphaBlend(output, hatch*1.5);
}

Just to catch up, here’s how the whole fragment function looks right now:
fixed4 frag_mult(v2f_vct i) : SV_Target{
    fixed4 original = tex2D(_MainTex, i.texcoord);
    fixed4 output = fixed4(0, 0, 0, 1);
    fixed4 hatch;

    if (original.a > .1) {
        hatch = tex2D(_HatchTex, i.texcoord * 7);
        output = alphaBlend(output, hatch*.8);
    }

    if (original.a > .4) {
        hatch = tex2D(_HatchTex, i.texcoord * 9);
        output = alphaBlend(output, hatch*1.2);
    }

    if (original.a > .8) {
        hatch = tex2D(_HatchTex, i.texcoord * 10);
        output = alphaBlend(output, hatch*1.5);
    }

    return output;
}
Ok, so far so good. This looks interesting but it’s still rather static. Let’s address that.
First, let’s animate the hatches by changing them every once in a while. To make this easier to follow, we’ll go back to just showing the hatch texture:
return tex2D(_HatchTex, i.texcoord);

Now let’s imagine we’re dividing the hatch texture into 3 rows and 3 colums, resulting in 9 equal "mini-textures". Here’s a static example:
float row = 0;
float col = 0;
float2 adjustedTexCoord = (i.texcoord / 3) + float2(row / 3, col / 3);
return tex2D(_HatchTex, adjustedTexCoord);
We can play with the row and col with values like 0, 1 or 2 to sample any of the different “mini-textures”. What’s happening here is we “shrink” the texture lookup variable by a factor of 3, going from 0-1 to 0-1/3, then add 0, 1/3 or 2/3, effectively constraining them to one of the 9 mini-textures.
Once again, not very useful, but let’s try animating based on time passed. To simplify things, we’ll extract this lookup by row and column into its own function:
float2 texLookup(float2 texcoord, float row, float col) {
    row = row % 3;
    col = col % 3;
    return (texcoord / 3) + float2(row/3, col/3);
}
Notice the %3 – this allows up to pass any integral values and constrain them to be 0, 1 or 2. Now we just need to come up with some integral numbers to pass in.
One of the easiest ways to do that is to use the time parameters that are being passed into the shader every frame. In Unity, the _Time variable get populated with various values, for example the y component will contain time since level load in seconds (https://docs.unity3d.com/Manual/SL-UnityShaderVariables.html).
Let’s aim for changing the texture every second or so, while making it an integral value:
floor(_Time.y % 9)
If we were to try this right away, we’d notice it feels too slow, so instead, let’s speed it up ten-fold:
float texIndex = floor(_Time.y*10 % 9);
float row = 1 + texIndex % 2;
float col = floor(texIndex / 3);
return tex2D(_HatchTex, texLookup(i.texcoord, row, col));

Now this is a bit too coarse so we can apply the same principle as before to make the lines more dense:
texLookup(i.texcoord*20, row, col)
Notice the multiplication by 20 (as opposed to the initial 7 we started with) – that’s because now we need to account for that factor of 3 we introduced while slicing up the hatch texture into 3x3:
Ok, now we’re getting somewhere. Let’s combine this with the previous layered drawing approach. Coming up with a fragment function looking like this:
fixed4 frag_mult(v2f_vct i) : SV_Target{
    fixed4 original = tex2D(_MainTex, i.texcoord);
    fixed4 output = fixed4(0, 0, 0, 1);
    fixed4 hatch;
    float texIndex = floor(_Time.y * 10 % 9);
    float row = 1 + texIndex % 2;
    float col = floor(texIndex / 3);

    if (original.a > .1) {
        hatch = tex2D(_HatchTex, texLookup(i.texcoord * 21, row, col));
        output = alphaBlend(output, hatch*.8);
    }

    if (original.a > .4) {
        hatch = tex2D(_HatchTex, texLookup(i.texcoord * 27, row+1, col));
        output = alphaBlend(output, hatch*1.2);
    }

    if (original.a > .8) {
        hatch = tex2D(_HatchTex, texLookup(i.texcoord * 30, row, col+1));
        output = alphaBlend(output, hatch*1.5);
    }

    return output;
}
Once again, notice how we multiplied the original values by 3 for the hatch lookups. These numbers can be tweaked for the best result, but for now here’s what we have:

Getting there. When I was first coming up with this shader, it felt like something was still missing to give it the feeling I was going for.
So, for the last time, back to the drawing board, let’s start with a function that just outputs the plain image. Then we’ll reuse a technique that’s detailed into one of my previous articles, the one on “wavey walls on fire” that used a noise texture to offset the texture lookup.
Here’s an exaggerated version to make things more visible:
float2 displacedTexCoord = i.texcoord +
    tex2D(_NoiseTex, i.vertex.xy/700  + float2((_Time.w%10) / 10, (_Time.w%10) / 10)) / 400;

return tex2D(_MainTex, displacedTexCoord) * i.color;
What those values do and how to tweak them to come up with various results is explained here: http://www.gamasutra.com/blogs/RaduMuresan/20150804/250403/Achieving_a_quotwalls_on_firequot_effect_using_simple_shader_changes.php
This is extremely wavey:

Please note that those hardcoded values are there just to make this article shorter. In real life they’re actually shader parameters so you can play around to find the desired values.
To match the first part of the article, we’ll want to make this one less fluid and more “jumpy”. We’ll do that by using different steps, much like earlier we came up with numbers like 0,1 or 2:
floor((_Time.y * 5) % 5)
This value will change 5 times a second, and if we put this in instead of the hardcoded 10 value in the example above, the code would look something like:

This is now very subtle, but it’s enough to add a bit more variation to the image.
Now we have all the pieces to assemble the final shader, here’s the result 
And finally, adding a semi-transparent gradient and putting it in game, it looks like this:
Congratulations if you got this far. If you want to find out more about my game, it's releasing tomorrow (or may already be released by the time you read this): http://semispher.es. You can also find me on twitter here: https://twitter.com/VividHelix. If you want to see this shader effect in higher resolution, check out this older gameplay video.
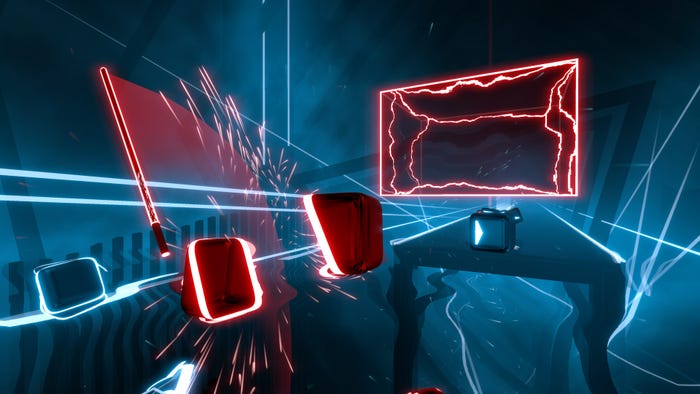
Also, stay tuned for more shader articles, including one on how to achieve this swoosh effect:
Read more about:
Featured BlogsAbout the Author(s)
You May Also Like
Latest News

Trending


Featured Blogs


