

Daily news, dev blogs, and stories from Game Developer straight to your inbox
Sponsored By
Featured Blog | This community-written post highlights the best of what the game industry has to offer. Read more like it on the Game Developer Blogs or learn how to Submit Your Own Blog Post
Rendering painted world in JG
The "painted" effect wasn't planned. Originally I only had an idea to render a natural scenery of a certain kind, and I wasn't ready to spend a whole lot of time on it. It became clear to me, a "realistic" approach won't work.
5 Min Read

Here's a little breakdown and implementation details of the real-time painted world in my last demo - JG.
Here's the video:
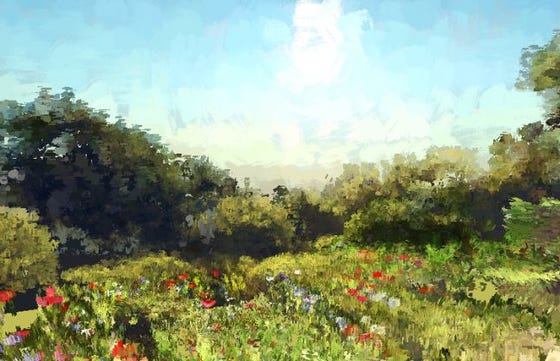
The "painted" effect wasn't planned. Originally I only had an idea to render a natural scenery of a certain kind, and I wasn't ready to spend a whole lot of time on it. It became clear to me, a "realistic" approach won't work, resulting in either very mediocre visuals (due to engine limitations and the complexity of real-time vegetation modeling), or a whole year of trying to catch up with Crysis. So it wasn't the way.
What I really wanted is to preserve the atmosphere, the feeling, avoiding ruining it with technical limitations.
So I have to render something very complex without killing myself and players' computers, what do I do? Intuition said: "bake everything". I recalled seeing outdoor 3D scans: even with bad geometry (or even as point clouds), they still looked quite convincing, thanks to right colors being in right places, with all nice and filtered real-life lighting already integrated into everything. Unfortunately, the time of year was absolutely the opposite of desired, so I wasn't able to try my mad photogrammetry skills.
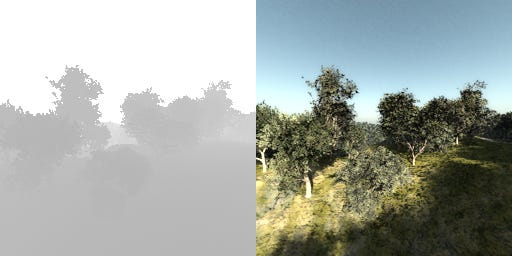
But what if we "scan" a realistic offline 3D scene? Vue surfaced in my memory as something that movie/exterior visualization folks use to produce nice renderings of nature. I had no idea what to expect from it, but I tried.
I took a sample scene, rendered it from several viewpoints and put those into Agisoft Photoscan to reconstruct some approximate geometry with baked lighting. And... alas, no luck. Complex vegetation structure and anti-aliasing weren't the best traits for shape reconstruction.
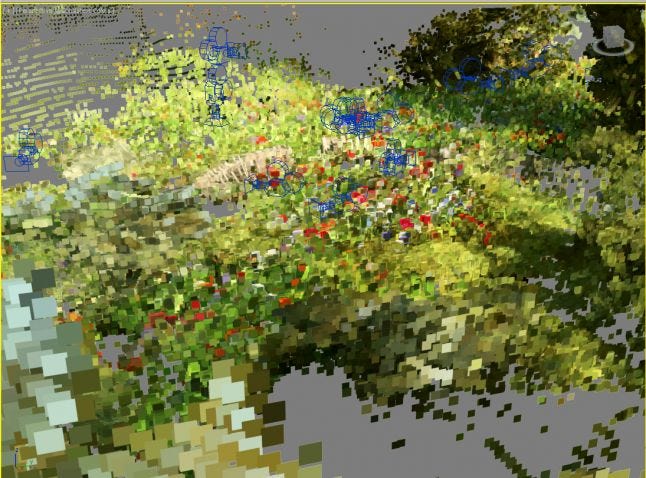
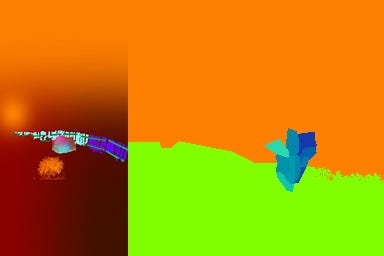
Then it hit me. What does Agisoft do? It generates depth maps, then a point cloud out of multiple depths. But I can render a depth map right in Vue, so why do I need to reconstruct?
Being familiar with deferred rendering and depth->position conversion, I was able to create a point cloud out of Vue renderings. Not quite easily, though: Vue's depth appeared to have some non-conventional encoding. Luckily, I finally found an answer to it.
And from this:
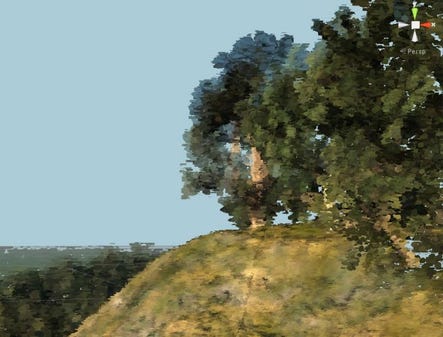
With some MaxScript magic, we get this:
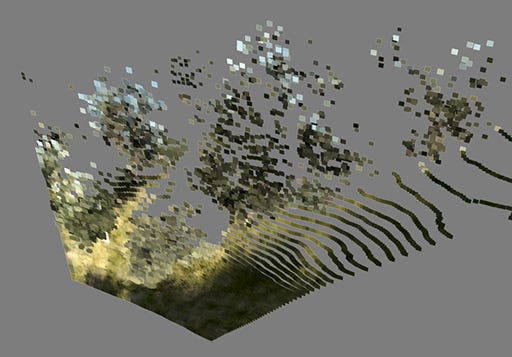
Which is a solid single textured mesh.
Hard part is over, now I only needed to repeat the process until I get a relatively hole-free scene. Finally it's time to have some fun with shaders :)
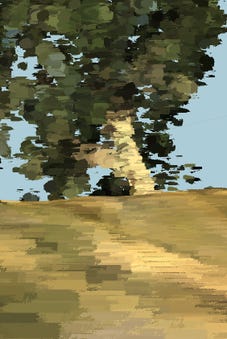
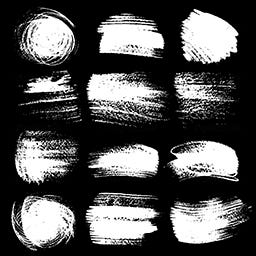
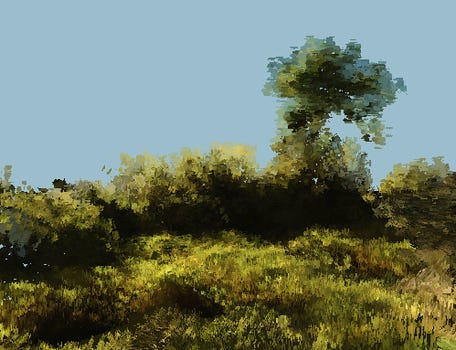
Each projected pixel acts as a camera-facing quad, textured with one of those stroke textures:
Almost. There was a bug in my atlas reading code, so some quads only had a fraction of stroke on them. However, it actually looked better, than the intended version, so I left the bug. It's now a feature :)
Quads size obviously depends on depth, becoming larger with distance. It was quite important to not mix together small and large quads, so I had to carefully choose viewpoints.
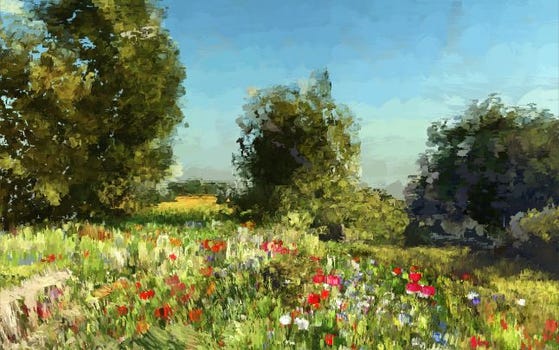
Test scene looked promising, so I started to work on the one I wanted:
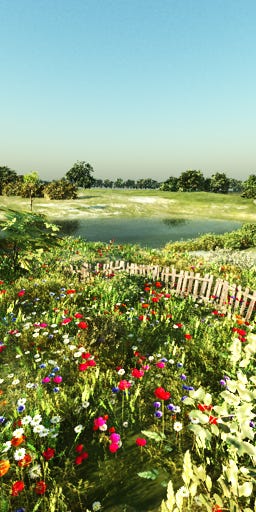
I made the house, fence and terrain from scratch. Plants were taken from various existing packs. Then I assembled the final composition out of this stuff. I lost count on the amount of renderings I had to do to cover all playable area:
Some had to be photoshopped a little to get rid of dark spots and to add more colors:
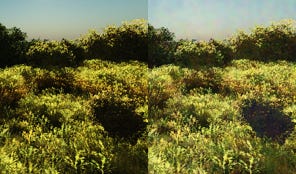
At first, I had troubles with getting the lighting right, so I had a lot of these black spots to fix, then I actually managed to tune it better. Final scene is actually a mix of different approaches, because I didn't have the time to re-render everything with different settings, and because it actually looked less monotonous.
Some early screenshots:

At this moment I also had stroke direction set up properly, what was pretty important, as uniform strokes had very unnatural look. At first, I tried to generate stroke direction procedurally (similar to how you generate normal map from a height map), but it wasn't sufficient. It was obvious to me how some strokes must lay, for example, I really wanted vertical strokes for the grass and fence strokes following the shape of the fence. Not being able to direct it with purely procedural approach, I simply decided to manually paint stroke direction in additional textures. Final version uses manual direction near the camera and procedural for distant quads. Here're some examples of direction maps:
To be honest, painting vectors with colors in Photoshop wasn't the most exciting thing to do, but still, it was the quickest way I could think of.
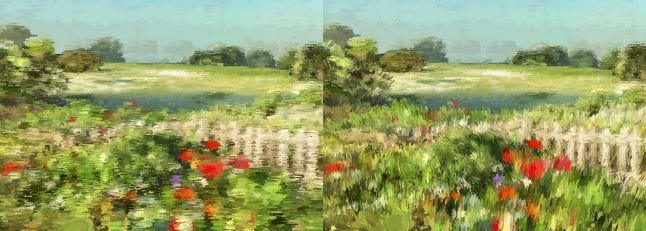
The difference was quite obvious. Here's uniform direction on the left, changed on the right:
And this is it. The point cloud nature of the scene also allowed me to have some fun in the ending part, making quads behave like a surreal particle system. All motion was done in vertex shader.
I hope it was somewhat interesting to read, at least I'll not forget the technique myself :)
Bonus information
Recently I was asked how to fill inevitable holes between quads. The way I did here is simple - I just used very rough underlying geometry: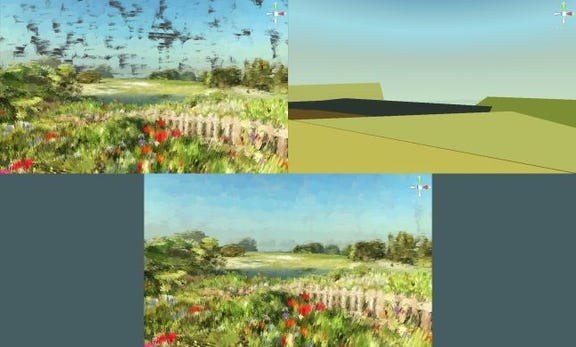
Read more about:
Featured BlogsAbout the Author(s)
You May Also Like


.jpeg?width=700&auto=webp&quality=80&disable=upscale)


