

Daily news, dev blogs, and stories from Game Developer straight to your inbox
Sponsored By
Featured Blog | This community-written post highlights the best of what the game industry has to offer. Read more like it on the Game Developer Blogs or learn how to Submit Your Own Blog Post
Keep the Guns Rolling: Modeling for Overkill 3 and Optimising Workflow
I'm a 3D artist working at Craneballs (previously 2K Czech) and in this article I want to provide tips for fellow artists on how to improve their workflow and produce high-quality models when time is mercilessly ticking.
17 Min Read


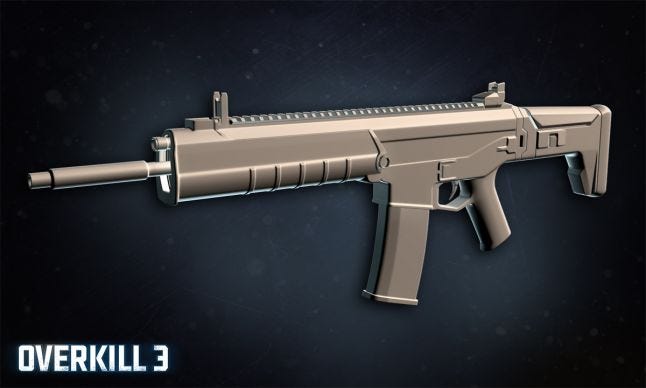
When I was hired to Craneballs, the development of our latest mobile shooter Overkill 3 was already at full speed. Game was already playable and looking good, yet it lacked a major part of the game that our fans thoroughly enjoy guns, massive weaponry. The two Overkill prequels were pretty big hits on mobile devices so the stake had been correspondingly high. Naturally, Overkill 3 had to be even better. My contribution to this goal was to create the whole set of guns. 30+ highly detailed, fully customisable weapons, all alone, before the game hit the stores. I love challenges.
The gaming industry demands the best of you as gamers are merciless critics. Being best with endless time, powerful tools and infinite resources is easy. But what if you are alone, targeting mobile devices and most of all, the clock is ticking? Let's optimize.
You Can Never Spend Enough Time on Planning
I learned this lesson the hard way during the many years of learning my skills as 3D artist. I always wanted to create something spectacular, right at that moment. Rushing into work without any idea of what to create and how resulted in disaster every time. Planning and patience are the necessary parts of the skillset every artist should have - it eats some time at the beginning, but saves a lot of struggle later on. The questions I always ask myself before any work begins are these:
What will I be creating?
What are the specifications? (i.e. tricount, texture size)
How much time do I have?
What can I sacrifice and what do I really need?
What can I recycle and reuse to speed things up?
Sitting down and answering all these questions is of vital importance when big tasks arise. Not just in my head, but writing it down on a piece of paper. My thoughts went like this when dealing with this particular challenge.
I was asked to create 30 weapons which need to have replaceable parts like stock, different kinds of scopes, muzzle brakes, foregrips, attachments including lasers, flashlights and other gun specific equipment. Guns in Overkill 3 can be rotated to any angle, so every detail had to be pixel-perfect, nothing stays hidden.
Specifications were demandingly strict. Mobile devices are getting powerful every day, but there are still older models to be considered, so every gun had to be squeezed under 4 500 triangles with 1024x1024 diffuse map and specular and normal map sitting at 512x512. Plus, to spice things up, action part of the game required LOD (reduced geometry) version of each weapon with 1 500 triangles tops.
Time issue was pretty vague at first, since we didn't have any release date in mind at that time. But I had to take into account that my colleague and I were the only two 3D artists working on this game, so I was expected to work on other aspects of the game (levels, vehicles, rigging, animation and rendering). Looking back my time was split about 50/50 between guns and other stuff. So I set myself this deadline: one gun, from scratch to final import into Unity must take no more than 3 days. 3 days were the limit. Later in development I was able to squeeze this into 2 days. More on this in next chapter, where we will focus on the gun creation process in-depth.
Working for mobile devices is a curse and gift at the same time. The bad thing is, you are very limited by the performance of the mobile device, so you must try and squeeze everything you can to make it as good as possible. The good thing is, you simply cannot create Battlefield or Call of Duty like detailed weapons, because they are using much higher tricount budget as well as bigger textures – so you can be quicker about making models and textures. I didn't have to work into extreme details, just because they wouldn't be visible. What I really needed was a gun with all the necessary parts, unique look and eye-pleasing result. Nothing more, but nothing less.
Along my long years of 3D modeling career I created a decent library of models and textures - nothing got discarded along the years as everything can come in handy from time to time. Also, Overkill 2 was stuffed with a lot of gun models, which I could use to save me some time. They required some time to customise for my needs, but it definitely helped speed things up.
With these things in my mind I could start to pump weapons, one by one. Let's take a look at the process, in depth and with details.
Creating Guns, Step by Step
The process I used is pretty straightforward and well known for any experienced 3D artist, but if you are new to this, you may find something useful. Here are the most important steps and some inside informations that were important for my pipeline.
1. References

Result of any work is only as good as the reference material you can gather. Sure, everybody knows how AK-47 or M4 looks, and you could easily recreate it from memory, but the devil is in the details. Every good photo of the real thing is pure gold, so I usually spend about good hour lurking around Google and gun forums gathering as many pictures as I can. I also need to find out measures of the weapon, how long it is with stock, without a stock. Usually there are more versions of the same weapon, adapted for different situations. There is MP5 with built-in suppressor, there is L85 which varies from assault rifle to light machine gun, ACR which is basically a weapon platform that can be customized to user's liking and preferences... In my case, I always preferred the most interesting looking versions.
Aside from the pictures I also looked around for basic information of the gun, its history and anything else that could give me the feeling for this particular gun. It helps to get my juices flowing and the creation process suddenly becomes a lot more fun and interesting.
TIP: Working in real scale is always a good idea. Using real scale is optional if you are a lone wolf, but absolutely mandatory for a group of people. It can get very painful to unify everything if people on the team work with different scales and units.
2. Low-Poly

After all references are gathered, it is time for low polygonal model which will appear in the final game. In the previous phase I always try to get blueprints which I then put into viewport of 3D Max. This gives me solid guidelines for the proportions of the gun. If there are no blueprints, I use side photos of the gun, but those are usually distorted with perspective, so it is important to take this into account and model accordingly.
In this phase I always think ahead what needs to be modeled and what could be faked with textures. For instance, smaller screws, indents, gaps between parts or bevels can be easily left for texture to save a few triangles. Where I don't hold back with triangles on the other hand is the silhouette of the gun - it must be nice and round (we like 'em curvy), no sharp angles. This goes for round objects as well (barrels, etc.).
Most of the time guns are very symmetrical, they usually differ only in small details and around the bullet discharger. I take heavy advantage of this and work with symmetry modifier so I don't have to worry about the other side. When the gun is almost finished, I start working on its unique parts and finalize the weapon.
This symmetry is connected to the next stage, unwrapping. Because of the small texture size, most of the parts also have to be mapped symmetrical. More on this later, but in low-poly stage I already decide which parts will be the same and which can be unique and modify the mesh according to that decision.
TIP: When creating hard-surface models, don't get sloppy - flat planes should really be flat, round objects should be made of cylinders and straight lines should be straight. Sounds obvious, but these small things are easy to skip, but matter a lot in the final result.
3. Unwrapping

The most boring, hated part of 3D. It's basically creating a 2D plane representation of your 3D model. This is necessary for texturing. A lot of time I consider this monkey work, but good unwrap is absolutely crucial and no good textures ever existed without solid mapping. To make things easier I started using TexTools which is a handy little plugin for 3D Max that allows ironing chunks of unwrap and relaxing them (also very useful for organic models).
As I mentioned before in low-poly section, most gun parts are symmetrical. So I start with those and when one half is done, I apply symmetry and move onto unique parts. One of the hardest thing about unwrapping is to think ahead and place your seams where they won't matter or won't be visible. Placing them where one part meets the other is usually a good idea. But sometimes you can't avoid it and the seam will be there. In this case, everything can be solved with careful texturing and polishing.
After the unwrapping is done, packing the UV chunks is just the cherry on the top. To assure my chunks are all the same size (pixel density wise), TexTools have a handy feature called Normalize which evens all pieces to be the same.
Packing UVs correctly can be a bit tough, but don't rush this one. The better you can pack everything, the better and sharper your textures will be. After everything is done, I usually take a look around and see if some small parts couldn't be enlarged. Pixel density is forgiving at small objects and those extra pixels can make all the difference when adding small details.
TIP: When unwrapping and packing UVs always start with the biggest pieces and work towards the smallest. You can always fit small things somewhere, but trying to put a huge chunk into your carefully packaged UV can be a bit frustrating and you may as well start all over.
4. High-Poly
High-poly is what I love most in 3D. When I have some free time, I always go nuts with details. But with this assignment, high-poly had to be done fast.
High-poly model is really important, because it enables you to transfer crucial details into your low-poly model in the form of normal maps. This process is called baking and we will look into it later. But before you can bake, you have to create a good looking high-poly model.
I always begin with making a copy of a low-poly model, applying smoothing (TurboSmooth) and adding geometry until it doesn't look like some huge blob, but a sharp, menacing piece of destruction.
When making high-poly versions of the guns, I focused only on getting nice smooth look with the main features modeled in. Most of the details were left off as I could easily fake them in the texture; much faster than modeling them. As you can see below, the model looks pretty simple compared to the low-poly model with modified normal maps.
TIP: Hard Surface Essentials by Grant Warwick (http://vimeo.com/10941211), long and huge tutorial that will teach you everything you need to know to model beautiful high polygonal models. Grant Warwick was a beast in the industry. Now retired, but before he did so, he shared his knowledge. If you see him around, don't forget to thank him for me!
5. Baking

The baking process is bit of alchemy and it takes some time to transfer details from high-poly model to your low-poly model. But once you get a grip of it, it's a piece of cake.
Before going into baking, I make sure smoothing groups are set up correctly and double check my wrapping. After this, I apply projection modifier and see if the projection cage is OK. After that, I choose which maps I want (Ambient Occlusion, Normal map) and what resolution I want (2048x2048) and hit render.
If everything is set up correctly, bakes will come out nice and smooth. Red color on render usually means something is wrong with the projection cage. When everything is perfect, it's finally time for texturing.
TIP: There are plenty of programs to bake your maps, whether it's built in your modeling tool or external (XNormal, for instance). Every program uses different algorithms and this can be painful especially when making Normal maps. They are very tricky to get right and everything affects them - smoothing groups, packing of UVs and the shader you are using. Before pumping up weapons, I had to make extensive tests to see how Unity handles normal maps and set my pipeline right. If you are not sure what approach to use, consult it on internet forums or try your own tests.
6. Texturing

Ah yes, the climax. No matter how well you've modeled and unwrapped everything, no matter how much blood, tears and sweat you dripped into your creation, everything can be totally destroyed by bad textures. This is why I spent most of the time on textures.
My first step is to put the model into lit environment and put on everything I have made so far (normal maps and ambient occlusion). Then I proceed to work out all the details I've left out in the high-poly stage to normal map. This takes some time, but is much faster than actually modeling everything. Things I usually do are rivets and screws, small gaps and bevels, grips, logos, serial numbers and other stuff. (To speed things up, I have created a library of normal maps presets mentioned above. Then it's just copy and paste.) First in greyscale, then I convert them into proper normal maps with Photoshop plugins (I use XNormal, because it's free, but there are others like nDo). I make sure that everything is crisp and sharp, because guns are mostly metal and sloppy details could ruin the weapon look.
After normal map is done, I make a little map from my normals called Cavity. As you can see below, it's a greyscale map that highlights edges and really bring out the details. This is the map which I use as the base for my diffuse map. I just stick it on top of the stack and hit Overlay as blend mode.
Diffuse map is the toughest one. First of all, I take a look at the gun and see which parts are made of metal, rubber, plastic... and block those materials out with colors. Metal is usually black in diffuse and really bright in specular map, rubber is a little lighter, plastic depends on the color. After I have the colors in, I go ahead and put in smaller details - there might be printed serial numbers, logos, warnings, aim dots, etc. I use those elements to break up the sometimes monotonous look of a weapon to make it more interesting. Look below for example.
At this point, I should be pretty happy with the basic look of the diffuse. Before I go into any more details (like damage, weathering or other traces of usage), I create basic specular map to put the weapon into life. At this moment, the gun could be considered finished - the gun is perfectly clean, fresh from the factory.
But we are making a gun used at war and it should look like it's used daily. So to the diffuse we return. I usually have a lot of reference photos of the particular gun and see where it is weathered the most. Usually it's the handle and grips, end of barrels and ejection chamber, plus all moving parts. Usually, there are scratches from moving around, the handle is shinier than the rest because of the constant contact with the human hand.
Also, a gun needs to be taken care of, usually disassembled apart, cleaned, oiled and assembled back together. So whenever two parts meet, there should be scratches and some residual oil. If you go for a more older look, rust would also appear here.
There are a lot of places where you could apply damage. The trick is, don't get tempted. It's very easy to overdo it, but then it's not very nice and doesn't make sense. Our setting is near future with modern weapons - these bad boys can't be beaten-up like some old toys. Yes, they should carry a mark of using, but it's a professional soldier who uses them, not some wannabe gangster. The less is more in this case and carefully made textures make all the difference.
In the process of texturing, I always use as many photos as possible. Painting your textures by hand is tricky and unless you are a professional painter, you just can't recreate the reality of photo texture (and it would take a lot of time to do so). The subtle variety in color and feeling really brings your textures to life, so make sure you use enough of them. (But carefully, again, less is more!)

After Diffuse is done, I duplicate all layers in Photoshop and start working on Specular texture. Specular is basically telling the shader how to react to light – should this area be shiny? How much? While Diffuse is the foundation, Specular is the final coat that brings everything to life.
Metallic parts should be really shiny, while rubber absorbs most of the light and doesn't shine as much. It really depends on each gun and the materials used. I always observe the weapon very carefully and try to catch the right feeling.
After specular is done, the whole weapon is usually done. I usually take a break, clear my head and refresh my eyes and return to the screen. If something still doesn't feel right, I fix it and repeat the process. Once I am satisfied, the weapon is done. Finally!

TIP: Create a structured library of high quality textures. If you ever find some nice texture you like and looks good, put it in the right category. Having a well organized source of textures is a huge time saver.
Conclusion
This article is about thinking through your whole workflow. Most of the time you don't need to plan as far ahead, thinking about every step, but sometimes you are in charge of creating a lot of assets in the shortest time possible. And in that case, it's a good idea to stop and think about the best way.
I always imagine Henry Ford, what he had to think about before he started serialized production of cars in his factories. The process would be much slower, if the production stopped every once in a while and his workers were asking „What next?“.
I had a checklist and I went through it. Step by step. No need to think about what to do next. Everything was already worked out, everything fell together. Sometimes you need to be creative. And sometimes, you need to be a machine. Well-oiled, effective machine.
Thanks for reading!
Note:
Overkill 3 launches 26th February on Android and iOS. If you'd like to see all my guns in detail, and in action, visit www.overkill3.com where you'll find the links. Or simply download the game through app stores.
Read more about:
Featured BlogsAbout the Author(s)
You May Also Like


.jpeg?width=700&auto=webp&quality=80&disable=upscale)


