Featured Blog | This community-written post highlights the best of what the game industry has to offer. Read more like it on the Game Developer Blogs or learn how to Submit Your Own Blog Post
Game Making with Kids: How the Ouya and Free Software Saved Summer Camp
In this post, I discuss putting together a game development summer camp course for kids, and how we used free and open source tools to empower kids to continue making games at home.

This is a repost from my blog, DevFromBelow, where I talk about game dev for the little guy.
Like many kids in the 80’s and 90’s, I thought it would be cool to create a video game. Being of a more artistic mindset, my grand designs were most often merely drawings of what I thought my games could look like: platformers with my friends, family, and self-created superheroes fighting burglars. The actual creation of such games, however, was black magic. Though our teachers attempted to teach us BASIC through “hello world!” exercises, my elementary school self could only stare at the blinking cursor on the TRS-80 Color screen and wonder when we’d get to the interesting part.

I was more of an MS Paintbrush kid...
Now, in many ways, we have cycled back to the type of independent game creation that was common in the 1980’s. The ZX Spectrum, Apple II, Commodore 64, and other computers for which people distributed their own games have been replaced by smartphones, tablets, and a resurgence in PC gaming. Distribution channels such as Steam, the App Store, and Google Play have likewise replaced the floppy disks in plastic baggies that once littered Radioshack shelves (though an image of one would make a killer app icon.)
While the publishing landscape is opening up again, the tools for actually developing games are, in many ways, more accessible than ever before. Unlike the days when an elementary school version of this author stared into the green abyss of the TRS-80, game making is no longer the sole purview of programmers. Game engines, once proprietary tools released only for mods or licensed for large sums of money, can be cheaply downloaded and published from. Even art-leaning indie designers like myself can make games in Game Maker, Unity, Construct 2, or a myriad of other integrated development environments (IDE’s.) Perhaps even more drastic, however, is the attitude of parents towards the idea of making games. Decades ago, video games were only productive if it was raining outside or if one wanted to be a fighter pilot when they grew up. Now, projects such as Sissy’s Magical Ponycorn Adventure and the Ouya’s Astronaut Rescue show the results of parents and their kids making games as a way to spend time together.
This summer, I’ve been teaching game development courses during a camp at George Mason University called the Summer Game Institute. The camp consists of week-long classes for kids (in age groups from 9-12 and 13-18) in topics such as basic game design, Minecraft modding, and even mobile game development, which I teach. To be honest, I had my reservations about mobile development and 9-year olds: certain marketplaces are too restrictive, require a paid subscription (which kids may or may not fully utilize if parents buy them), and feature complicated setup processes for launching. My goal was to give the kids attending the ability to go home and make games on their own computers for free, regardless of launching platform, but be able to expand their knowledge in the future to include mobile. This required choosing accessible game engines, asset creation tools, and finding a platform that would provide the gratifying feeling of “look, I made that…”

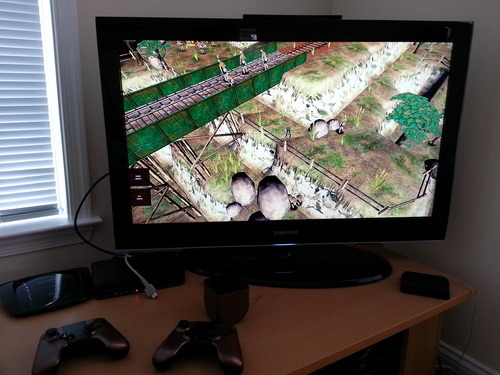
Game making is more fun if it feels like this
This article describes the planning process that went into my first course for the camp – a mobile game development course for 9-12 year-olds – and the tools and technologies we chose that resulted in its success.
Choosing Engines
My first step was to find game engines. The criteria here was to search for an engine that launched to mobile, but also provided a simple enough development environment that the students could also create games on their own computers without too much advanced knowledge. For this, my first inclination was Game Maker (GM) – it requires little programming, but can be extended by scripting with the Game Maker Language (GML.) While the mobile tools are not quite to the level of other engines, my feeling was that the kids could get a good introduction to game making through GM’s action-based event builder. Unity was another choice for the course, but had both pros and cons. On the plus-side, it is a very simple engine for launching to both iOS and Android. This made Unity a very attractive choice for addressing the class’s mobile theme. However, its more complicated interface and reliance on scripting presented a problem – would the kids be able to create something that they could put onto devices within a week? I decided to evaluate how the students were progressing with GM before making a decision either way.
Asset Creation: Industry Standard or Outside of the Box?
My next challenge was choosing tools for teaching asset development. Unlike engines, which have drastically opened up, industry-standard asset creation tools such as Photoshop, 3D Studio Max, and Maya still come at a premium price. While student versions of these applications are available with a “.edu” e-mail address, this does little to a child who is years away from college. In this instance, I turned to open-source software. Since I was focusing on Game Maker to teach development, I opted to use the GNU Image Manipulation Program (GIMP) as the primary art tool for my course in the camp. Like the engines, it is freely available for kids to download at home, but offers features that allow them to later expand their knowledge to Photoshop or other industry standard tools.
GIMP was an appealing choice thanks to a well-built support community, lots of existing documentation, and a Photoshop-like layer system. Perhaps the most important element of using GIMP over other freeware spriter such as GraphicsGale was the expandability. GIMP can do sprites with the proper settings, but it is primarily photo-manipulation software. This opens the doors for future outside-the-classroom learning with digital painting or other techniques.
Lastly, I had to find a launching platform that would provide a satisfying end to the week when the kids would learn how games are published. For this younger group, I stayed away from the Apple Provisioning Portal, though I plan to show it to the older groups in future classes. In my own development process, I lean towards Android as a demonstration platform, as I can export builds to my devices quickly and without the need for provisioning. This led it to be my demonstration platform of choice for the camp, though I was still unsure whether the kids would be impressed with their game on a small screen.
In-class Implementation
In retrospect, I’m ecstatic that I made the software choices I did. Game Maker, despite some initial head scratching over building behaviors, became the hit of the week after only the first day. My TA and I opened with a tutorial from the book The Game Maker’s Apprentice where the students could make a simple shooting game. From then on, every morning the kids would sit down at their computers and work on their own projects in the engine. While we built a lesson plan of several games for them to create, the first introduction was all it took before they explored the engine and went above and beyond even what we had planned to teach.
GIMP was also a great hit among the students after the first intro. For teaching sprite animation, I kept them to a 16 x 24 pixel grid, showed them how to turn on the appropriate guideline features in the program, and showed them how to proportion an RPG sprite’s body.

Like the Game Maker tutorial, GIMP caught on and many of the students would come in each morning with sprites they had created and animated at home the night before. Once they had learned how GIMP worked, many of them began making sprites for other types of games they had seen: side scrollers, schmups, and others.
Saved by Dark Horses
Initially the most difficult issue in our planning process, launching platforms became the highlight of the course for both the teachers and the students thanks to some serendipity and good timing by the DHL delivery service. The first major boon to our course was an announcement by Unity mere days before the camp that their platform would now allow mobile publishing for free. As Unity had been brought up as a way to fulfill the mobile title of the course, it became a goal we pushed for during our work with the kids. The other coincidence was that the week before the camp started, my Ouya finally arrived.
Like so many, I had backed Ouya’s Kickstarter campaign last year, and had even thrown in the extra money for the special-edition copper console with an extra controller. To me, the console was an artifact, something to hold up in future iterations of my History of Game Design course as an example of the “microconsole”, whose ultimate fate has yet to be decided. Upon getting it, I played a few games, though pickings were slimmer than they are at the time of this writing (Towerfall, which came out during the camp, is good enough for killer-app status.) Through viewing a few YouTube tutorials, I was able to sideload my own Android builds to the device.

It was from this that I had the most fun with the Ouya, making it my own and showing off my own games on a true TV console, something that I had not experienced before as a mobile dev. Then it hit me, could I have the kids in my class help me build an Android game for the Ouya?
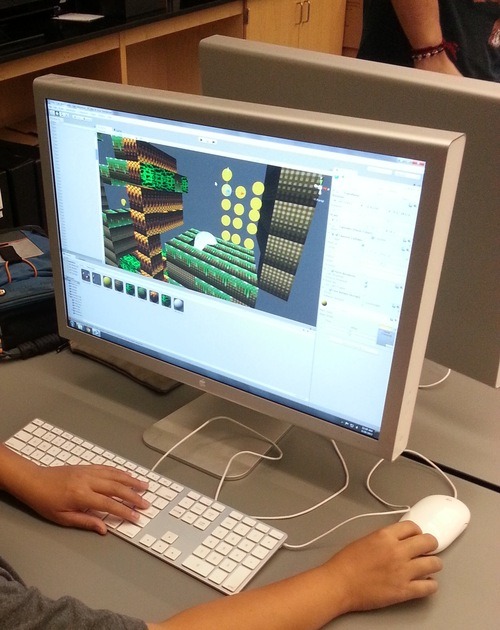
I set to work on a simple platformer based on a mobile game tutorial I had created for my college students in Unity. I added character sprites I had dug up for my GIMP sprite animation tutorial to give the course some continuity. Lastly, I created prefabricated blocks from which I would construct the game levels. From this setup, the students could import environment tiles that they had created in GIMP, using them as textures for the Unity blocks, and each design their own level for the game.

One of the students building a level
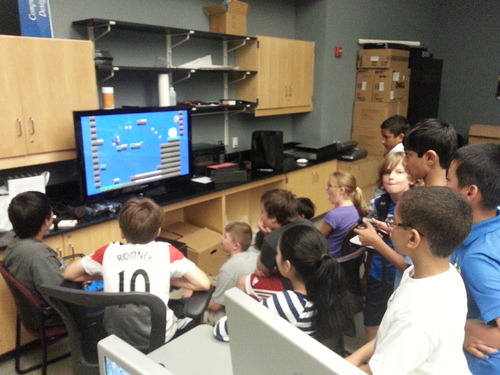
When they were done building, I compiled all of their levels into one game, uploaded the Android file to a Dropbox, and downloaded it through the Ouya’s web browser. Without yet diving into the actual Ouya SDK, we were pleasantly surprised to learn that our character’s WASD movement controls mapped right to the Ouya’s control stick and that his jump (using the default space bar setting) mapped to the Ouya’s “A” button. For the camp’s grand finale, we sat in front of the classroom’s TV passing the controller around so each kid could play his or her own level of a real video game.

Success!
Conclusion
For us teachers more than the students themselves, there were lessons to be learned from how we structured the mobile portion of our camp. The first was that making games can be a pleasurable and empowering experience when one removes the restrictive aspects of the process: industry standard software and foci on specific technologies. The second is there is creativity out there to be fostered if we only give it a small nudge: most of the students needed only a short tutorial in each software before they were pushing it past where we had intended to go with it. In many ways, it was largely due to the accessibility and freedom of the tools we utilized – the simplicity of Game Maker, the newly opened Unity mobile options, GIMP’s accessibility, and Ouya’s transparency - that the course was a success. They made it more about the games and the kids’ ability to create something of their own.
Read more about:
Featured BlogsAbout the Author(s)
You May Also Like


.jpeg?width=700&auto=webp&quality=80&disable=upscale)


