

Daily news, dev blogs, and stories from Game Developer straight to your inbox
Sponsored By
Featured Blog | This community-written post highlights the best of what the game industry has to offer. Read more like it on the Game Developer Blogs or learn how to Submit Your Own Blog Post
City builder games: make Build-Up animations cheaply
For many types of games, the player would construct buildings on a map. This article is about how to make graphics of the Build-Up animation, in a cheap way. Yet the quality is good.
3 Min Read

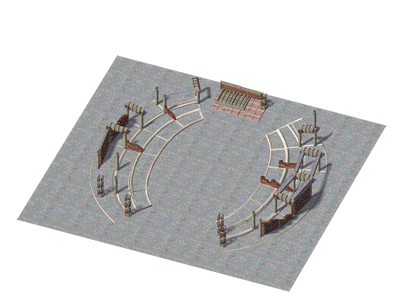
For many types of games, not only strictly City Builder Games, you have a piece of land, that you can construct buildings upon, this scheme looks all too familiar:
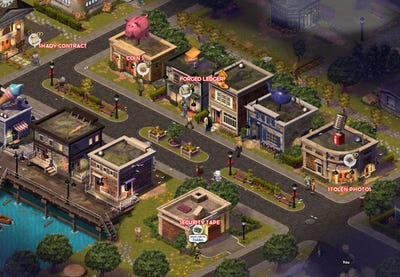
After you drag a building form the store on to your land, it would take a while before it’s done constructing.
Most often, in this process, a single piece of graphic which resemble a construction site would be put there. And to save memory and budget, some games would use 3 common pieces of graphics: small, medium and large, to fit different buildings. When the construction is done, the graphic would be shift to the building in its completion.
But if you want to create more subtle Build-Up animations for your game, that is, to see the building gradually growing to the sky?
We know today most isometric buildings are made by 3D pre-render. If you need for example 5 frames animation for this purpose, you would have to make 5 stages of completion in 3D, then render the images. Yes, in this way it would cost lots of money.
Our company had created this type of animation for a client’s game, 5 frames of Build-Up animations for around 40 buildings. We made them in a cheap way, taking a few days. It takes little budget, but the quality is not compromised. Let’s see how we did it:
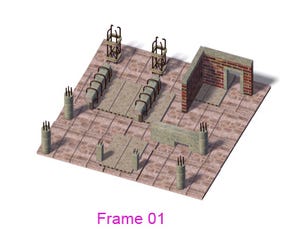
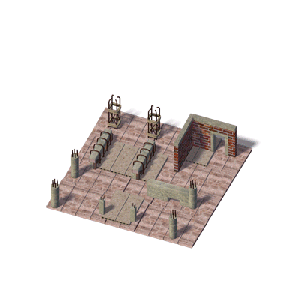
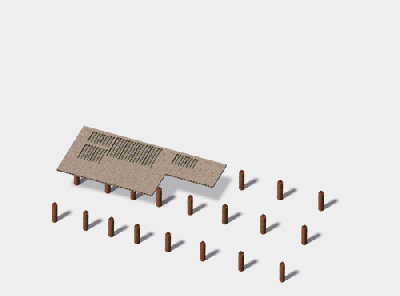
Step One: Make Construction Components
First of all, make lots of construction components in 3D, and as many types as you can imagine: walls, pillars, steel bars… just as the below image:
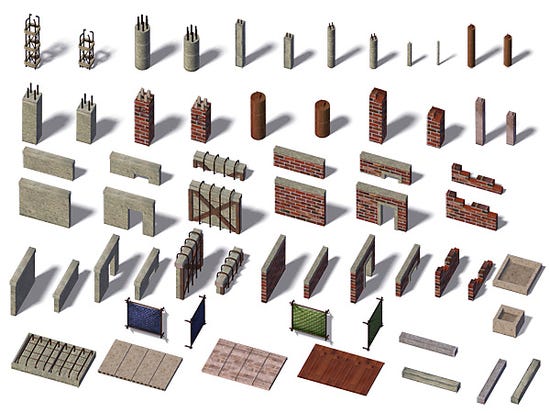 And you need to render these things to 2D images, for later use. Needless to say, you should render these in the same camera angle as in your map, and cast the same lights to them.
Everything should have two copies, placed in two directions of your isometric map.
Then pack all the construction components graphics in a large PSD file, each thing has its own layer.
Step Two: Make the Actual Animation
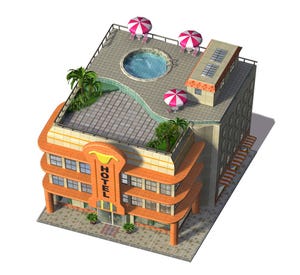
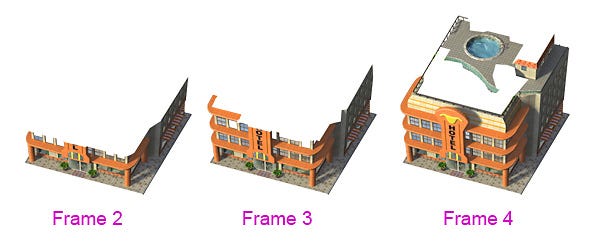
In this example, we would make animation for a small hotel building.
First, make the complete building graphic in the usual way:
The next jobs could be done in Photoshop. This animation needs 5 frames. According to the degree of completion in each frame, erase some parts of the complete building away:
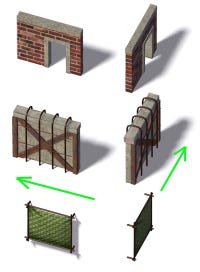
Then fill the hollows/cross-sections with the construction components you just created in Step One.
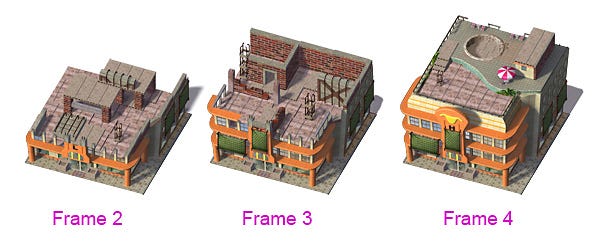
Put in the components following the structure of the building, that would look reasonable. For example, if the building is a cinema, you should make a big hall in middle of the space.
The first frame could be a basic plan on the ground. And the last frame is the building itself. Now job Done!
This solution can be applied to buildings of all shapes, not only boxy buildings, only that you need to bend the construction components a bit:
I know this way of Building-Up is too cartoonish, but it’s for games, right?
If you like this post, please see more of my articles and follow me here...
I would post regularly--one article every two weeks, about game art production.
Read more about:
Featured BlogsAbout the Author(s)
You May Also Like


.jpeg?width=700&auto=webp&quality=80&disable=upscale)


