
Featured Blog | This community-written post highlights the best of what the game industry has to offer. Read more like it on the Game Developer Blogs or learn how to Submit Your Own Blog Post
Unity Wheel Collider for Motor vehicle Tutorial 2018
The main objective of this post is to give an idea of how to work with wheel collider and physics of Wheel Collider.

Objective
The main objective of this post is to give an idea of how to work with wheel collider and physics of Wheel Collider.
Want to Make a Car Racing Game?
Having troubles with Car Physics?
Where to use Wheel Collider?
How to use Wheel Collider?
What are the components of Wheel Collider?
How is Wheel Collider Different than other Colliders?
Have these Questions in Your Mind?
No worries. You'll know everything about Wheelcollider after reading this post.
INTRODUCTION
Wheel Collider is a special kind of Collider which is used for vehicles. It has in built collision detection technique and physics of actual Wheel.
It can be used for objects other than wheels (like bumper Boats, bumper cars etc which uses suspension force ), but it is specially designed for vehicles with wheels.
Is there is anything special which is not in other Colliders?
Yes, each and every collider has something special (That’s why Unity created them).
In this Collider, you will get all the components which are used to make vehicle drivable. You will get to know most of the components here.
To get a car working in Unity it’s useful to understand how the Wheel Collider component works internally. Here we attempt to explain that in just a few minutes.
This is how you look at your dashing and shiny car.
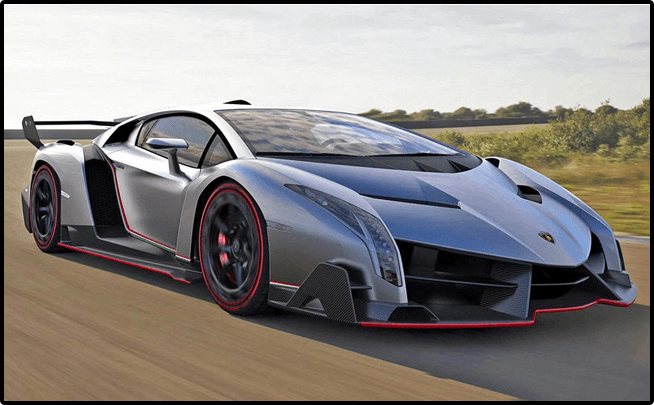
But, Unity doesn’t have good eyesight. So Unity looks at your car like this.
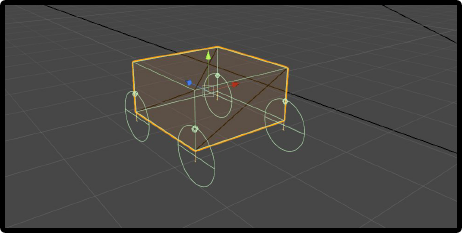
4 wheels colliders and 1 car collider, that’s it!
Now Let’s Discover inside Wheel Collider.
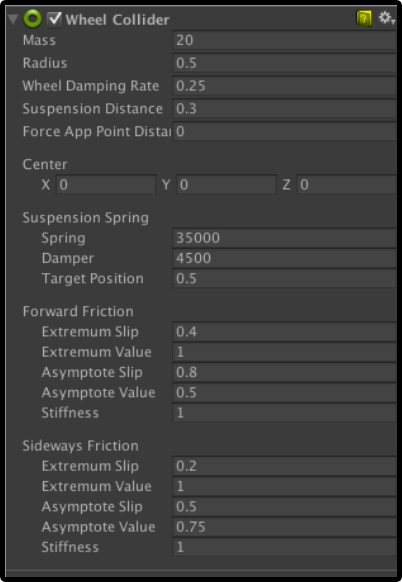
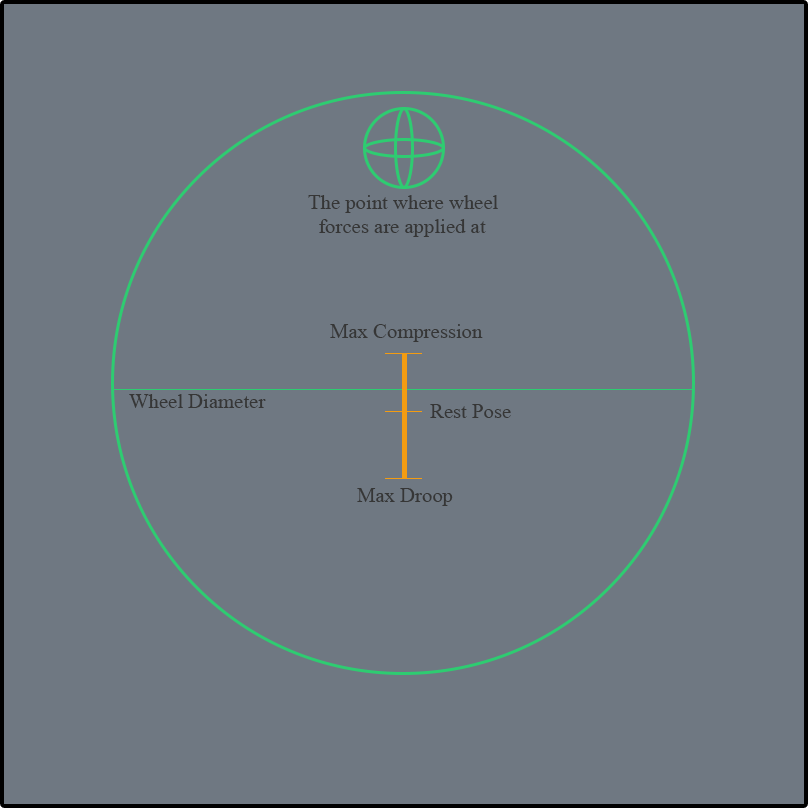
Wheel doesn’t have any shape it is Raycast based.
Mass & Radius: mass and radius of the wheel. (Easy isn’t it ?)
Below I had given a little introduction about physics of wheel collider.
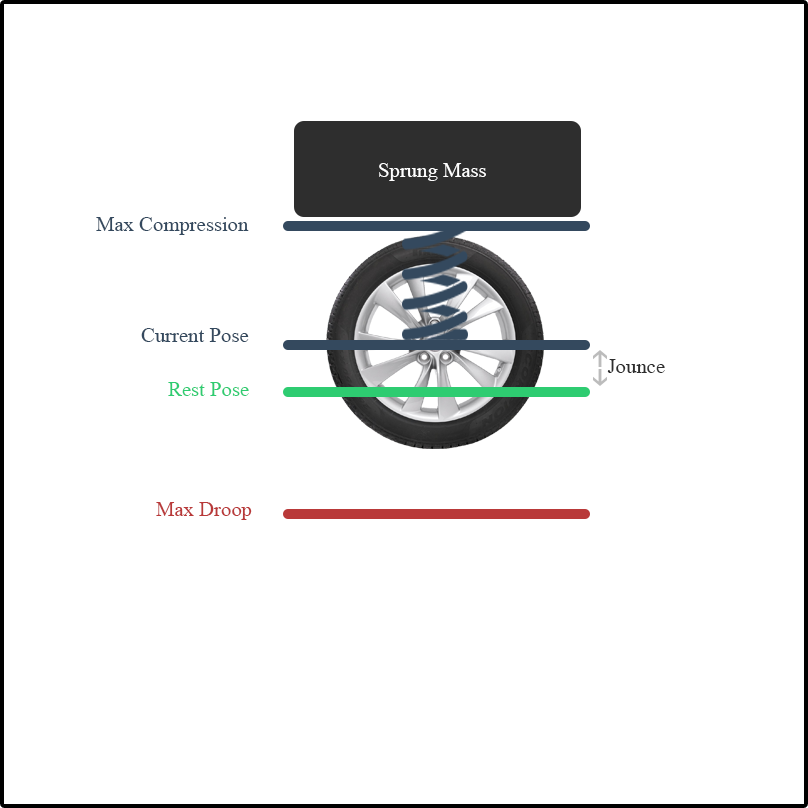
Every Wheel counts it’s sprung mass. Sprung mass (not weight) is used to apply individual force on each wheel.
Suspension Distance is the distance between max droop and max compression. This suspension is calculated based on rest pose.
Suspension Force(F) = (sprungMass * g ) +( jounce * stiffness) - (damper * jounceSpeed)
jounce | offset of the wheel relative to the rest pose. |
|---|---|
stiffness | that means physics friction. (setting this to 0 means no friction change this runtime to simulate in various ground material). |
damper | damping value applied to the wheel |
jounceSpeed | wheel moved with suspension travel direction. |
Tire simulation rather than using dynamic or static material slip-based material is used.
To learn more about physics of wheel collider click here
First we need to setup Scene for that(Don’t Worry that is Easy part).
PART-1: SCENE SETUP
Step 1: Create a 3D plane Object give it scale of (100, 0, 100).
Step 2: Create an empty Object add Rigidbody 3D. Name it as “Car”
Step 3: Import 3D Car Model inside your Scene (you will get download link below) add as a child of Car.
Step 4: Take Mesh Collider and add as a child of Car name it ”CarCollider”.
Step 5: Create Two empty GameObject inside Car name them as “Wheel Meshed ” and “Wheel Collider”.
Step 6: Inside Wheel Meshes add 4 empty GameObject name them as “FL” ,”FR” ,”RL” and “RR”. assign Mesh of Wheel (you will get download link below). Set their Position.
Step 7: Inside Wheel Collider add 4 empty GameObjects name them as “Col_FL” ,”Col_FR”, ”Col_RL” and “Col_RR”. Add wheel collider as their component. Set radius of colliders same as the size of mesh and set their position same as the mesh have.
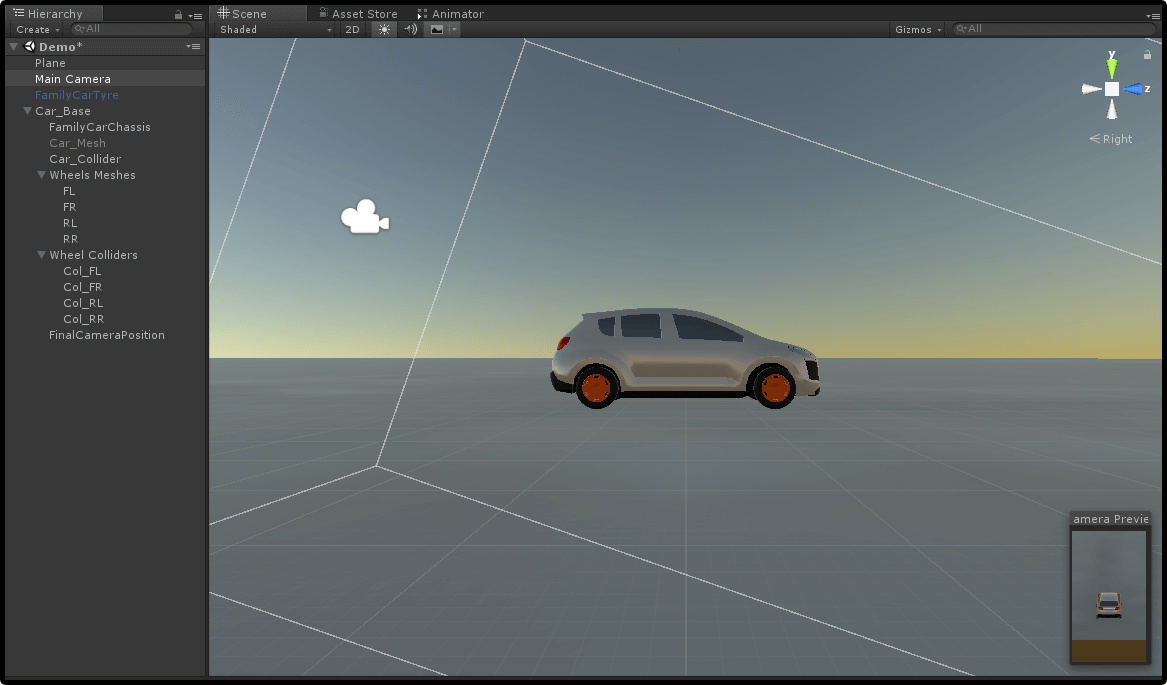
Yeap, Its Done! actually that was the Difficult part to setup scene.
Now Time for really easy part Scripting.
PART-2: SCRIPTING (Check Script Reference Click here)
[System.Serializable]
public class AxleInfo
{
	public WheelCollider leftWheelCollider;
	public WheelCollider rightWheelCollider;
	public GameObject leftWheelMesh;
	public GameObject rightWheelMesh;
	public bool motor;
	public bool steering;
}
In this AxleInfo Class, we are going to store info for a pair of the wheel.
Variable Name | Variable Type | Description |
|---|---|---|
leftWheelCollider / rightWheelCollider | WheelCollider | To drive a car using WheelColliders inbuilt physics. |
leftWheelMesh / rightWheelMesh | GameObject | To Visualize rotation and movement of wheels. |
motor | bool | Enable movement of this pair of wheels. |
steering | bool | Enable rotation of this pair of wheels. |
Now, We are going to drive Car
public class CarDriver : MonoBehaviour
{
	public List<AxleInfo> axleInfos;
	public float maxMotorTorque;
	public float maxSteeringAngle;
	public float brakeTorque;
	public float decelerationForce;

	public void ApplyLocalPositionToVisuals (AxleInfo axleInfo)
	{
		Vector3 position;
		Quaternion rotation;
		axleInfo.leftWheelCollider.GetWorldPose (out position, out rotation);
		axleInfo.leftWheelMesh.transform.position = position;
		axleInfo.leftWheelMesh.transform.rotation = rotation;
		axleInfo.rightWheelCollider.GetWorldPose (out position, out rotation);
		axleInfo.rightWheelMesh.transform.position = position;
		axleInfo.rightWheelMesh.transform.rotation = rotation;
	}

	void FixedUpdate ()
	{
		float motor = maxMotorTorque * Input.GetAxis ("Vertical");
		float steering = maxSteeringAngle * Input.GetAxis ("Horizontal");
		for (int i = 0; i < axleInfos.Count; i++)
		{
			if (axleInfos [i].steering)
			{
				Steering (axleInfos [i], steering);
			}
			if (axleInfos [i].motor)
			{
				Acceleration (axleInfos [i], motor);
			}
			if (Input.GetKey (KeyCode.Space))
			{
				Brake (axleInfos [i]);
			}
			ApplyLocalPositionToVisuals (axleInfos [i]);
		}
	}

	private void Acceleration (AxleInfo axleInfo, float motor)
	{
		if (motor != 0f)
		{
			axleInfo.leftWheelCollider.brakeTorque = 0;
			axleInfo.rightWheelCollider.brakeTorque = 0;
			axleInfo.leftWheelCollider.motorTorque = motor;
			axleInfo.rightWheelCollider.motorTorque = motor;
		} else
		{
			Deceleration (axleInfo);
		}
	}

	private void Deceleration (AxleInfo axleInfo)
	{
		axleInfo.leftWheelCollider.brakeTorque = decelerationForce;
		axleInfo.rightWheelCollider.brakeTorque = decelerationForce;
	}

	private void Steering (AxleInfo axleInfo, float steering)
	{
		axleInfo.leftWheelCollider.steerAngle = steering;
		axleInfo.rightWheelCollider.steerAngle = steering;
	}

	private void Brake (AxleInfo axleInfo)
	{
		axleInfo.leftWheelCollider.brakeTorque = brakeTorque;
		axleInfo.rightWheelCollider.brakeTorque = brakeTorque;
	}
}
This script was a little bit difficult but I am here to help you.
Variable Name | Variable Type | Description |
|---|---|---|
axleInfos | List | List of AxleInfo Which contains a pair of wheels data. |
maxMotorTorque | float | maximum Torque is applicable on Vehicle. |
maxSteeringAngle | float | Maximum angle at which wheel is rotate. |
brakeTorque | float | Torque is applied when a brake is pressed. |
decelerationForce | float | This force is applied to stop the vehicle because of friction. |
ApplyLocalPositionToVisuals (AxleInfo axleInfo)
This Method takes one argument: axleInfo. This method is used to Display rotation and position of WheelMeshes.
FixedUpdate()
This is Unity callBack used to do certain changes in physics at fixed time.
Inside that, we will take Input.
Vertical: W/Up Arrow for Forward & S/Down Arrow for Backward.
Horizontal: A/Left Arrow for Left Side Rotation. & D/Right Arrow for Right Side Rotation.
Space: To Stop(brake).
Assign this Script to our “Car” GameObject.
Add Size of AxleInfo to 2.
Now add your Colliders and Meshes to appropriate Location.
We have 3 methods to Control Car Acceleration(), Steering() and Brake().
You can relate all the methods listed below. These methods are works like how actually Vehicle we drive in reality Accelerator, Brake(No Clutch here).
Acceleration()
It is used to make the vehicle move forward and backward.
If forward or backward buttons are not clicked then need to add Deceleration().
motorTorque is used to add torque (In forward or backward direction) in a vehicle.
When the vehicle is moving at that time brakeTorque is needed to change to 0.
Deceleration()
It is used to stop the vehicle when forward and backward buttons are not pressed.
Steering()
It is used to turn angle of vehicle.
steerAngle is used to change an angle of the the vehicle
Brake()
It is used to stop the vehicle using brakeTorque property.
PART-3: ASSIGNING VALUES
Finally at the end This the last thing to make your car drivable. Enable motor if you want to Apply Force and Suspension on That Wheel.
Enable Steering if you want to give rotation Force on that Wheel. Maximum Motor Torque change as per your car’s Rigidbody mass.
Maximum Steering Angle must be between (30-35). Brake Torque depends on how much Brake Torque you want to apply.
Deceleration Force is must be less than Brake Torque.
Tip
Experiment with This Value to make your Car run smoothly.
Caution
Brake Torque and Deceleration Force value need to be much higher to stop usually(1e+5 to 1e+8).
Feel free to contact us if you really liked this blog. And don’t forget to share your comments below!
Read more about:
Featured BlogsAbout the Author(s)
You May Also Like


.jpeg?width=700&auto=webp&quality=80&disable=upscale)


