
Featured Blog | This community-written post highlights the best of what the game industry has to offer. Read more like it on the Game Developer Blogs or learn how to Submit Your Own Blog Post
Tokyo Game Showing - How much does it really cost?
This post is intended for first-time visitors to the Tokyo Game Show, both gamers and exhibitors. I will break down our costs for Blue Volcano to attend, and give others a solid cost-benefit ratio from checking out the Japans premier game show.

It's my opinion that Tokyo Game Show should be on the annual to do list of any game lover. Over the last few years it has lost some of its reputation as a show full of new reveals and announcements (bar some games that never make it out of Japan), but the craziness of Japan shines through the whole festival giving show goers experiences not seen in western shows such as PAX, E3 and Gamescom. This is a show where booth babes seem mandatory, cuteness levels are taken to the extreme, cosplay is an art form and you will see some of the most bizarre and downright ‘only in Japan’ games that would never see the light of day outside the country.
This post is intended for first-time visitors to the Tokyo Game Show, both gamers and exhibitors, where I will break down our costs for Blue Volcano to attend, and look at who else will get a solid cost-benefit ratio from checking out the Japans premier game show. I will write later about my personal experience as a traveller and a gamer, including great games that I saw and people that I met.
* I will be using Australian dollars throughout the article with an equivalent at the time US dollar conversion of $1 AUD = 0.75US rounded up.
Deciding on Tokyo Game Show
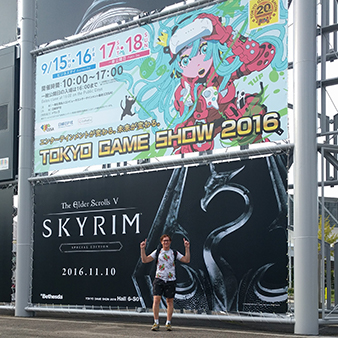 Before you can start planning your budget for travel and marketing at a show, you first need to find a show to attend. We’ve spent six months on development of Roto Color Runners and now feel confident that it’s ready for submission to shows, conferences, awards and the like – anywhere that we can get honest feedback for continual improvement. With this in mind, I found Promoter App which lists all the game related shows coming up and deadlines for submissions. If you are a dev and not aware of it yet, definitely check it out - it lets you know when the deadlines for a competition are coming up and may help you discover new conferences you’re not aware of.
I’ve been to Tokyo Game Show once before in 2010 as a general attendee while living in Japan and was eager to see how much it has changed, along with being on the other end of the booth and meeting people within the indie scene over there.
This year Roto Color Runners was accepted to be showcased in their Indie Games section of the Tokyo Game Show. which was great news. With the booth cost being waived, it was time to start working out the costs and logistics of being at the show, something that should be assessed before deciding to try and attend a show.
Getting To Japan
First and foremost, I knew I couldn’t do this show alone. Well, I could have, but a four day show can lead to burn-out very quickly and few of those crucial opportunities to meet with other developers. Additionally, I wanted time to check out some games, enjoy regular breaks at the show, and seriously considering blowing my present allowance on pervy Dead or Alive mousepads for all of my colleagues.
I called on my brother Cameron (who has been on board since the beginning and has a great understanding of the game) to see if he would help out at the show in exchange for flights and accommodation. Not surprisingly, he jumped on board at the opportunity to go to Japan again. Flights from Sydney to Tokyo direct were $1040 each, so $2080 ($1560US) total through JAL. I could probably have found a cheaper flight if going with Jetstar or via China, but I have travelled enough to realise that saving $200 is not worth it in the long run. We had bigger leg room, 2 bags each at 23kg and meals, etc included which was great as there wasn’t the stress of hoping to be underweight at the airport and being stung with extra baggage.
Setting up the Booth
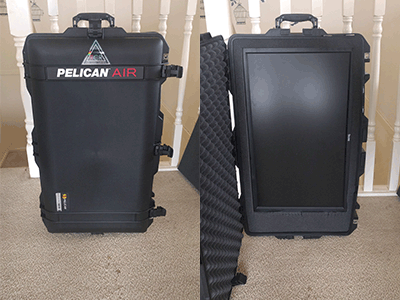
Being accepted, what you were given by the show was a standing booth space, with black panel at the back and a power cord to the booth. Since we were selected as part of the showcase, instead of the usual $1500 booth fee, it was complimentary. $0. Winner! All other equipment was yours to arrange, with a hiring option available if you would like to use their screens, speakers, etc. The cost of hiring a screen worked out to be close to $400 ($300US) so I though it better to take a screen from here and spend the money on something of more benefit in the long run. Looking around online, I found a heavy duty Pelican Air case made for storing and transporting equipment. This would perfectly fit a 28” monitor in it along with some other things. At $494 ($370US), it was only a small amount over what it would have cost to hire the equipment, though is an investment that will be used for years heading to shows and overseas. I would be taking my laptop to run the game off so with the monitor, computer and a speaker I already owned taken care of, the bare bones booth was complete. Though nobody likes bare bones and I wanted to add some more wow factor so onto phase 2…
BOOTH SPACE: | $0 | $0 |
BOOTH SETUP TOTAL: | $494 | ($370US) |
Lighting up your life
Roto Color Runners is a sensory experience that takes you on a trip through colourful galaxies in a meticulous orchestration of light, colour and sound. So far I had the sound and colour parts working well, now to add the light. I had always thought of the game being more than something to be played just on screens at home (as an instillation, in a club, etc.) and one way in particular to add more immersion while following the themes of the game was to have lighting react to the gameplay.
*After writing this section, it ballooned out to be almost 2 pages on the lighting system alone. I thought it best to use that as its own post since it goes into technical details outside the scope of this post, so keep an eye out for it soon.
All up the lighting blew out to cost a lot more than originally thought. The additions of adapters plus other software were not initially known so it became a bit of a money pit. However, we identified two major successes attributable to our work and expenses in lighting. Primary among these were increased feedback reports describing intensified immersion due the lighting. The second major benefit was in marketing, our booth had built-in visual appeal that drew crowds towards us like Mario towards an invincibility star. At the end of the day, this was an investment in the game that I’m glad I made, and like the Pelican case are something that can be used again in future shows and projects. So lighting totals:
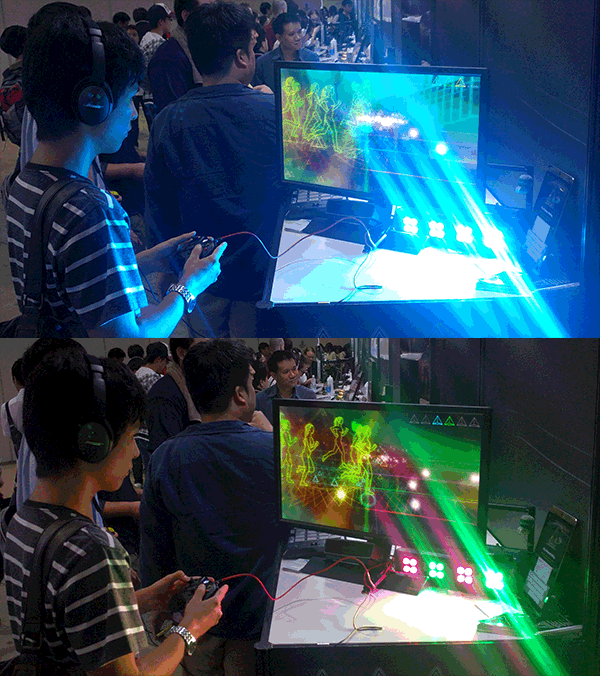
Lighting up the Show!
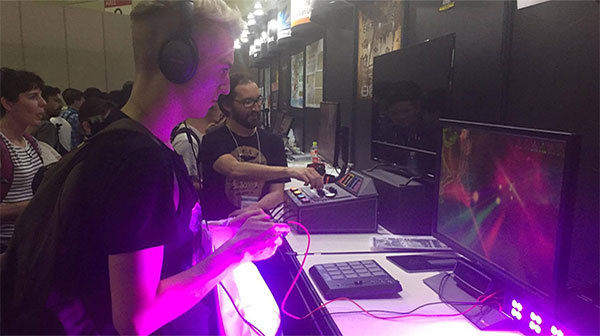
Expensive but worth the costs
The Joys of Technology
Roto Color Runners is a music game at heart, and as such I feel the best form of input for a music game is a music device. MIDI was the obvious choice to target first as it’s a universal protocol and there are so many various instruments out there that use MIDI to connect to a computer. While I had bought an old Akai Drumpad months ago and started playing around with the idea of connecting the game then, there have been some to-be-expected bumps in the road since then. For example, sometimes the very first play through the buttons would map perfectly and as soon as the stage was reset, the mapping would go all over the place. Eventually the clock ran me out and we had to concede that it would not be in the TGS version of the game. That didn’t mean that I didn’t take the device anyway. Just having it there was another draw to the booth and people who were informed that the game would be playable via any MIDI device in the future were excited by this prospect. We’re content to use the traditional controllers for now and they were great for TGS, but we’re confident we’ll have MIDI controller input working with Roto Color Runners soon.
CONTROLLER AND HARDWARE COSTS: $0 (Yay!)
Finishing off the booth
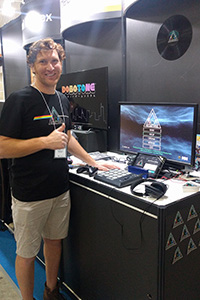
The final thing for the booth would be the non-game related things to decorate the space with, hand out to players, and register interest with. I had a pile of stickers still from previous conferences so could tick that off as a cost that has now been paid forward, likewise with business cards. For SXSW, I went to a second-hand store and bought a pile of old records, with which I replaced the album label with a Roto Color Runners one. While they had slowly been given out, I still had a few left to decorate with and another zero cost. I used my iPad to take down subscribers. The only thing that was printed for the show were handouts with links to the website and social media which totalled $10 ($7.50USD). So with all the above, the booth was complete and we were finally ready for the show!
Internal Transport
Japan has, in my opinion, the best train system in the world. The entire country is connected from Sapporo in the north to Kagoshima in the south via bullet trains, and a myriad of networks in between. Almost every town has a train station and you would be hard pressed to be stuck anywhere further than a kilometre from a station in any metropolitan area. Unfortunately, even though the train system is great, it doesn’t take long before those small trips start to add up.
Despite being called Tokyo Game Show, the show is actually held in neighbouring prefecture Chiba which is about an hour from Tokyo. We decided to stay close to the convention centre during the show as it would be cheaper accommodation than travelling to and from Tokyo. We were five stops from the convention centre. This would work out to about $7.50 ($5US) return which isn’t not too bad. Multiply that by the four days of the show and the day on either side then it worked out to $45 ($34US) for transport to the convention centre. However, the first night we had stayed in Tokyo so the initial trip to Chiba was $35 ($26US). During the show, we went to Tokyo one night again to meet friends which turned out to be a $50 ($38US) round trip, and 1.5 hours each way. Ouch. Then after the final night in Chiba it was another $35 ($26US) back to accommodation for the last few nights in Tokyo. There were two events that followed TGS on the Monday and Tuesday nights on the other side of town to our accommodation. So let’s add on another $30 ($22US) for some local trains to these events. The final train was back to the airport at $15 ($11US). So let’s add the trains up now:
Tokyo to Chiba: | $35 | ($26US) |
To and from convention: | $45 | ($34US) |
Extra trip to Tokyo: | $50 | ($38US) |
To accommodation in Tokyo: | $35 | ($26US) |
To gaming events within Tokyo: | $30 | ($22US) |
To airport: | $15 | ($11US) |
TRANSPORT TOTAL for 2: | $420 | ($315US) |
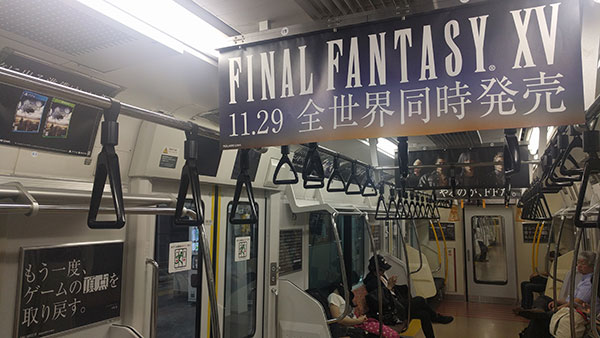
Which is rarer?
An empty train or release date for FFXV?
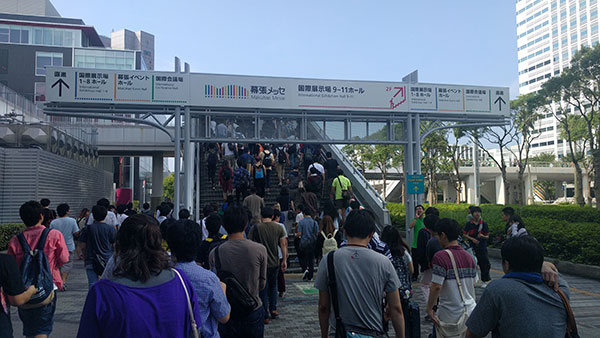
Usually best to sit in the local park with a beer until the train lines become less crowded.
Accommodation
We could have saved some cash on accommodation expenses if we had gone only for the show but as we both have connections in Tokyo and a love for the city, we spent a couple of extra nights. Alberto Santiago of Studio Canvas – another Sydney based developer - was also at the show with his game Goat Punks (which you should definitely check out). We have bunked together before during conferences so thought we should find something we could all fit into for the show days in the Chiba area. We opted for Air BnB rentals which didn’t include meals but hit the right price point.
Let’s add up our accommodation now:
Night 1 – Tokyo: | $77 | ($58US) |
Nights 2 – 6 in Chiba: | $403 | ($302US) |
Nights 7 – 8 in Tokyo: | $156 | ($117US) |
ACCOMMODATION TOTAL for 2: | $636 | ($477US) |
Food, drink and other
We blew this section out more than you need to so I’m including an estimated budget at the bottom for a traveller on a shoestring budget.
After spending thousands on flights and accommodation it’s sometimes hard to justify putting extra away for meals while travelling but in Japan it’s worth it. You can try food here available literally nowhere else. Even if you can’t do that, you’re not relegated to McDonald’s. For the same price you can try some amazing Japanese food across the entire style of cuisine.
I would say we could split our meals into three categories. Indulgent, cheap, and beer. Indulgent meals we had were Yakiniku one night (which came to $75 ($56US) a head though included all you can drink), two nights at Izakayas (Japanese gastropubs) that worked out to about $40 ($30US) – including all you can drink. The last day we treated ourselves to a sushi lunch at Tsukiji Fish Market that was well worth the $50 ($38US) per head price. Other meals such as ramen, bento boxes and shockingly deceptive pastries that surprise you with either delightful sugary sweetness or savoury curry flavours (one could never tell) would average about $10 ($7US). Beer was something a lot of people could probably get by without – if I were one of them I’d already own a beachfront mansion in Sydney by now. Over the nine days, we spent about $150 ($120US) each on beer (not including the meals that it was included with). The abundance of vending machines in Japan mean that it’s never far to get a drink. The problem is that you usually end up buying a half-dozen drinks a day, we spent about $8 each per day on vending machine drinks. Breaking down the food scenario per person:
Indulgent Meals: | $205 | ($172US) |
General Meals: | $150 | ($120US) |
Snacks/drinks: | $100 | ($75US) |
Beer: | $150 | ($120US) |
FOOD/DRINK TOTAL for 2: | $1210 | ($907US) |
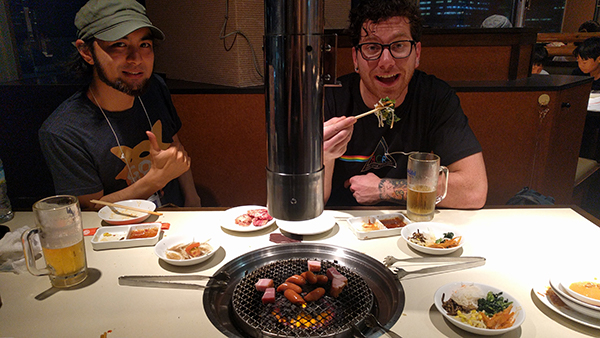
Good food in my opinion is worth a splurge.
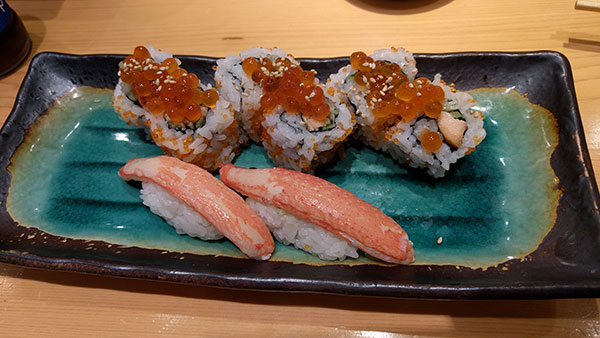
Sushi fresh from the worlds busiest fish market
Adding it all up!
A note to make is that some of these things are one-off expenses and will be used for future shows, though costs that have been paid during previous shows help balance this:
CORE COSTS (for 2 people)
Flights: | $2080 | ($1560US) |
Accommodation: | $636 | ($477US) |
Internal Transport: | $420 | ($315US) |
Food/Drink: | $1210 | ($907US) |
TOTAL for 2: | $4346 | ($3254US) |
ADDITIONAL COSTS
Extra stuff for the booth and such that won’t be needed next show:
Pelican Case: | $494 | ($370US) |
Lighting System: | $543 | ($407US) |
Other Booth expenses: | $10 | ($7) |
TOTAL ADDITIONS: | $1047 | ($785) |
GRAND TOTAL COSTS OF TOKYO GAME SHOW 2016
FOR BLUE VOLCANO STUDIO (2 people): $5393 ($4007US)
MY ESTIMATED TGS COSTS THAT COULD BE DONE BY A
SINGLE PERSON ON A SHOESTRING BUDGET: $2000 ($1500US)
Ouch! That is a lot of money. Even more so the fact that we currently do not have any income as our games are not yet released. We also do not yet have early access or pre orders yet so total income from the show: $0
Was it worth it?
From a strictly ROI point of view, this was a total loss and not worth the costs. However I do not view it in that way. We at Blue Volcano believe the best takeaway from attending Tokyo Game Show is something that does not show immediate results or ROI but is none the less essential for any game developer – that is access to a wide crowd of journalists, creators, developers and manufacturers who can contribute to the long term overall quality and exposure of the game.
Through these connections we were generously given some new hardware we needed, have press ready to do a feature once we are ready, key members of the IGDA Japan interested in helping get the game to market there, and best of all introduced the game to a new audience who were very receptive and enjoyed the game.
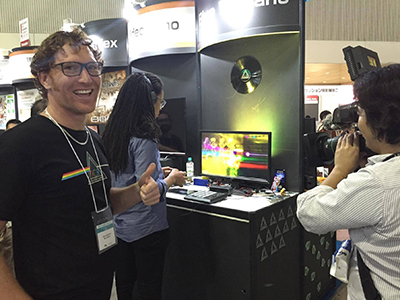
Getting some press coverage
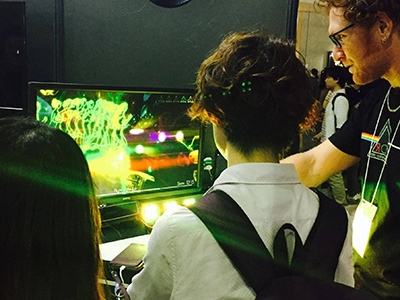
Seeing player happiness is worth every cent
Plus a trip to Japan!
The way I view it is that I would spend the same amount on a week holiday elsewhere but this had the added bonus of showing off something I am passionate about to people as part it. Even though the expenses have all been paid out of pocket, I’m confident it will be an investment that returns in the coming year.
Next stop PAX Melbourne...
At least this one is closer to home...
Thanks for reading!
Brendan
@BrendanVotano
This article also appears on the Blue Volcano website.
To follow the further progress of Roto Color Runners, sign up to the newsletter via our website, on twitter: @bluevolcano_ and facebook: Bluevolcanostudio
Read more about:
Featured BlogsAbout the Author(s)
You May Also Like


.jpeg?width=700&auto=webp&quality=80&disable=upscale)


