


Daily news, dev blogs, and stories from Game Developer straight to your inbox
Sponsored By
Featured Blog | This community-written post highlights the best of what the game industry has to offer. Read more like it on the Game Developer Blogs or learn how to Submit Your Own Blog Post
Skyhook's Super Smash Con Post-Mortem
This post mortem covers my experience showing Skyhook at the new convention SuperSmashCon. It goes over preparing for the con, what the event was like, costs of showing, and lessons learned.
9 Min Read

tl;dr: Yes, you should totally bring your game to Super Smash Con! It was incredible, and amazing, and exhilarating!
This year, I had the pleasure of attending a fresh new convention in the U.S. called Super Smash Con. While preparing for the event, I read every shred of blog I could find online about event postmortems. Still, I wished that I could read about the actual event itself. Of course, one written by a time traveler, who traveled back for the sole purpose of writing video game convention postmortems. Alas.
Hower to you, future con goer, I write this post mortem about our experience showing Skyhook at Super Smash Con.
A SMASHCON YOU SAY?
If you haven’t yet heard of Super Smash Con, it’s a brand new video game convention as of 2015. It’s centered around all things Super Smash Bros. I’m talking Smash Bros tournaments, Smash Bros panels, Smash Bros artist alleys, Smash Bros vendors, and even Smash Bros parkour performances!
The event took place at the Dulles Expo Center in Chantilly, Virginia in the U.S. They gave us a 10x10 booth in the Indie Games area for free! All we had to do was get ourselves to Virginia.
HOTEL AND TRAVEL
The convention was partnered with the Holiday Inn that was literally in the same parking lot. We stayed there the third night. They were already booked up, though, so we spent the first two nights at the Hyatt Place Chantilly, a 5-minute drive from the expo center. The Hyatt also had free breakfast, which really helped fuel us for the con, and had a shuttle bus that went to and from the expo center.
The Dulles Expo Center is also minutes away from the Dulles International Airport, but we opted to drive from New York to keep travel and shipping costs low.
PRE-CON PREPARATION
The most challenging thing about preparing for SSC, though, was that I had no idea how big (or small) it would be -- it was literally the first event! Since I was preparing so close to the event date, I was lucky that this infographic was posted on twitter, showing how many people were registered for the Smash Bros. tournaments. Over 9000!
Just kidding, but there were over 700 people signed up for the Wii U tournament, so I used that as a gauge and decided to plan for roughly 1,000 potential players. In hindsight, it might have made more sense to just ask the event organizers.
SAVED BY THE STAPLES
Since we found out about the convention pretty late, I had only about a week to get the booth together. Staples’ same-day pickup printing really came in handy here. I literally ordered an 8-foot banner on outdoor vinyl at 9 AM before work and picked it up on my way home on that same day. And oh, did I.
I got an 8’ x 2’ outdoor vinyl banner with grommets for hanging behind the booth and a 6’ x 2’ vertical banner for propping up with a banner stand. I got lucky because Staples accidentally printed the vertical banner on outdoor vinyl, even though I asked for indoor vinyl, and so they let me keep both! What luck!
But then I got a bit unlucky…
DIY BANNER STAND
I hadn’t accounted for the 7 business-day shipping time it took to get a banner stand. Staples doesn't carry the stands in stores! I began calling all the local print shops on Long Island, but they all quoted me $120+ for JUST a banner stand! That’s when I had the idea to search the internets for “DIY banner stand.”
I found this great video on making PVC light stands for photography, so I took the basic idea and added two cross-beams to hold the top and bottom of the banner.
It was surprisingly fulfilling to make the stand myself. The total cost for the stand was a whopping $16, and took me about an hour to build. I’m already working on pirate-themed banner stands for our next event!
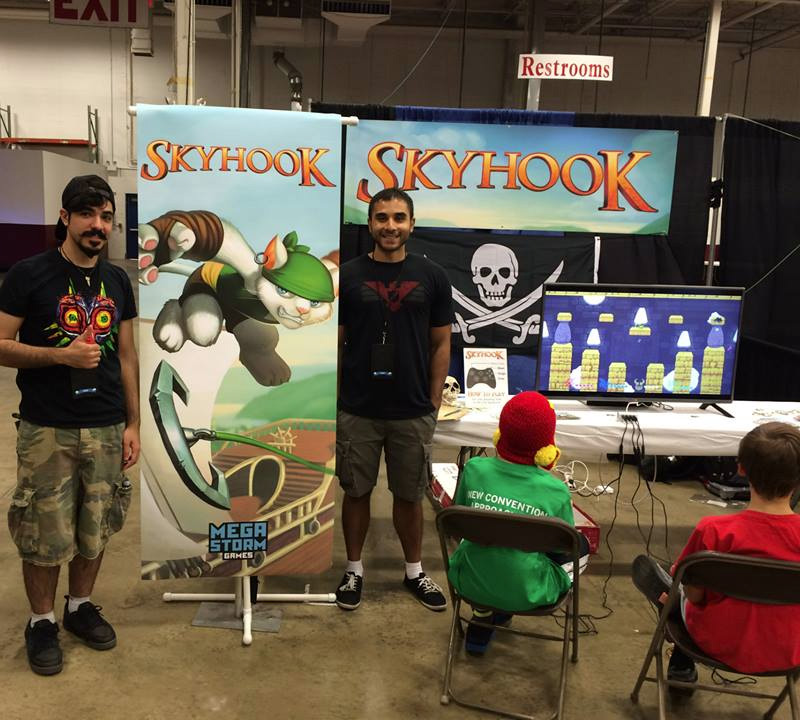
OUR BOOTH
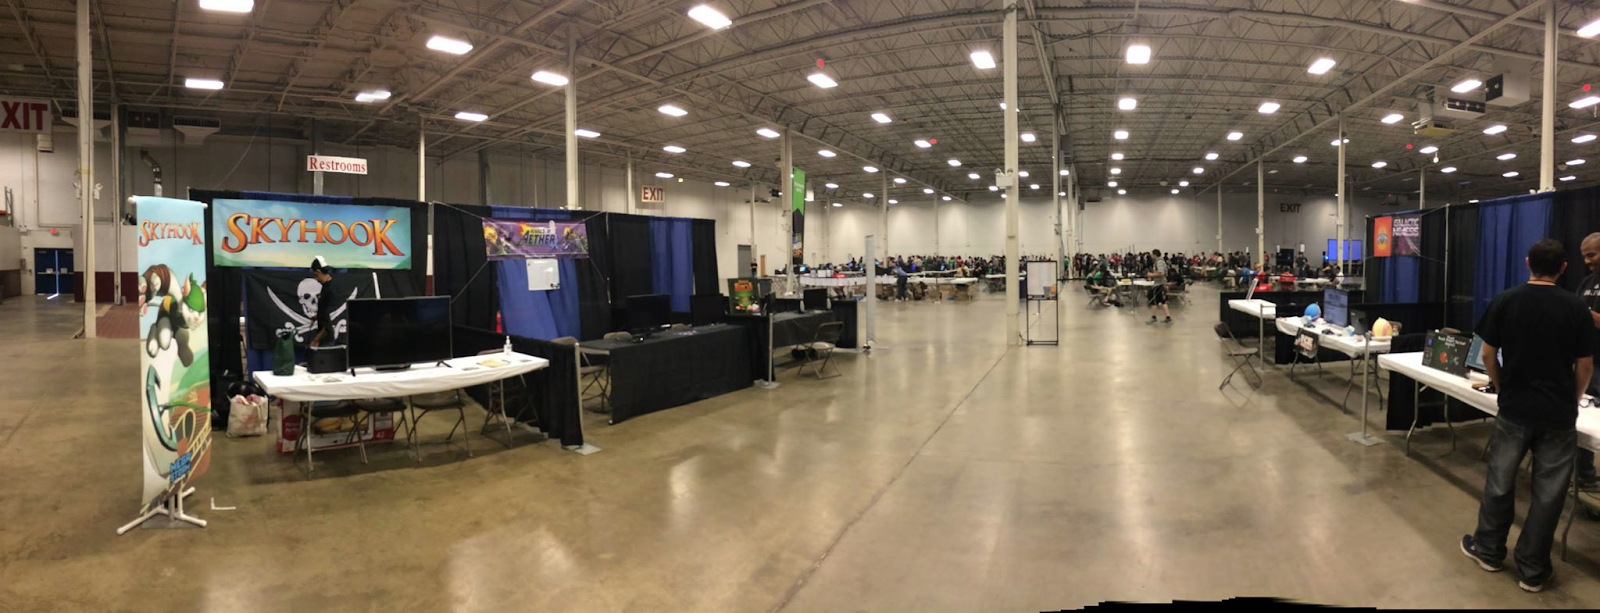
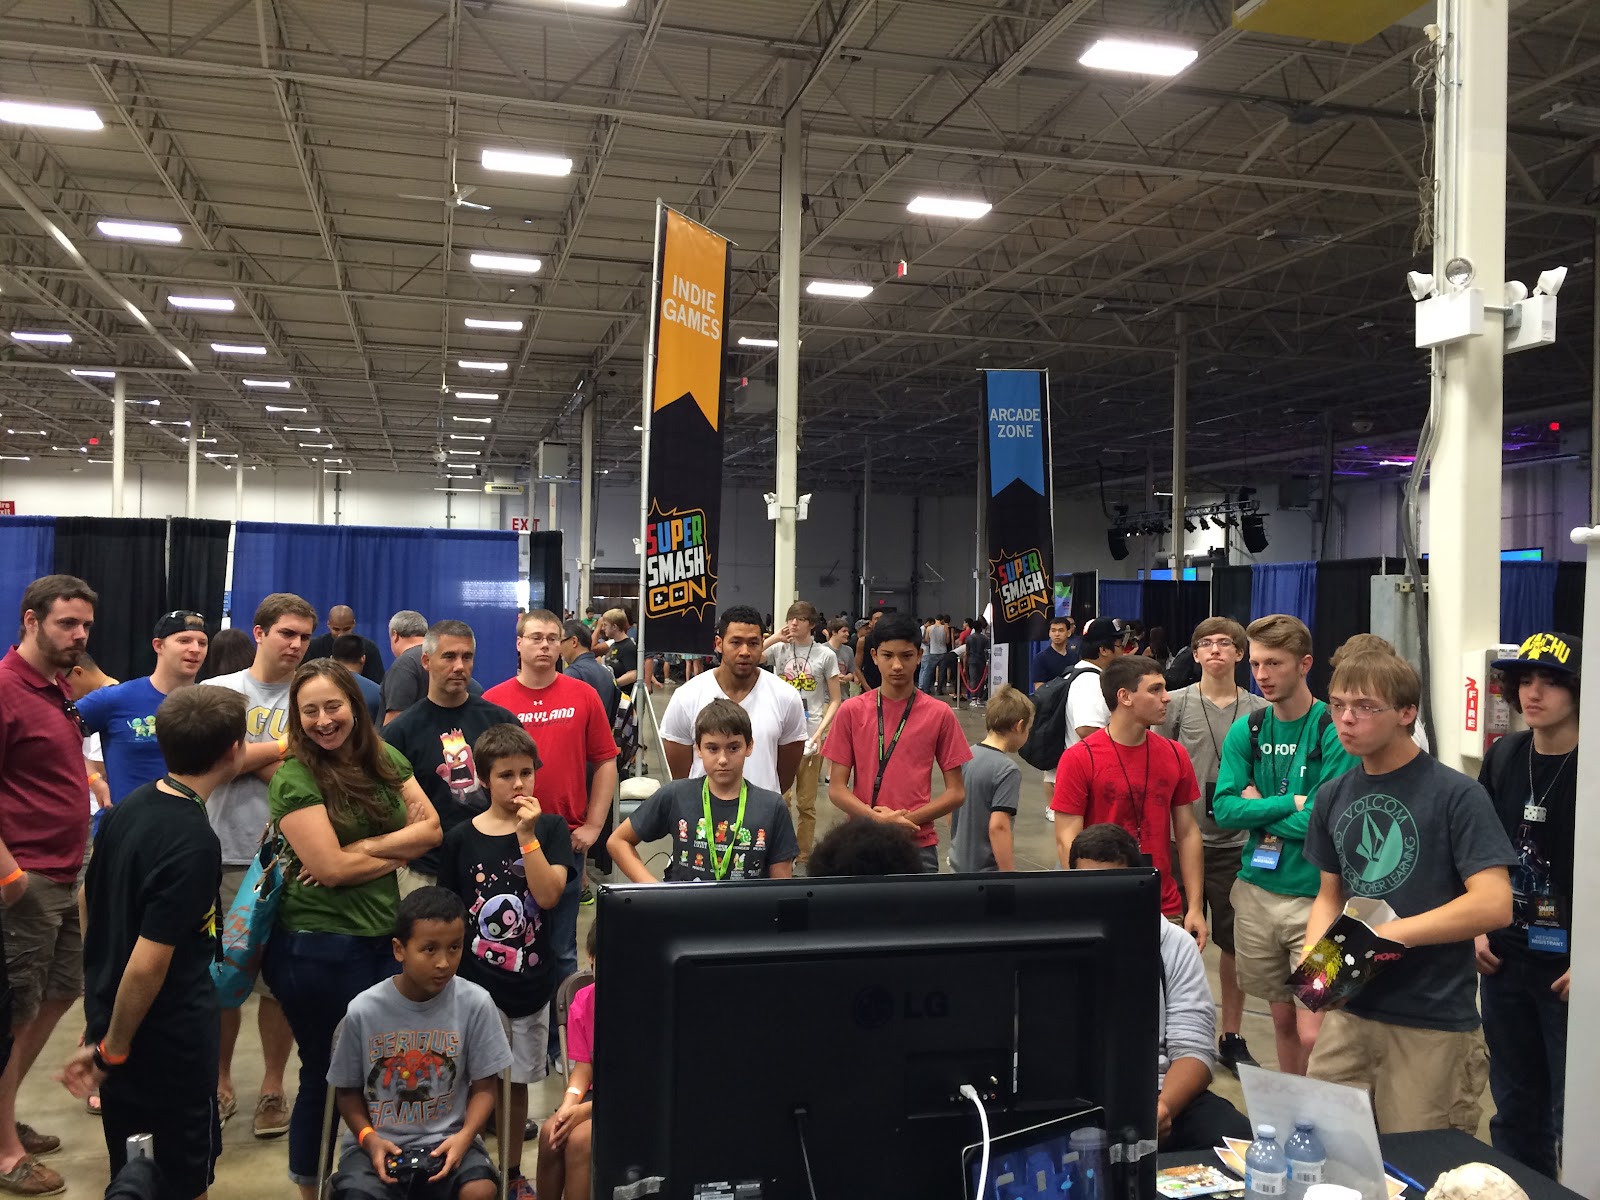
The Indie Games area at SmashCon consisted of 12 booths about 10x10 feet, very professionally done with black curtains and side walls. There were power outlets inside each booth, and electricity was free. It was all pretty great.
Here’s a photo of the 6 center booths, with 6 more on the opposite sides. You can see the hoards of people playing Smash Bros in the back. That area was a dedicated console area with every Smash Bros game ever.
For our booth, I wanted to have some pirate-themed elements to help give it some personality. I had a plastic skull lying around from halloween and I picked up a pirate flag and some plastic doubloons for very cheap on Amazon.
I printed 250 postcards and 500 business cards to hand out at the con. Staples same-day pickup again. They seem to always have sales on their print products which really helped keep costs low, and there is no shipping charges for picking it up.
I also printed the how-to-play sign and the mailing list forms there, too. I’d strongly recommend you bring some kind of mailing list signup form when you go to these kinds of events. We got 88 new email subscribers at the con and gave out most of our print material. We also ran out of signup forms and had to start using the backs. In the future, I will definitely go with using an iPad or other tablet to avoid having to copy all the handwritten emails over to Mailchimp.
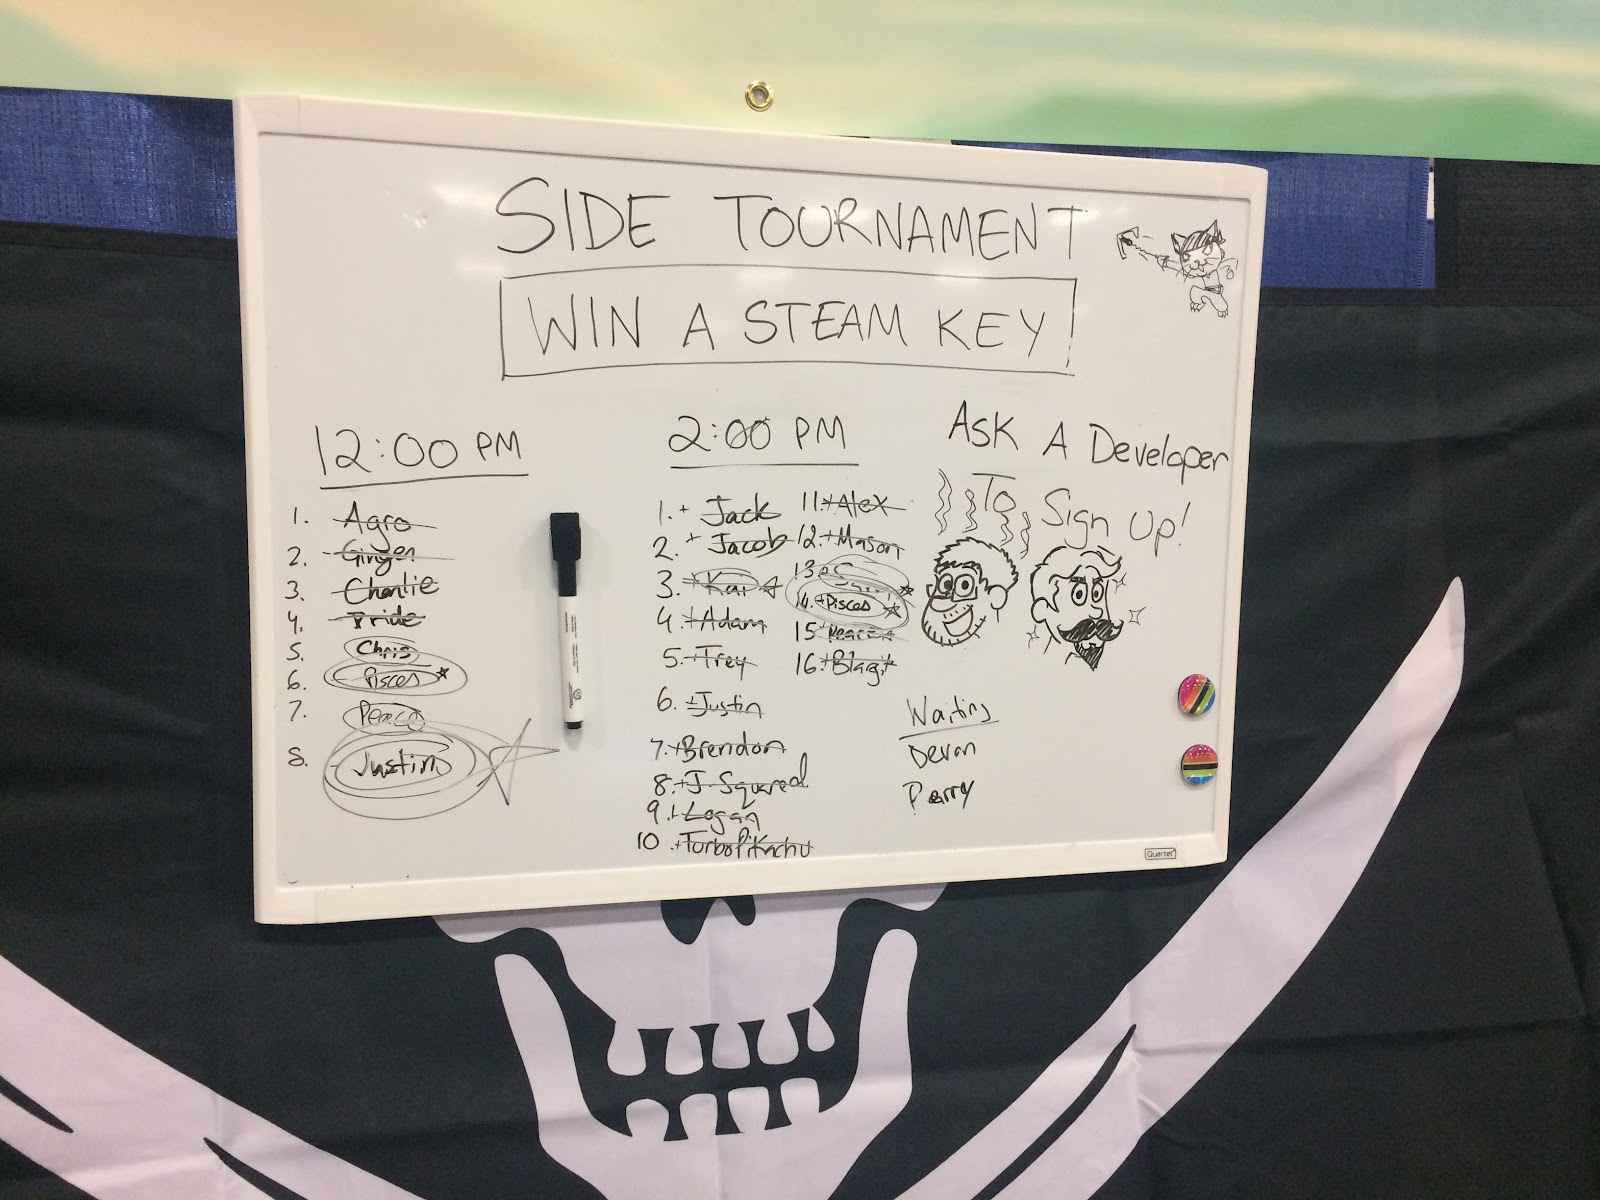
We also picked up a black tablecloth and a dry-erase board for tournament signups at the Walmart which is also in the same parking lot!
TOURNAMENTS
Holding side tournaments every few hours was perfect for both the game and the smash audience. People would sign up hours ahead of time and return when the tournaments started. I tried to commentate on every match, which resulted in me losing my voice, but I think that -- combined with the noise from the tournaments-crowd -- really helped draw in more people. We didn’t have much swag at the event, so we gave out Steam Keys that I had printed on little pieces of paper.
ATTRACT MODE
Leading up to the con I implemented a special Attract Mode for the game, where if it was left idle it would start a match with Bots to grab the attention of people passing by. This was a major lesson I learned showing the game at local events where people would pass by to see just the logo and main menu art. I think it definitely helped to draw players in: by showing them the gameplay, instead of just a menu. It also gave better idea of what they were getting themselves into.
We rarely had to convince people to sit and try the game. They usually just grabbed a controller and gave it a go. I’d strongly recommend this for any type of game, whether it uses bots or a trailer that automatically plays when the game is idle.
RESULTS
We gave out about 300 flyers during the 3-day period, and collected 88 emails for our mailing list. We held 5 tournaments throughout the weekend and gave away Steam keys to all the winners. The game was played 664 times, with each match averaging 3-4 players.
COSTS (USD)
10’ x 10’ Booth - Free
2 Banners - $86.32
Banner Stand - $16.72
Print Material - $70.36
Decorations - $60.69
Hotel - $372.50
Gas - $38.44
Food - $211.16
(2) Xbox Controllers - $69.46
TOTAL - $925.65
VERDICT
Overall, our experience showing at the con was a success, and we got the most eyes on the game than we ever had before. The con-goers at SSC were full of energy and the perfect group of people who would enjoy an arena fighting game like Skyhook!
So, if you’re considering joining Smash Con in the future years, go for it!
I hope to see you there.
-Qazi
Skyhook is a game where you fight with grappling hooks and is out now on Steam Early Access. You can follow it’s development on Twitter, Facebook, or on Steam.
Read more about:
Featured BlogsAbout the Author
You May Also Like