How to Build a Trailer using Unity
A step-by-step explanation of how I used Unity - along with various other tools - to create the launch trailer for Power Inspector.

This post is a step-by-step explanation of how I used Unity - along with various other tools - to create the launch trailer for my add-on for Unity Power Inspector.
Why I decided to go with Unity?
I considered other solutions for building the trailer, such as Blender and After Effects.
In the end the decision boiled down mostly to familiarity; I was already very comfortable working with Unity, so I knew that I would be able to get the trailer done fastest with it.
I also knew that I had a good collection of particle effects, shaders, camera effects and other assets I've acquired over the years, which I could leverage to quickly add some cool effects to the trailer.
Step 1: Where to Begin?
Before I could start thinking about any specifics of the trailer, I first had to decide in which way I would even approach making the trailer.
The first question I asked myself, was whether I would first decide on the music track, and then build the rest of the trailer around that, or first decide on the content of the trailer, and then add a music track that fits the content.
Considering that I had very little experience producing great music from scratch, I decided to start the process by finding some good music created by other more talented individuals.
Step 2: The Music
Like I mentioned earlier, I already had a collection of assets at my disposal, so I decided to begin my search for the music track by going through those.
And as luck would have it, I found some music that I liked for the trailer in the Mega Game Music Collection.
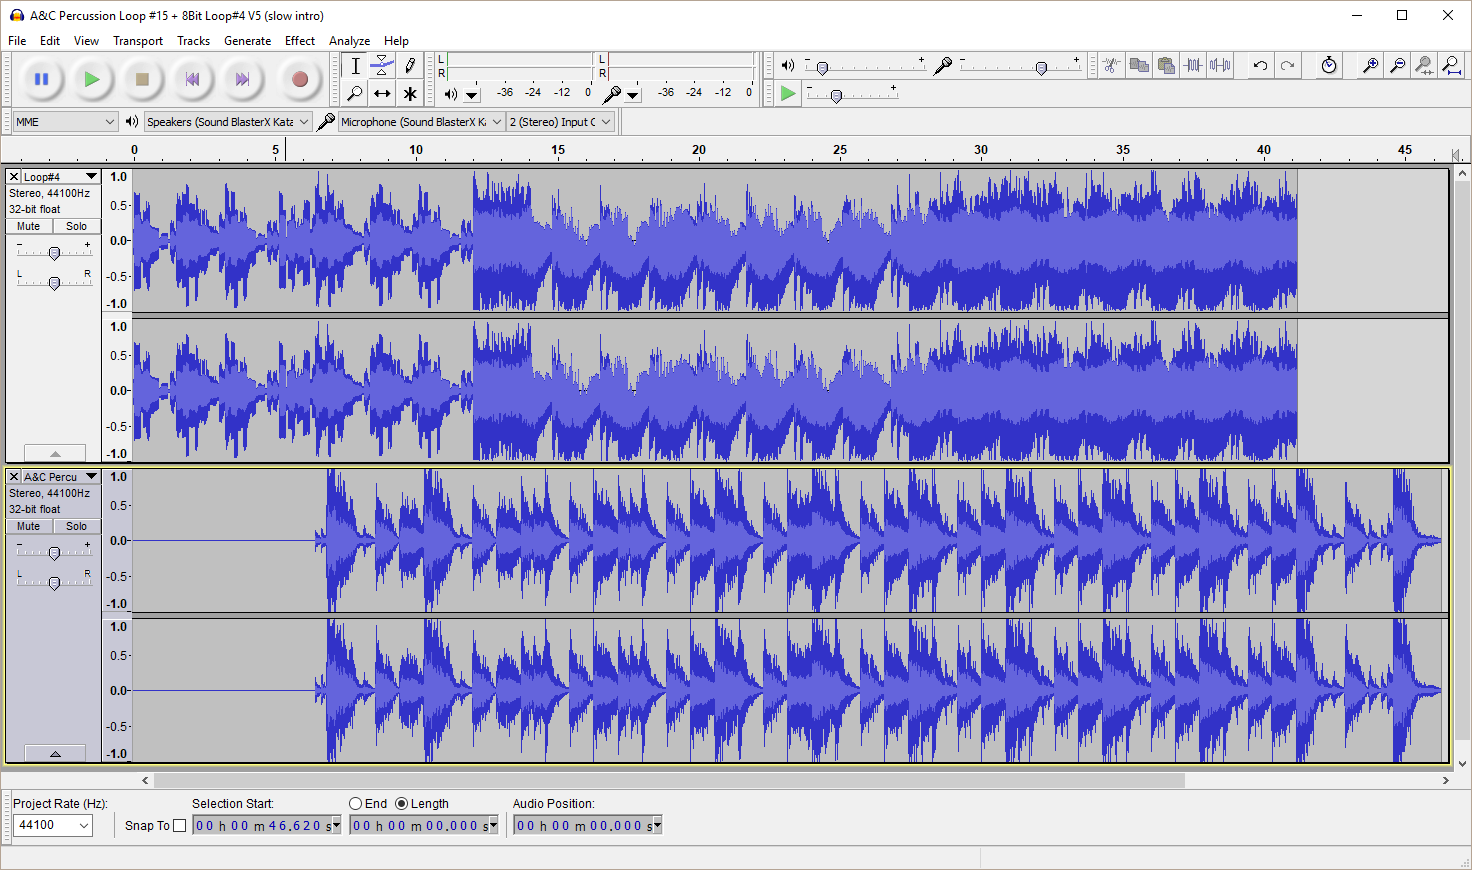
I wanted to add some more dynamics to the music, to have more of a build-up and to add some bombastness to the peak moments, so I ended mixing together two different songs from the collection using Audacity.
Here I also had to option to adjust the length of the music, by cutting off portions from the songs, or by changing their tempo, but I didn't end up having to do much of this, as the songs already happened to be perfect in length.
Step 3: The Storyboard
Now that I had the music track, and as such the run-time for my trailer, I could really start thinking about what the content of my trailer would look like.
I fired up Photoshop, and added an image representing the waveform of the music track, acquired by taking a screen capture of Audacity.
Then I listened to the music closely, finding any places where there were noticeable changes to the intensity of the music, and using this to divide the song into distinctive parts.
I could then use this information to divide the trailer into distinctive phases. I ended up with the following six: intro, gearing up, features, features part 2, outro and outro part 2.
During the intro the music would be relatively quiet. In the gearing up phase the music would start building up. During the features phases, the music would be at its most intense level. And finally, during the outro, the music calm down again.
With the main outline for my trailer now figured out, I could start building a storyboard to flesh out each section in more detail.
I ended up doing this by creating drafts for specific key frames for the trailer, and then adding them as thumbnails on top of the waveform timeline I had created.
Once I was satisfied enough with my plan, I wanted to see how it would look in action, and so I moved onto the next phase: prototyping.
Step 4: The Prototype
I decided to build my first prototype directly in Unity, instead of doing something simpler, like making a slideshow in PowerPoint.
My rationale for this was, that it would already be pretty quick to build the thing in Unity, with the additional benefit that if the prototype should work out fine, I could start building the final version on top of the prototype, and avoid having to start from scratch again.
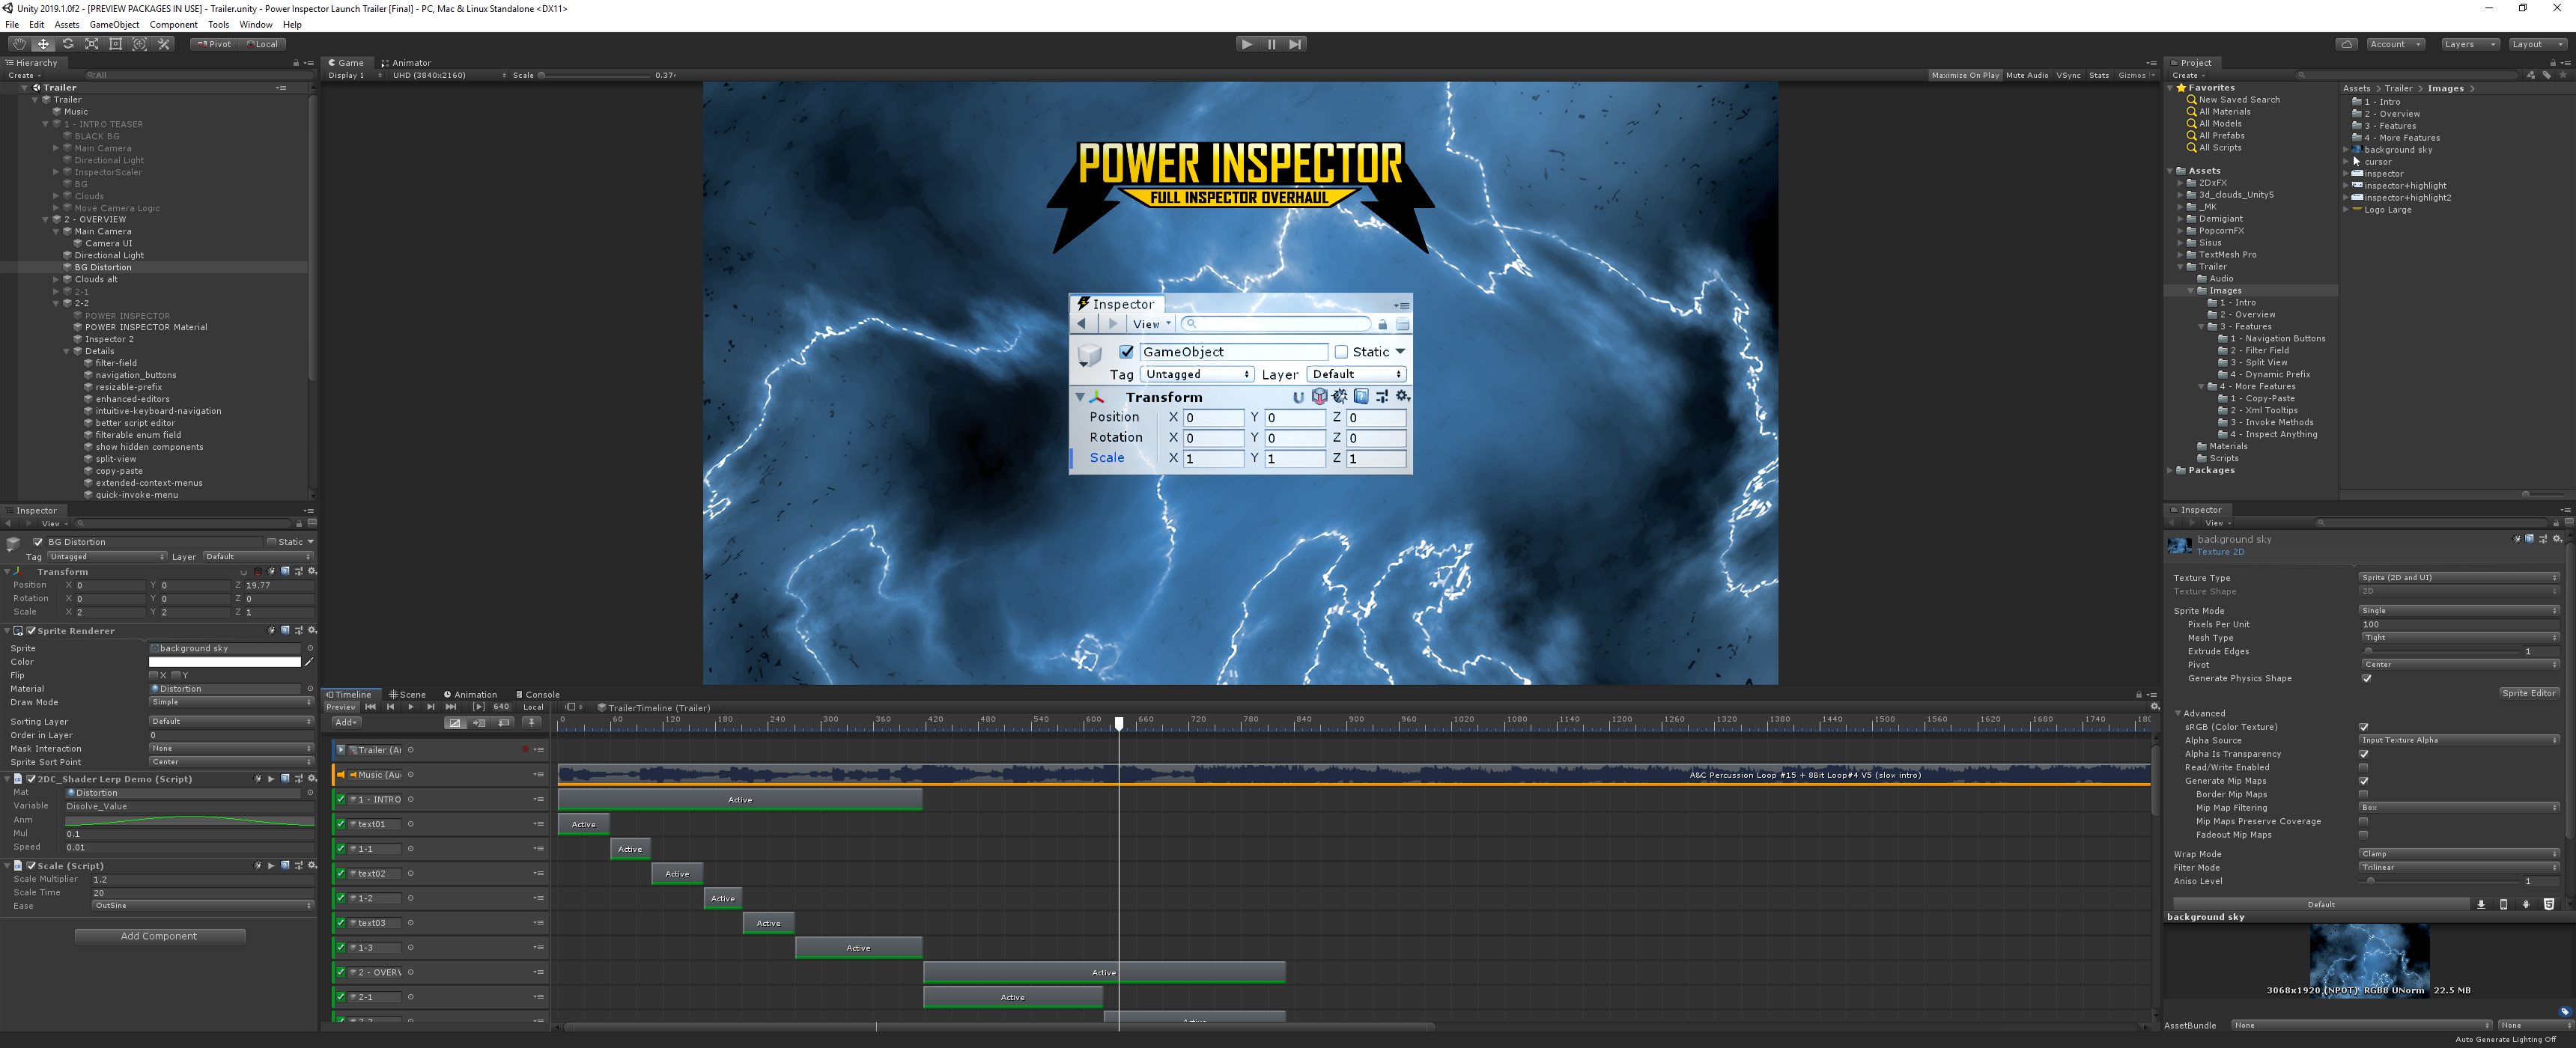
Unity's Timeline is the perfect tool for the job, because it makes it easy to adjust timings with a visual editor just by dragging elements around.
I started with building a hierarchy of GameObjects in a scene to act as the containers for the different parts of my trailer.
Then, the way I ended up doing things, was I mostly just used Timeline's Activation Tracks to make it so that these container GameObjects would only be active during specific parts of the trailer sequence.
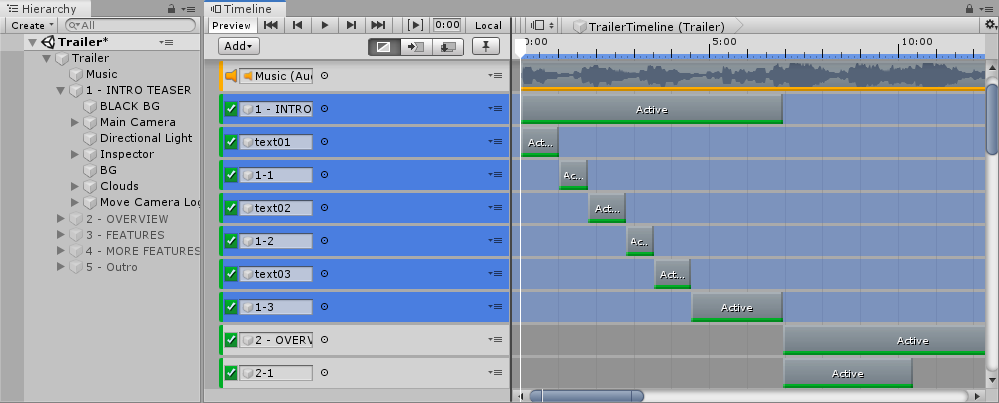
When it came to animating elements within a particular part, I did not use Timeline that much, but would more often manually start animations when the GameObjects were set active using the OnEnable event function.
I used DoTween Pro a lot to move, scale and rotate elements, instead of Unity's animation system, because I find it quite a bit faster to adjust timings by just be tweaking the delays, durations and ease types of tweens, instead of opening up an animation and moving around the keyframes of its curves.
The downside to this was that I would not see the animations caused by tweens represented visually in the Timeline. Sometimes when there were multiple elements moving around simultaneously in a certain part, it could be difficulty to get them to work well together.
But using Timeline to only handle the larger bush strokes was also a blessing, because I noticed that the more cluttered the Timeline view became, the harder it was to work with it.
My objective with the protype was to make sure that the general pacing and feel of the trailer were working, so I didn't pay attention to the intricacies of the animations just yet. I used pictures I pulled from my documentation material to use as placeholders for the feature sections.
Some hours later, the prototype was finished. I was pleased with the results, and so next up it was time to start replacing all those placeholders with actual final art.
Step 5: Final Quality
I took screenshots and captured video of Power Inspector being used in Unity, and used them to create the images to replace the placeholders in the feature sections.
I ran up into one problem though: the screenshots I had taken of Unity ended up looking quite blurry when scaled up for my 4K trailer.
I ended up solving the issue by upscaling the pictures with an AI image enlarger. The one I used is called Bigjpg.
Another challenge was deciding how I should handle processing and playing the video files I had captured. I now had a working pipeline for getting sharp images into my Unity project, but would it be as simple to do the same with video files?
To keep things simple, I decided to not use any video files in the project, and instead converted all the video material I wanted to use into PNG files. I did this by enabling the Scene video filter in VLC Media Player, and then playing the videos.
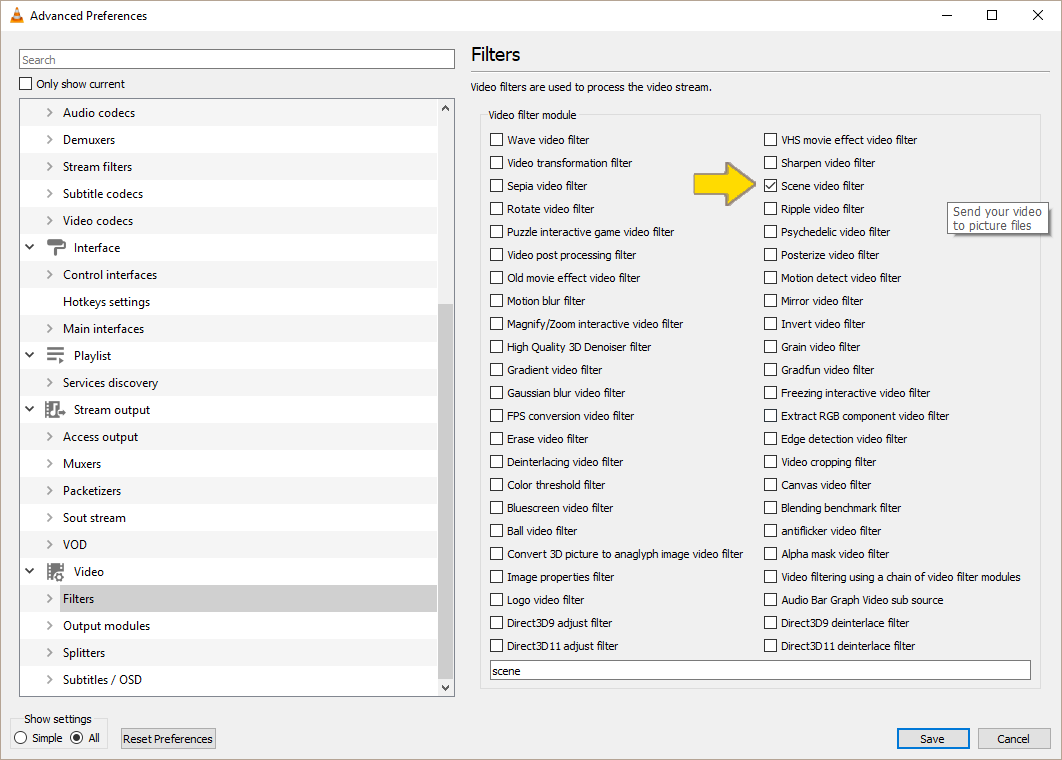
Once I had the PNG files, it was simple to upscale them and do any other adjustments they needed in Photoshop.
To create animations out of the PNG files in Unity, I used a combination of Activation Tracks (when there were only a few frames) and Animations (when there were many frames).
Step 6: Finishing Touches
Lastly, there were some finishing touches I did to add some polish and eye candy into the trailer.
I used a package called 3D Animated Clouds to add moving clouds into the background.
I used 2DxFX: 2D Sprite FX to add a shine effect during the intro, to add movement to the background using a distortion effect, and to animate in the different feature texts during the gearing up phase.
I also added a bloom effect to the intro using MK Glow.
After some tweaking and tinkering to get all the transitions and frames just perfect, I decided that the trailer was now ready!
Step 7: Recording The Video
Once I had finished the trailer in Unity, all that was left was turning it into a video file.
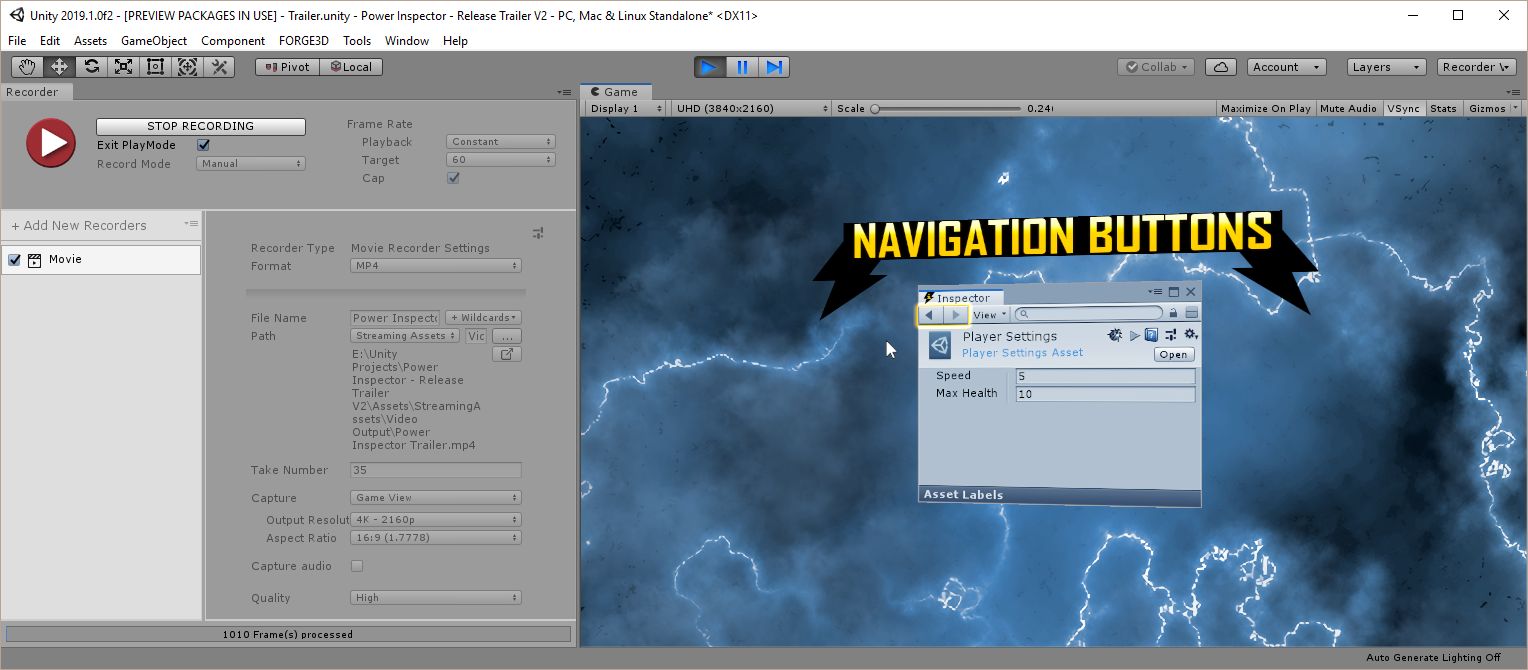
After some research I decided to use Unity Recorder for the job. You can install the latest version using Unity's package manager, but you'll first have to tick the "Show preview packages" item under the "Advanced" menu item.
I also added a 3 second delay before the Timeline asset starts playing, to make sure that any slowdowns from entering play mode are not noticeable in the video. I also set the target frame rate and capture framerate to 60 frames per second (I'm not sure if Unity Recorder already does any of these things automatically). Here's the code for the controller I used to do the above things:
using System.Collections;
using UnityEngine;
using UnityEngine.Playables;

namespace Sisus
{
	public class TrailerController : MonoBehaviour
	{
		public PlayableDirector playableDirector;

		[Tooltip("Delay before Play is called on PlayableDirector.")]
		public float autoPlayDelay = 3f;

		[Tooltip("Sets target frame rate for the application.")]
		public int frameRate = 60;

		[Tooltip("This can break audio sync, so only enable it when you're recording video.")]
		public bool enableCaptureFramerate = false;

		private void Start()
		{
			if(playableDirector == null)
			{
				playableDirector = GetComponent<PlayableDirector>();
			}

			Application.targetFrameRate = frameRate;

			if(enableCaptureFramerate)
			{
				Time.captureFramerate = frameRate;
			}

			StartCoroutine(DelayedPlay());
		}

		private IEnumerator DelayedPlay()
		{
			yield return new WaitForSeconds(autoPlayDelay);

			if(playableDirector.state != PlayState.Playing)
			{
				playableDirector.Play();
			}
		}
	}
}
Once I had set up Unity Recorder, all I needed to do was press the "START RECORDING" button, and Unity automatically entered play mode and started recording. Then I waited until the trailer had finished playing, and hit "STOP RECORDING", and - voilà! - I had my video file.
Step 8: Fixing Audio Sync and Video Delay
In setting the capture frame rate to match the recording framerate I ensured a stable framerate for the video file, but it also had the unfortunate side effect of causing the audio to go out of sync with the video.
Another thing I had to fix, since I added that 3 second delay before the trailer started playing, was that I now had 3 seconds of black frames in the beginning of my video file.
To fix both of these things, I used a tool called MKVToolNix.
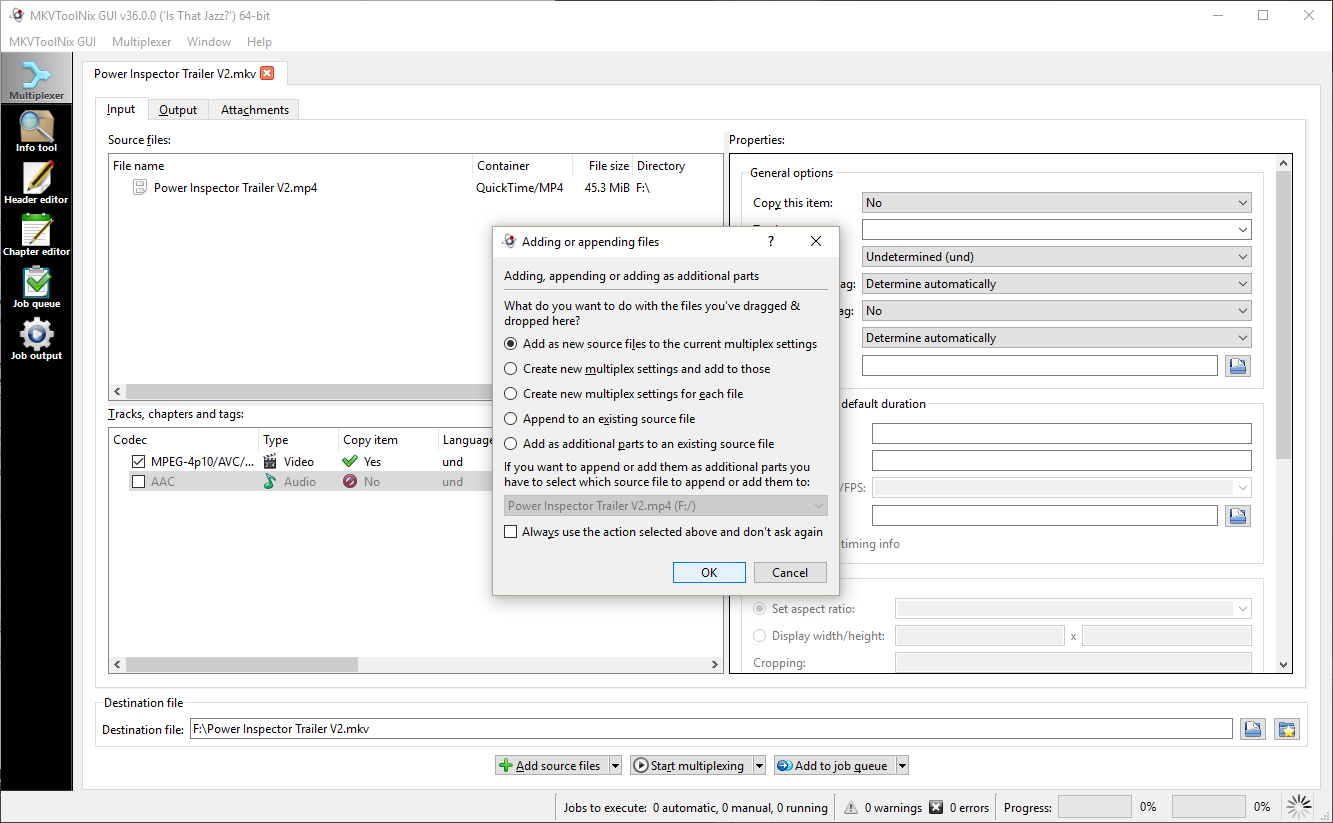
I opened up MKVToolNix GUI and added my video file as input by dragging it into the Source files view. I then unticked it's audio track in the Tracks view.
Next I took the original audio file for my trailer's music, and dragged it also into the Source files.
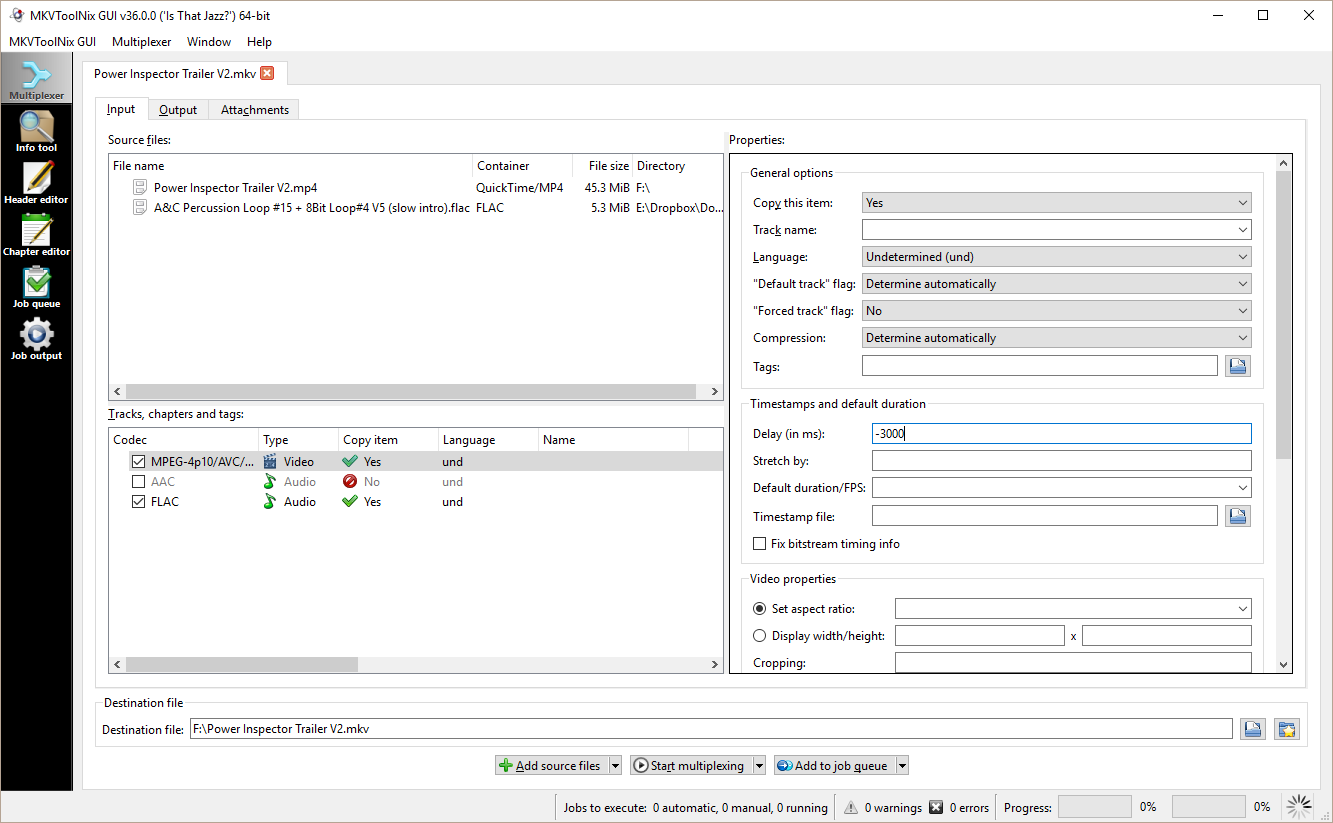
After that, I ticked the newly added audio file in the Tracks views.
To remove the 3 second delay at the beginning of the video, I selected the video file in the Tracks view, and added "-3000" in the Delay field.
Then I just pressed "Start multiplexing", and the final video - with video and audio playing in sync from the very beginning - was all finished!
The Results
All in all, the whole process took around a week, from the planning phase to the finished video being up in YouTube.
This is how the finished trailer ended up looking like:
This article was originally posted on my blog.
Read more about:
BlogsAbout the Author(s)
You May Also Like






.jpeg?width=700&auto=webp&quality=80&disable=upscale)


