

Daily news, dev blogs, and stories from Game Developer straight to your inbox
Sponsored By
Featured Blog | This community-written post highlights the best of what the game industry has to offer. Read more like it on the Game Developer Blogs or learn how to Submit Your Own Blog Post
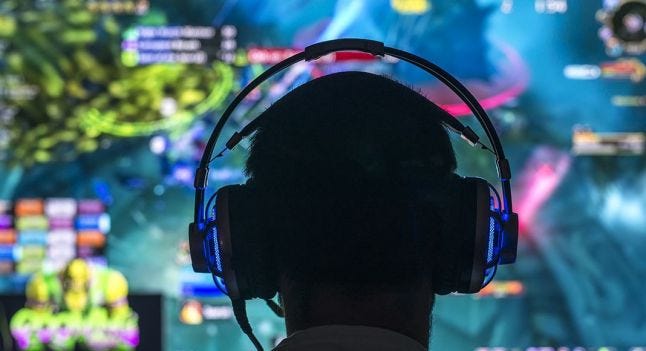
Designing Sounds for a Game
Out of all articles on game development topics, I find that ones about sound and music design are covered in really vague ways. I decided to get a bit behind the scene looks at how I create sounds here at Knocknock Games.
12 Min Read

Out of all articles on game development topics, I find that ones about sound and music design are covered in really vague ways. You can easily find articles on how to become a sound/music designer and approach video game sound design. You can read that you need to be creative, have imagination, etc.. But does it really help get the audio aspects of your game right? Well, not for me.
I decided to get a bit behind the scene looks at how I create sounds here at our game dev studio Knocknock Games. The results of this work can be heard in our games or on SoundCloud.
In this article, we will speak about sounds for casual games with mobile specifics and set up a sound studio if you want to create music for your games in house.
Designing Sounds in a Nutshell
Talking about various sounds found in a particular game, those could be generalized to the following types:
1. Sound Effects (SFX) – all the sounds that objects in your game make (ambient, shots, hits, splashes, menu sounds, etc).
2. Music – typically, a casual game has 2-3 distinct music themes, i.e. menu music and the one for levels.
3. Voice-overs – these are character lines, story narrations, announcements, dialogues – whatever your game may have.
You can typically get sounds for your game using the following approaches (or their combinations):
1. Create them yourself (or with the help of your game team).
2. Download them from royalty-free libraries.
3. Order them from a professional studio.
Designing game sounds by yourself can be quite time-consuming, but in my opinion, it’s absolutely worth the effort, because you’re the only one who knows your game best, understands its atmosphere, emotions it should bring, etc. so, provided you have enough talent, this approach brings you the best results.
Getting sounds from royalty-free libraries (or, in general, obtaining them from a 3rd party) is also almost a must-have as you don’t have to record all the generic sounds (like kicks, wood hits, etc) yourself. However, may it not mislead you – no sound library can cover all your needs – you will still have to work with sounds (process them, combine, etc).
Ordering game sounds from a professional studio can bring good results in terms of quality, but not in terms of emotions and proper setting feel. An additional drawback is that sounds design process (like any other assets for the game) usually involves several iterations and then, it is a big question if you’ll be able to match deadlines while waiting for 3-5 sounds to be updated or added.
Our Approach towards Sound Design
Generally speaking, we intend to create as much as we can ourselves.
So, we do it the following way:
1. SFX – we use royalty-free libraries as the basic source of sounds that are later heavily processed and combined. We record some sounds that don’t exist to find in a library.
2. Music – I write all of the game music myself.
3. Voice-overs – we order them from 3rd parties because proper voice-overs require talent and experience, which no one in our team has. These days, the numbers of VO services existing on the Internet, where professionals can record 10 minutes of audio (which, believe me, for casual titles is a lot) for something around $50-100. It should be noted, however, that you have to give them detailed directions regarding your game characters and emotions you aim to convey, which takes a considerable amount of time since you need to basically provide a description for each line of text. If you don’t feel like doing that, there are services that can do part of those activities for you, but you’ll be paying around $1000 for the same amount of work. The decision is yours. Personally, I prefer to have every creative aspect of the game under control, while enjoying the process, so I usually work with individuals.
Hardware & Software for Sound Design
Now, since we are clear with the approach, let’s see what else you would need to setup your sound studio.
The possibilities are endless these days, and you can dig yourself into setting up a $100K+ studio with really expensive equipment, which you don’t really need. On the software side, things are simpler as it is more about personal preference than quality.
But, first things first. What is the minimum indie game development companies need for the hardware?
1. A laptop with a good battery.
My recommendation is 13’’ MacBook Pro 2018. Why MacBook? Well, I choose MacBook because I use Logic Pro X as a DAW station and it exists only for Apple Computers. 13’’ is because the form-factor is quite small to be portable. MacBook 2018 – is because they are shipped with Quad-Core CPUs – the power, which is very important as you start throwing in software instruments in Logic. Why the battery? Well, because, when you will be recording sounds, voice or live instruments (if you work with the stationary desktop), you’ll experience all sorts of electromagnetic interference from nearby devices, connected to the same wall outlets. The equipment (mics, cables, soundcards, etc.) that is capable of reducing the amount of interference is somewhat several degrees more expensive than a laptop, which you’ll simply disconnect from the power source during recording sessions. Let’s roughly say, that’ll cost you 1500$.
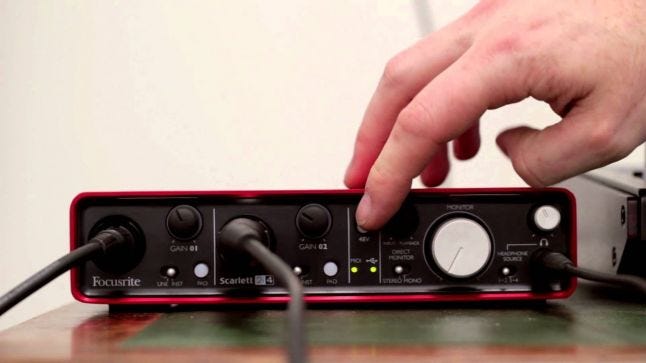
2. An external sound interface.
This is highly recommended but is not absolutely necessary as you can plug your analog equipment into laptop’s line-in input. However, you’ll quickly find out that it is not very convenient, because you’ll have to constantly switch between devices and use all sorts of adapters, which also give their portion of headache. So, as for the sound interface, you’ll need one that has at least 2 inputs (you won’t need more anytime soon) and is capable of delivering phantom power to condenser mics – that’s pretty much every interface on the market today.
I personally use Focusrite Scarlett 2i4 2nd generation, which gives me separate volume controls for headphones and external monitors – it’s really convenient. Before that, I used Focusrite iTrack Solo for 6-7 years and it was perfectly fine in terms of quality, leaving aside limited connectivity. But, really, I have no real preference here as for your needs any sound interface you buy on the market will be around that price tag. It’ll cost you around $200.
3. MIDI Keyboard.
You’ll need this device in order to record your tunes and edit them later in the DAW. These days, the selection is quite limited (at least, in the European region), and many manufacturers offer mini-versions of keyboards with low keys numbers: like 25 keys boards. My advice – avoid them, because you are not a field composer and don’t need to have a keyboard with you all the time, so don’t try to save space here – even beginners will quickly hit notes limits. Look for 49 or 61 keys keyboard variants (49 will be enough to get the convenient recording).
Don’t look for an expensive keyboard, anything of mediocre-decent quality will be just fine for an indie game developer. My recent personal preference is M-Audio Code 61. It’ll cost you another $200. I often saw how people were afraid of using keyboards, stating they don’t need it as they are not musicians or pianists. My advice — think of this device not as piano keys, but as a controller (as gamepad, joystick, if you like), that helps you enter notes in the DAW.
4. Guitar.
If you plan to record some rock or guitar tunes, you’ll obviously need a guitar, because software guitar instruments suck at best. This is a bit of advanced level, because recording an analog tune is a whole new level, so you don’t feel like it is your cup of tea, just stick to electronic-themed sounds. If you already have a guitar, then you don’t need my advice on this, just skip to the next section.
If you’re buying your first guitar, buy the one you like to hold, because it needs to be pleasant for you even if it costs $100. The price and quality are secondary here, because you’ll be recording a clean sound through line input and then, processing it with a VST instrument, so you can adjust sound in audio editors later. Let’s assume another $200 for the guitar with reasonable quality to record clean sounds.
5. Headphones.
You should have 2-3 pairs of headphones. Again, buy monitor-quality headphones to to maximize sound quality, but you don’t have to buy expensive headphones, something within $100-150 range will be fine. I still use the ones that were supplied with my iTrack Solo audio interface (studio pack), and they do the job just fine.
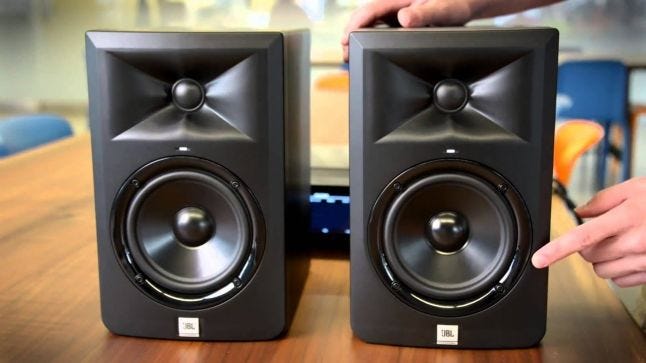
6. Audio Monitors.
These are not required but highly recommended, as you’ll be able to spot more strange things with sounds than with headphones. Again, no real preference here, but I use JBL LSR305 Studio Monitors and don’t plan on using anything else in the near future – they do the job just fine.
7. What else? The harness.
You’ll need some wires to connect everything. One advice here: do not buy expensive cables as they will be no use to you, look at the lower end, because you’ll be working in a small office or home environment, so all those thick wires and double-triple-something shielding is secondary in your case. So, it will not cost you more than $30-50 to wire everything up.
Total: Something about $2,500. However, there are good chances that you already have some of the equipment. Have decent headphones? – Use them instead of monitoring ones. Have an older laptop? You’re fine, skip the upgrade as long as performance is OK for you. As you see, even from scratch you don’t need to invest a lot of money into the hardware. Just skip all the audiophilia and remember — it is a creativity that gets results, not the bare metal.
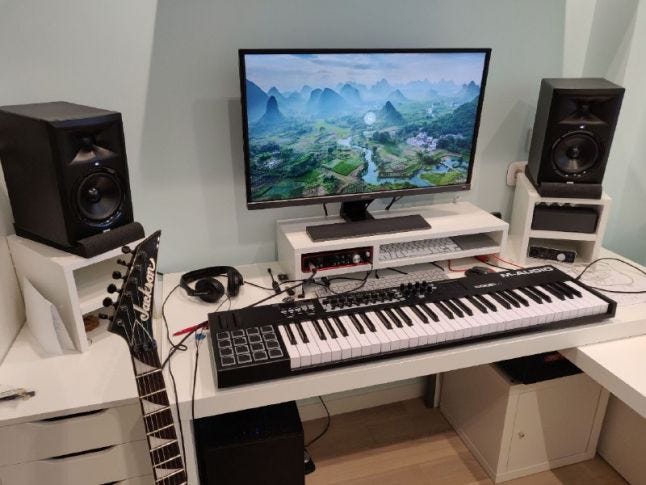
Here is, how our temporary sound studio setup looks like:
Now, the most difficult part is done, but what is about the software? Well, as a bare minimum you will need this:
1. Digital Audio Workstation (or DAW) – this is the main tool to compose and master music tracks.
2. Audio Editor – to edit and process separate sound files
3. Royalty-free library access – you’ll need it as the source of basic sounds.
Basically, that’s it, so let’s look at the above in more details.
DAW.
There are several major players on the market such as Avid Pro Tools, Cubase, Reaper, Logic Pro X, FL Studio and some others. All DAW have different payment models, with most shifting towards subscriptions, which in the long term can cost a decent amount of money. Some DAW like FL offer lifetime free upgrades after a one-time purchase. However, when it comes to DAW choice, my personal one is hands down with Logic.
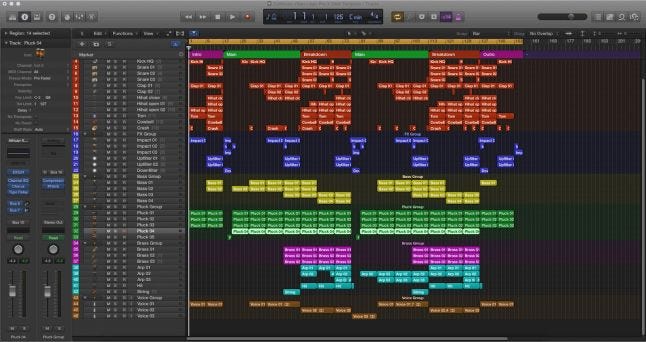
The main reason behind it is an insane (I mean, a literally INSANE) amount of content that comes with it. For $200 you get over 90GB of different music content in samples loops and software instruments. Logic has hundreds of virtual synthesizers presets for just about any theme and style. If you feel this is not enough, welcome to RetroSynth or Alchemy advanced settings. You can get just about any sound with the number of settings in these synth plugins. Of course, other instruments like pianos, orchestral kits, basses, drums are all there. It is unlikely you’ll ever need to look anywhere else for the sounds.
Other DAWs come quite bare, so in addition to the price of the DAW, you’ll be throwing in extra $100-1000 for various software instruments. In terms of music, Logic can get you anywhere; the rest is just a personal preference. The only thing I have set up in addition to Logic Pro X is Native Instruments’ Guitar Rig Pro pack. Logic’s bundled software guitar amplifiers are kinda weak, so I use GRP for overdriven guitars in rock and heavy passages. That’s another $200, but it is totally worth it when working with guitars.
2. Audio Editors.
If Logic Pro is my personal standard de-facto tool for music production, Adobe Audition is the same for SFX production – I master all sound effects in this tool. The benefits are that it has both multitrack and wave editors under one roof, so it helps to get complex effects mastered here. This software also has a set of plugins, like Reverb, Pitch, EQ, and Normalization, so I only really use bundled plugins.
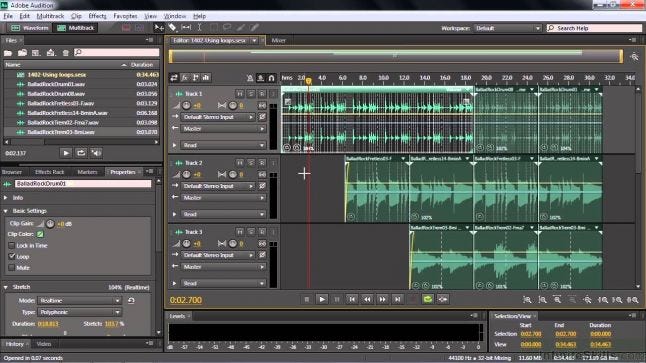
The only major downside is the subscription model, which I don’t really appreciate – it costs something like $250 annually, but you can purchase it for one month for about $30 and complete all SFX while the subscription lasts. Or you could stick to something free, like Audacity, if you are really low on budget, but trust me on this, save your nerves and time and use a commercial editor.
3. Royalty-Free Library.
That’s the trickiest one as the offers are all over the internet with one of the biggest being sounds offered by Sound Ideas with a price range from $2,000 up to $12,000, which is an insane amount for casual budgets. You could buy separate collections, but the problem is that when producing SFX you need as many source materials as possible.
My personal preference here is the library from Digital Juice. They offer one-time payment lifetime subscriptions that are often on sale for $250 for a premium plan, but if you are there only for Sound FX, you can choose with their Standard Plan for less. They have 40,000+ different sounds – a lot to choose from – some areas are lacking a bit, but in general, they are more than enough for any casual game.
So, let’s sum up our software: if you purchase all of the above, it’ll cost you only $900 to get set up on the software side.
Summary
Now you got the idea of what we use at Knocknock Games to produce SFX and music and as you can see, there’s nothing really expensive if you approach it reasonably.
Well, honestly, when I started writing this article, I never thought, it’ll be that large, so let’s wrap it up for today and leave creative side for the next articles, where in addition, we will cover some behind the scenes SFX and music production aspects for our Rise of Colonies: Uprising titles.
Till next time, folks!
Read more about:
Featured BlogsAbout the Author(s)
You May Also Like


.jpeg?width=700&auto=webp&quality=80&disable=upscale)


