

Daily news, dev blogs, and stories from Game Developer straight to your inbox
Sponsored By
Featured Blog | This community-written post highlights the best of what the game industry has to offer. Read more like it on the Game Developer Blogs or learn how to Submit Your Own Blog Post
Antegods Art Update: Crank up the Cracks
As we’re working hard to make our stonepunk arena action game Antegods a reality, you can stay up to date with regular development blogposts. This time, lead artist Tom shares his boundless love for Substance Designer. No clue what it is? He'll explain!
6 Min Read

Pain in the ass
Texturing and creating in-game materials has always been fun… and a pain in the ass at the same time. Before I got going with Substance Designer, I used Photoshop and xNormal to create all the maps I needed. There was a lot of going back and forth between the two applications, which could get tedious. Well, no more!
Substance Designer (SD) is a piece of software that lets you create materials and textures on the fly. It uses a node-based system that’s surprisingly easy to use. As an artist I usually get scared as soon as I see nodes (or anything that’s not a brush, really). And to be honest, when I first looked at SD I was indeed a bit startled. Luckily the creators have made some amazing videos that show off what the app can accomplish. It just megakicks you from a cliff to let you take the required leap of faith.
Tell me why
First of all, why did we end up with Substance Designer anyway? The first reason was that Unity switched to a new Material System called PBS, Physically Based Shading, which is explained in this awesome blogpost. We wanted to make the most of this new technology.
The second reason is that with Antegods, we’d like to explore the field of procedural generation. SD has some amazingly fast algorithms that make it possible to generate materials on the fly. With one click or one new node, you can drastically alter the look and feel of an entire material.
Finally, the workflow to get all of this into Unity is great. You can export a full material into Unity and then alter it there… and everything just works!
Examples
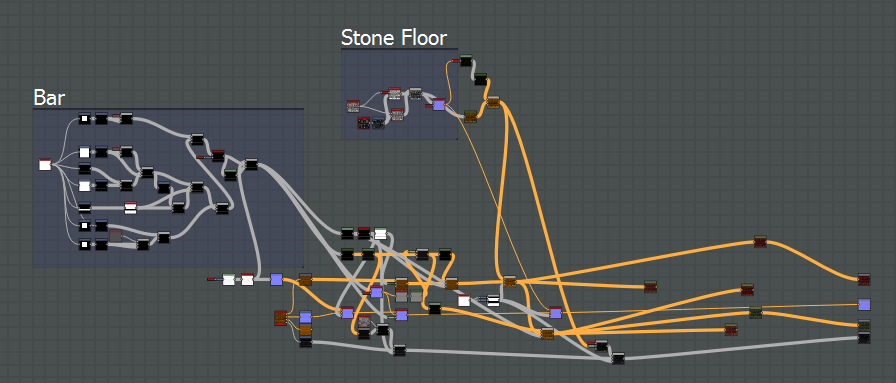
Here are some examples of materials that we’ve built in Substance Designer.
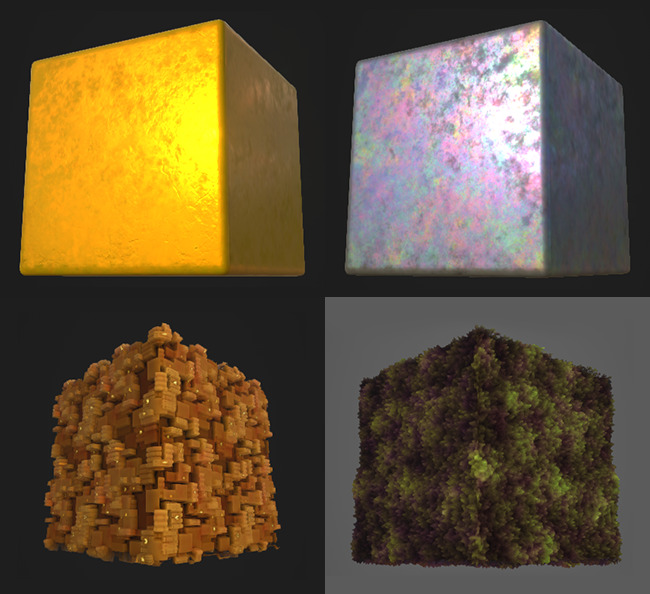
Gold, Silver, Forest and GreebleCity.
With SD you’re just never done learning. There are so many ways to achieve the same result, some of which are better or faster than others.
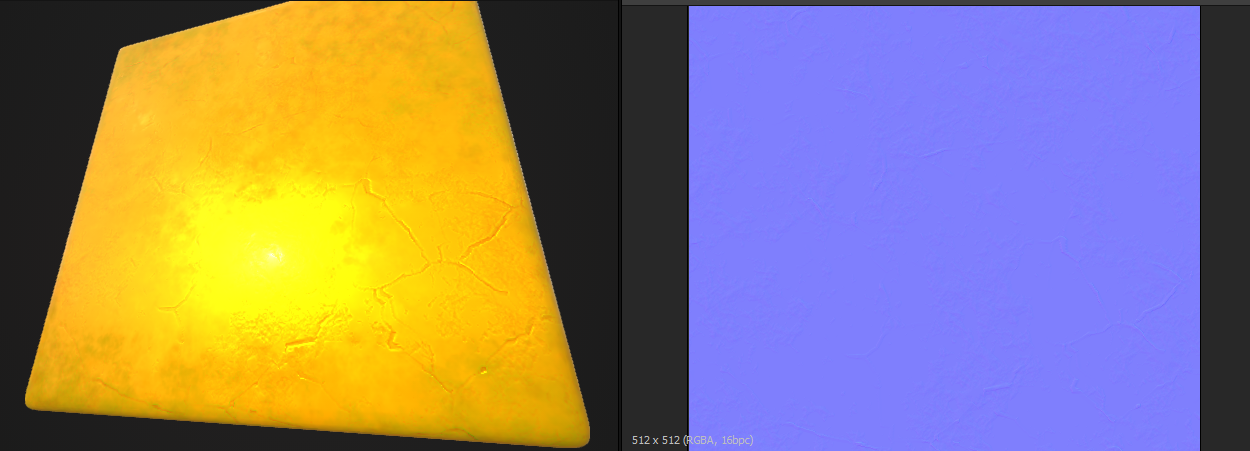
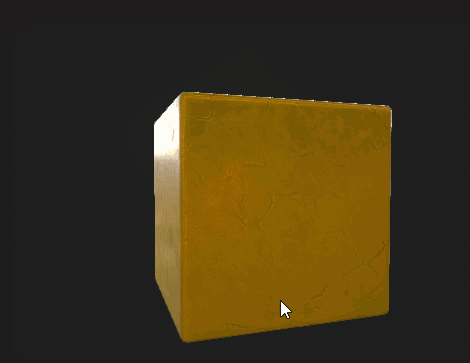
Digging for Gold!
Next up, I’ll give you a tiny walkthrough on creating gold. Something that eluded alchemists for centuries, and an important material for a game based on ancient Latin-American culture.
If you know Substance Designer inside out, you’ll probably see stuff that could be done way better. If so, please share! On the other end of the spectrum, if you’re completely new to this piece of software, I suggest you first watch the extremely helpful www.youtube.com%2Fuser%2FAllegorithmic&t=NDdiY2M0Y2M5ZDE3OTVjYjQ5NWEwMTcxYTcxYmJjOWMzZDQyOGYwYSxMNEhCWHBUUA%3D%3D&b=t%3AISXygd5CA8_xcNFMAoya9Q&m=1" target="_blank">tutorial videos from Allegorithmic.
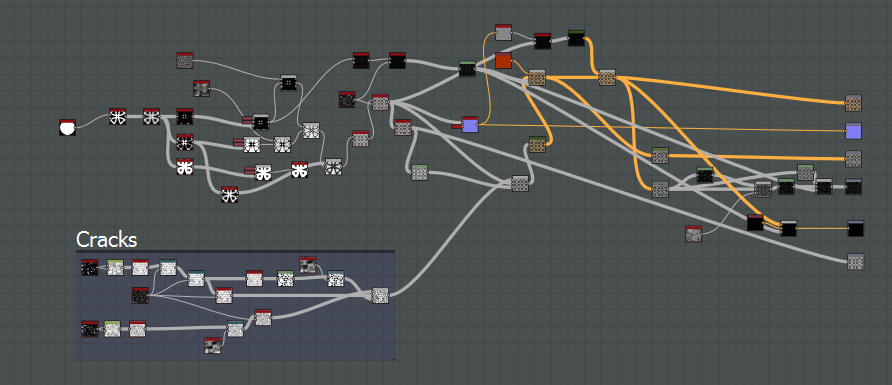
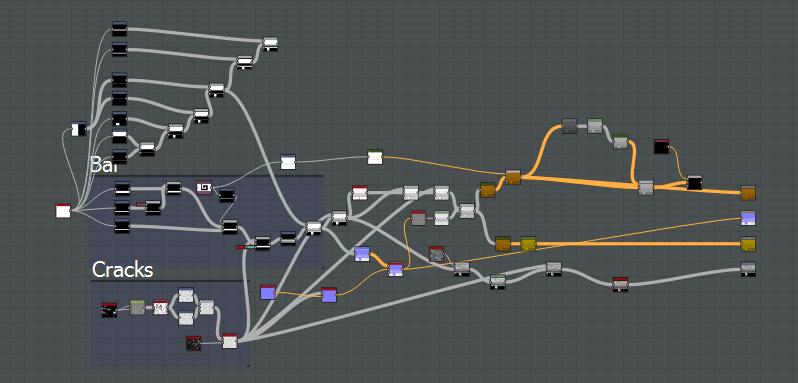
The gold material actually quite easy to make, but it still took a lot of tweaking. Here’s the final Graph in Substance Designer.
I usually start off with a Specular/Glossiness setup. Mostly because I’m more used to it than the Metallic/Roughness version. This might already be weird, because Metallic/Roughness is the standard in Unity.
Secondly, I wanted a nice metal/stoney pattern with cracks and dents.

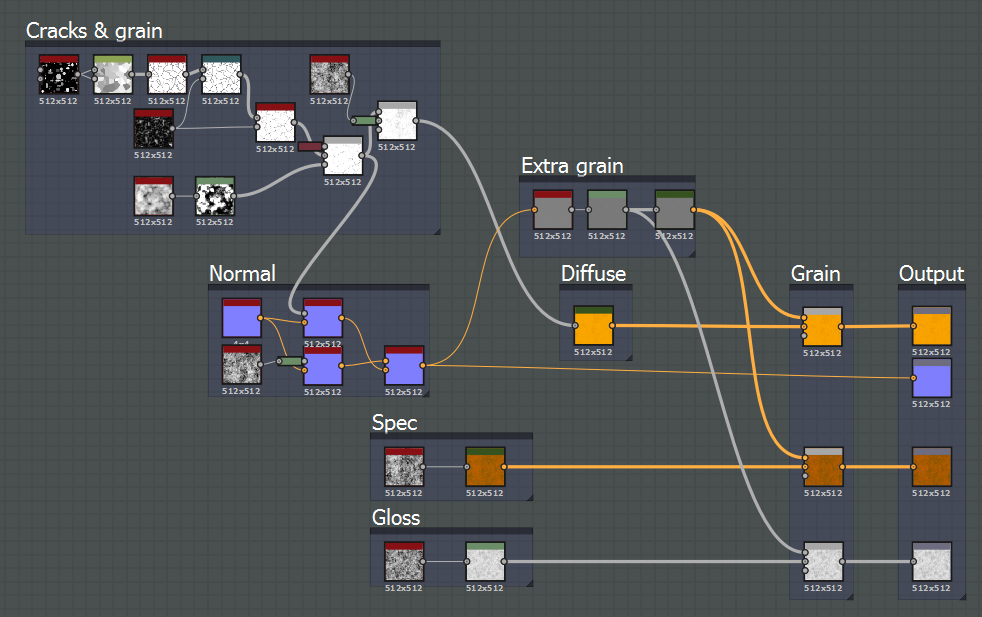
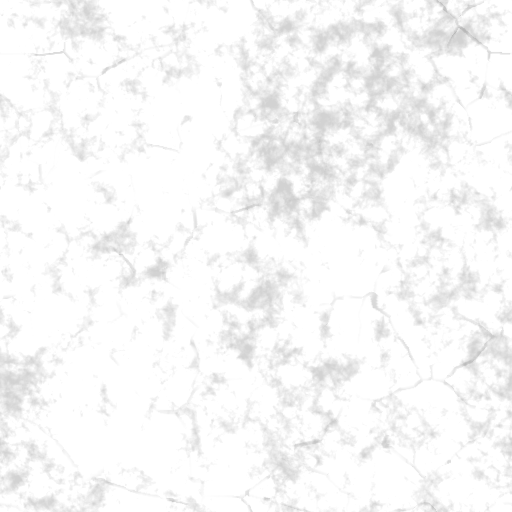
Cracks & Grain is a very subtle pattern that’s mostly seen in the Normal map and very lightly in the Diffuse map. I started with a Mosaic-styled tile, which I combined with some Clouds nodes to get a nice, subtle pattern in there.
Because I wanted the cracks to appear more in the Normal than in the Diffuse, I took the node just before the end to appear in the Normal map section.
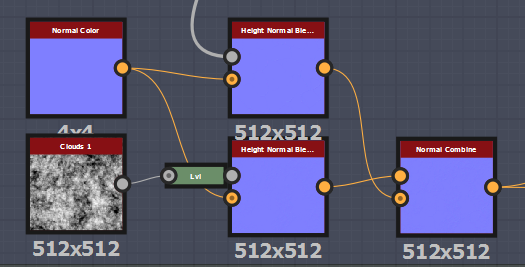
Gold needs to be as smooth as possible to be convincing, otherwise you get yellow tinfoil. So the Normal map is super subtle, but still visible.
By adding a simple Gradient map to the Cracks & Grain map, I could easily create the Diffuse map.
There’s still something missing though. What’s nice about Substance Designer is that you can just work with the maps you’ve created earlier. Here I took the Normal map, turned it into a Curvature, pushed the values up and turned it into a color map. (Grayscale and Color maps don’t blend)
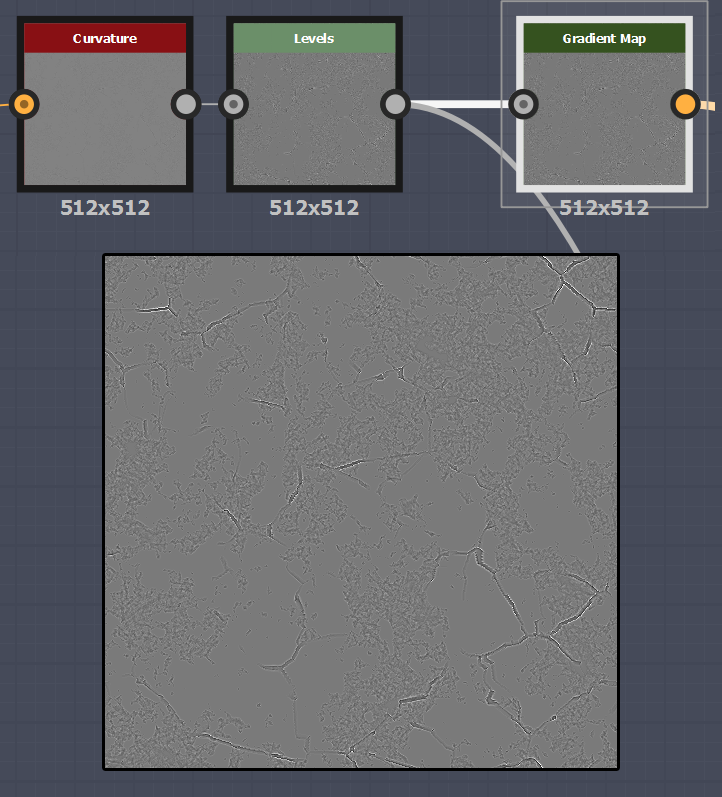
By blending this over the already existing Diffuse map, the texture turned into something a bit more interesting.
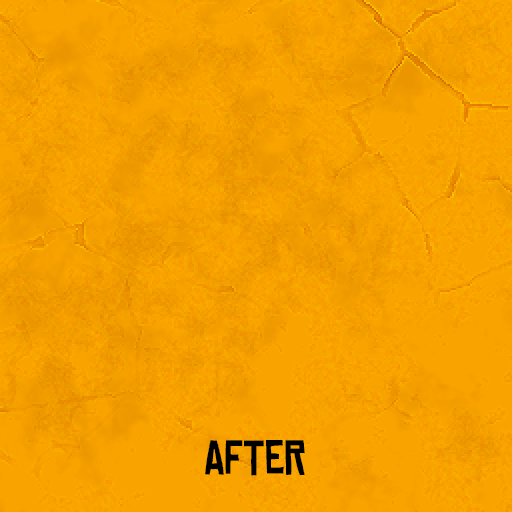
Finally, for the Specular I used a basic Clouds node, Gradient-mapped with some slightly darker colors than the Diffuse map, and added the details of the pumped up curvature on top of it.
For the Glossiness, I used the same Clouds node, brightened it up big-time (the brighter the shinier), added the pumped-up Curvature details, and I was done!

Now all that’s left is clicking export. SD then exports the .sbsar file to Unity, which functions just like a material. It automatically sets all the maps to the correct positions, after which it even allows you to adjust things. I must say the materials look slightly different in Unity than in Substance Designer itself, but the creators may have fixed this in their latest update.
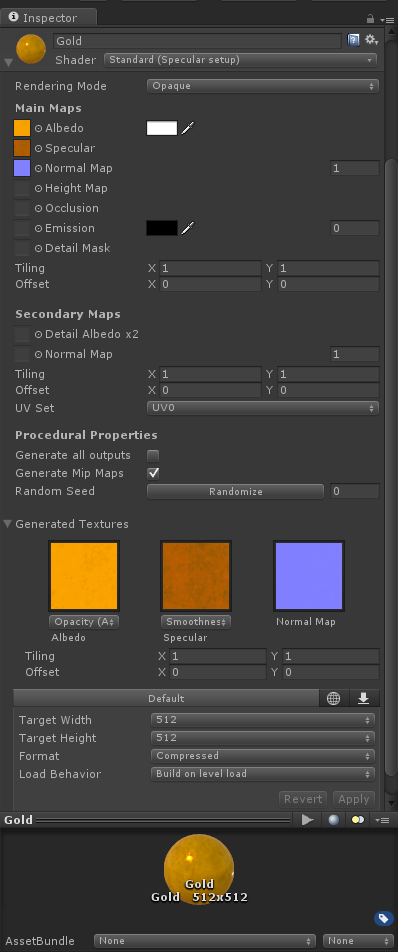
There you go, the material is now in Unity. As you can see at the bottom, there are some settings. For example, you can easily set the size of your texture, which is really handy if you need to downscale your project.
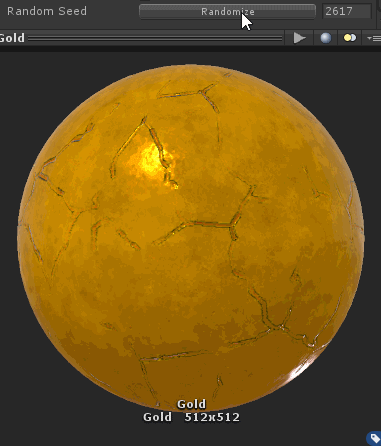
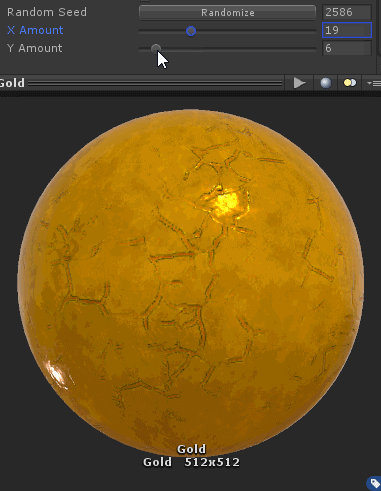
There is also a Randomize button. If you press this, the material will change all the generated stuff. Now my gold is not the best example, because it uses the same small amount of clouds and cracks every time. However, if I crank up the cracks for a bit, and then press the Randomize button, look what happens:
Now this is close to the procedural generation we want. Every time you see something, it will look slightly different.
But things can get even more awesome in SD, as you can expose certain nodes or functions. These will then become visible in Unity, where you can adjust them. In this example, I’ve exposed two functions. The amount of cracks X and the amount of cracks Y. In the editor you can adjust the slider to your heart’s content.
Recommended by Tom
In conclusion, I can recommend Substance Designer to anyone working with textures and materials. It gives a lot of freedom and you get awesome results very quickly. There are so many functions that I think you can create anything you want.
By way of a farewell, here are some of the graphs we created while practicing. Good luck with those! ;-)

To keep up to date with our development updates, please follow us on
Tumblr, Twitter or Facebook. Or subscribe to our newsletter. Whatever is your taste in social media!
Antegods is supported by the Dutch Cultural Media Fund, Cultural Industries Fund NL and the MEDIA Programme of the European Union.
Read more about:
Featured BlogsAbout the Author(s)
You May Also Like


.jpeg?width=700&auto=webp&quality=80&disable=upscale)


