Daily news, dev blogs, and stories from Game Developer straight to your inbox
Sponsored By
Featured Blog | This community-written post highlights the best of what the game industry has to offer. Read more like it on the Game Developer Blogs or learn how to Submit Your Own Blog Post
Achieving A Painterly Look In The Signal From Tölva
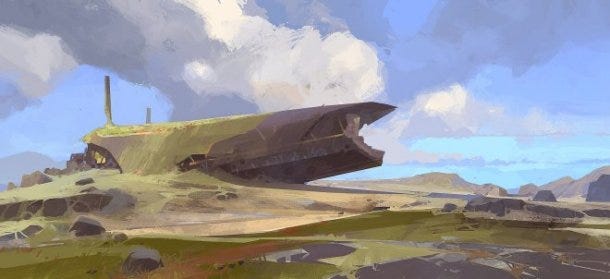
Big Robot's first-person shooter, The Signal From Tölva, delivers a painterly look by aligning technology with the concepts of artist Ian McQue. This post explores that unconventional art process.
17 Min Read

This is a short blog post by Olly Skillman-Wilson about how Big Robot achieved a painterly look based on the concept art of Ian McQue (formerly of Rockstar) in their forthcoming open-world shooter, The Signal From Tölva.
For a digested version of this post, watch this video:
What follows is an expanded take on what we touch on in that video. If that sounds good, read on!
Tölva’s world and tone are exciting for a number of reasons - lasers, exploding robots, unfathomable space mystery and the phrase "combat archaeology", to mention but a few - but here we’re going to talk about how we crafted that rich, screenshot-friendly visual style. We will try and understand the majesty of Ian McQue’s concept art, learn the fundamentals of ‘splattery precision’ and some other made up terminology, as well as comprehending the beauty of a clean normal map bake or efficient UV layout. You know you’re in deep when you can appreciate UVs. We intend to go deep(ish).
So... Defining the look of Tölva was a process of looking at our inspirations and influences and breaking them down into their constituent parts. This way we could take what made a certain look ‘work’, and begin to create a process that we could apply to a variety of assets while maintaining consistency with one another as well as looking appealing in isolation. This meant taking Ian McQue’s sketches and paintings and finding common shapes, colours, types of brush stroke, silhouettes, and starting to form a "McQuevian language".
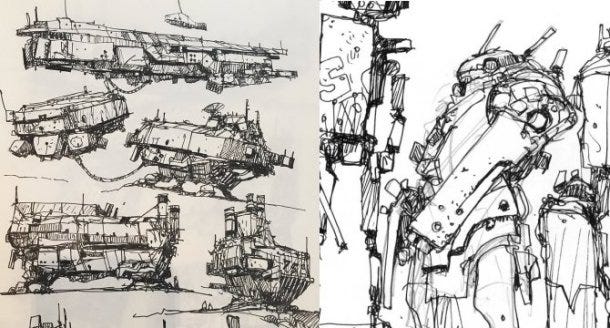
Often robots, vehicles, or ships, were chunky with lots of rectangular protrusions breaking up their silhouettes. Layering of details was important, with colour often going from darker to lighter as the layers got closer to the exterior. Angles were often a few degrees off being parallel with each other but still consisting of straight lines, rarely curved. The dumpier a spaceship, the thinner it’s aerials and wires: <em>contrast from form</em>.
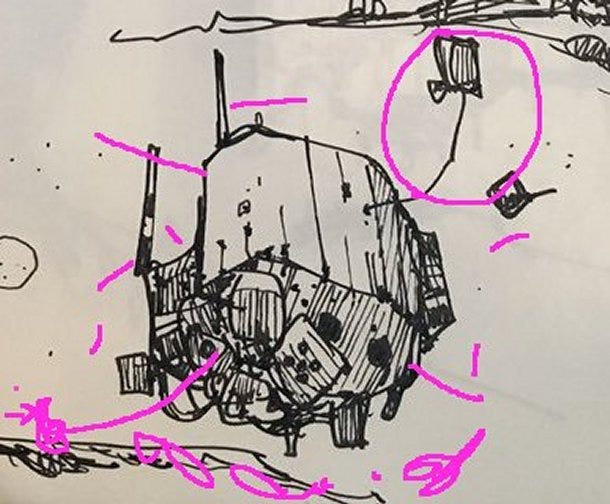
We could use these style guidelines to judge how well something would fit in the world, and how close it was to the source. I’d sometimes create reference boards using a tool called Kuadro, a convenient way of laying out image files on the desktop and storing their scale and position in a file. I’d be conferring with Jim at various stages throughout an asset’s creation- he would direct the design, and mine his extensive and tasteful tumblr image library, or doodle thumbnails to illustrate specific requirements. Interpreting sketches from one angle and turning them into 3D geometry has been a particular challenge for me on this project, but following these guidelines, and practicing this approach has enabled me to get better at it through the course of the project.
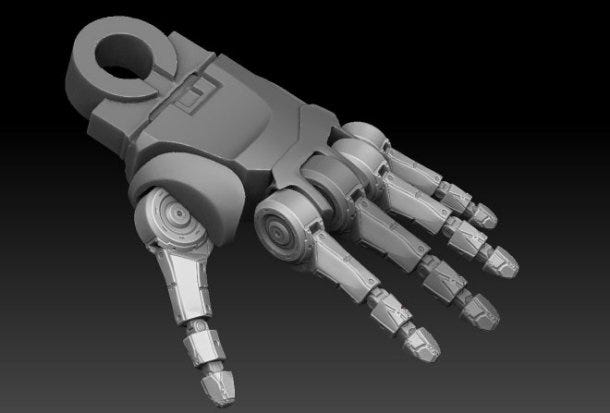
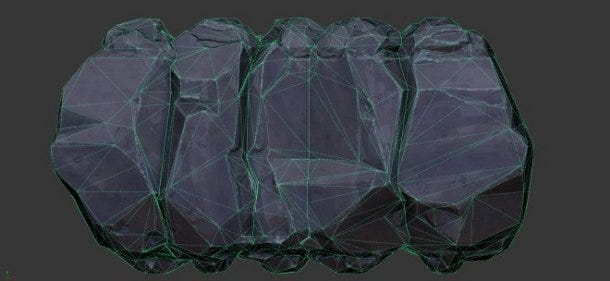
The first step towards actually making something, once reference was set up, was blocking out a 3D form in Maya using simple primitives and keeping things low detail. Often if this stage went well the geometry could be reused for the final low polygon asset. Then I’d take this base mesh into zBrush and play with the shapes, maybe add things that were more awkward to create in Maya. If I was feeling really fancy, I might do a paintover.
Sculpting, Detailing, Baking
Once something is starting to feel like a strong design I can start to commit to adding details, again referring to the guidelines as I bevel edges, chamfer corners, and smooth any (rare) curved surfaces. Then come surface details that will be baked down into the normal map such as wires, nuts and bolts, screws, handles, cutlines. It’s easy and enjoyable to go overboard at this point and fill every surface with greebly goodness but any artist will tell you that the eye needs space to rest. Not only are you looking for space to rest within this asset, but often you will need to look at the game as a whole and decide whole assets need to act as rest points devoid of any noisy detail, in making up the composition of the world.
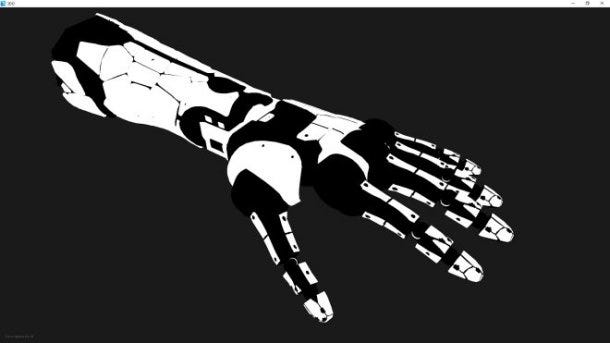
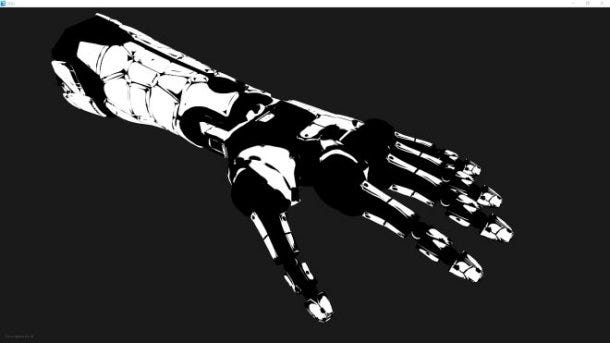
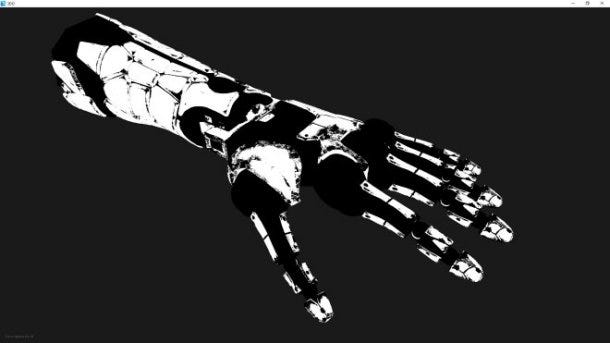
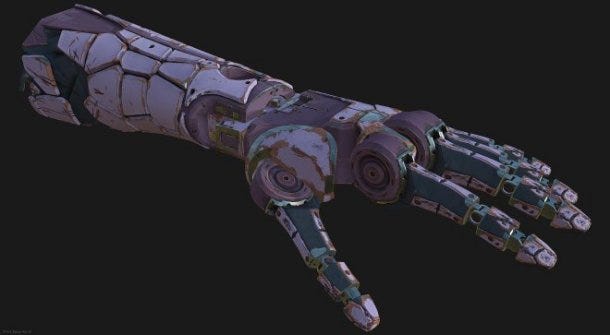
At this stage I’m also starting to break up edges with wear and tear and damage where seems appropriate, this is one of the most satisfying parts- chipping away and scratching up clean surfaces requires little moment to moment decision making and I can let this almost therapeutic activity absorb my attention. It’s important to split objects as I go into logical groupings based on their material types, I will use these later to bake a material ID map which is essential to the texturing process.
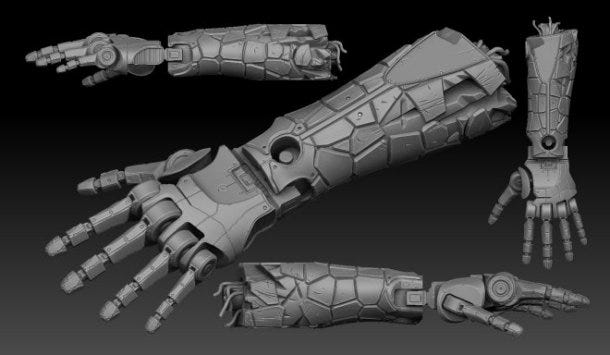
One of the of the recurring aspects of creating such a mechanical world is designing (relatively) convincing joints, paneling, and other robotic goodness. It was important to spend enough time look at machined parts or engines so that I could start to internalise where a cut line might occur, which panels needed screws, how a curved edge might be carved out of a larger piece. Manufacturing is often about starting with a form and reducing it from there, and the same approach works really well when sculpting.
Then comes a series of steps that are dull but very necessary to getting a clean bake but once that’s done I can move onto texturing. A tight UV layout, good smoothing groups on your low polygon model, and a precise cage mesh all aid in a clean bake.
Generating an Automated McQue Texture process. Or: How to Hand Paint Textures, Without Using Your Hands
Good modelling is essential and a stunning texture won’t save a bad model, but texturing drives a lot of Tölva’s look and helps distinguish it from other games. It’s also what was most clearly imitable from the concepts. We were fortunate enough to be given access to the list of secret brushes that Mr McQue utilises most frequently and to such effect, and using these able to create an automated process that streamlined the texturing of hundreds of assets. We essentially created a system where I fed in my sculpts and a McQuevian texture was churned out for me to tweak and finesse. This worked by taking the right brushes in Photoshop and creating a tiling pattern with each, attempting to recreate a certain type of stroke or scribble that could be found in any given concept piece. With these ‘master strokes’ I could tile relatively convincing McQuvian patterns across a surface, tinting its colour, and using the pattern to break up the edges of masks in Photoshop. Daub, dash, splatter, speckle, spray, smear, squiggle, strokes, crosshatch, and grainy swirl would become my best friends over the next 2 years. Grainy swirl was great for organic or noisy surfaces like mud or concrete, while crosshatch had a natural galvanized metal flakes look. Each pattern came into its own as I built a library of reusable materials from these tiling patterns.

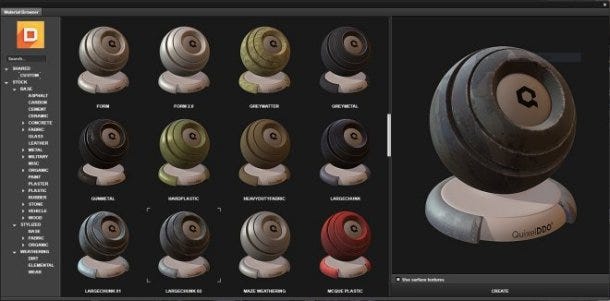
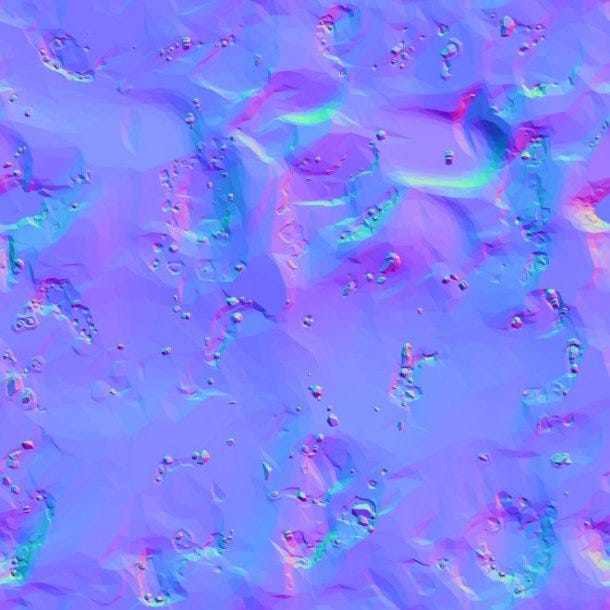
The tool tying all this together was the Quixel Suite’s dDo, a Photoshop based texturing tool aimed at primarily at creating PBR materials very quickly, which we had employed for our own nefarious aims. Feeding the sculpt data from the bake (tangent and object normals, ambient occlusion, material ID, gradient, sometimes a height map) dDo could tell me where edges were, crevices, what was at the top of the mesh, what was only facing down or upwards. The amount granularity in terms of how you define the masking of a material is very powerful, and once I’ve made decisions about where a material should be confined to I can apply that as a preset to any other asset. “Here’s my paintedMetalC material, it will have chips and scratches on the edges, sunbleach on the top, water damage on the undersides, and some lichen in the crevices.”
Material ID, edge mask, pattern mask
I found the simplest way to structure a texture was to have a form layer at the top that brightened upward facing surfaces, and conversely darkened downward facing surfaces, with an edge brightening layer to accentuate the objects natural shape. Our ambient light in-engine is a single colour and so baking in some subtle lighting data helped objects have some shape even when in total shadow. Next, a weathering layer that universally affects the asset. Things like dust, stains, and other environmental effects go here. Beneath this all the materials are applied to their corresponding material IDs from the high polygon sculpt bake.
From this point I’ll start to work in overlaid scanned details from the dDo library, these won’t affect the diffuse channel very much (deliberately), but will add some physically based detail and reflectance values. The materials that make up Tölva and it’s inhabitants are 90% diffuse covered and 10% specular, meaning they are largely matte looking surfaces with bits chipped away to reveal the metal beneath. McQue’s style has very little exposed steel, or polished chrome and there is no glossy plastic, so I tried hard to match that. More on the PBR side of things later.
Once materials are assigned to the whole texture there’ll be a lot of tweaking of the tiling pattern’s intensity, colour, size. Material specific details will also go on, like rust that only affects metals. Then in some cases I’ll add bespoke hand painted details like glyphs, diagrams, or bits of weathering that only appear where there’s a pipe or something and that can’t be defined by the automated process. But this is the only part of texturing where I’ll actually paint a specific detail onto a specific part of the texture, everything else is controlled by dDo and my masking.
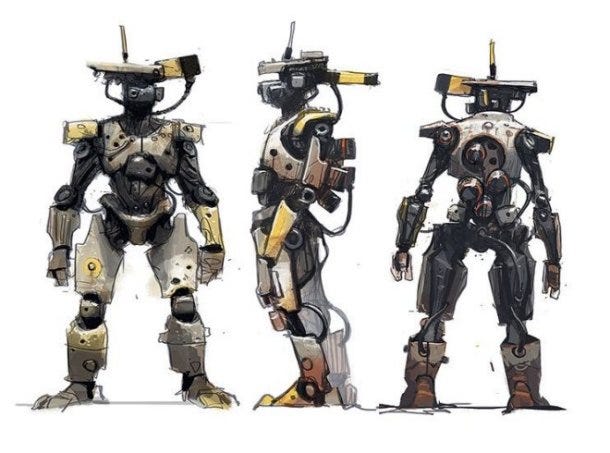
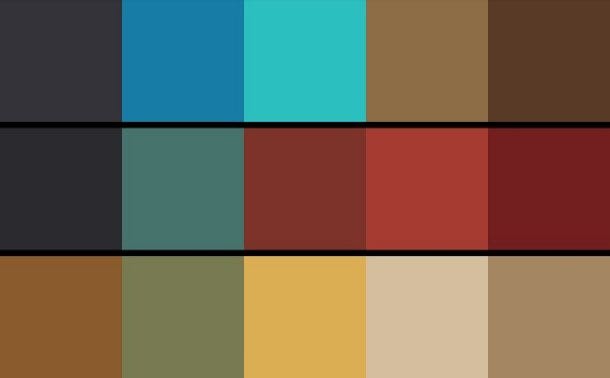 Factional colour schemes (Bandit, Zealot, Surveyor)
The colours we use are often collections analogous colours making up 60% of an asset, then it might have a darker or more saturated variant covering another 30%, and then remaining 10% has a bright or rich accent colour. Usually the best way to get a decent start with this is to colour pick directly from a concept and go from there, can’t get more accurate than that. As we got further into the project certain palettes would mean different things to me about where they were in the world and who created them, making decisions about colour schemes much easier.
Once all this is done I can save individual materials as presets, or entire documents to be reused on similar assets, this is largely what facilitated us in getting the texturing done as a efficiently as possible.
Implementation: Make Everything Modular
Being able to cannibalise existing assets for reuse is an invaluable tool when you’re trying to squeeze as much variation into the world as possible without burdening your VRAM usage further. The mileage you can get from an asset is often surprising in terms of reimagining it for other purposes. If you model things with discrete watertight intersecting meshes rather than combining everything and deleting interior faces, you can at any point split these out and reassemble them into a new variation of that asset.

This is probably obvious to veteran game artists but was something I was often in two minds about at the start of production, modularity vs bespoke detail. The other thing to bear in mind with this approach is baking with your meshes well exploded so occlusion data doesn’t interfere with neighbouring meshes, preventing you from reusing that one piece in a prominent place because it has a massive shadow across one side of it. Meshes can be merged using boolean operations to merge intersecting meshes and create totally new shapes, which we did to create cliff faces comprising multiple rotated cliffs into one uber cliff.
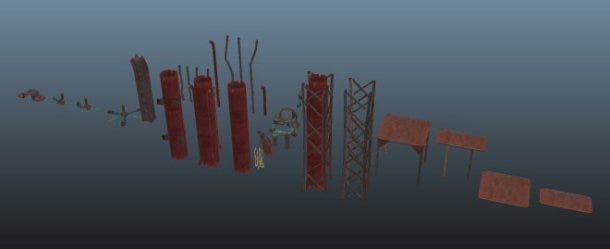
Creating asset kits is a common technique in games utilised particularly well by (for example) the Bethesda teams. Tölva has less of a need for complicated interconnecting architecture but we were still able to get some use out of concrete piece kits that we made to build more industrial areas, and kits of damaged spaceship to decorate the space wreck debris that litters the world. Creating these kits for the environment team (er, Jim) took a sizeable amount of the art dev time. Another example of this kit-based approach are the weapons attachments, all modelled as separate items that could be rearranged and mixed together to create weapon variants.
Working in the sizeable world of Tölva meant pushing a lot of geometry onto the screen at any one time. Occlusion culling and culling regions far from the player helped alleviate some of this but ultimately we were going to have to create level of detail meshes for a lot of polygon heavy, or frequently used assets. This is a fairly simple process and its amazing what you can get away with when an object is at distance.
Expanding the look with Shaders
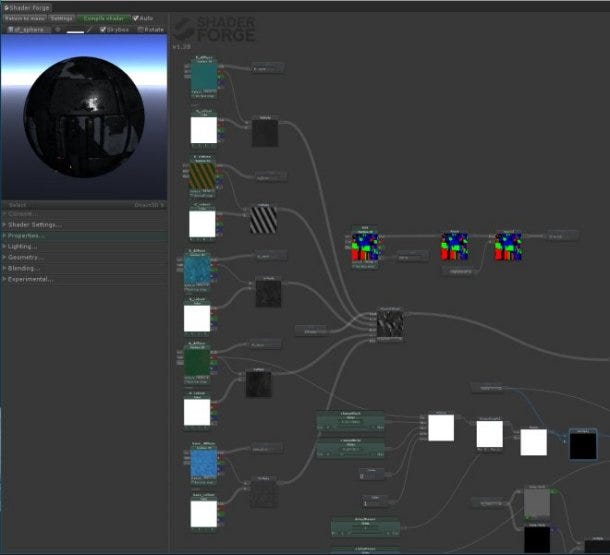
I have no programming skill or experience to speak of, but I found fairly quickly I was being limited by my ability to create simple shaders to achieve effects commonplace in games and desirable within our sci-fi aesthetic. Unity plugin Shader Forge became my go-to tool for solving these problems, it’s a node based shader writing solution that is approachable but still crammed with maths terminology most artists have never heard of. Using this I was able to assemble and visualise shaders that had pulsing lights, tinted a material based on ID maps, did weird things with transparency, or just layered textures based on normal direction. This saved me using up precious programmer time - Tom was full time on the project, and Dan part-time, so their brain cycles were at a premium! - and gave me control over very specific parts of the look. This kind of autonomy is very precious when you work remotely and there isn’t always someone on hand for you to pester with technical queries. Being a visual scripting system it does have the downside that when it breaks, I often had no idea why, or how to fix it. These issues weren’t insurmountable but did lead to a day of debugging from our resident shader expert, Tom Betts.

I would approach materials very differently if I was starting this project from scratch tomorrow. Coming from a CG background pretty much everything is given a specific texture that uses the full UV tile, and that was pretty much my only option to get the look we wanted at the time. As my understanding of Shader Forge evolved I was able to create a sort of shader version of how my textures were set up inside dDo. I was limited to 4 masks (RGBA channels of the ID texture) plus a base layer, and I could tile and tint some of the McQue patterns within those masks. Each McQue pattern had the diffuse pattern stored in the red channel, specular in the green, and gloss in the blue.This allowed me to get good resolution on textures for assets that were 5, 10, 100 metres long. The ID and normal maps were still limited by resolution but the tiling worked very well. It serves well as a halfway house between a 1:1 mapped texture and tiling materials, but lacks the subtlety and detail of a 1:1 or the variation and fidelity of having a library of materials applied to submeshes.
Terrain texturing
Our initial approach to terrain textures was to treat them as purely two dimensional, abstract patterns. As the style developed it became clear we were going to need something a bit fancier to fit the aesthetic, especially given the fact that terrain filled the majority of the frame a lot of the time. I began sculpting tiling terrain materials in zBrush, creating quick sculpts that could be exported to Unity quickly to test tiling, detail, and blending between layers. It was important to use detail meshes like small pebbles and shards of rock that already existed to tie the textures to actual 3D props sitting on the terrain. This was the first organic thing I’d had to sculpt that wasn’t a rock or cliff and the soft shapes weren’t fitting the style at all. The solution ended up being to reduce the polygon count of the sculpt using zBrush’s decimation tool to create a more faceted organic surface. Feeding this through dDo and using existing material presets was pretty straight forward. The height map was used by the RTP terrain setup to cleverly blend layers together based on depth, creating a much more pleasing blend that a simple fade.

Lighting/Rendering/Post Processing
PBR or physically based rendering has become a buzzword and marketing tool as it’s adoption has spread, symbolising a graphical upgrade over traditional game rendering. Mwoar detail mwoar realism mwoar immersion. Much as I love all those things it’s most important contribution from the artist’s perspective is having a controlled environment within which to work where you can create a material and have it react to light in a predictable manner, not only between scenes and lighting setups in the game engine, but also between software packages.
Having this predictability is even more useful when your game has a full day night cycle and is going to appear in all sorts of lighting conditions. Even if your game isn’t crammed with brushed metal and lacquered pine (highly reflective surfaces being a sure sign of a game trying very hard to get the most of its PBR) it can still massively benefit from a physical approach. Having a nice fresnel falloff on a largely diffuse material makes every object lit at a glancing angle look fantastic, materials are energy conserving so nothing washes out in a way that just appears like a white value being clamped.
McQue’s paintings have naturalistic quality to their lighting, this is ideal for PBR. His colour palettes have a fairly limited range, there are few bright whites or really dark blacks, much like real world albedo colour values. This allows a PBR lighting model to really shine without being overpowered or limited by overly saturated or contrasting texture colour values. PBR is not a style, it’s a tool. You can push your look in a number of directions with colour correction, lighting, and post processing- but you are starting from a well calibrated, stable, neutral position that is easy to control. Using PBR also means you can draw on nearly 200 years of photographic knowledge. Exposure, tone-mapping, HDR, colour correction, bloom, lens flare, chromatic aberration, depth of field, vignette: these are all techniques that have either been part of photography and film for a long time, or are simulating things that a lens does naturally. Also use linear colour space everyone, it has been VFX industry standard for forever, there’s no reason not to.
Having this linear colour space PBR setup means we are generating accurate colour values in the render that, after tonemapping, exceed the screen’s full brightness value. They are brighter than white, this is what makes the render high dynamic range. We use these values on our light emitting (emissive) materials particularly to trigger a bloom effect, but also to illuminate any dirt or scratches on the lens you’re viewing the game through.
Nothing says sci-fi like bright blinking lights!
Read more about:
Featured BlogsAbout the Author(s)
You May Also Like


.jpeg?width=700&auto=webp&quality=80&disable=upscale)


