

Daily news, dev blogs, and stories from Game Developer straight to your inbox
Sponsored By
Featured Blog | This community-written post highlights the best of what the game industry has to offer. Read more like it on the Game Developer Blogs.
Tech Art in Sausage Sports Club
A breakdown of the best shaders and effects used in Sausage Sports Club with gifs and explanations.
21 Min Read

Tech Art in Sausage Sports Club
Also check out my posts on (Design, Programming, and BizDev)
What Is This?
I worked on Sausage Sports Club for 3 years and learned an insane amount in the process. I was incredibly lucky to be surrounded by experienced and generous game makers in that time who were willing to give feedback, advice, and help push me and my game forward every step of the way. I know few people have that privilege, so this post is to lower the ladder a bit and hopefully make making games a little bit easier. Here are the topics I cover in this post:
Prop Process—details about my modeling, AO bake, and texture process
Characters—my rough pipeline of modeling and setting up characters
Effects—examples and detailed explanations of various effects
Shader features —a few ways I optimized my shader workflow
I feel I should give a preface here about my background and to clarify this post isn’t a guide to follow, but more a recap of what happened. All the art in Sausage Sports Club was made fast and loose and barely anything got a second pass, which is not necessarily the best way forward. Let’s jump in!
Prop Process
Everyone has their own workflow and technique of making assets and mine doesn’t too many special tricks, but I’ll go through all the details anyway for anyone getting started making 3D art.
Modeling & UV Layout
First I’ll block out a basic form with primitives. Then I’ll use the bridge tool to connect shapes or quad draw to make a whole new topology. If I have a similar asset I’ll start with that instead of building from primitives first.
Once I’m close to finished with the model, I’ll layout UVs by doing planar map on different parts of the mesh, using the unfold tool to get things in shape, then sometimes stitching parts back together. Then I arrange and scale the separate UV islands to give more visible areas the most detail.
I have a custom toolbar in Maya that’s pretty basic, but helps a lot since I don’t use the right-click context menu much. There’s a bunch of primitives, extrude, combine, bevel, add edge loop, cut face, extract, merge, separate, freeze transform, delete non-deform history, and export selected.
Ambient Occlusion
Next step is baking Ambient Occlusion which I do using Mental Ray. Make sure you have that installed, enable the mayatomr.dll plugin, assign a surface shader, assign a new lighting texture, then bake selected. My settings are all default, except the fill texture seams option is cranked up.
I should also mention my base textures for authoring are tiny by modern standards, only 512px for most props and 1024px for everything else.
Texturing
Everything 2D is done in Photoshop. For this project I exported everything as PNGs to avoid the repo getting huge, but I may switch to just keeping PSDs in the project in the future to avoid lost work.
I set the AO layer to multiply so it shadows over whatever colors I tweak. Then in another layer I paint solid colors or gradients. If the prop demands texture then I’ll grab something from Textures.com and probably lower the opacity and saturation before drawing over it to add details.
If the texture needs to be seamless I’ll use Photoshop’s Offset tool to show where to mirror the texture. I’m not a great digital painter, so I mostly use the default brush with varied hardness settings.
Characters
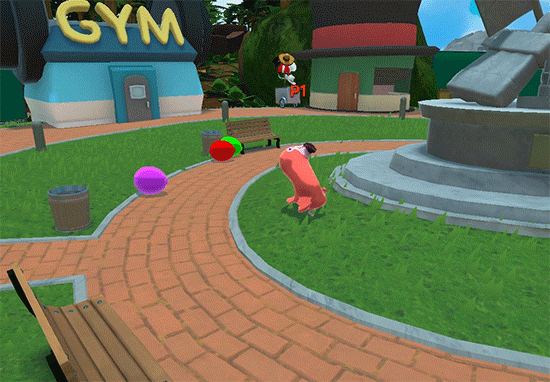
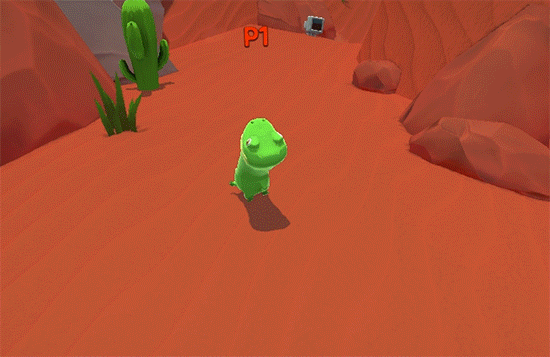
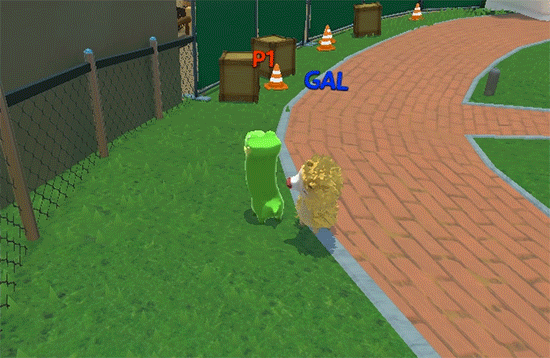
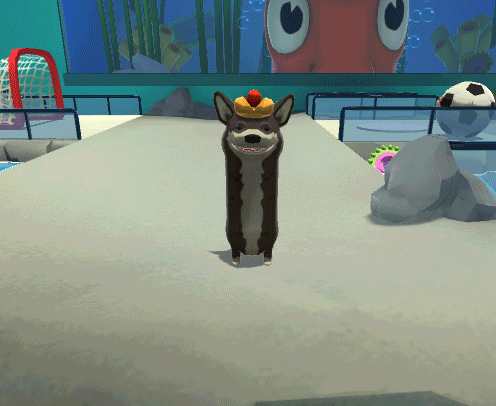
Bon Bon the flamingo and Flop the frog!
There are 14 characters in Sausage Sports Club, so being able to make them quickly and without doing much setup per character was a big priority. Focusing there first gave me a workflow that was sloppy, but got the job done.
Here’s what I ended up with:
I didn’t bother keeping Maya scenes up to date and instead opted to work from FBXs. I made this switch because I was forgetting so often to sync the files, but sometimes had to redo work after accidentally baking out frames.
I don’t use any custom rigging plugins, none of my rigs have controls, and I just do my best with rotating bones and then let PhysX take the wheel. The animations in Sausage don’t require much nuance, so it would take more time than it was worth for the few short animations I author per rig.
There’s three rigs all the characters share: Dog, Bird and Horse. They have the same number and positioning of neck joints so the characters all feel mostly the same. I only animate body joints, so that Unity’s animator doesn’t override PhysX’s effecting of joints along each character’s neck.
Each character has its’ own prefab where I set up the scripts a character needs to move and wiggle. I also set up each character’s hats individually in Unity to get the best fit. A big time saver here was having a separate prefab payload with physics states, triggers for kicks and interactions, and other stuff that all characters need that gets spawned in at run-time.
Shaders & Effects
Going into making Sausage Sports Club, my strengths were programming, shaders, and tech art and not so much modelling or texturing. For that reason, I chose an art style that’s less dependent on those latter skills and put most of my polish time into custom shaders. Let’s run through the highlights:
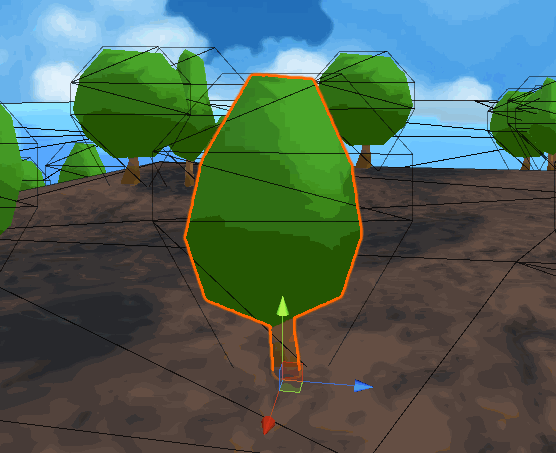
Notice how much more the ground stands out!
Height Gradient—Fairly late in the project, I was looking for easy wins to make the Overworld look better. I noticed there wasn’t much variance in color or value along walls or terrain, so I added a simple gradient along the world space Y-height. This is a really easy trick, but it makes a huge difference in adding some visual complexity to the scene and I ended up using it all over the project. Here’s the breakdown:
I pass the world position of each vert to the fragment program
Add top and bottom color shader properties to interpolate between
In fragment function, interpolate between bottom and top with worldPos.y

Slowed way down to make the effect more visible! Right shows the normal maps used to distort UVs.
Hit Distortion—Ever since noticing My Mom uses a screen space distortion effect to make weapon swings feels more powerful, I’d been looking for a chance to learn and use the same technique. As I added dash hits that knock players and physics objects around, I found my opportunity and did some research about how to make it happen in Unity. Here’s the breakdown:
I use the GrabPass to sample what’s already rendered to the screen
Offset that sampler UVs by reading from a normal map in texture space
Smear!
Motion Smear—Early on in development, an animator from Blizzard made a tweet showcasing some examples of motion smear in various trailers, promo videos, and cinematics from Overwatch. This is the animation technique of exaggerating poses to impossible levels to add character and make shots feel more dynamic when in motion. I was inspired to do the same dynamically in a vertex shader and got a pretty good result. I ended up not shipping this effect in the final game because it ruins screenshots, but it was part of my visual development process, so it feels right to include it. Here’s the breakdown:
Smooth the player head’s motion and pass that vector to the shader.
Offset verts on the opposite side of our movement direction.
Use noise calculated from world position to vary our offset’s scale.
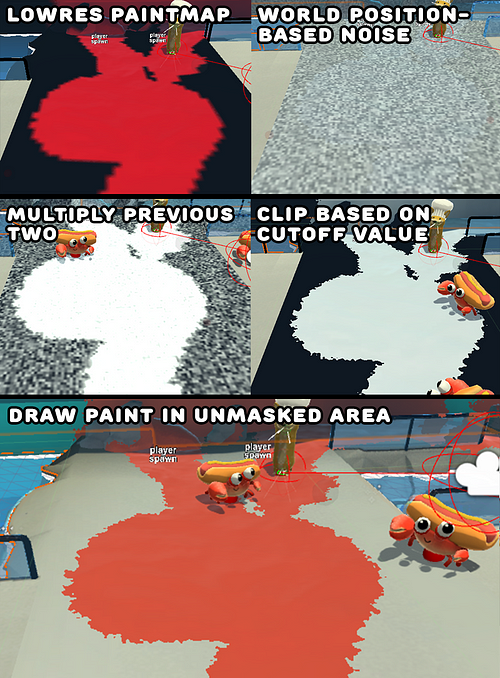
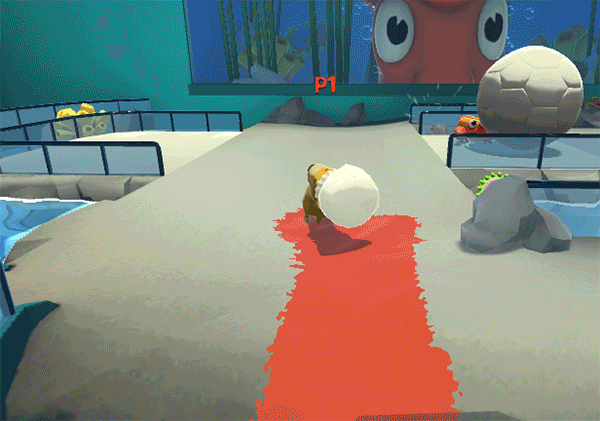
Paint Tech™
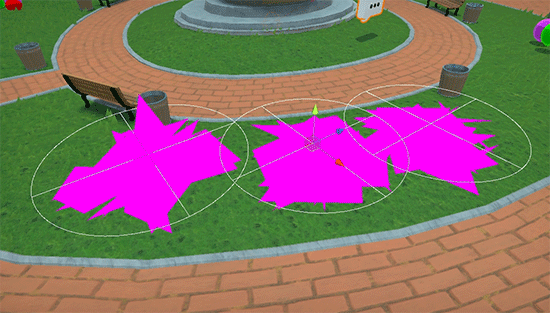
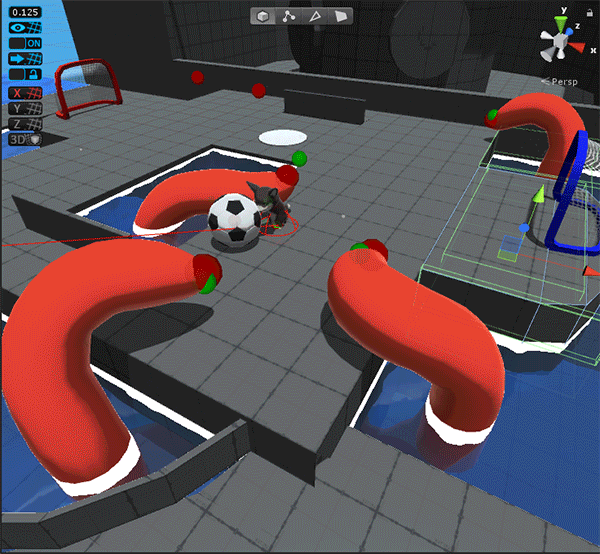
Dynamic Painting—Back when I was prototyping game modes, I stumbled on an article Valve wrote about how the gels worked in Portal 2. It covered the subject at a high level, suggesting they use a second set of UVs to represent much of the scene in a small space and then diving deep into many polish details. That was enough for me to figure out a similar solution in Unity, which I used as the underlying mechanic for Paint Ball mode. Here’s the breakdown:
During Paint Ball, I’m constantly shooting 4–8 rays each from player’s faces and feet as well as the Paint Ball at MeshColliders on everything in the scene on the Paintable layer.
With the returned raycastHits I grab the lightmapUVs and write the appropriate paint colors into low resolution paint maps at those coordinates.
In the function where I’m writing to pixels, I also change the score of each team so it matches the painted pixel count exactly. That’s all that happens on the CPU side, then we jump to shader code.
Here I combine the low resolution paintmap with carefully scaled world space noise and a cutoff that gives nice paint paint edges.
It’s worth noting these paintmaps are read into the shader using the lightmap UVs Unity can auto generate for imported meshes, which are usually reserved for lightmaps.
Everything that made the cut is paint and everything else is drawn with Unity’s standard shading.
For paint pixels we then apply a mud-like normal map and tweak the metallic and roughness values.
One notable exception is dynamic objects like Tiny Tokyo’s train and Junkyard’s car doors and trunk, which don’t get lightmapped and needed a variant of this shader that uses regular UVs.
If I were to use this effect in a future project, I’d look into optimizing the texture writing by using Graphics.DrawTexture on RenderTextures instead of the very expensive Texture.Apply which alters the asset on disk.
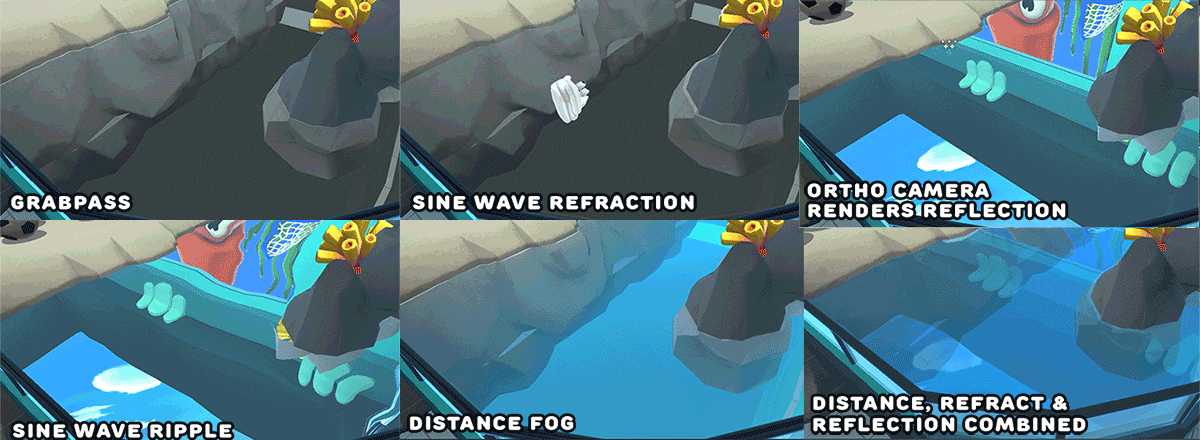
Reflection, Refraction, and Depth Fog

Edge Foam and Collision Displacement
Toon Water—In both the Aquarium and Overworld, water plays a big role in establishing a sense of place. To fit in with the fun, colorful aesthetic I needed water that would match. Referencing other games with gorgeous water like The Legend of Zelda: Wind Waker, The Witness, and Rime I noticed rippling waves, depth fog, and edge foam had the most impact. Once that implementation was looking good, I took it even farther with reflections and vertex displacement ripples to match splashes. Here’s the breakdown:
Making the surface ripple was as simple as distorting UVs with differently scaled sine waves along the two axes.
Adding depth fog required blending towards an opaque color for farther pixels along depth.
Then adding edge foam requires checking the depth buffer to see if this water pixel is close in depth to what’s been rendered already, marking as foam if sufficiently close and then multiplying that by a scrolling noise texture.
My first pass at reflections used an orthographic camera aimed at the sky, but when that proved to expensive I switched to relying on reflection probes which is less accurate but still convincing.
For splash ripples, I use a component and collider on the water plane to detect and track splashes so they can be passed to the shader. I track the splashes as a Vector4 with x, y, and z tracking the position and w tracking the remaining splash time which is used to decay each splash’s height displacement over time.
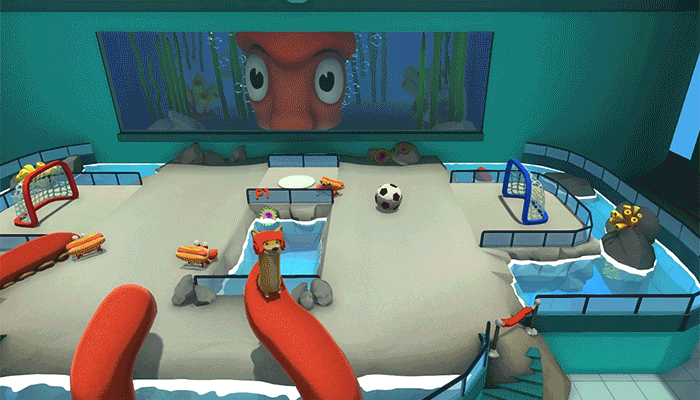
Depth buffer, Tank Effect, Behind The Glass
Aquarium Tank—The Aquarium’s big gimmick is the giant squid who moves around the tank in the back and grabs at players with tentacles all over the arena. To sell that the squid in the back inside a huge tank, I needed to make the water foggy and distort its’ contents when viewed from oblique angles. To make these happen technically, I use a use a GrabPass that distorts UVs more at oblique angles and blend towards blue for farther pixels along depth.
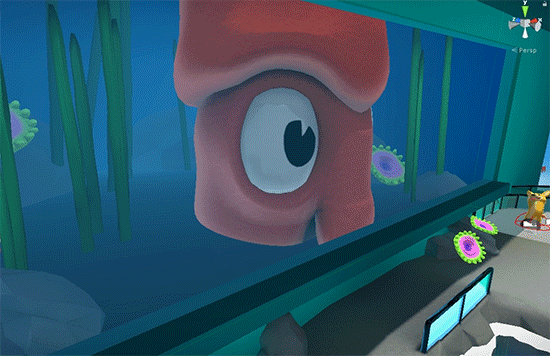
Smush tech™
Squid Smush—An additional effect that really help sells the squid being in a tank is smushing the squid against the glass. Here’s the breakdown:
Add a shader prop to pass the world Z position to define the smush plane.
For any verts that go past this Z position in world space—clamp them back to that Z position, push them out a bit on the X/Y axes, and brighten those pixels to show more light is captured by the surface.
Right shows what the grass mesh looks like before and after my Geometry Shader.
Geometry Shader Grass—Around the time I started adding bits of detail to the Overworld, The Legend of Zelda: Breath of the Wild came out. Its beautiful grass inspired me to play around with a relatively modern feature- geometry shaders. This is a third type of shader functionality that, unlike vertex or fragment programs, can create new geometry based on passed in data. Here’s the breakdown:
To layout Sausage Sports Club’s grass I place lots of grass generator gameObjects around the scene and then use a ContextMenu to force a bunch of random verts to be placed within a specified primitive shape.
In the geometry program, a blade of grass is created at each vertex on the mesh and then bent based on passed in size, wind, and time parameters.
Left is the effect in action, Right shows an example mask mesh.
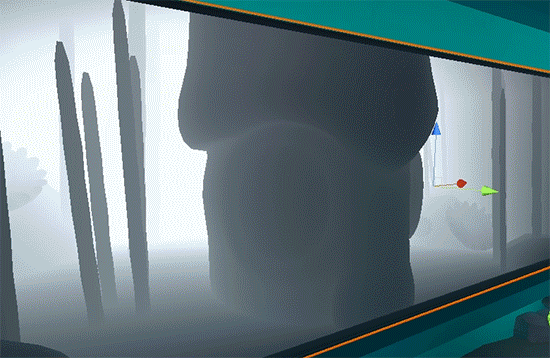
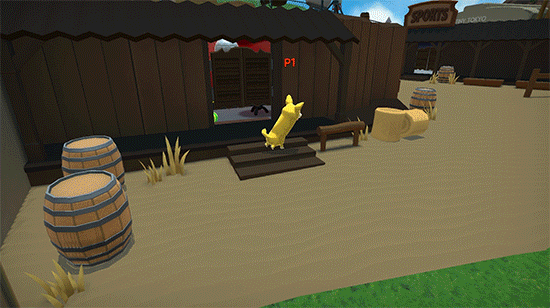
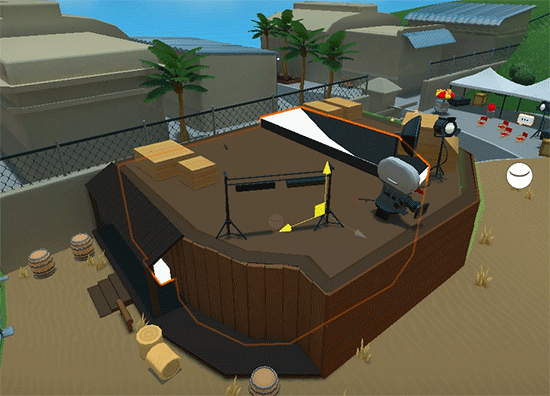
Indoor Mask—As the Sportsville biome of the Overworld is the last section to be unlocked, I wanted to hide lots of surprises and fun things to do there. Its Hollywood-like theming gave me a good excuse to add varied movie sets that feel really different from each other and the rest of the world, but up until that point my only interior spaces were different scenes. I decided to add an effect that renders black anywhere outside the currently occupied interior space. Here’s the breakdown:
I made special meshes for each interior that cover everything I want to shown and added a material that writes a specific value to the stencil buffer.
Then in an image effect, I render plain black to every screen pixel that doesn’t match that stencil value.
Along with this masking effect, I also swapped in and out certain gameobjects when entering and exiting interiors, which allowed them to be bigger than they looked from the outside.

Top right shows the History Buffer, which holds recent motion relative to the camera’s focus position.
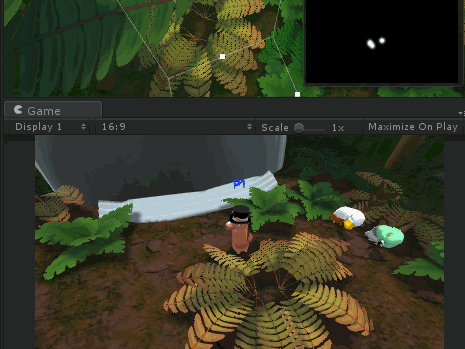
Reactive Foliage—The reactive foliage in the Overworld’s forest biome is based on a technique Naughty Dog shared from Uncharted 4 in a talk a few years back. Here’s the breakdown:
By rendering a top down view of slowly fading particles with an orthographic camera from above the camera’s focus point, we can get a view of motion along the X/Z axes over the last few frames.
By reading that texture in the plant’s vertex shader we can push the plant down if there’s been any recent motion nearby.
In the future I’d like to make this technique more efficient by manually drawing the motion of objects to the texture with Graphics.DrawTexture instead incurring the CPU cost of another full camera render.
Billboarding trees!
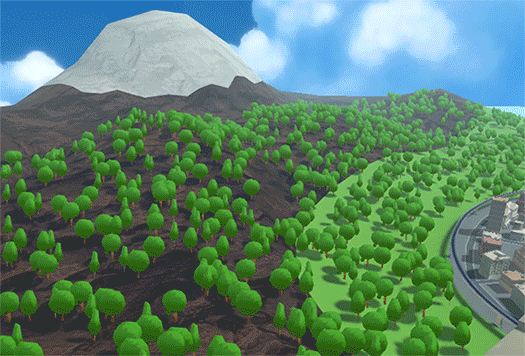
Billboard Trees—In Tiny Tokyo, having lots of background trees was really important to make it feel like you’re in a real city surrounded by forest and countryside. Having tons of 3D trees would’ve meant having many hundreds of thousands of verts in the scene just for background foliage. On low-end platforms, switching those trees to be screenshots of the 3D trees on transparent cards with alpha cutout ended up giving a shorter render time. Unsatisfied with the look of static cards, I wrote a shader to billboard these cards so they would always face the camera and give the illusion of being fully 3D. I could only get this effect working on certain platforms due to differences in shader compilers on various platforms. Here’s the breakdown:
Place 3D modelled out version of the trees in a lit scene against a flat color background. Screenshot then delete the background in photoshop.
Use Unity’s terrain tool to place 3D trees as desired around the scene. Use a script to replace the terrain decorations with prefabs. This is important for swapping in tree cards and because terrain decorations use an ugly shader.
Bake lighting with the 3D trees to get realistic shadows despite our goal of using cards to save polys.
Update the tree prefabs to the low poly tree cards and apply billboard shader that forces verts to face the camera.
Shader Features
CGInclude Files—A handful of Object-Oriented C++ classes in college drilled into me a healthy disdain for duplicate code. As I was working with shaders more in the middle third of development, having the same functionality in multiple files and having to remember to update them everywhere was super frustrating, so I started moving stuff to cginc files. These are just files you can add functions and variable declarations toand then include in any shader file. This was great and I highly recommend building this into your workflow, but there are some drawbacks to be aware of (at least as of Unity 2017.3.1p3):
Saving code changes in cginc files doesn’t automatically propagate changes to dependent shader files. That means you’ll have to force those to re-compile yourself which is annoying and prone to mistakes.
This also means changing any cginc file that has a lot of dependents means all those files need to be recompiled, which can be a long process depending on how many dependents and which features you’re using.
The path you specify to include a cginc file can either be relative to the shader’s location or relative to the asset folder, both of which will break if you move either the cginc or dependent shaders.
Multi-Compile Branches—Another way to avoid having duplicate code between shaders is to combine shaders using the multi-compile pragma to enable or disable certain features in your shader. I used this a lot, sometimes with up to 5 multi-compile branches, so I didn’t have to have many separate files for the Player shader. Internally this works by compiling different versions of the shader for each of the options in all your multi-compiles and then swapping to the correct one based on which keywords you specify on a material. This means for every additional multi-compile option, the number of times your shader has to be compiled into a new version is multiplied, which will really slow down your iteration time after a point.
Baked Lightmaps
After the Kickstarter ended successfully, I was emboldened to try and up the quality bar of the game and spent some time improving my environment art chops. In that process I discovered baking lightmaps made Sausage Sports Club look much higher quality and run much better, especially on low-end platforms. Here are the settings I used to balance visual quality, memory usage, and light bake times:
Indirection Resolution: 0.5 to 1.0 texels per unit
Lightmap Resolution: 25 to 50 texels per unit
Compress Lightmaps: true (this has a big effect on quality and file size)
Final Gather-Ray Count: 16 (this solved artifacts where non-backface culling objects cast shadows on each other)
Environment Lighting-Source: Color-medium gray with a bit of blue
Tiny Tokyo and Overworld with and without baked lighting.
Everything other setting was pretty much default and made less of a difference in quality and bake time. With these settings the Overworld takes 40 minutes, each arena takes 15 minutes, and every other scene takes under 5 minutes.
Particle Effects
Most particle effects in the game are based on assets from the JMO Assets Cartoon FX packs. For the first half of development I thought of it as placeholder, but eventually I got better at making them fit the style and tone I was going for and only needed to redo a few. Some developers argue using asset packs like this is cheap and makes your game feel lower quality, but buying a few of these packs and then kit-bashing parts from various effects and tweaking settings was the fastest, most fun way to add polish.
Inverse Kinematics
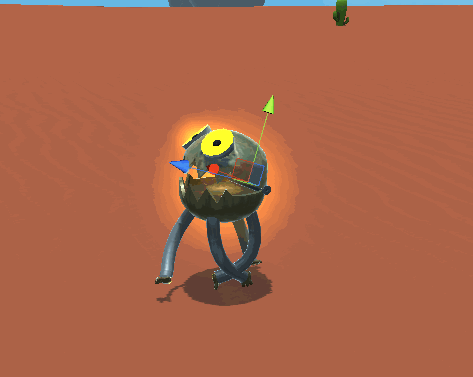
To simulate realistic motion of tentacles and long, tube-shaped robot legs I use the inverse kinematics, which is a technique most commonly used to ensure characters feet align to the ground. Rather than writing my own IK solver I opted to use one of the highest rated and most commonly recommended Unity assets Final IK. I’ve tried out a lot of Unity assets and one thing this asset does that I really appreciate is to give a lot of options on a spectrum that goes from favoring ease-of-use to flexibility. In the single plugin, you get a full-featured bipedal IK script that’s easy to setup and also a flexible, unassuming IK controller that can be used for unusual cases like mine.
In both my uses cases, I wanted long joint chains to try and reach towards a moving target while staying within a believable range of motion. With this plugin it was as easy as adding components along the joint chain, tweaking the constraints, and passing a target position to the solver each frame. In my worst case, there’s up to 13 joint chains with 4–6 joints each running the solver once per frame and the performance cost is close to negligible even on low end platforms.
Some lessons learned from the tentacles:
Use sine/cosine to add a continuously moving offset to the IK target position to make it feel alive even when the target isn’t moving.
To simulate a kick, pick a target position that’s through/past the kick target and then lock the tentacle into following through on the motion.
Some lessons learned from the robots:
Once a foot gets too far from the body, shoot one ray in our move direction and downwards to pick a new foot plant position, then start a coroutine to move our target position there in an arc motion.
Tilting the body away when turning will help give the sense that the legs are driving our motion and the body is trying to keep up.
Shameless Plug
Thanks for reading, I hope you found this valuable. If you’d like to see more content like this please support my work by checking out Sausage Sports Club and sharing it with a friend. It’s out now on Steam and Nintendo Switch!
Read more about:
Featured BlogsAbout the Author(s)
You May Also Like


