


Daily news, dev blogs, and stories from Game Developer straight to your inbox
Sponsored By
Featured Blog | This community-written post highlights the best of what the game industry has to offer. Read more like it on the Game Developer Blogs.
How we achieved high quality graphics and kept performance on Angest for GearVR (Part 2)
Second part of techniques and tricks used to achieve high quality graphics while keeping performance used on Angest for GearVR
12 Min Read

(Disclaimer: Teofilo is now Senior Engineer at Archiact Interactive but worked as Core tech engineer at Black River Studios during the development of Angest)
This article was written in collaboration with Janderson Lima (Technical artist, Black River Studios).
In this article, we continue the series of posts (Graphics and Optimization - Part 1 and Management of Scenes and Takes) related to our recent released game, Angest. Angest is narrative-driven game made by Black River Studios (Finding Monsters Adventure, Rococo VR, Rock & Rails) available for GearVR. Our previous performance related article was about some techniques that we used to reduce the number of draw calls in our scenes; here we talk about techniques and tricks used to achieve the lighting, color and other visual effects desired for the game.
GearVR is a very restrictive platform resource-wise speaking. Despite the limitations, we do wanted to have high quality graphics while keeping the performance demanded by Oculus (60fps). In order to achieve the results desired, we needed to resort to tricks to fake visual effects that would demand too many resources. Those tricks are detailed in the next sections.
Preparing the environment
Before explaining the visual effects let’s recapitulate some of the steps we take to save resources in terms of processing. As more resources we have available, more budget we will have to improve visual effects. I’m not going deep into this because these steps are well referenced over there (here, here, here, here and here, just to cite a few), I’d like just to reinforce the importance of keeping your shaders simple; reducing overdraw; and, compressing textures. Those play a very important role in keeping our resource usage low.
Artists at Black River Studios create shaders using ShaderForge, which is an awesome tool, however most of the code generated is placed at fragment shader and it might also generate redundant code. Be aware also that some options in ShaderForge add a second pass to the shader (remember to select ‘Single directional’ in ‘Light Count’ and to tick ‘Force no custom shadow pass’ in ‘Experimental’). Depending on the complexity of the shader, we need to refactor the code manually once the artist finishes it. What we usually do is:
To move constant computations to script and send final value via uniform;
To move all possible computations from fragment to vertex shader;
To remove redundancy;
Your texture does not use Tilling and Offset? Remove TRANSFORM_TEX() usage.
If not using Unity’s fog remove lines (or untick ‘Receive Fog’ in ShaderForge’s ‘Blending’):
#pragma multi_compile_fog
UNITY_FOG_COORDS(x)
UNNITY_TRANSFER_FOG(o,o.pos);
UNITY_APPLY_FOG(i.fogCoord, finalRGBA);
Shader optimization might be a bit tricky, be always measuring the effect of your changes using profiling tools such as Mali Offline Shader Compiler, Mali Graphics Debugger or Adreno GPU Profiler.
Overdraw
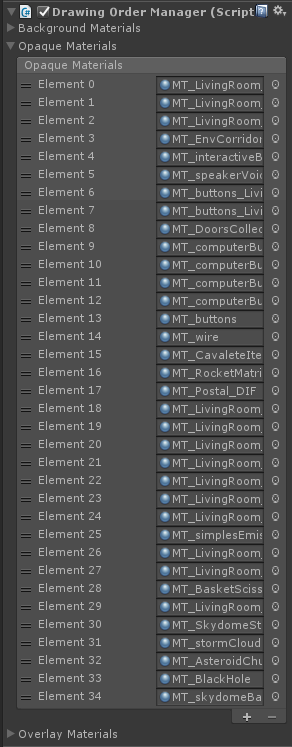
We reduce overdraw by sorting materials properly (opaque in front-to-back order) using a script where the user sets an array of materials in the order they have to be drawn (Figure 1). This script was useful because we had materials shared between scenes (bad practice!) that had a different order at each scene.
Figure 1 Example of Drawing Order Manager usage. The drawing order is set from the top element to the bottom one in the list.
Texture compression
We know that we must always compress textures. With a few number of textures and having them compressed: there will be less data to be copied to memory, faster loading times and your device will take more time to get hot or overheat. In GearVR case, we must always use ASTC. What people sometimes do not know is which ASTC option to choose or what they mean.
ASTC is a texture compression format developed by ARM and AMD. In (very) short, the texture is divided into blocks of pixels with 128 bits per block for storage. We can then choose a block dimension from 4 x 4 pixels up to 12 x 12 pixels. Well,
(128 bits)/(4 x 4) = 8 bits per pixel;
(128 bits)/(12 x 12) = 0.89 bits per pixel.
We can conclude that the smaller is the block (4 x 4), the more bits per pixel we will have, i.e., more quality and higher size; whereas a larger block (12 x 12) means less quality and lower size. For comparison sake, a true color RGB 24 bit texture with no compression has 16 MB; ASTC compressed 4 x 4 has 5.3 MB; and ASTC compressed 12 x 12 has 0.6 MB. Now it is up to you to choose the block size that suits better the result you want to achieve. And, finally, do not forget to compress your lightmaps.
Static lighting
For our static lighting we bake lightmaps and that demands preparing the UVs of our 3D models. In Unity the UV2 is used for lightmapping. The UVs of the objects can be either opened by Unity or can be made manually. For better lightmap results we opted for doing it manually where:
We can have a better resolution for Lightmap Atlases, avoiding unused space chunks; and
We can hide seams, avoiding cuts in the mesh of objects with low resolution maps.
Also, it is important to use better resolution for objects that will appear near the camera.
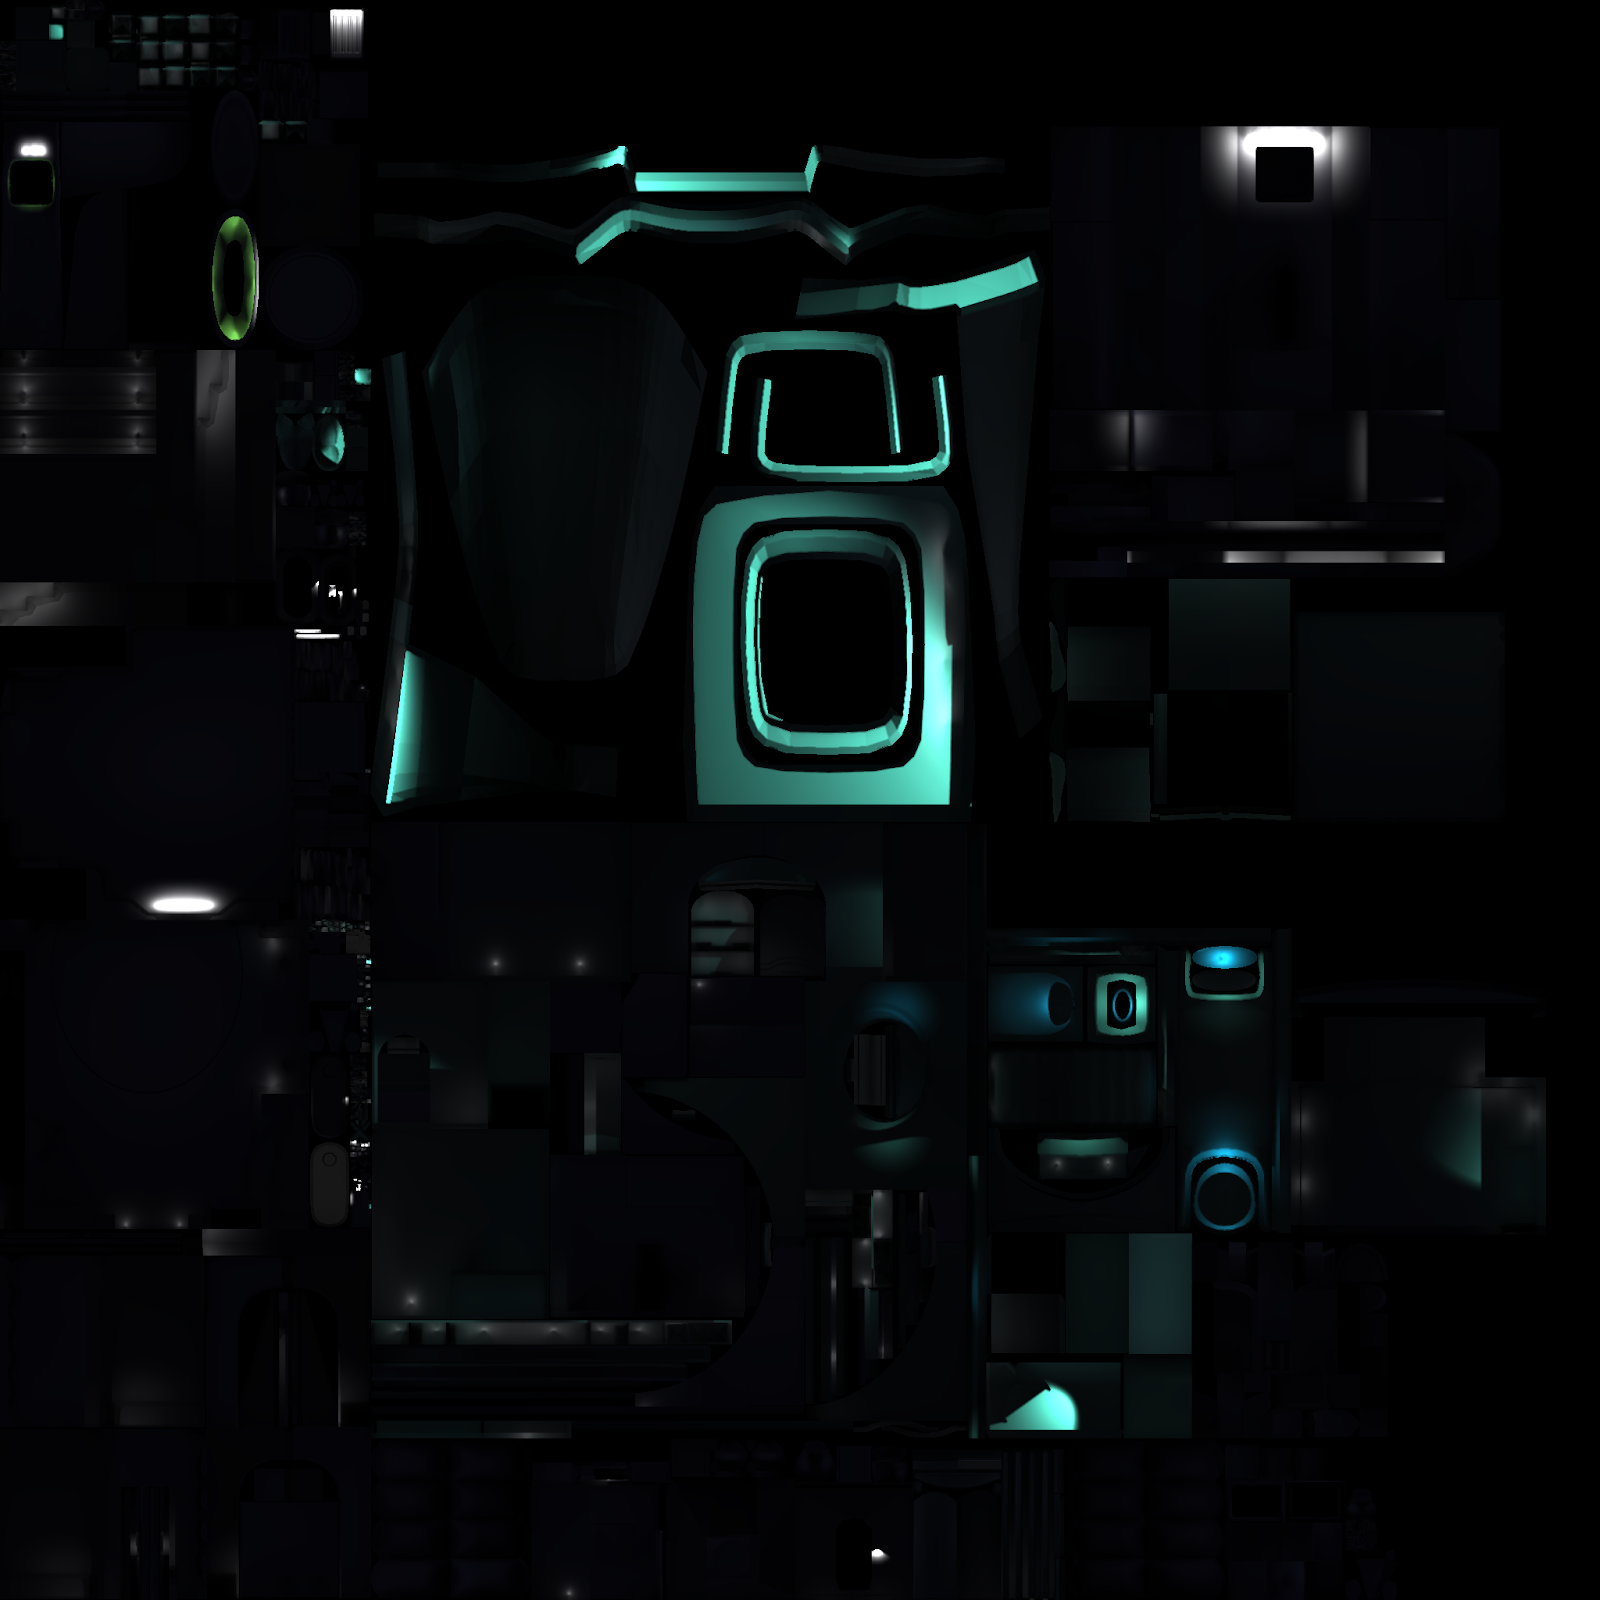
Figure 2 Lightmap example.
Sometimes we want to use different lightmaps to give different moods to an environment, or even to be able to change them dynamically. In the Living room environment, for example, the player can use a switch to turn lights on or off (Figure 3). Putting this system to work was a bit challenging.
Figure 3 Example of Lightmap transition.
The idea is pretty simple; it is just a lerp between lightmaps. However, we need to be careful when setting up the lightmaps because Unity organizes the UV2 of a scene in an atlas during the baking process. Then, every lightmapped object requires its UV2 to be in the same atlas position.
Figure 4 Different lightmaps used in Living room environment (GIF).
The atlas is organized according to the game objects transforms; then position, rotation and scale must be the same for all objects in the scene. Lightmaps transition will not work if we have, for example, a lightmap with the door open and another one with the door closed.
Furthermore, our shader recognizes only one lightmap at time. That is ok for indoor scenes, but for outdoor scenes, that contain large area spaces, it can be a problem.
Multiple lightmaps allows for better lighting setups in an environment, however, one must also be careful about the memory usage when resorting to them. Even compressed lightmaps can have about 5MB each. So it is important to weight if the mood change expected for the environment is worth for the cost involved of using multiple lightmaps.
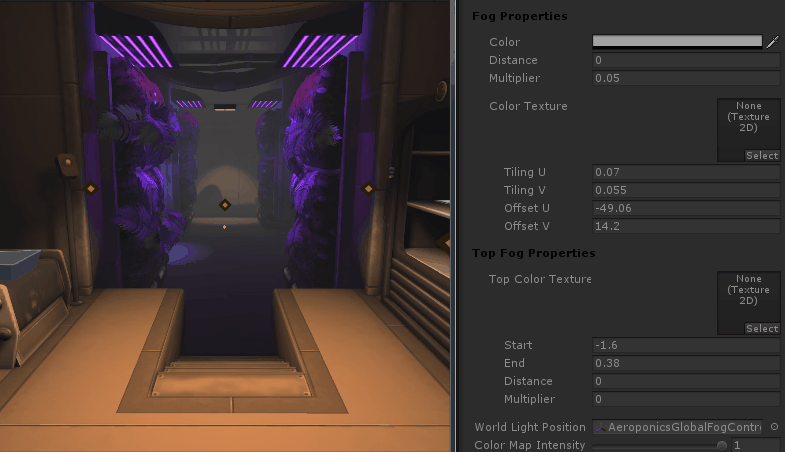
Texture-based “dynamic” lighting and “volumetric” fog
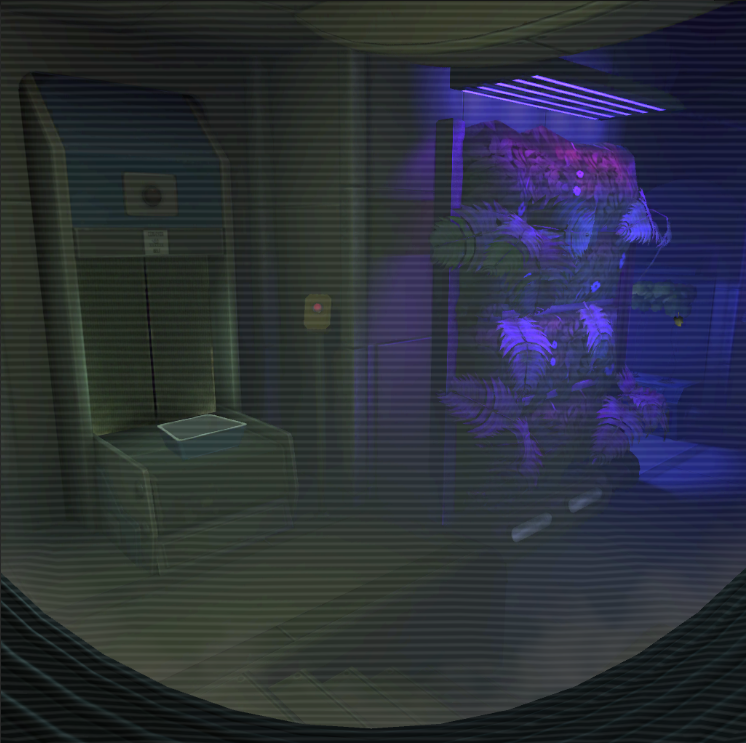
The Aeroponics environment in Angest has different light colors and several dynamic objects, such as tools and vegetables. The problem here is that the shading of dynamics objects gets weird as soon as one takes them to different lighting conditions. Since this scene was already overwhelmed we couldn’t resort to use some dynamic lighting or light probes anymore.
The solution our technical artists found was to map a small texture (32x32 texels) to world coordinates (top view) and to sample this texture in object’s shader according to its position in the world (uv = xz). Images below show the aeroponics top view (left), the “light” texture (top-center) and an object being lit using the technique (right).
Figure 5 Aeroponics top-view (left). Dynamic color/Fog color (top-center). Top fog color (bottom-center). Object being lit with technique (right) (GIF).
We use this kind of light texture also for coloring the custom fog we implemented. Our custom fog is similar to Unity’s linear custom fog, with few differences:
We use the light texture to give different colors to the fog around the world;
We add another texture for coloring the top of the fog; and
We can control where the top fog starts and ends.
Figure 6 Custom fog (GIF).
With this technique we were able to achieve the visuals we wanted with a fair cost on performance. Maybe the most difficult part of using it is that it might be hard to map textures to world coordinates.
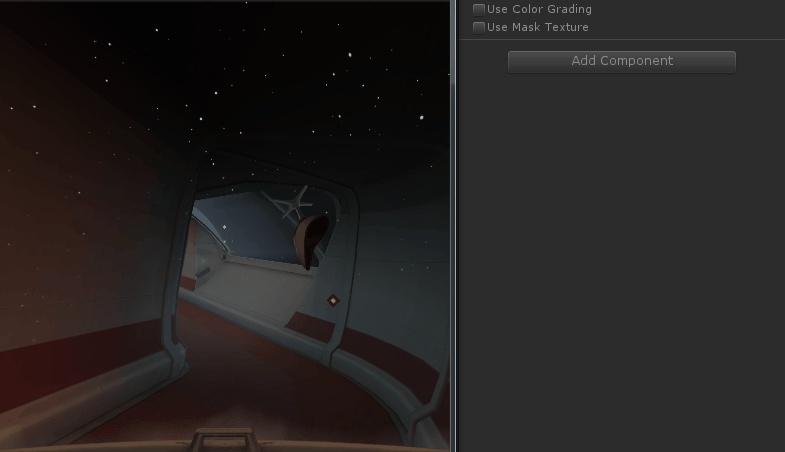
Faking color grading
In the early development of Angest we had a problem: the artists were not happy with the resulting colors in the environments once they were assembled in Unity. They needed to be retuning textures until achieving the colors they wanted at beginning. We considered using a color grading post effect, but it was unfeasible given the GearVR constraints, then we decided to fake it. What we did actually was to add a function to all our shaders allowing for the artists to globally tune colors via RGB or HSV. As one can see in the image below, we also added the option for using a mask texture mapped to screen space. That mask texture was useful at some situations where we needed to have a dream mood, for example.
Figure 7 Color grading component (GIF).
With this technique we could achieve the results seen in Figure 7. Ideally, it would be nice to have a true color grading, but the results we had were quite satisfying to our purpose. The main drawback of this technique is the need to include the code in all your shaders, what might take a lot of time if you have many of them.
Cubemap tricks
In Angest, we also resorted to some effects using cubemaps. The first one is seen as soon as the game starts, when you have the first checkpoints to pass through. As soon as you move from a checkpoint to another, you’ll see the environment fading out and other part fading in. This smooth transition is a result of an interpolation between the sky cubemap and the mesh color, where the interpolator is the radius of a sphere centered at a user-defined location. This effect was used in many environments and an example is shown in Figure 8.
Figure 8 Cubemap transition (GIF)
(SPOILER ALERT) There are spoilers about the story in the next paragraphs.
.
.
.
Another trick using cubemaps was used in one of the endings of Angest. In this ending, the player becomes Konstantin and start seeing the world from its point of view. We then needed to show almost every scene as its point of view, in a few seconds. At first, we were loading each scene again with a new take (See more about the take system here), but loading scenes takes a lot of time and that was not working as we expected.
The solution we found was to save each scene as a cubemap and then just to change cubemaps instead of loading each scene again. That was possible because in this ending there is no interaction but gazing, so the cubemaps are barely noticeable. As result we had similar visuals without suffering with loading times.
Figure 9 Aeroponics cubemap (left) and lower deck cubemap with different mipmaps (right).
Those who played the game know that at some point we find Konstantin with a broken screen. We needed then to be able to represent its point of view in that situation too. In this case, what we do is to increase the cubemap mipmap within areas where the screen glass is broken as one can see in the Figure 9 (right).
Conclusion
Those were some of the techniques and tricks we used to achieve the great visuals seen in Angest for GearVR. This concludes the graphics and performance story that I started in the previous article. You can find more info about the development of Angest in our other article about the Take and Event systems written by the project Lead Engineer, Victor Hasselmann. Finally, I would like to thank the very talented team at Black River Studios, but in special: Kleverson Santana (Core tech engineer), Gregory Oliveira (VFX artist), Janderson Lima (Technical artist), Alexandre Soria (Technical Arstist) and Flávio “Dante” Villalva (former VFX artist at Black River Studios) that somehow contributed to the implementation of the techniques presented here.
Read more about:
Featured BlogsAbout the Author(s)
You May Also Like


