


Daily news, dev blogs, and stories from Game Developer straight to your inbox
Sponsored By
Featured Blog | This community-written post highlights the best of what the game industry has to offer. Read more like it on the Game Developer Blogs.
Fast per-pixel lit volumetric fog without depth pre-pass
In this blog I briefly describe the standard approach to implementing volumetric fog and then show the approach we used in Zombie Hunter, Inc., which produces fast per-pixel lit volumetric fog and works without requiring the depth pre-pass.
26 Min Read

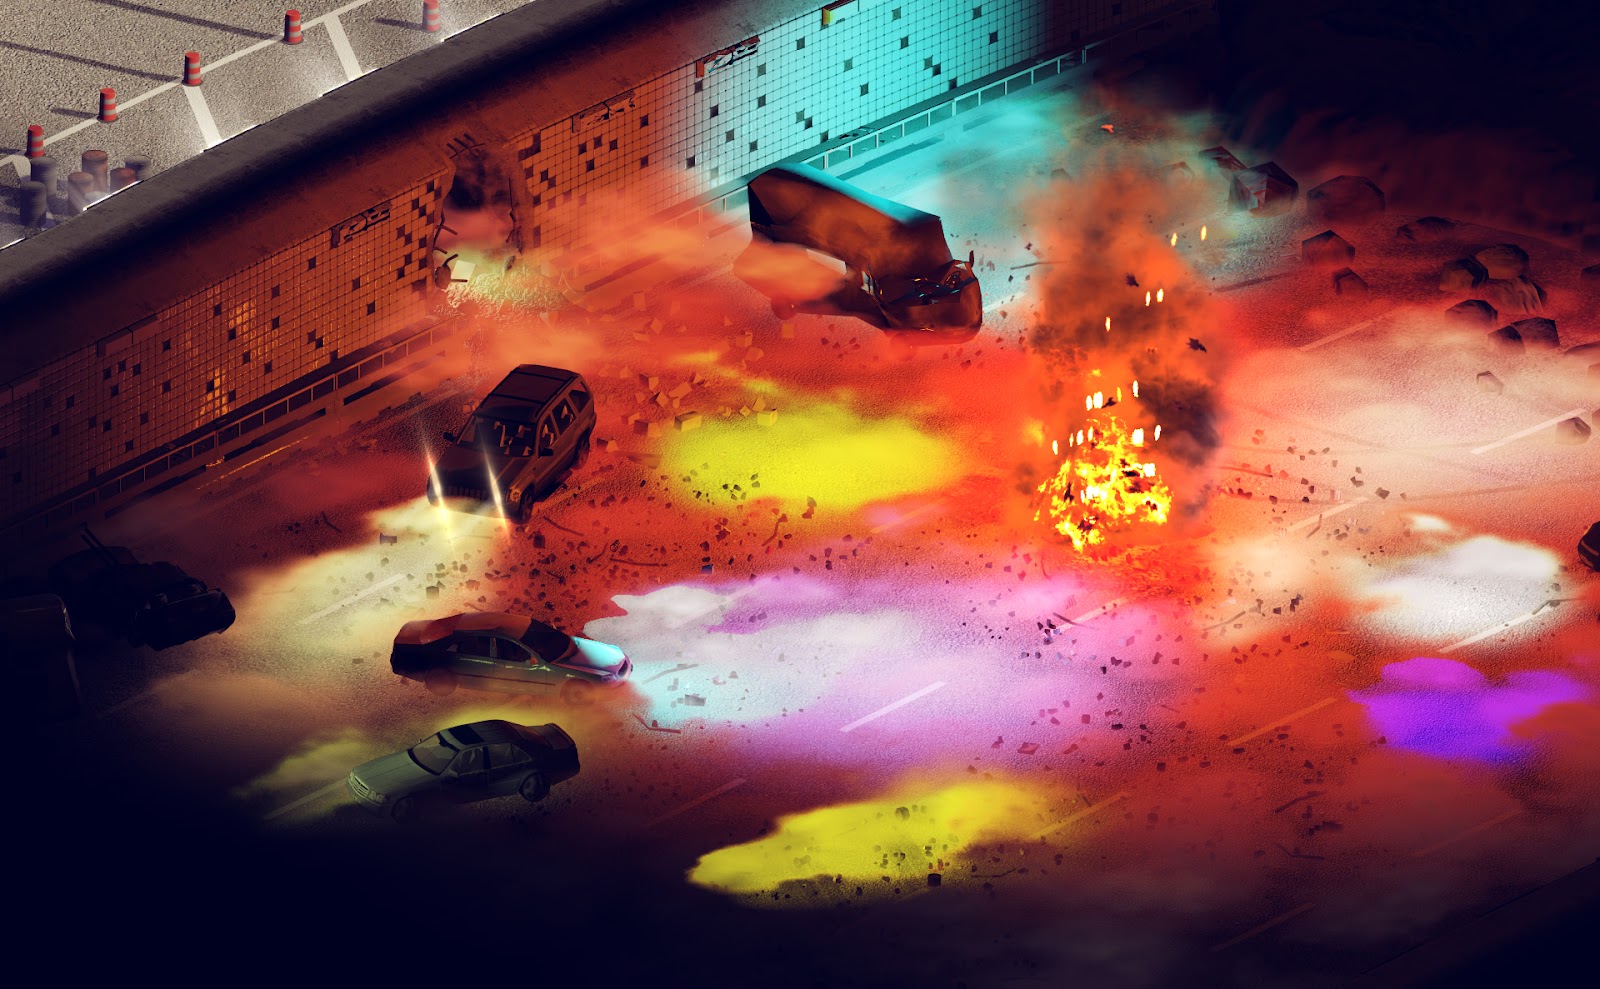
Lit volumetric fog in Zombie Hunter, Inc.
Volumetric fog has become a very popular feature in modern games. When made right, it can greatly enhance the experience and atmosphere of nearly any game. Unfortunately, there are very few sources that are readily available about this topic. In this blog I will briefly describe the standard approach to implementing volumetric fog and then explain the approach we used in Zombie Hunter, Inc., which produces fast per-pixel lit volumetric fog and works without requiring the depth pre-pass. This blog might be interesting not only to those trying to implement the volumetric fog as our system utilizes a neat way to blend depths which might be useful outside of this context.
Fog is an atmospheric phenomenon which occurs when masses of cloud water droplets float near the ground. In real life certain combinations of light, shadow and fog can produce mesmerizing effects.
Unfortunately in video games, such effects are difficult to render in real time. The main problem lies in the fact that during the history of computer graphics, GPUs have always had trouble superpositioning any two objects (or even pixels) against each other. On any GPU each fragment is always being shaded (computed) in parallel, which means it has no idea about other fragments being shaded at the same moment. One tool available to GPUs that prevent scenes from looking like a complete mess is the depth buffer (or z-buffer). A depth buffer is nothing but a texture that stores depths (distances from camera) of all the pixels being shaded. The unique ability of this texture is the fact that the GPU can read from it, make a decision based on what it reads and then write into it DURING THE SAME PASS. I am underlining this because for some unknown reason the Gods of hardware decided that this ability is too powerful to be given to mortals. To date ,and in the immediate future, no other texture we (graphics engineers) use has this capability , which is really limiting us on many features we could potentially implement.
With z-buffer, the GPU can read, make a decision, and write into it during the same pass. It uses this ability to sort objects on screen in a very simple way: if the depth of a pixel being shaded is further away from the camera than the one that is currently in the depth buffer, the former pixel is discarded. At the end of the day, we send a bunch of models to the GPU in a random order and end up with a picture, where pixel representations of those objects are nicely sorted front to back with nearby pixels covering those further away, just like in the real world.
The important thing to note here is with the z-buffer, GPUs can only make two decisions: to draw or not to draw. It cannot do ANYTHING else . This is where our fog comes into play. Fog is translucent, it PARTIALLY obstructs the color of objects behind it with it’s own color. This way in real life you can often see things “swimming” in fog:
And here is an example of how video games do it:
Operation Flashpoint and many other older 3D games tried to model fog by drawing many semi-transparent sprites. However, because the GPU can only make two decisions with its depth buffer, they usually ended up with these terrible artifacts, where fog sprites were literally cut in half by other 3D geometry in the scene through the depth buffer. In action this looks even worse as you can actually see the sprites move through objects.
“Distance fog” is a different approach to implementing fog that does not have this problem. Distance fog implies that you simply fade the color of an object when you draw it depending on its distance from the camera. There are even many techniques to contain this fog into a volume instead of making it full-screen. You can read about one of these techniques here.
However, the distance fog approach has a major drawback: you cannot add any textures to your fog this way - you can only have a boring linear fog that gets thicker the deeper in the fog you go.
Of course there is a way to make the fog look more natural, “volumetric”, AND add a texture to it, but this approach was not very practical before deferred rendering came into play.
This technique is called “volumetric fog” and I figured out how it works while I was looking into the way Battlefield 3 implements its fog system. The simple answer came to me when I saw that they use a depth texture when they render their fog sprites.
Battlefield 3 features state-of-the-art lit volumetric fog
In a standard approach to soften the fog, you need to build a depth buffer of your own. To do that you need to render the scene (all the other objects, except fog) into a texture but instead of writing color as usual, you should output the distance of a pixel from the camera. There are lots of useful guides on the internet about how to do that, just keep in mind that to make it work, you might need to either change the format of your resulting texture so that each channel can store more than 8 bits of data (8 is not enough for depth), or you need to spread your large 32-bit depth variable across 4 (or 3) channels; which can be more complicated but is generally more efficient.
An example depth texture. The darker the color - the closer the pixel is to the camera.
Now that you have a depth texture, you can read from it whenever you draw a fog sprite and modify the sprite’s alpha value, depending on how close it is to the objects in the scene. If your current sprite’s pixel is obstructed by some object in the scene, you set the alpha to zero (or discard the pixel) - just like the z-buffer would; however, if your fog’s pixel is closer to the camera, you can actually measure the distance between the fog’s pixel and the nearest object behind it in the depth map and then use this value to smoothly modify your alpha. Here’s an example of the formula we used:
FinalFogAlpha = max(min(FogSpriteAlpha, (SceneDepth - FogDepth)*DepthModifier), 0);
FogSpriteAlpha - is the alpha value you read from the fog sprite texture or “the fog color”;
SceneDepth - is the depth you read from your depth texture;
FogDepth - is the depth of your fog’s pixel;
DepthModifier - this variable should be hand-picked, given the average depth spread in your scene.
The only variable worth talking about is DepthModifier. In theory, you need to change it manually until your fog looks natural . In practice, the variable should be connected to the value of the average depth spread in your scene. It should be connected to the average minimum and average maximum depth values in your scene. How you do this is up to you. We did not have this problem, because the average depth spread in our top-down isometric game is mostly the same. I can only suggest an article called “Making it Large, Beautiful, Fast, and Consistent: Lessons Learned Developing Just Cause 2” from the first edition of GPU Pro (“GPU Pro : advanced rendering techniques” edited by Wolfgang Engel, 2010). Please note that just like with lens flares and bloom, you will need an uncompressed 16-bit precision texture for your volumetric fog, keep that in mind if you see any square-ish artifacts when you render the fog.
Implementing volumetric fog in a standard way is easy when your engine’s rendering pipeline already produces a depth texture, like most modern deferred rendering engines. However, in Zombie Hunter, Inc. we have developed a unique light culling system based on Damien Trebilco’s paper “Light Indexed Deferred Lighting” (2007). When we started building our game we actually used the standard deferred renderer, but as time moved on, our artists constantly asked to add the support for lit translucent models into the game. Then one day I stumbled upon this article by MJP which totally blew my mind. The approach described there allows you to render anything you can imagine on screen with a traditional forward pass, light it up with any number of lights you wish, and have a smooth picture by utilizing one of the best AA systems out there: MSAA. The technique had a problem though: the number of lights was limited per pixel and increasing it was a challenge, especially given that we are using XNA 4.0 which implies DirectX 9 and Shader Model 3. But, at the end of the day, we found a way to do it and now we have one of the most unique and powerful lighting systems out there. I plan to dedicate a separate blog post to that system in the near future, but right now let’s get back to volumetric fog.
So I figured out how the “standard” volumetric fog is done, and immediately understood that we cannot do it this way. Firstly, our renderer does not produce a depth texture and I did not want to render it just for the volumetric fog as it can get a bit expensive. Secondly, since you cannot add semi-transparent objects into the depth texture, volumetric fog will always fail on objects like leaves and glass. Finally, even if we DID render the depth texture, we would be forced to turn off MSAA for the picture to look consistent. The last point was not obvious and in the end we actually decided to render a depth texture because we wanted to add SSAO at some point in the future. The truth is, with the standard volumetric fog and MSAA ON you get VERY rough edges of every single object the fog passes through simply because MSAA cannot be applied to the depth texture. At the end of the day standard volumetric fog completely negates MSAA.
Standard volumetric fog completely negates MSAA in a forward rendering scenario. Note hard edges on models on the left and smooth edges on the right.
I was able to get around this issue by doing things the other way around: I rendered the volumetric fog’s depth into texture, instead of the scene’s depth. Then I read this texture whenever I rendered objects onto the scene and modified their final color given the fog (just like with “distance fog”). As I have a forward renderer and have access to all the lights for the given pixel when I draw an object, I can simply calculate the attenuation for the fog’s depth for each light and have a pretty fast per-pixel lit volumetric fog.
Unfortunately, just like in most cases, implementing such system was much harder than formulating it.
Firstly, I had to properly choose the texture type for this operation. In our top-down scenario, the depth spread was pretty small and I could easily get away with 10-bits of precision for the volumetric fog’s depth. There is a popular texture type featured in many GPUs that allows you to store three 10-bit variables into the red, green and blue channels and have 2 bits in the alpha channel (R10G10B10A2). That was perfect for me as I could write the color I read from the volumetric fog texture into the red channel, the pixel’s depth into the green one and even store the color modifier for the fog in the blue channel (0 was black fog, 1 was white fog and 0.5 was the custom fog color, set for the entire shader). Moreover, since I am working with XNA 4.0 that was the only texture type that allowed me to filter the values I read from this texture. Remember, I was working with fog which has no rough edges, that is why I could easily filter (blur) the depth values. The latter in hand allowed me to use the texture 4 times smaller than the screen (0.5 width and 0.5 height of the screen buffer) and have a boost in performance over the standard volumetric fog, where all the fog had to be drawn into the large screen buffer.
With that out of the way I started working on the shader and in half an hour I had the system working. And it was perfect! The single fog sprite I rendered blended nicely with surrounding objects. However, when I rendered additional sprites I immediately saw a problem: the edges of the fog sprites were blending in a terrible way!
The reason for this was the way I actually blended the depths. I used the minimum blend because that seemed to be the most prudent solution. I immediately switched to alpha blending, where alpha was the texture alpha I read from the fog sprites. The blending was better, but not perfect. Then I started using the square of the fog’s alpha instead of the actual value. This finally produced seamless blending, but had a different problem - fog formed noticeable “puddles” with rough edges, which looked quite ugly.
The solution to this puzzle was not trivial and it actually took me some time to understand what was going on. The problem arose from the color with which I initially filled the volumetric fog texture. It was white initially, which basically meant that depth-wise all the fog pixels were as far away from the camera as possible. The alpha blending formula works as follows:
FinalColor = SourceColor*SourceAlpha + DestinationColor*1-SourceAlpha
SourceColor - is the 3-value rgb vector you output from the shader;
SourceAlpha - is the alpha value you output;
DestinationColor - is the rgb vector stored in the texture you output and blend data into;
As the alpha value gradually changes across the fog’s texture from 0 to 1, the final color will always be skewed towards the color you use when you clear the texture. Mostly in situations where output pixels have low alpha. I tried different colors to clean the texture with, but nothing worked well, it was obvious that I needed a dynamic color, different for every pixel in the texture. So what I ended up doing was rendering the fog twice: the first time with minimum blend for the depth and the second time with alpha blending for all the three components. This produced a near perfect result. The only problem was the return of the seams, which appeared because I introduced the minimum blending again. They were not as noticeable as before, but still annoying. I mitigated this issue by clearing my texture with white color and adding the following formula into the minimum blend shader:
float fixer = max(0.1f - Color.r, 0);
fixer *= fixer*100;
depth += fixer;
This smoothed the edges a bit and masked the seems. You would still see them, but only when you deliberately search for them.
That’s how we ended up with fast, smooth per-pixel lit volumetric fog that does not require a depth pre-pass.
So just to recap:
You need a fog texture which should have a 16-bit precision and no compression. One channel is enough though - you can only use it as your alpha value.
In your engine you need a render target which will allows you to store the fog’s depth with precision, similar to your scene’s precision. This texture should also store the alpha value of the fog. If you can afford it, with three more channels (or two more if you somehow factor alpha into these three channels) you can have a fully-colored volumetric fog. And I am only talking about the “native” fog color.
You clear your render target to white (but fog alpha value - red channel - to black) and then render the fog twice. In the first pass you set the blending options to minimum blend and render the depth (and the color modifier, if you are using it) with the smoothing code in the shader. Do not write to any other channel here. In the second pass you render the fog with blending options set to alpha blend and store all the fog values you need. To make the fog extra smooth, make sure you output the alpha value of the fog in squares. To make it right, output the naked alpha value in one of the color channels as well as in the alpha channel (remember the blending formula), otherwise you will apply the squared alpha to all the other channels.
When you render your models, you read from the fog render target and tweak the fog’s alpha value given with the example formula shown earlier in this blog.
Then you can compute the fog’s lighting utilizing the fog’s depth at hand. If you are planning to use this technique with deferred renderer, you can use the second light accumulation texture to store the fog’s lighting while you compute the scene lighting. The way to compute the lighting might be different, we only used the attenuation formula.
Here are the shaders we used to store the fog parameters:
The minimum blend shader (only write Green and Blue channels):
half Color = tex2D(LinearDiffuseSampler, TexCoord.rg).r;
clip(Color.r - 0.000001h);
half fixer = max(0.1f - Color.r, 0);
fixer *= fixer * 100;
Depth += fixer ;
Density += fixer ;
return half4 (0, Depth, Density, 0);
The alphablend shader:
half Color = tex2D(LinearDiffuseSampler, TexCoord.rg).r;
clip(Color.r - 0.000001h);
return half4(Color.r, Depth, Density, Color.r);
I must admit that I did not test this technique thoroughly. On our PCs GPA (Intel’s graphics performance analyzer) showed, that in a scene with many lights, models rendered with the volumetric fog code cost roughly up to 25% extra time for the GPU to process than those without the code. And that is when fog actually spread over the entire screen. The price for the two fog passess was negligible due to the small texture size (1/4).
Here is the final result used in a scene with lit semi-translucent trees:
We are now finishing the demo for Zombie Hunter, Inc. and soon you will be able to see this technique in action. If you want to know the latest news about our project and read the story of our unique lighting system once it’s out - subscribe to our newsletter.
Read more about:
Featured BlogsAbout the Author(s)
You May Also Like


