

Trending
Opinion: How will Project 2025 impact game developers?
The Heritage Foundation's manifesto for the possible next administration could do great harm to many, including large portions of the game development community.
In this Game Developer magazine reprint, a gymnast and UFC developer dives into how the center of mass of a character is the basis for all realistic motion -- and delivers the technical know-how to achieve it.
May 20, 2010

Author: by Eiko Oba
[In this Game Developer magazine reprint, a gymnast and UFC mixed martial art game developer dives into how the center of mass of a character is the basis for all realistic motion -- and delivers the technical know-how to achieve it.]
A common complaint from consumers regarding computer animation (especially in the video game industry) is the "puppet-like" movements characters often seem to perform. When two character models come into contact with each other in a fighting game, or when they must climb structures in an acrobatic manner, the difficulties become more pronounced.
In this article, I'd like to talk about some techniques for analyzing human movement that can be applied to make your hand-keyed character animations look more natural.
Before joining the 3D computer software industry I was a competitive gymnast, and also worked as a gymnastics coach. When I was a gymnast, I would practice a move over and over to achieve the right timing, speed, balance, and angle.
I repeated and adjusted my technique until I could execute the move perfectly every time. I developed my skill to perform, analyze, and teach gymnastic moves through those experiences.
While I was coaching, I also studied physiology and kinesiology for sports science in university, focusing on the mechanism of the human body in movement. I learned how to analyze the physics of human motion using mathematical calculations, which lead to an understanding of how muscle generates the force to perform a move.
I was hired by Kung Fu Factory to look over the animation team to help them improve the quality of the company's character animation. Over the years I've come to realize that animating characters in 3D space is similar to coaching gymnastics, and my analysis of movement was quite relevant to the creation of quality animation. If you can analyze a move and understand the kinetics behind it, you can create better, more natural animation -- and faster, too.
Some skilled animators have the ability to picture and recreate human movement easily. But most of us can't. At our studio we often encourage animators to use reference videos showing a person performing the action they're meant to animate. This helps them understand the movement better, but video can only go so far.
One critical, and often undervalued element of movement is an understanding of the character's center of gravity, or center of mass. I will refer to both as the "COM."
The center of gravity is the point at which the entire weight of a body may be considered as concentrated, so that if supported at this point the body will remain balanced in any position.
Your balance and movements are always affected by gravity. As a gymnast I learned how to control and adjust my body's COM to perform various actions. Tumbling, balancing, and so forth, all require an adjustment of the COM. Some animators I know who are martial artists also understand this concept, so they can see how the COM flows and adjust the character's body appropriately. Adjustment of the COM is something we all do naturally in real life when performing actions like dancing, running, and so forth -- but it's not easy to create this in a fictional character.
Figuring out the position of the COM is not hard when a human is standing up straight. Usually the COM of a human body sits around the lower stomach, which is a little above half his height. On a moving character it becomes more difficult, because the location of the COM will constantly shift.
For example, as you bend forward from a standing position, your COM will start to adjust and move forward as well. Eventually your COM will be so far forward that you'll fall over if you don't do something to regain your balance. This shifting of the COM position during the move represents the main flow of the movement you're performing (in this case bending over). We call it the COM trajectory.
If you can properly animate your characters with the appropriate COM trajectory, they will move much more realistically.
To do this, you have to know the physics behind the movement being performed, and how physics relates to the center of mass. An obvious example is gravity. Every object on Earth is affected by gravity. To understand how gravity affects the COM, physics calculations can be very useful. When I work with animators, I use Excel to show the physics simulation and how the movement is affected by gravity.
In the following section I will show you my process of physics simulation using Excel. I will also show a tool that displays the COM trajectory, used to examine if the COM is moving naturally.
When you animate in 3D, you will manipulate three transform controllers (translation, rotation, and scale). Each of these controllers can be broken down into x, y, and z components. Understanding the relationship between these components is very important.
In games, these movements may need to be exaggerated -- but understanding physics gives you the foundation to create a realistic base. From this base, you can develop or adjust to your animation to meet your expectations for the movement performed.
The advantage of using Excel is that once the formula is set up properly, the calculation result is updated immediately when variables are updated.
Excel can also export a visual representation of how the COM should move in the form of a graph. By doing this, COM translation and rotation is broken down into x, y, and z components, which can be used as a visual aid for reference.
The components will be described on the x, y plane (we'll ignore depth) as x = horizontal and y = vertical.
Characters in 3D software don't have weight. To make something look like it has weight, you'll need to simulate gravitational acceleration. The easiest example is a free fall.
When an object is falling with no acceleration other than what's provided by gravity, the falling distance (y) could be calculated with this formula:
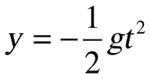
g = gravitational acceleration (= 9.8)
t = time (sec)
y = distance (m)

Figure 1: Examining free fall.
Figure 1 shows this formula in a line chart. Calculating this curve will give animators a good base for creating a realistic fall animation. Take the same acceleration and apply it to the vertical translation channel in the 3D software (which is Z, but sometimes it can be Y depending on the product).
As you see in the formula, this is movement with constant acceleration (g = 9.8). You can see the distance (y) within each time increment is growing little by little. This formula is common knowledge but it's not always utilized for the creation of game animation. If the acceleration is not constant, the fall will look jerky.
The most accurate way to animate proper acceleration is to animate an object frame by frame. If you want to use fewer keys, try adjusting the tangents.
If character A knocks out character B with a strike, character B's body falls to the ground, and gravitational acceleration is applied. If the animation doesn't accelerate when the body is falling, the animation will look "floaty" and will give the impression that the object has no weight.
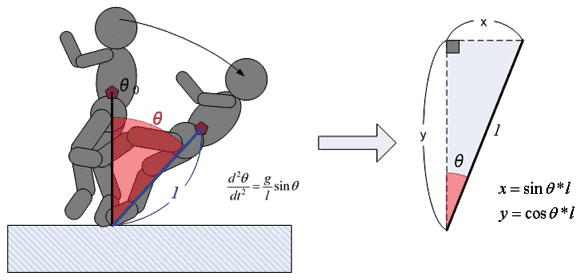
Figure 2: Physics when a body falls.
Calculating the acceleration in this case is not as easy as calculating the gravitational acceleration, because the foot is pinned to the ground. This foot becomes a pivot point and the COM will rotate around the pivot. This results in the COM trajectory being shaped like an arc. This mechanism is complicated, so let's break it down into a diagram. See Figure 2.
This movement could be described as an inverted pendulum with a static pivot. In this case, the distance between the pivot (foot position) and the COM will be defined as the pendulum length (l). For the calculations I'll need the following components.
1) ð (angular position calculated by acceleration)
2) X component (Horizontal translation of the COM)
3) Y component (Vertical translation of the COM)
First I will calculate ð. This is the differential equation that determines acceleration.
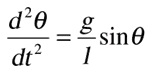
---- acceleration
g = 9.8 (gravitational acceleration)
l = the length of the pendulum
ð = angle [radian]
The first integral of motion found by integrating the formula above is:
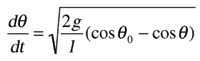
----- velocity
ð0= Initial angle to start
Integrating velocity will return the angle (ð). The result of the simulation is shown in Figure 3 (below).
Once I get the angle ð, the x and y components can be calculated from trigonometric functions, as below. This is also calculated for each time unit in Figure 3 as well.
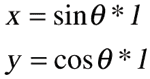
When length = 0.6, if the fall starts from an initial angle of 5 degrees, the angle changes over time as seen in column C of Figure 3 (green border). The value is in radian not degrees. The x, y coordinates are shown in column G (red border) and H (blue border).
The graph on the top right in Figure 3 shows the x, y coordinates. This could be used as a reference to determine the COM trajectory in 3D space. The bottom one shows ð. This could be the rotation curve for the root bone.
Note that I used a simple rectangle rule numerical integration in excel to calculate the ð. When you calculate a numerical integration in this way, the calculation is most accurate when the time interval is small. See Figure 4 for the comparison between the results with two interval steps.
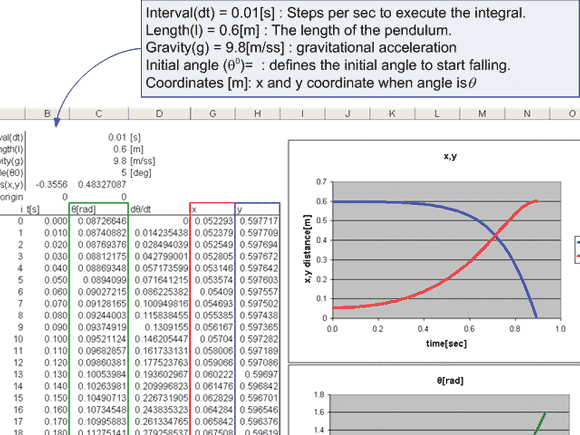
Figures 3 and 4. (click for full size)
In Figure 4, the left side of the table shows when the interval step is 0.01 -- the right side shows the interval at 0.0333. When you compare the time it takes to reach 90 degrees (falling flat to the ground), the time(t) using the interval of 0.01 is 1.320 sec, which is about 0.08 sec faster than the time(t) using the interval of 0.0333. Thus, if you do the simulation with smaller steps, you can get a more accurate result.
If you perform the same calculation in a 3D package, when it's 30fps you would get the same result as the right table, which is not as accurate as the one on the left. If you need to obtain more accurate values, it's ideal to set up "sub-steps" between each frame to calculate a more precise integration.
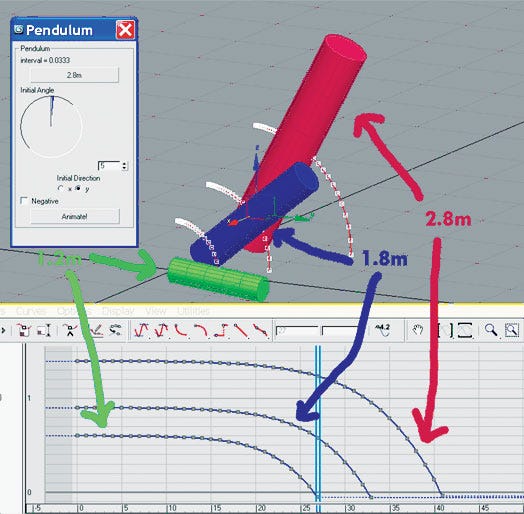
Figure 5: Comparison between three different lengths of pendulum falls.
The same simulation can be done using max script (see Figure 5). The comparison between three different pendulum lengths shows that the falling speed (velocity) is inversely proportional to the length(l).
The result of the simulation in Excel tells you how the COM moves, and you can animate your character's COM to match the result. When you do this, you should use the root bone to move the character, not the COM itself because the COM is not an object that you should manipulate, but rather an animation guide.
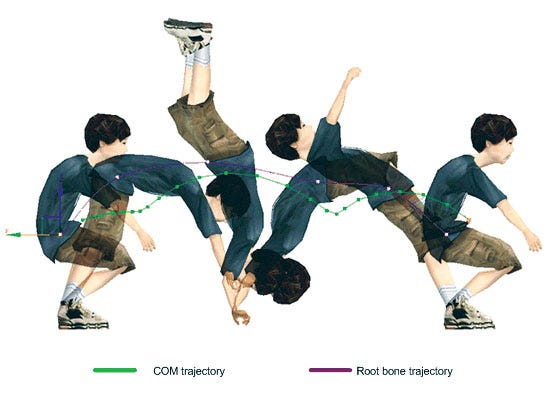
Figure 6: Comparison between COM trajectory and root bone.
Some animators that I've worked with were confused because they believed that "root equals COM." But that's not quite right, because the COM is the center of gravity, and it moves around depending on posture. The difference between COM trajectory and root trajectory is obvious when the body is rotating. See Figure 6.
In this figure, a boy is doing a back flip. As you can see, the trajectory of the root bone is completely different from the COM trajectory. Without knowing this fact, if you animate the root to match up with the COM, your movement would be incorrect.
To help with this, I created a COM trajectory tool to calculate the coordinates of the COM of animated characters, which shows the difference between the trajectories. You can also use this tool to evaluate whether the COM trajectory of the character animation is moving naturally.
When a character is animated, the posture changes from frame to frame which also causes the COM to move constantly. To calculate the COM trajectory, we calculate the mass of the character's mesh frame by frame.
In reality, the human body is structured with a lot of different components like fat, bones, and muscles, and each component has different density (fat is lower, bone is higher). Also, the composition of bodies will vary between individuals.
For our math, we are assuming that the typical human body is roughly the same average density as water (1g/cm3). In this way we can consider an object's weight (mass) to be equal to its volume. After calculating that the object's volume ( = mass), the COM of the object can be calculated with several formulas.
I will explain the concept using a simpler shape; an octahedron. See Figure 7.
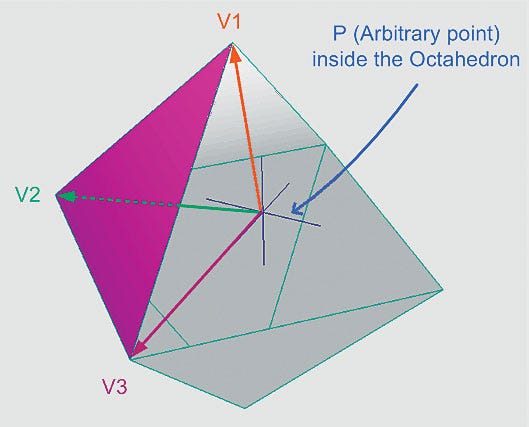
Figure 7: Calculating the mass of an octahedron.
To calculate the octahedron's mass, I am going to divide it into eight tetrahedrons for easy calculation. To do that, I placed an arbitrary point (P) inside the octahedron so that it will form eight tetrahedrons between each face and the arbitrary point. The sum of mass of the tetrahedrons will indicate the mass of the octahedron. The mass of each tetrahedron (Mn) can be calculated using the coordinates of three vertices and an arbitrary point.
Note that in order to get the vertex coordinates that shape the triangle, the order of the vertex has to match with its vertex index so that it can calculate the volume properly.
After the vertices' coordinates are determined, the tetrahedron volume can be calculated with the following formula:

The volume of the octahedron (M) is the sum of the tetrahedrons' volumes. Next, the center of mass (Cn) of each tetrahedron can be calculated with the following formula:

After Cn is calculated, multiply Cn with Mn for each tetrahedron. Add those values together, then divide it by the weight of the octahedron (M). This will return the COM of the octahedron (as in the formula below). This can be extrapolated for more complex objects, like character models.

To get the COM trajectory, this process should be repeated through the length of the animation. For our company, we have a tool that draws a spline to form the COM trajectory. We use this tool to evaluate whether the flow of the COM is translating properly.
This script could be used to examine paired animations as well. See Figure 8, which depicts a hip toss.
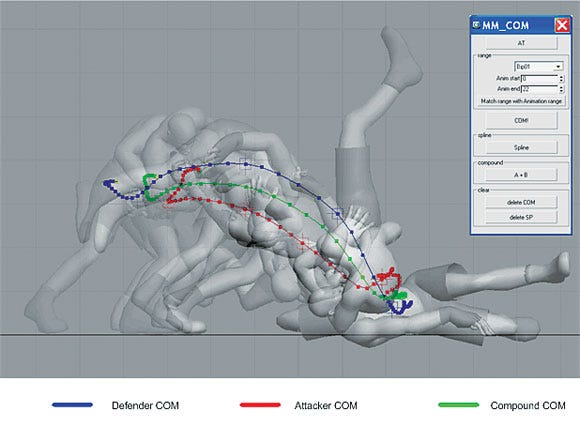
Figure 8: The COM trajectory for paired animation.
The hip toss is a move that's difficult to animate, because two bodies are falling together. The red line is the COM trajectory of the attacker, and the blue line represents the trajectory of the defender. The two bodies are moving together like one object, so they form a compound object (attacker + defender). The COM of the compound object can also be calculated by using the last formula above. The green line you see in the figure is the compound COM trajectory.
In the evaluation process, this tool can be used to create a tangible reference so that animators can adjust their animations.
To give an example of how you might apply this tool -- one of our animators had created an animation where the character was performing somersaults as he was falling, almost like an Olympic competitive diver. The animation looked off but the animator didn't understand why.
The problem was that he had animated the root as if it were the center of rotation. But the COM position when the human body is in this pose would be closer to the front of abdomen outside of the body. In this case the body should be rotating around the COM, not the root bone, which would cause movement to look wobbly and unrealistic.
Figure 9 shows this scenario. Here, the red lines represent the character's root bone trajectory, and the blue lines represent COM trajectory. By using the tool, you can see the COM moving from side to side in the right picture, which is physically unrealistic. The image on the left shows how gravity pulls the COM straight down while the root is rotating around it.
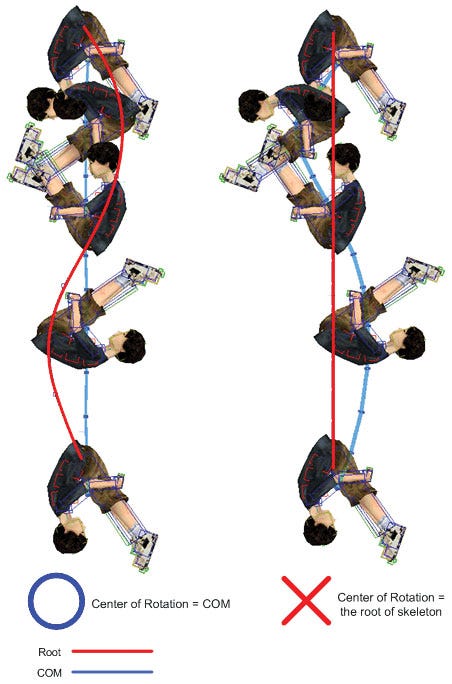
Figure 9: Comparison animations with different centers of rotation.
In a wire action movie, a wire is connected to the stunt person's hip to help him or her perform movements in the air. Because of that, the center of rotation is fixed to the hip position. In that case, the motion would look like the picture on the right in Figure 9, so the rotation "wobbles," and does not smoothly translate. This can happen if you try to simulate certain actions using motion capture with a wire as well. When you animate a character, always remember the COM is not equal to the root bone.
The COM in 3D is not something you can manipulate, so it's important to understand how the COM flow determines character movements.
Keep in mind that the human body is not a simple solid object, and is a compound structure with many joints and muscles. Because of this, human movement is complex and may not be something you can simulate precisely. But if you use a simplified physics model (like the inverted pendulum) it will give you a good base to start with. Animators can use this base and modify it accordingly.
I hope the info I provided can give some of you a new perspective on how to create and analyze character animations.
Read more about:
FeaturesYou May Also Like