

Daily news, dev blogs, and stories from Game Developer straight to your inbox
Sponsored By
Creating Game Character from Scratch
In this post originally published on RocketBrush Studio's Blog, you will find a simple tutorial on creating your game character from the idea to the completed work.
4 Min Read

Tutorial by RocketBrush Studio - a team of game artists inspired by the amazing visual art and graphics of the world of games.
Introduction
Today we would like to share the way we arrange the workflow and why creating an illustration for us is more art than craft. Creating a picture is like a journey. To make this journey fascinating we are better to be sure that it brings pleasure and happiness.
It's crucial to find at least something, a part that you're interested in - something to challenge and motivate the author so that it makes the whole task appealing to the author.
If an artist does not like the process of creating his picture, the spectator later will not likely enjoy contemplating it. Also, having become professionals and gained some experience, we strive not to lose the love we possess for the visual arts and keep the recollection of the feeling when we first picked up a pencil.
Search for the idea
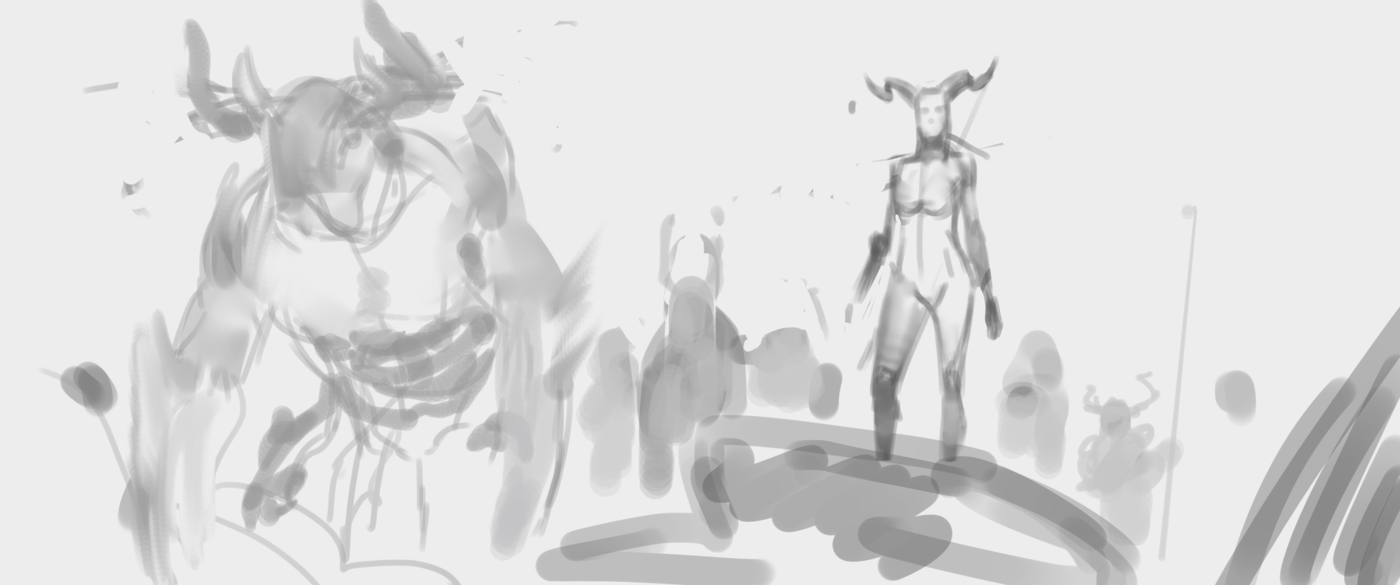
We begin with the search for the main idea. Usually, we make the first sketches on a piece of paper or in Photoshop. An abstract idea, design and general sense of mood at the initial stage provide the imagination with the needed assistance to generate the first images of the future work.
Now, it is important to focus on the actual speed of work rather than delving into details, so that you can work faster and won't spend too much time on doubts and hesitations. As a rule, the first sketches turn out to be too simple and minimalistic, but they will charge the imagination for further work. This is their main task.
Development of the idea
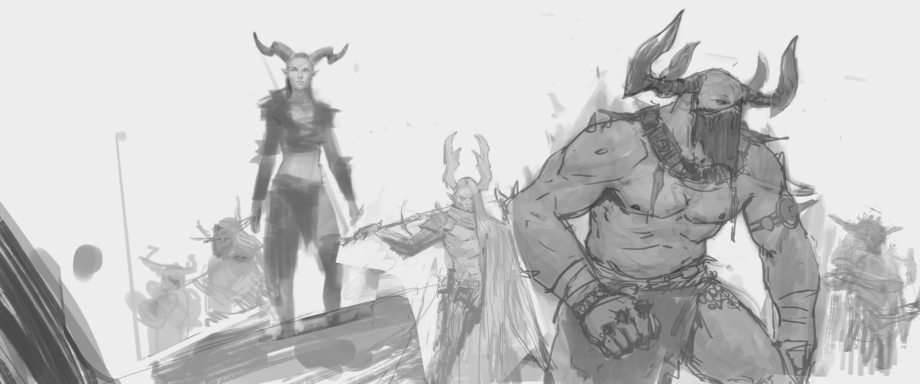
Having defined the main idea, we begin to elaborate on it. Here we outline the details and work on the design using both the line and the form. At this stage, we try to think about silhouettes and use light moves and hints to unleash imagination.
Refining the idea
Since time is usually of the essence, first of all, we choose the central character and focus on it. Then we determine the direction of our following steps: here we wanted to create a moderately aggressive and at the same time fragile girl, protected by a light armor and bearing the sword behind her back.
Once the basic frame and the overall proportions and design are ready, we begin to think about the design within the silhouette. At this stage, there may not be a clear idea of what the final result will look like, so here we turn our attention to the references.
Working with them, we use a collage method to boost the imagination and add details to the work. This method helps us to get a grasp of the overall direction of our further steps.
References

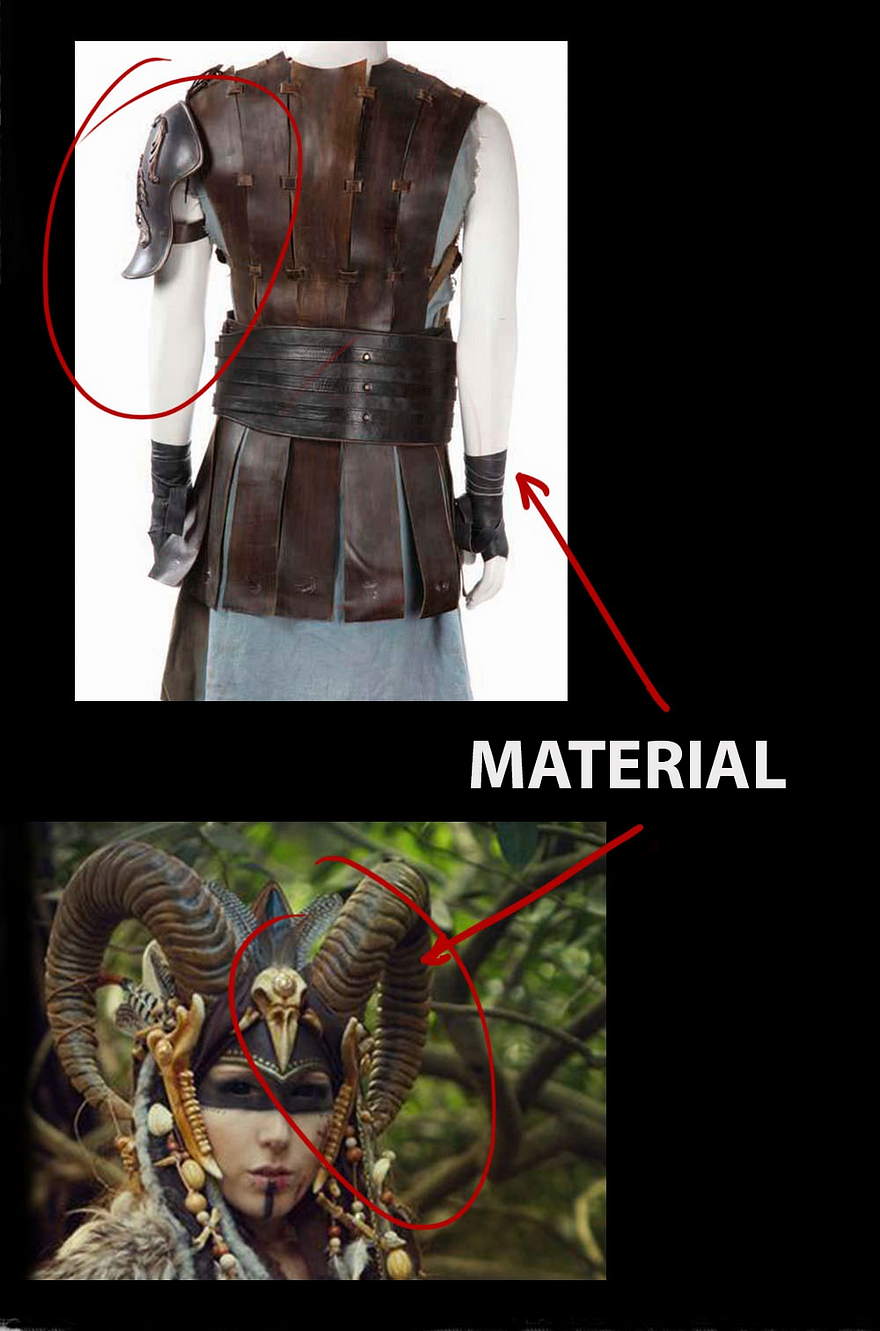
We treat refs as a source of inspiration and usually try not to copy them entirely. Instead, we try to understand what we enjoy about them to highlight the key features that can be used in further work. In general, we try to analyze them and not just redraw.
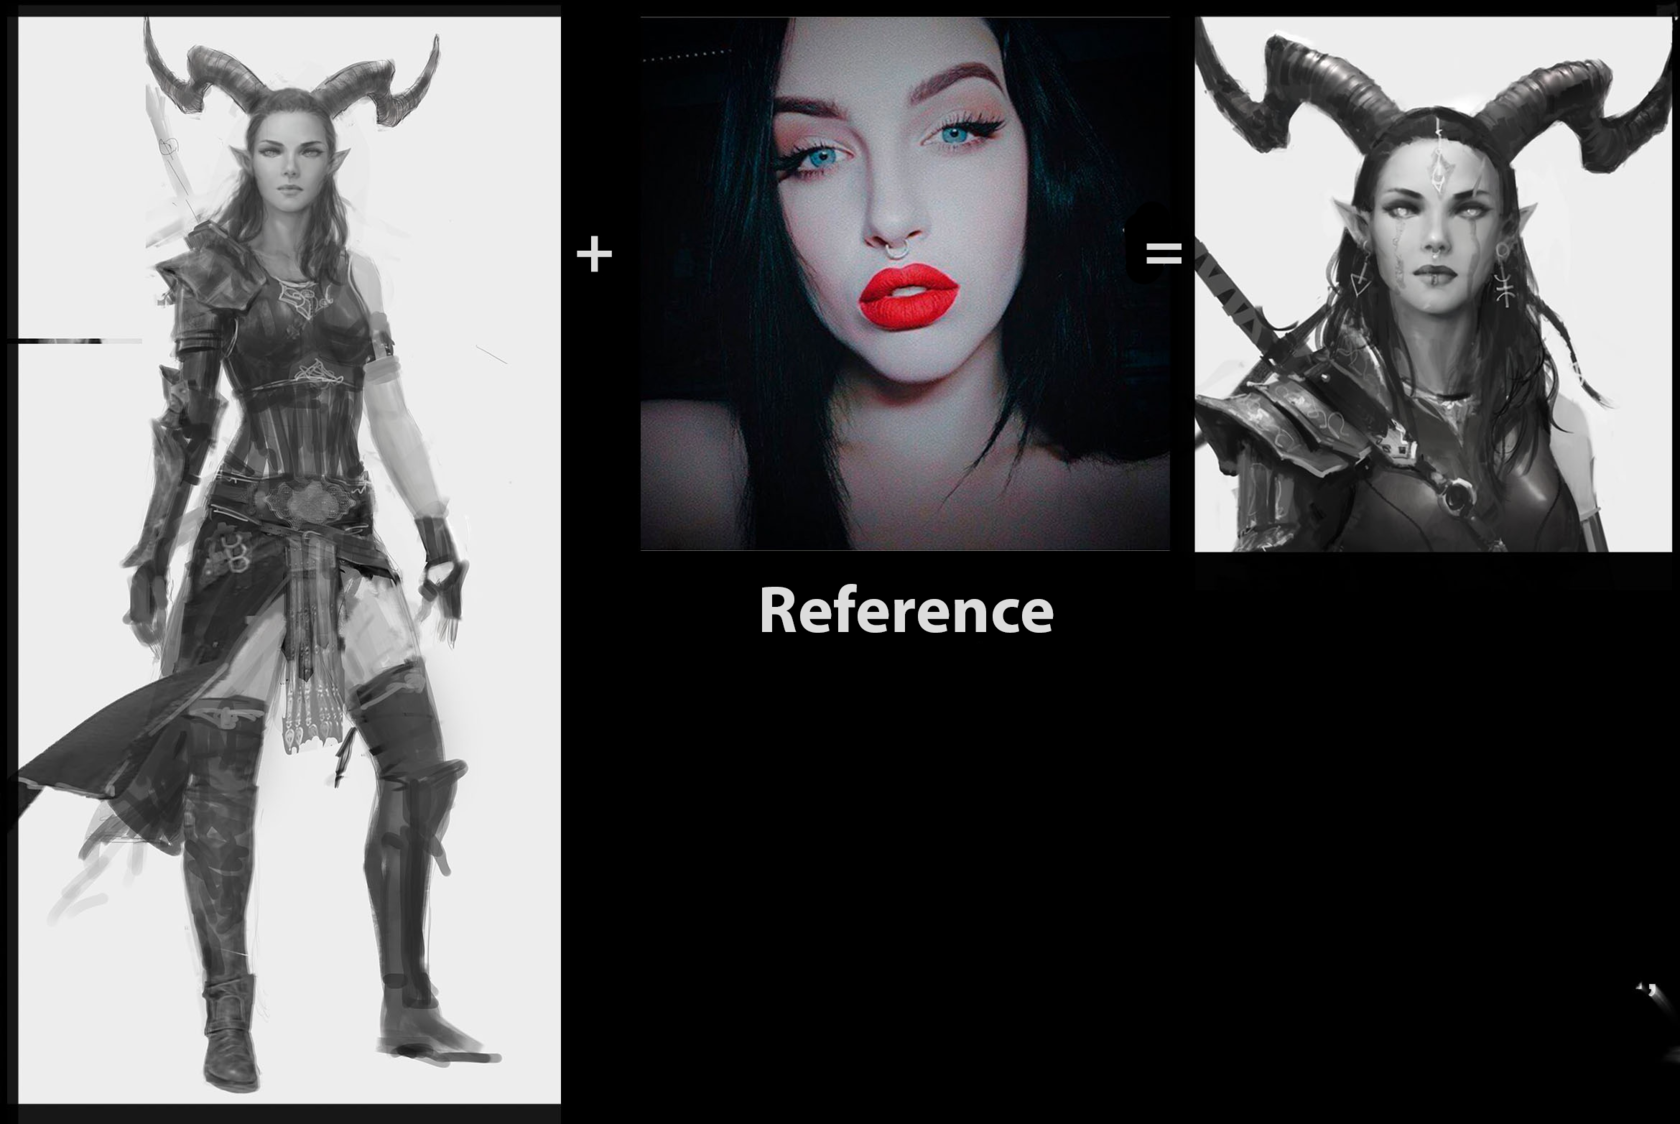
Drawing a character's face without references is a dead end, therefore by choosing the appropriate ref, we strive to feel its mood and emotions, grasp its personality and reflect this in our work. Understanding forms and anatomy helps a lot in this task.
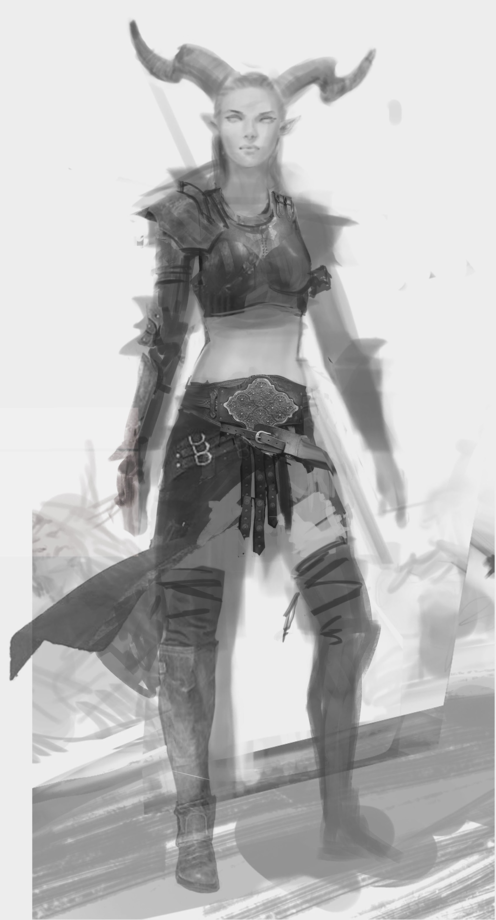
Adding the details
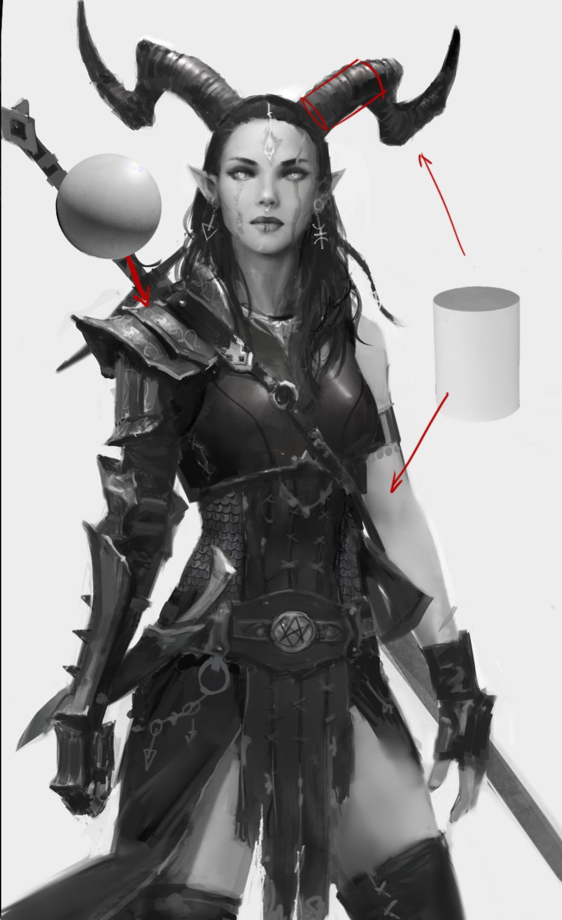
Further drawing of the work is a matter of technique. Here we add contrast and clarify the details, while not forgetting about the silhouette. The level of the drawing depends on both personal skill and understanding of the form, which is sometimes easier to do in the black-and-white.
Previous practice works help a lot to better convey the images that our imagination generates. Also here it is important for us to recreate the feeling of the materials themselves – leather, metal, fur, and the nuances of their contrast: the glint of steel, the dull hue of the skin, and so on.
Colour
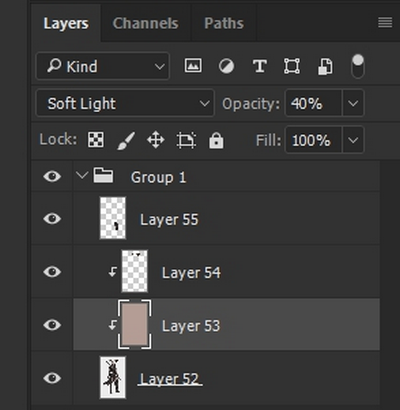
At this stage, we select the blend mode "Soft Light" with a transparency of 40%. We don't have a specific algorithm for turning it into a coloured image – we try different blending modes and opacity settings until we find the best option.
Polishing
We try to constantly improve the work at all stages of its creation – this fills the whole process with positive emotions. But even here it is important not to overdo it because excessive polishing can deprive the image of some sort of "spirit" , which helps the viewer to feel himself participating in the creative process. In the final stage of work, we brush over the image in the "Normal" mode.
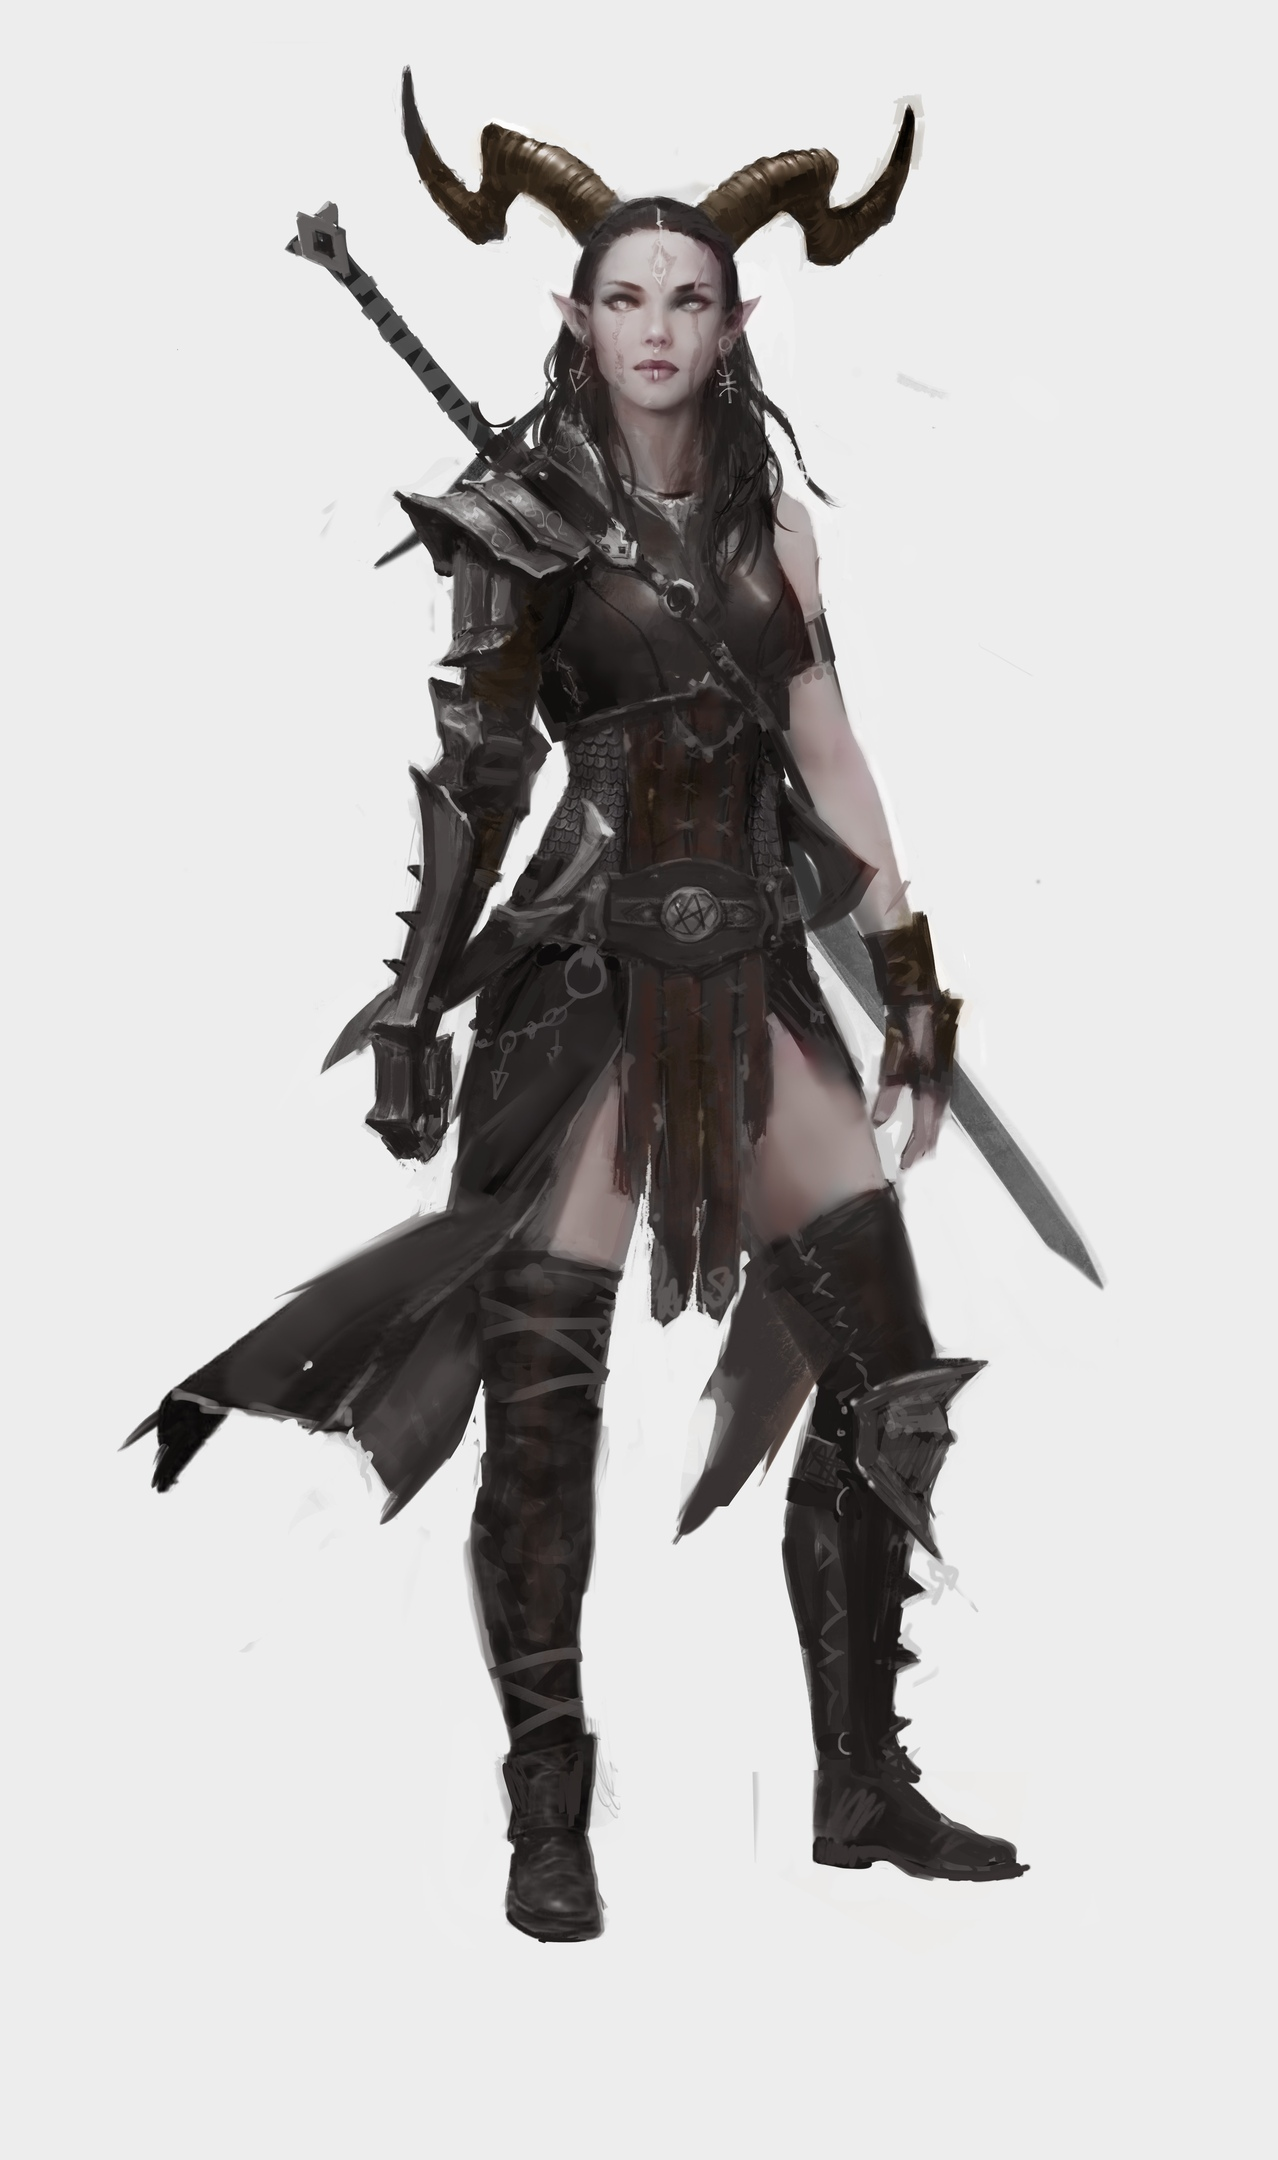
That's it – our work is ready!
Source: https://rocketbrush.com/creating-2d-character-for-games
Read more about:
BlogsAbout the Author(s)
You May Also Like


