Daily news, dev blogs, and stories from Game Developer straight to your inbox
Sponsored By
Meet Diligent Engine 2.0: Direct3D12-powered cross-platform graphics API
This post introduces Diligent Engine 2.0, the second version of an open-source lightweight graphics abstraction layer. The engine has been completely redesigned since version 1.0 to take full advantages of the next-generation APIs such as Direct3D12.
20 Min Read

This article is now out-of-date. Please go to Designing a Modern Cross-Platform Low-Level Graphics Library.
Introduction
Diligent Engine is a light-weight cross-platform abstraction layer between the application and the platform-specific graphics API. The engine has been completely redesigned since version 1.0 to take advantages of the next-generation APIs such as Direct3D12 and Vulkan. It still supports older platforms via Direct3D11, OpenGL and OpenGLES. Diligent Engine exposes common front-end for all supported platforms. It is designed to be used as a graphics subsystem in a game engine or any other 3D application and has very low overhead (on the level of 10-20% compared to the implementation in native APIs). It is distributed under Apache 2.0 license and is free to use. Full source code is available for download at GitHub. The engine contains shader source code converter that allows shaders authored in HLSL to be translated to GLSL.
Notice that Diligent Engine is not a rendering engine, it is a graphics engine. It does not operate with high-level concepts like meshes, materials, lights etc. Rather, it provides API to work directly with low-level entities like buffers, shaders, textures, etc.
Supported Platforms and APIs |
Platform |
Windows Desktop |
Universal Windows Platform |
Android |
Downloading the Engine
The engine source code is hosted on GitHub (https://github.com/diligentgraphics). The engine consists of three modules:
Core (https://github.com/DiligentGraphics/DiligentCore) provides basic engine functionality. It implements engine interface on the platform-specific graphics API.
Tools (https://github.com/DiligentGraphics/DiligentTools) contain utilities built on top of core module.
Samples (https://github.com/DiligentGraphics/DiligentSamples) module contains sample application that demonstrate how to use the engine.
Every module can be downloaded independently. Alternatively, there is a master repository that includes all three as submodules: https://github.com/DiligentGraphics/DiligentEngine.
Building the Engine
Win32
To build the engine for Win32 platform, Microsoft Visual Studio 2015 or later is required. Any edition including Visual Studio Community is sufficient. Open the solution file located in build\Win32 folder, choose the desired configuration and build it. Note that ARM platform is intended to build the engine for Android (see below).
Build Details
Diligent engine is self-contained and does not have any external dependencies. Installing Visual Studio is all that is required to build the engine.
Tools module references core module and samples module references both core and tools modules. The modules must share the same parent directory, otherwise links in the project files will be broken.
Core module contains several property pages that define common build settings. The pages are located in diligentcore\Shared\Build subdirectory and are referenced by every project.
There is a build subdirectory in each project's directory that contains Visual Studio project files.
GraphicsEngineD3D11, GraphicsEngineD3D12 and GraphicsEngineOpenGL projects can be built as either static or dynamic link library.
Universal Windows Platform
As with the Windows Desktop, Microsoft Visual Studio 2015 or later is required to build the engine for Universal Windows Platform platform. Again, any edition including Visual Studio Community is sufficient. Navigate to build\UWP directory, open solution file and build the solution for the desired configuration.
Android
To build the engine for Android, you first need to set up your machine for Android development: download Android SDK (Android Studio is not required), Android NDK, Apache Ant and other required tools. There are two ways to build the engine for Android:
Download and install Visual GDB plugin for Visual Studio, open Windows Desktop solution (located in build\Win32 folder), select ARM platform and build the solution as usual. Note that despite the name, you can build the application for both ARM and x86 Android platforms. You can then deploy and run your Android application directly from the IDE
It is important to rebuild the app project for the first time
To run the app from Visual Studio, go to Project Settings->Debugging and select Local Windows Debugger option in the Debugger to launch drop-down list. Then start the application
In command line, navigate to the build\Win32 folder of the project you want to build and use ndk-build. In the folder you can find android_build.txt file with detailed build instructions
Note that when building for Android, the engine root path must not contain white spaces.
API Basics
The engine interface is based on Direct3D11 and Direct3D12 APIs. If you are not familiar with these APIs, it is highly recommended to take a look at Direct3D help pages first.
Initializing the Engine
Before you can use any functionality provided by the engine, you need to create a render device, an immediate context and a swap chain.
Win32
On Win32 platform, you can create OpenGL, Direct3D11 or Direct3D12 device as the following code snippet shows:
void InitDevice(HWND hWnd,
                IRenderDevice **ppRenderDevice,
                IDeviceContext **ppImmediateContext,
                ISwapChain **ppSwapChain,
                DeviceType DevType)
{
    SwapChainDesc SCDesc;
    SCDesc.SamplesCount = 1;
    switch (DevType)
    {
        case DeviceType::D3D11:
        {
            EngineD3D11Attribs DeviceAttribs;
            DeviceAttribs.DebugFlags = (Uint32)EngineD3D11DebugFlags::VerifyCommittedShaderResources |
                                       (Uint32)EngineD3D11DebugFlags::VerifyCommittedResourceRelevance;

#ifdef ENGINE_DLL
            // Declare functions pointers
            CreateDeviceAndContextsD3D11Type CreateDeviceAndContextsD3D11 = nullptr;
            CreateSwapChainD3D11Type CreateSwapChainD3D11 = nullptr;
            // Load the dll and export functions
            LoadGraphicsEngineD3D11(CreateDeviceAndContextsD3D11, CreateSwapChainD3D11);
#endif
            CreateDeviceAndContextsD3D11( DeviceAttribs, ppRenderDevice, ppImmediateContext, 0 );
            CreateSwapChainD3D11( *ppRenderDevice, *ppImmediateContext, SCDesc, hWnd, ppSwapChain );
        }
        break;

        case DeviceType::D3D12:
        {
#ifdef ENGINE_DLL
            // Declare function pointers
            CreateDeviceAndContextsD3D12Type CreateDeviceAndContextsD3D12 = nullptr;
            CreateSwapChainD3D12Type CreateSwapChainD3D12 = nullptr;
            // Load the dll and export functions
            LoadGraphicsEngineD3D12(CreateDeviceAndContextsD3D12, CreateSwapChainD3D12);
#endif

            EngineD3D12Attribs EngD3D12Attribs;
            CreateDeviceAndContextsD3D12( EngD3D12Attribs, ppRenderDevice, ppImmediateContext, 0);
            CreateSwapChainD3D12( *ppRenderDevice, *ppImmediateContext, SCDesc, hWnd, ppSwapChain );
        }
        break;

        case DeviceType::OpenGL:
        {
#ifdef ENGINE_DLL
            // Declare function pointers
            CreateDeviceAndSwapChainGLType CreateDeviceAndSwapChainGL = nullptr;
            LoadGraphicsEngineOpenGL(CreateDeviceAndSwapChainGL);
#endif
            EngineCreationAttribs EngineCreationAttribs;
            // Load the dll and export functions
            CreateDeviceAndSwapChainGL(
                EngineCreationAttribs, ppRenderDevice, ppImmediateContext, SCDesc, hWnd, ppSwapChain );
        }
        break;

        default:
            LOG_ERROR_AND_THROW("Unknown device type");
        break;
    }
}
On Windows, the engine can be statically linked to the application or built as a separate DLL. In the former case, initialization functions CreateDeviceAndSwapChainGL(), CreateDeviceAndContextsD3D11(), CreateSwapChainD3D11(), CreateDeviceAndContextsD3D12(), and CreateSwapChainD3D12() can be called directly. In the latter case, you need to load the DLL into the process's address space using LoadGraphicsEngineOpenGL(), LoadGraphicsEngineD3D11() or LoadGraphicsEngineD3D12() function. Each function loads appropriate dynamic library and exports the functions required to initialize the engine. You need to include the following headers:
#include "RenderDeviceFactoryD3D11.h"
#include "RenderDeviceFactoryD3D12.h"
#include "RenderDeviceFactoryOpenGL.h"
You also need to add the following directories to the include search paths:
diligentcore\Graphics\GraphicsEngineD3D11\interface
diligentcore\Graphics\GraphicsEngineD3D12\interface
diligentcore\Graphics\GraphicsEngineOpenGL\interface
Also, enable Diligent namespace:
using namespace Diligent;
CreateDeviceAndContextsD3D11() and CreateDeviceAndContextsD3D12() functions can also create a specified number of deferred contexts, which can be used for multi-threaded command recording. Deferred contexts can only be created during the initialization of the engine. The function populates an array of pointers to the contexts, where the immediate context goes at position 0, followed by all deferred contexts.
For more details, take a look at WinMain.cpp file located in diligentsamples\Samples\SampleBase\Src\Win32 folder that implements initialization of the engine on Win32 platform.
Universal Windows Platform
On Universal Windows Platform, you can create Direct3D11 or Direct3D12 device. Also, you can only statically link with the engine. Initialization is performed the same way as on Win32 Platform. The difference is that you first create render device and device contexts by calling CreateDeviceAndContextsD3D11() or CreateDeviceAndContextsD3D12(). The swap chain is created later by a call to CreateSwapChainD3D11() or CreateSwapChainD3D12(). Please look at the DeviceResources.cpp file located in diligentsamples\Samples\SampleBase\Src\UWP\Common for more details.
Android
On Android, you can only create OpenGLES device. The following code snippet shows an example:
EngineCreationAttribs CreationAttribs;
RefCntAutoPtr<IRenderDevice> pRenderDevice;
SwapChainDesc SCDesc;
CreateDeviceAndSwapChainGL( CreationAttribs, &pRenderDevice, &pDeviceContext_,
                            SCDesc, app_->window, &pSwapChain_ );

IRenderDeviceGLES *pRenderDeviceOpenGLES;
pRenderDevice->QueryInterface( IID_RenderDeviceGLES, reinterpret_cast<IObject**>(&pRenderDeviceOpenGLES) );
If engine is built as dynamic library, the library needs to be loaded by the native activity. The following code shows one possible way:
static
{
    try{
        System.loadLibrary("GraphicsEngineOpenGL");
    } catch (UnsatisfiedLinkError e) {
        Log.e("native-activity", "Failed to load GraphicsEngineOpenGL library.\n" + e);
    }
}
Creating Resources
Device resources are created by the render device. The two main resource types are buffers, which represent linear memory, and textures, which use memory layouts optimized for fast filtering. To create a buffer, you need to populate BufferDesc structure and call IRenderDevice::CreateBuffer(). The following code creates a uniform (constant) buffer:
BufferDesc BuffDesc;
BuffDesc.BindFlags = BIND_UNIFORM_BUFFER;
BuffDesc.Usage = USAGE_DYNAMIC;
BuffDesc.uiSizeInBytes = sizeof(ShaderConstants);
BuffDesc.CPUAccessFlags = CPU_ACCESS_WRITE;
m_pDevice->CreateBuffer( BuffDesc, BufferData(), &m_pConstantBuffer );
Similar, to create a texture, populate TextureDesc structure and call IRenderDevice::CreateTexture() as in the following code snippet:
TextureDesc TexDesc;
TexDesc.Type = TEXTURE_TYPE_2D;
TexDesc.Width = 1024;
TexDesc.Height = 1024;
TexDesc.Format = TEX_FORMAT_RGBA8_UNORM;
TexDesc.Usage = USAGE_DEFAULT;
TexDesc.BindFlags = BIND_SHADER_RESOURCE | BIND_RENDER_TARGET | BIND_UNORDERED_ACCESS;
TexDesc.Name = "Sample 2D Texture";
m_pRenderDevice->CreateTexture( TexDesc, TextureData(), &m_pTestTex );
There is only one function CreateTexture() that is capable of creating all types of textures. Type, format, array size and all other parameters are specified by the members of the TextureDesc structure.
For every bind flag specified during the texture creation time, the texture object creates a default view. Default shader resource view addresses the entire texture, default render target and depth stencil views reference all array slices in the most detailed mip level, and unordered access view references the entire texture. To get a default view from the texture, use ITexture::GetDefaultView() function. Note that this function does not increase reference counter on the returned interface. You can create additional texture views using ITexture::CreateView(). Use IBuffer::CreateView() to create additional views of a buffer.
Initializing Pipeline State
Diligent Engine 2.0 follows Direct3D12 style to configure the graphics/compute pipeline. One big Pipelines State Object (PSO) encompasses all required states (all shader stages, input layout description, depth stencil, rasterizer and blend state descriptions etc.)
Creating Shaders
To create a shader, populate ShaderCreationAttribs structure. There are two ways to create a shader. The first way is to provide a pointer to the shader source code through ShaderCreationAttribs::Source member. The second way is to provide a file name. Graphics Engine is entirely decoupled from the platform. Since the host file system is platform-dependent, the structure exposes ShaderCreationAttribs::pShaderSourceStreamFactory member that is intended to provide the engine access to the file system. If you provided the source file name, you must also provide non-null pointer to the shader source stream factory. If the shader source contains any #include directives, the source stream factory will also be used to load these files. The engine provides default implementation for every supported platform that should be sufficient in most cases. You can however define your own implementation.
An important member is ShaderCreationAttribs::SourceLanguage. The following are valid values for this member:
SHADER_SOURCE_LANGUAGE_DEFAULT - The shader source format matches the underlying graphics API: HLSL for D3D11 or D3D12 mode, and GLSL for OpenGL and OpenGLES modes.
SHADER_SOURCE_LANGUAGE_HLSL - The shader source is in HLSL. For OpenGL and OpenGLES modes, the source code will be converted to GLSL. See shader converter for details.
SHADER_SOURCE_LANGUAGE_GLSL - The shader source is in GLSL. There is currently no GLSL to HLSL converter.
To allow grouping of resources based on the frequency of expected change, Diligent Engine 2.0 introduces classification of shader variables:
Static variables (SHADER_VARIABLE_TYPE_STATIC) are variables that are expected to be set only once. They may not be changed once a resource is bound to the variable. Such variables are intended to hold global constants such as camera attributes or global light attributes constant buffers.
Mutable variables (SHADER_VARIABLE_TYPE_MUTABLE) define resources that are expected to change on a per-material frequency. Examples may include diffuse textures, normal maps etc.
Dynamic variables (SHADER_VARIABLE_TYPE_DYNAMIC) are expected to change frequently and randomly.
This post gives more details about the resource binding model in Diligent Engine 2.0. To define variable types, prepare an array of ShaderVariableDesc structures and initialize ShaderCreationAttribs::Desc::VariableDesc and ShaderCreationAttribs::Desc::NumVariables. Also ShaderCreationAttribs::Desc::DefaultVariableType can be used to set the type that will be used if variable name is not provided.
When creating a shader, textures can be assigned static samplers. If static sampler is assigned, it will always be used instead of the one initialized in the texture shader resource view. To initialize static samplers, prepare an array of StaticSamplerDesc structures and intialize ShaderCreationAttribs::Desc::StaticSamplers and ShaderCreationAttribs::Desc::NumStaticSamplers. Notice that static samplers can be assigned to texture variable of any type, not necessarily static. It is highly recommended to use static samplers whenever possible.
Other members of the ShaderCreationAttribs structure define shader include search directories, shader macro definitions, shader entry point and other parameters. The following is an example of shader initialization:
ShaderCreationAttribs Attrs;
Attrs.Desc.Name = "MyPixelShader";
Attrs.FilePath = "MyShaderFile.fx";
Attrs.SearchDirectories = "shaders;shaders\\inc;";
Attrs.EntryPoint = "MyPixelShader";
Attrs.Desc.ShaderType = SHADER_TYPE_PIXEL;
Attrs.SourceLanguage = SHADER_SOURCE_LANGUAGE_HLSL;
BasicShaderSourceStreamFactory BasicSSSFactory(Attrs.SearchDirectories);
Attrs.pShaderSourceStreamFactory = &BasicSSSFactory;

ShaderVariableDesc ShaderVars[] =
{
    {"g_StaticTexture", SHADER_VARIABLE_TYPE_STATIC},
    {"g_MutableTexture", SHADER_VARIABLE_TYPE_MUTABLE},
    {"g_DynamicTexture", SHADER_VARIABLE_TYPE_DYNAMIC}
};
Attrs.Desc.VariableDesc = ShaderVars;
Attrs.Desc.NumVariables = _countof(ShaderVars);
Attrs.Desc.DefaultVariableType = SHADER_VARIABLE_TYPE_STATIC;

StaticSamplerDesc StaticSampler;
StaticSampler.Desc.MinFilter = FILTER_TYPE_LINEAR;
StaticSampler.Desc.MagFilter = FILTER_TYPE_LINEAR;
StaticSampler.Desc.MipFilter = FILTER_TYPE_LINEAR;
StaticSampler.TextureName = "g_MutableTexture";
Attrs.Desc.NumStaticSamplers = 1;
Attrs.Desc.StaticSamplers = &StaticSampler;

ShaderMacroHelper Macros;
Macros.AddShaderMacro("USE_SHADOWS", 1);
Macros.AddShaderMacro("NUM_SHADOW_SAMPLES", 4);
Macros.Finalize();
Attrs.Macros = Macros;

RefCntAutoPtr<IShader> pShader;
m_pDevice->CreateShader( Attrs, &pShader );
Creating Pipeline State Object
To create a pipeline state object, define instance of PipelineStateDesc structure:
PipelineStateDesc PSODesc;
Describe the pipeline specifics such as if the pipeline is a compute pipeline, number and format of render targets as well as depth-stencil format:
// This is a graphics pipeline
PSODesc.IsComputePipeline = false;
PSODesc.GraphicsPipeline.NumRenderTargets = 1;
PSODesc.GraphicsPipeline.RTVFormats[0] = TEX_FORMAT_RGBA8_UNORM_SRGB;
PSODesc.GraphicsPipeline.DSVFormat = TEX_FORMAT_D32_FLOAT;
Initialize depth-stencil state description (see DepthStencilStateDesc). Note that the constructor initializes the members with default values and you can only set the ones that are different from default.
// Init depth-stencil state
DepthStencilStateDesc &DepthStencilDesc = PSODesc.GraphicsPipeline.DepthStencilDesc;
DepthStencilDesc.DepthEnable = true;
DepthStencilDesc.DepthWriteEnable = true;
Initialize blend state description (see BlendStateDesc):
// Init blend state
BlendStateDesc &BSDesc = PSODesc.GraphicsPipeline.BlendDesc;
BSDesc.IndependentBlendEnable = False;
auto &RT0 = BSDesc.RenderTargets[0];
RT0.BlendEnable = True;
RT0.RenderTargetWriteMask = COLOR_MASK_ALL;
RT0.SrcBlend    = BLEND_FACTOR_SRC_ALPHA;
RT0.DestBlend   = BLEND_FACTOR_INV_SRC_ALPHA;
RT0.BlendOp     =  BLEND_OPERATION_ADD;
RT0.SrcBlendAlpha   = BLEND_FACTOR_SRC_ALPHA;
RT0.DestBlendAlpha  = BLEND_FACTOR_INV_SRC_ALPHA;
RT0.BlendOpAlpha    = BLEND_OPERATION_ADD;
Initialize rasterizer state description (see RasterizerStateDesc):
// Init rasterizer state
RasterizerStateDesc &RasterizerDesc = PSODesc.GraphicsPipeline.RasterizerDesc;
RasterizerDesc.FillMode = FILL_MODE_SOLID;
RasterizerDesc.CullMode = CULL_MODE_NONE;
RasterizerDesc.FrontCounterClockwise = True;
RasterizerDesc.ScissorEnable = True;
//RSDesc.MultisampleEnable = false; // do not allow msaa (fonts would be degraded)
RasterizerDesc.AntialiasedLineEnable = False;
Initialize input layout description (see InputLayoutDesc):
// Define input layout
InputLayoutDesc &Layout = PSODesc.GraphicsPipeline.InputLayout;
LayoutElement TextLayoutElems[] =
{
    LayoutElement( 0, 0, 3, VT_FLOAT32, False ),
    LayoutElement( 1, 0, 4, VT_UINT8, True ),
    LayoutElement( 2, 0, 2, VT_FLOAT32, False ),
};
Layout.LayoutElements = TextLayoutElems;
Layout.NumElements = _countof( TextLayoutElems );
Finally, define primitive topology type, set shaders and call IRenderDevice::CreatePipelineState() to create the PSO:
// Define shader and primitive topology
PSODesc.GraphicsPipeline.PrimitiveTopologyType = PRIMITIVE_TOPOLOGY_TYPE_TRIANGLE;
PSODesc.GraphicsPipeline.pVS = m_pTextVS;
PSODesc.GraphicsPipeline.pPS = m_pTextPS;

PSODesc.Name = "My pipeline state";
m_pDev->CreatePipelineState(PSODesc, &m_pPSO);
Binding Shader Resources
Shader resource binding in Diligent Engine 2.0 is based on grouping variables in 3 different groups (static, mutable and dynamic). Static variables are variables that are expected to be set only once. They may not be changed once a resource is bound to the variable. Such variables are intended to hold global constants such as camera attributes or global light attributes constant buffers. They are bound directly to the shader object:
PixelShader->GetShaderVariable( "g_tex2DShadowMap" )->Set( pShadowMapSRV );
Mutable and dynamic variables are bound via a new object called Shader Resource Binding (SRB), which is created by the pipeline state (IPipelineState::CreateShaderResourceBinding()):
m_pPSO->CreateShaderResourceBinding(&m_pSRB);
Dynamic and mutable resources are then bound through SRB object:
m_pSRB->GetVariable(SHADER_TYPE_VERTEX, "tex2DDiffuse")->Set(pDiffuseTexSRV);
m_pSRB->GetVariable(SHADER_TYPE_VERTEX, "cbRandomAttribs")->Set(pRandomAttrsCB);
The difference between mutable and dynamic resources is that mutable can only be set once for every instance of a shader resource binding. Dynamic resources can be set multiple times. It is important to properly set the variable type as this may affect performance. Static variables are generally most efficient, followed by mutable. Dynamic variables are most expensive from performance point of view. This post explains shader resource binding in more details.
An alternative way to bind shader resources is to create IResourceMapping interface that maps resource literal names to the actual resources:
ResourceMappingEntry Entries[] = {
    { "g_Texture", pTexture->GetDefaultView(TEXTURE_VIEW_SHADER_RESOURCE)},
    ResourceMappingEntry()
};
ResourceMappingDesc ResMappingDesc;
ResMappingDesc.pEntries= Entries;
RefCntAutoPtr<IResourceMapping> pResMapping;
pRenderDevice->CreateResourceMapping( ResMappingDesc, &pResMapping );
The resource mapping can then be used to bind all resources in a shader (see IShader::BindResources()):
pPixelShader->BindResources(pResMapping, BIND_SHADER_RESOURCES_ALL_RESOLVED);
in a shader resource binding (see IShaderResourceBinding::BindResources()):
m_pSRB->BindResources(SHADER_TYPE_VERTEX|SHADER_TYPE_PIXEL, pResMapping, BIND_SHADER_RESOURCES_ALL_RESOLVED);
or in a pipeline state (see IPipelineState::BindShaderResources()):
m_pPSO->BindResources(pResMapping, BIND_SHADER_RESOURCES_ALL_RESOLVED);
The last parameter to all BindResources() functions defines how resources should be resolved:
BIND_SHADER_RESOURCES_RESET_BINDINGS - Reset all bindings. If this flag is specified, all bindings will be reset to null before new bindings are set. By default all existing bindings are preserved.
BIND_SHADER_RESOURCES_UPDATE_UNRESOLVED - If this flag is specified, only unresolved bindings will be updated. All resolved bindings will keep their original values. If this flag is not specified, every shader variable will be updated if the mapping contains corresponding resource.
BIND_SHADER_RESOURCES_ALL_RESOLVED - If this flag is specified, all shader bindings are expected be resolved after the call. If this is not the case, debug error will be displayed.
BindResources() may be called several times with different resource mappings to bind resources. However, it is recommended to use one large resource mapping as the size of the mapping does not affect element search time.
The engine performs run-time checks to verify that correct resources are being bound. For example, if you try to bind a constant buffer to a shader resource view variable, an error will be output to the debug console.
Setting the Pipeline State and Invoking Draw Command
Before any draw command can be invoked, all required vertex and index buffers as well as the pipeline state should be bound to the device context:
// Clear render target
const float zero[4] = {0, 0, 0, 0};
m_pContext->ClearRenderTarget(nullptr, zero);

// Set vertex and index buffers
IBuffer *buffer[] = {m_pVertexBuffer};
Uint32 offsets[] = {0};
Uint32 strides[] = {sizeof(MyVertex)};
m_pContext->SetVertexBuffers(0, 1, buffer, strides, offsets, SET_VERTEX_BUFFERS_FLAG_RESET);
m_pContext->SetIndexBuffer(m_pIndexBuffer, 0);

m_pContext->SetPipelineState(m_pPSO);
Also, all shader resources must be committed to the device context. This is accomplished by the IDeviceContext::CommitShaderResources() method:
m_pContext->CommitShaderResources(m_pSRB, COMMIT_SHADER_RESOURCES_FLAG_TRANSITION_RESOURCES);
If the method is not called, the engine will detect that resources are not committed and output debug message. Note that CommitShaderResources() must be called after the right pipeline state has been bound to the context. Note that the last parameter tells the system to transition resources to the correct states. If this flag is not specified, the resources must be explicitly transitioned to the right states by a call to IDeviceContext::TransitionShaderResources():
m_pContext->TransitionShaderResources(m_pPSO, m_pSRB);
Note that the method requires pointer to the pipeline state that created the shader resource binding.
When all required states and resources are bound, IDeviceContext::Draw() can be used to execute draw command or IDeviceContext::DispatchCompute() can be used to execute compute command. Note that for a draw command, graphics pipeline must be bound, and for dispatch command, compute pipeline must be bound. Draw() takes DrawAttribs structure as an argument. The structure members define all attributes required to perform the command (primitive topology, number of vertices or indices, if draw call is indexed or not, if draw call is instanced or not, if draw call is indirect or not, etc.). For example:
DrawAttribs attrs;
attrs.IsIndexed = true;
attrs.IndexType = VT_UINT16;
attrs.NumIndices = 36;
attrs.Topology = PRIMITIVE_TOPOLOGY_TRIANGLE_LIST;
pContext->Draw(attrs);
DispatchCompute() takes DispatchComputeAttribs structure that defines compute grid dimensions:
m_pContext->SetPipelineState(m_pComputePSO);
m_pContext->CommitShaderResources(m_pComputeSRB, COMMIT_SHADER_RESOURCES_FLAG_TRANSITION_RESOURCES);
DispatchComputeAttribs DispatchAttrs(64, 64, 8);
m_pContext->DispatchCompute(DispatchAttrs);
Sample Applications
The engine contains sample applications that demonstrate the usage of the API.
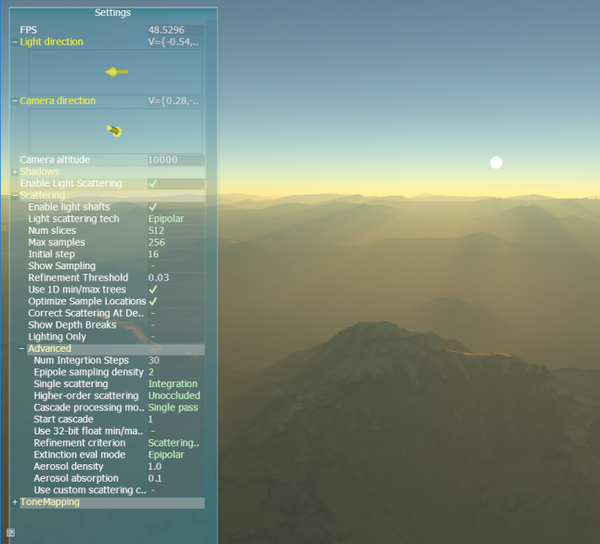
The two samples currently available are Ant Tweak Bar Sample that demonstrates how to use AntTweakBar library to create simple user interface and more sophisticated Atmospheric Light Scattering Sample.
The samples are available for download at GitHub (https://github.com/DiligentGraphics/DiligentSamples).
Running the Samples
Windows Desktop
To run a sample from Visual Studio, locate the sample’s project in the solution explorer, go to Project->Properties->Debugging and set Working Directory to $(AssetsPath) (This variable is defined in the EngineRoot.props property page file located in the sample’s build\Windows.Shared folder). Then set the project as startup project and run it. By default the sample will run in D3D11 mode. To use D3D12 or OpenGL, use the following command line option: mode={D3D11|D3D12|GL} (do not use spaces!).
To run a sample from windows explorer or command line, navigate to the sample’s build\Win32 folder and execute the appropriate run_*.bat file (you need to build the corresponding configuration first). Do not execute run.bat!
Build Specifics
Win32 samples dynamically link with the engine. The dlls are included into the sample’s solution and are copied to the sample’s output folder using the custom build tool.
Universal Windows Platform
To run a sample from Visual Studio, locate the sample’s project under Samples folder in the solution explorer, set the project as startup project, deploy and run it. On Universal Windows Platform, only D3D11 or D3D12 mode is available.
Android
If you are building the sample using Visual GDB plugin for Visual Studio, you can run the sample directly from the IDE. You first need to go to project debugging settings and make sure that Debugger to launch is set to Local Windows Debugger. If you are building the sample using the command line, you can use Android tools to deploy the project to device and run it.
Android-19 or later is required to run the samples.
Resources
Diligent Engine Web Site: http://diligentgraphics.com/diligent-engine/
Diligent Engine on GitHub: https://github.com/diligentgraphics/ (do not forget to star the repo! :) )
Diligent Engine on Facebook: https://www.facebook.com/DiligentGraphics/
Diligent Engine on Twitter: https://twitter.com/diligentengine
Read more about:
BlogsAbout the Author(s)
You May Also Like