Featured Blog | This community-written post highlights the best of what the game industry has to offer. Read more like it on the Game Developer Blogs.
Dead Body Falls: Designing the Waypoint System
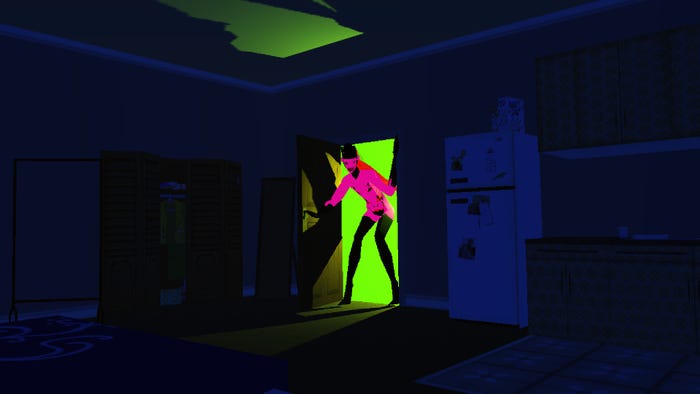
A look at the Waypoint System used in the game Dead Body Falls (2018, GearVR, Oculus Go)

This article is a part of Dead Body Falls dev series:
Dead Body Falls: Designing the Waypoint System
In this article, we’ll take a look at the waypoint system designed to support teleport mechanics in the game Dead Body Falls, by Black River Studios.
Teleport Mechanics?
In case the reader is unfamiliar with VR development, the notion of teleport mechanics, or the reason one might want to use such a thing, may not be understood. A brief overview follows:
Locomotion in virtual reality games has been a problem for as long as VR has been on the market. It might seem straightforward to just give the player a pair of analog sticks, like in non-VR 3D games, and let them walk around the environment. However, this approach often proves uncomfortable to the player due to sensory disagreement: their visual system perceives, from the images on the head mounted display, that their body is in motion (vection), but the vestibular system, which is responsible for perceiving acceleration and body orientation, does not. These conflicting signals cause the user to experience motion sickness.
For more information, Richard Yao, a researcher from Oculus, gave a great talk on the matter that can be found here. There are also some interesting reads on the evolution of VR locomotion written by developers who’ve worked on VR over the years, such as this recent post by Paul White and Antony Stevens.
There is no one solution to this issue, and VR developers are still experimenting with different approaches and designs today. One technique that has been shown to work is to make the player’s movement discrete: place waypoints on positions the player can move to; when one of them is selected, the screen briefly fades and the player is teleported. This is a trade-off that limits player freedom but eliminates vection, increasing comfort. It’s been employed successfully in other games by our studio, like Angest and Conflict 0: Shattered.
The Project
Dead Body Falls is a story-driven VR game which has the player witnessing a series of events in a hotel as seen by different characters. In the final release, the game has you witnessing these events as the characters themselves, in first person. However, it was not always so: the player used to be a spectator that teleported freely between rooms as the story unfolded. This version of the game was axed, leading to wide-ranging redesigns from story to mechanics.
To the engineering team, this meant, among other things, redoing the movement system from scratch and rethinking game flow management. This happened while the game was in active development, meaning that, at that point, we had but a vague blueprint of how the game would be. Our new system had to be flexible enough not only for us to create a variety of events, but also to facilitate constant revisions, which were sure to happen. Even when it came to UI and presentation, we could not make many assumptions.
In the following sections, we’ll look at a few of the architectural decisions we ended up making in order to make development more viable.
Tools
Below are some of the core tools, external and in-house, we chose to use.
PlayMaker
For those unfamiliar, PlayMaker is a visual scripting solution for Unity made by Hutong Games that is available on the Asset Store. The plugin allows attaching finite state machine components to your GameObjects whose states execute a series of actions, that is, a series of user-defined scripts.
PlayMaker was chosen as the means to implement events in the game since, on the engineering side, it offers an easy-to-use API for integrating to other game systems. In addition, the modular design it enforces allows reusing code and FSMs should the events change. As for the design and art teams, they can easily inspect and tweak events using the PlayMaker editor, without need for coding knowledge.
Game Variables
By itself, however, a PlayMaker FSM is just a MonoBehaviour that exists within a scene, and as such, it is not allowed to make cross-scene references to GameObjects. Dead Body Falls makes ample use of additive scene loading; thus, we needed to create some sort of index to keep track of currently loaded GameObjects so their references can be obtained during runtime.
Our Game Variables system does exactly that. Each GameObject is assigned a path string composed by its type, followed optionally by scene and/or chapter in which the object appears, then its name. Scripts can consult this index during gameplay, and more importantly, through a special FSM action, the state machine can retrieve necessary GameObject references on start-up, allowing us to use a large number of state machines in our game that don’t have to exist within specific scenes.
Blackboard System
Just like FSMs couldn’t reference GameObjects directly, so were the MonoBehaviours on the scene unable to reference FSMs, impeding communication between state machines and other game systems. We could use Game Variables to solve this issue as well, but this approach would bring with it huge amounts of coupling: not only having our scripts interact with FSM components directly would create strong coupling with PlayMaker classes, but also, targeting specific FSMs in scripts would make it more troublesome to swap them out if needed.
Our preferred solution was to use our in-house event system, Blackboard. Blackboard allows us to create named events that may or may not carry data within them. Objects can subscribe or invoke these events through the Blackboard Manager object itself, without needing to reference other scripts. As for PlayMaker, we created custom FSM actions for event handling and used them throughout the game.
The Blackboard’s Custom Editor, for creating and managing events.
This approach allowed us to easily swap out scripts, objects and FSMs whenever the situation called for. So long as the involved parties in a certain game event acted upon and reacted to the same Blackboard events, communication between them happened without a hitch.
More details about Blackboard can be found here.
The Waypoint System
Movement Rules
One advantage of having waypoints in your game is that you can tell exactly where the player will be at any point. That information can be used to easily determine what possibilities are available for the player, without a need for triggers or math. Of course, this means designing the system in a way that favors this approach, which is why one of the first things we did was create rules for movement and logic for the agent that would move in such a way (the player).
This script, aptly named WaypointAgent, defines three stages of movement that must always happen, in the order below:
Begin: happens as soon as a waypoint is clicked, before any screen transition animation.
Continue: happens at a moment where the screen is entirely black (or player vision is otherwise obstructed). The player teleports, assuming the position and orientation defined by the destination waypoint.
End: happens as soon as the screen transition finishes and the player is allowed to act again.
Waypoint Movement
In all of these stages, both waypoints involved in the movement (source and destination), as well as any listeners registered to the Agent itself, are notified of the WaypointAgent’s movement.
Waypoint FSMs
The core of the game flow’s implementation is in PlayMaker FSMs attached to each waypoint. There can be any number of those, and they control events in the vicinity of that waypoint.
FSMs for the waypoint that faces the lobby's mailbox
This is one of the reasons why we notify waypoints in each stage of movement, so that they can pass this information on to their FSMs. The waypoint will trigger an event, for each FSM, that informs them of which is the current stage of movement and if the player is entering or leaving that waypoint.
This is the information we need to manage player interactions. When a movement Begins, the FSMs on the source waypoint will disable all interactable objects they’re responsible for. When it Ends, the FSMs attached to the destination will enable interactions in its vicinity. Additionally, if an object needs to appear or disappear, or if a shader variable needs to be changed, this is done in the Continue stage so that the user won’t notice.
All this can be achieved with Unity Events, however, and it isn’t why we chose to use PlayMaker. Interactable objects themselves are implemented in an Inversion of Control style: they have only two custom scripts attached to them, one that receives clicks, and another that dispatches a Blackboard event if the object is clicked.
The actual logic for that interaction is implemented by the FSM that controls it. Going back to the movement’s End, once the interaction is enabled, the state machine halts, waiting for its corresponding Blackboard event. When it is fired, a sequence of FSM actions carries out the tasks related to that object. This can include a multitude of things: an animation and/or sound being played, a new waypoint path being opened, fading the screen, the player being teleported away… A myriad FSM actions were created so to be chained together, allowing for the creation of diverse game flow events.
This FSM controls a door that leads to the emergency stairs, and is the purest example of the pattern described above. An interactable object is enabled, then the FSM waits for a Blackboard event related to it. When it is fired, something happens in the scene. In this case, animations and sounds are played, and waypoint connections change.
Waypoint Visibility
In a waypoint-based game, a player cannot move to arbitrary waypoints: only those connected to the waypoint they’re in should be visible. This means, whenever the player moves, we must take the necessary steps to guarantee that waypoint states will remain consistent. This is easy to do by having a global manager for waypoints, but with dozens of them existing in the scene and only a handful active at a time, this could mean sending out a lot of redundant commands.
We opted, instead, to make our waypoints self-governing. Every one of them is deactivated at first. When the first movement of the game Ends, the destination waypoint activates all connected waypoints. When the next movement Begins, the now source waypoint deactivates its connected brethren, and in that moment, all waypoints are hidden again. This guarantees state coherency without the need for an external controller.
Waypoint connections are initially defined via a serialized list in the editor, but can be created and destroyed during runtime by using custom FSM actions. It’s worth noting that, in DBF, the player will often move between scenes: this means serialized references can only be made to Game Variables keys. During initialization in runtime, a waypoint will build the actual connection list by running the keys it has through the index.
Waypoint connections in the hotel lobby
Waypoint Visuals
Finally, as was mentioned, we could make little UI or artistic assumptions when it came to the game, and waypoints were no exceptions. Several kinds of them, with different looks and behaviours, were tested over the course of development, until the team reached a satisfactory result.
To allow our UX and Art teams to freely iterate on their concepts without influencing the game, we chose, early on, to completely separate the waypoints’ logic from the way they looked and reacted. A WaypointVisual script was conceived, which could be derived, reimplemented, and swapped out at will. This script handled player interaction, controlled mesh renderers, defined timings for animations and even implemented the fade-in/fade-out transition we see when moving in DBF.
In earlier prototypes of the game, the waypoint was a simple round icon that was always visible. Other versions tried out different appearances and behaviors; notably, one of them showed a character model posing at the waypoint’s location, hinting at interactions that were possible from that point.
The actual waypoint script exclusively implements FSM management and movement logic. It communicates with its visual only through the abstractions of Registering -- a function call by a visual which sets itself as the active visual for a waypoint -- and Showing -- called by the waypoint when it’s activated or deactivated. The former means that waypoints can change how they look during the game, however, this feature wasn’t used in the game.
Conclusion
Not every game’s development cycle goes smoothly, in fact, when conversing with other developers, one might even think the odds are stacked against us in that sense. Instead of crossing our fingers and hoping everything turns out perfectly, we need to be ready to react to setbacks when they occur.
And so, the point of this post is not to state absolute truths, but to share part of our team’s experience, our decisions in a somewhat turbulent project. Of course, had we had more time or information, we might have made different choices; for instance, the large reliance on PlayMaker almost became a performance concern near the end of the project. Ultimately, however, we were able to ship our game without crunching, which is the most important thing.
To close things up, I’d like to thank my colleagues in Black River Studios who collaborated in this project, in particular, Tayana Bacry and Anderson Cardoso, who codesigned this particular system with me. Dead Body Falls is the work of many people who I’m grateful for having been able to work with.
Read more about:
Featured BlogsAbout the Author(s)
You May Also Like


