

Daily news, dev blogs, and stories from Game Developer straight to your inbox
Sponsored By
Featured Blog | This community-written post highlights the best of what the game industry has to offer. Read more like it on the Game Developer Blogs or learn how to Submit Your Own Blog Post
Create a Physics Based Fighting Game in Unity
How do you create a fighting game in Unity with realistic physics? This article shows you the basics of creating a physics based fighting game in Unity. It leverages simple Spring PD controllers and Inverse Kinematics.
5 Min Read

Originally published here.
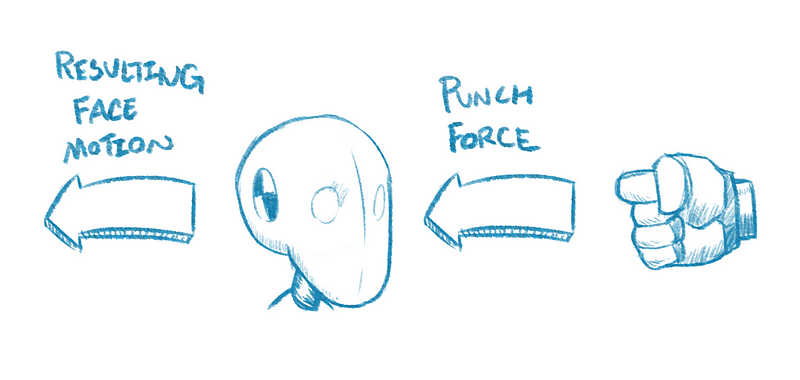
Just imagine two enemy opponents fighting each other in a game. If they are having a boxing match, then they might be punching each other’s head. The initial punch will knock the face in the direction of the punch’s force.
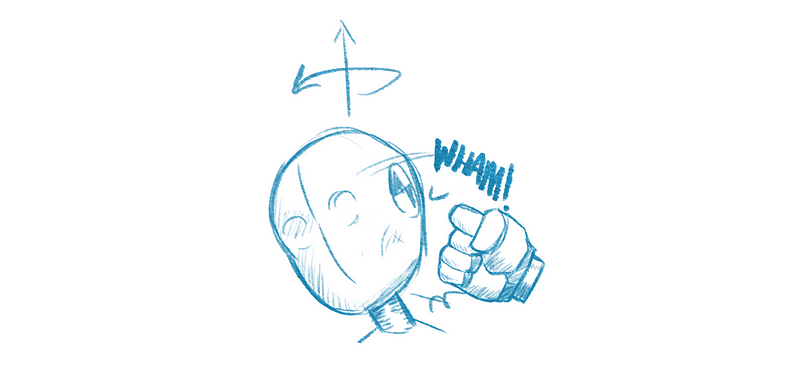
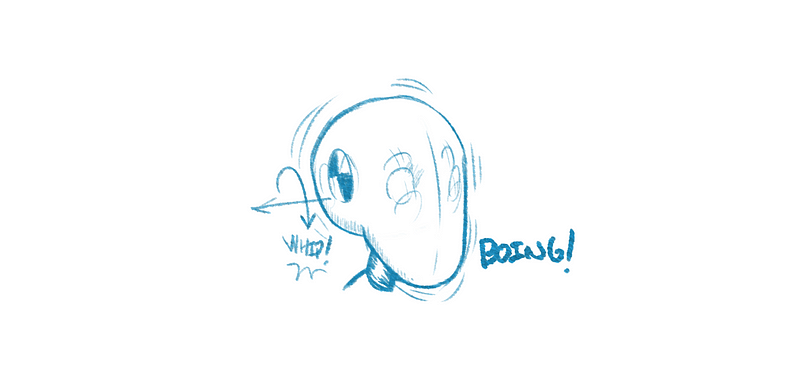
Y-Axis Rotation
The resulting force of the punch will be transferred to the head, and the head will rotate in the same direction as the punch’s direction. In this particular case, the face will rotate around the vertical Y-Axis. The head will eventually reach it’s limit of rotation as seen in the picture below.
Eventually, the face will want to rotate back to its rest rotation, such as the rotation in the following picture:
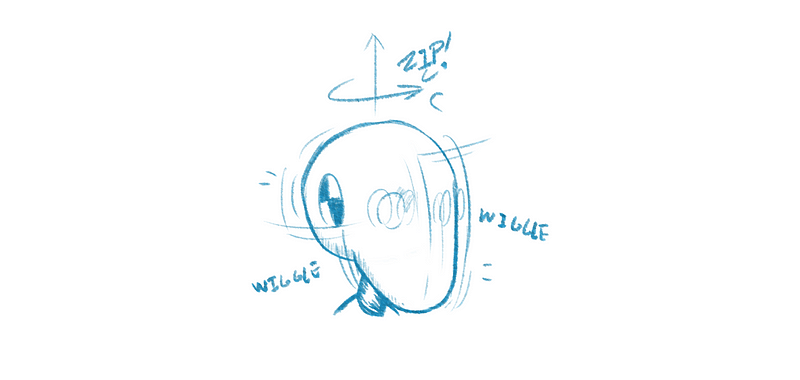
X-Axis Rotation
In addition to the rotation around the vertical axis, there is also a rotation around the horizontal axis. To re-iterate: The resulting force of the punch will be transferred to the head, and the head will rotate in the same direction as the punch’s direction. In this particular case, the head will rotate around the horizontal X (or Z) axis. The head will eventually reach it’s limit of rotation as seen in the below picture.
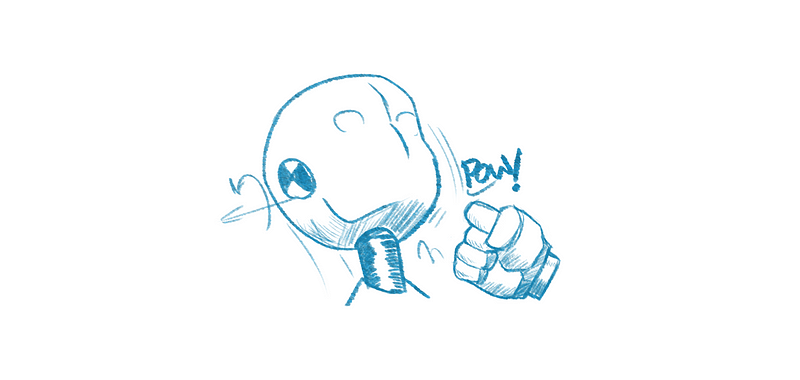
Eventually, the face will want to rotate back to its rest rotation, as shown in the following rotation:
Combining Rotations
Now that we’ve covered two key resulting motions that from the initial punch force, we are ready to combine both of them. Luckily, it is simple to combine both rotations. First do one rotation, then do the next rotation for each time step — nothing more complicated than that.
Here’s some simple code that does just that:
void FixedUpdate() {
    Vector3 ySpringTorque = getTorsionalSpringTorque (Vector3(0,1,0), Vector3(0,1,0));
    Vector3 xSpringTorque = getTorsionalSpringTorque (Vector3(1,0,0), Vector3(1,0,0));
    rigidBody.applyTorque(ySpringTorque);
    rigidBody.applyTorque(xSpringTorque);
}
Modeling and Implementation
As we’ve discussed, for each rotation, there is a rest rotation. A rotation at rest stays at rest. But if you knock the face to another rotational value, it will eventually eventually reach a certain maximum point of rotation, and it will want to return to its natural resting rotation.
This can be modeled with a rotational spring force (aka, a torque). This is explained in more detail in another article about Rotational Springs. The torque equation for the torsional spring is as follows:
T = q * r * a1 + p * w * a2
Where T is the torque, q is the spring stiffness constant, r is the distance from the desired rotation in degrees, p is the spring damping constant, and w is the difference between the current angular velocity and the desired angular velocity. Also, a1 is the axis of rotation and a2 is the axis of rotation for the angular velocity. Note that a1 and a2 are not necessarily the same axis of rotation vector. Furthermore, if you do not want damping, then p is equal to zero and the expression simplifies to T = q * r * a1.
The following function computes the required torque to apply to the game object (e.g., the head).
Vector3 getTorsionalSpringTorque (Vector3 axisOfRotation, Vector3 axisOfAngularVelocity) {
    float r_ij = desRot — currRot;
    float w_ij = desAngVel — currAngVel;
    Vector3 springTorque = Q * r_ij * axisOfRotation + P * w_ij * axisOfAngularVelocity;
    return springTorque;
}
Something to consider about the desired rotation is that the desired rotation can be controlled by animation data. This means that the desired rotation can be extracted from keyframe animations from animators, or the desired rotation can be derived from the motion capture data.
Additionally, note that the spring and damping constants, Q and P, can be controlled by the animator to define how responsive the rotational spring is. This means that the animator can control how fast the head will whip back to its desired rotation.
Aiming Your Punch
So far we have talked about how a fighter responds to a punch (physics), but we have not talked about how a fighter might aim his punch (kinematics). You can aim your punch by using Inverse Kinematics. If your punching fist is close enough to the opponent’s head, then you can switch from the punching animation data to a procedural animation using Inverse Kinematics. You do this by defining the target of the fist (aka, IK end effector) as the opponent’s head. Also, note that aiming your punch also generalizes to aiming your kick. If you need an overview of Inverse Kinematics, read this quick article.
I would suggest that you define the target as probabilistic distribution between the temple or the chin (e.g., a uniform randomization, where he is equally likely to hit anywhere on the opponent’s face). This way you can get a wide variety of responsive animations from the opponent, instead of punching the opponent in exactly the same spot every single time.
Generating a Punch Force
How do you generate the punch force that affects the opponent? The amount of force that is transferred to the opponent is based on the surface area during contact, the relative velocity of the punch, and the acceleration of the punch. An estimation or simplification of these variables should be sufficient. Otherwise, I might even suggest to apply an artist-defined force for each type of punch or attack.
Conclusion
These are the core concepts of a physically based fighting game. Having an opponent that is responsive to punches, aiming your punches, and defining your punch forces. Keep in mind that traditionally, you would need a large amount of animation data to create a wide range of punching animations and punching-reaction animations. Using these physics and kinematics techniques allows you to generate a large amount of animations without the need for a large amount of animation data. (Also note that all of these techniques generalize to kicking.)
Read more about:
Featured BlogsAbout the Author(s)
You May Also Like


.jpeg?width=700&auto=webp&quality=80&disable=upscale)


