Featured Blog | This community-written post highlights the best of what the game industry has to offer. Read more like it on the Game Developer Blogs.
How much people, time and money should QA take? Part2
Project planning is one of the most crucial and difficult steps of a videogame development project. In this Part 2, we’ll look into the main internal factor technique we use: the “Puzzle technique”.

Project planning is one of the most crucial and difficult steps of a videogame development project. It sets the scope of the game and its features and, through those, the amount of effort, time and money that is planned for it. With this series of entries I’ll share a couple tips and techniques my team and myself use to calculate how much people, time and money QA should take.
The most basic external factor rules we rely on are:
The 10% rule &
The QA/Debug Dev rule
The main internal factor technique we use is the “Puzzle technique” which considers:
Game content
Feature overlaps &
“Multipliers” (Positive and negative QA project/ratio influencers)
In Part1 of this article, we’ve looked at the basic external factor rules we rely on to evaluate how much people, time and money QA should take (The 10% rule & The QA/Debug Dev rule). In this Part 2, we’ll look into the main internal factor technique we use: the “Puzzle technique”.
And, again, before I start and get the question: “Matt! Does this apply to Dev QA or Publisher QA? Or outsourcers?”, this applies to all videogame QA!
The Puzzle Technique
I’ve named this method “Puzzle technique” because to apply it properly, you have to cut out all of a game’s features and content into smaller and smaller pieces and then reconstruct all of them to provide you with a big picture of the required work. That puzzle, once built, will be your QA Strategy. You can then use that QA Strategy to feed your QA plan and then, finally, use that QA plan to feed your testcases.
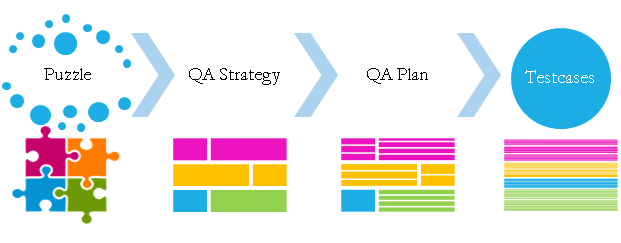
As mentioned before, it considers the game content, features overlaps and multipliers, in that specific order. Let’s take the example of an oversimplified game and project for the sake of the process explanation. And again, for the sake of the example, you do not need to do any Compatibility, Performance, First Party Publishing Certification, or any other type of testing than Gameplay. Let’s assume another team will cover the other parts (If you want me to cover strategy and execution of some of these other features, we’ll do it in other posts.).
Let’s delve in!
Step 1: Game content
First, list all of the game’s content/features and how much time it would be necessary for a normal user to see 100% of that content. Note here: I’d suggest to not go too much into details for the first pass. Firstly because you’ll spend too much time and overthink it for nothing, and secondly because going into details should be saved for your QA Plan and then testcases.
In the below example, we have a game that:
Can be completed in about 5h
Takes about 2h to see all UI functionalities, including menu interactions
Takes about 10h to collect all available items
Takes 24h to complete all achievements
Etc…
Let’s populate the below table with the information we have as of yet:
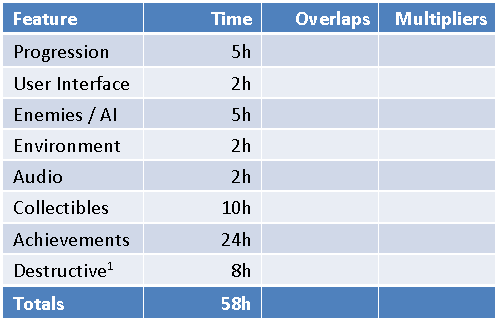
1Free tip: You’ll also notice that I added an extra line at the bottom for destructive testing. It’s not a game feature. Destructive testing is a type of unscripted/exploratory testing which is usually reserved for a very special type of tester. The type of tester that is able to use his gut, instinct and smarts to know and feel how to break the game, outside of your plan and testcases. The type of tester that sees different features in a game and can easily put 1 and 1 together to make something unexpected happen. I won’t go too much in details here as I could have an entry solely for scripted vs exploratory (including destructive) testing, but always, ALWAYS, reserve some time for destructive testing.
Step 2: Feature overlaps
Secondly, look into your list of features and see what can be covered simultaneously, easily and naturally by a tester. In the below example, to complete “Achievements”, you’ll need to complete “Progression” and “Collectibles” naturally, so we can reduce those to 0%. They have repeat coverage in all 3 sections, so if you don’t do so you’ll be wasting time on the same content coverage. Regarding “Audio”, let’s assume that looking into all other features will allow to hear 100% of sounds and music – all we need to do is to instruct testers to bug audio as discovered2. Per the table below, we’ve already reduced the required total time for a full pass from 58h to 41h.

2Please take in consideration that this is an example. It’s not always the case and sometimes a specific game may require extensive and separate audio checks.
Step 3: Multipliers
Finally, apply positive and negative multipliers to your game features.
Positive multipliers are anything that increases the productivity of the testers (e.g. efficient debug or cheat features within the game, no major blockers within the game, effective and useful reference material given to the QA team like the GDD and/or walkthrough docs, etc.).
Negative multipliers are anything that decreases the productivity of the testers (e.g. random appearance or generation of content – including procedural generation, presence of major blockers within the game, no/unclear/contradicting information or instructions given to QA team, Multiplayer checks requiring multiple people, etc.).
In the below example, let’s say the dev team provided a build with cheat/debug commands that allows for easy progression, reducing “Achievements” time by 12h3, but there’s also some random enemy encounters that adds about 3h to see all enemy content in the game. We saved another 9h. 32h total instead of our original 58h.

3Even though Cheat/Debug features usually helps QA progression, please take in consideration that you may want to take them out at some point if you don’t plan to publish with them included in your Release Candidate (RC) build, and you may also want some testers to not use them while testing throughout all the time, especially when nearing RC. The main reason being that active Cheat and Debug features may hide some important issues (e.g.: jumping over major blocker) or make new ones appear that wouldn’t be present in a non-debug build, which wouldn’t require any fix (thus wasting your testers’ and developers’ time).
Next steps
You now have your base puzzle done and know how much time is needed for 1 full pass. As shown previously, you can now use that information to present your base QA Strategy, build your QA Test Plan, and from that build your necessary QA Test Cases for your testers. Depending on the complexity of your game, project or even situation you’re in, you may need to look into a few other things.
The next steps, if applicable, are to apply the “Project Constraint Model” to your game project. The most well-known model of it being the Triple Constraint or Eternal/Iron Triangle, and its newest/updated and lesser-known counter-part, the Project Management Star.
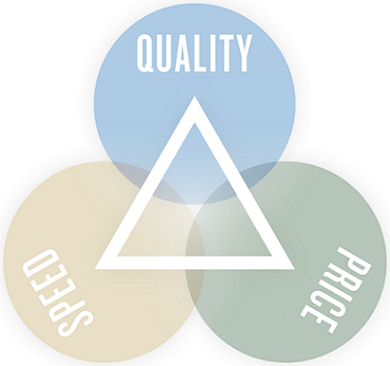
“Choose two”
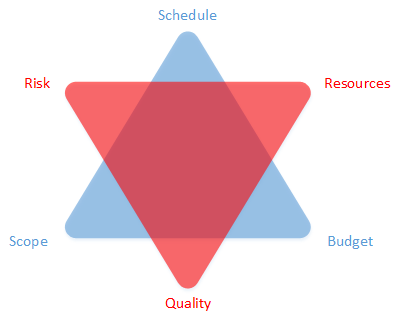
Some examples of that application:
Defining your timeframe and budget, usually per your development timeframe and budget (see Part1 of this post).
Defining your quality/content coverage requirements, usually per your game content plan and your team’s quality expectations (How much content is there in our game? What type of testing do we need? What’s our quality threshold? When should we consider the game “good enough”?).
Make sure the two above points are aligned, and if not, making as much of an informed decision as you can regarding your timeframe, how much you want to spend, the amount of content you’ll deliver and the quality of the content you’ll deliver, for QA but also all other spheres of your game (if you don’t have money nor time to test your game, you might not have enough time or money to also develop, add in audio, create music, create art assets, translate your game, etc… and/or you may want to scale back on content/quality).
Defining the QA support coverage process you need and want to apply (E.G.: constant team, fluctuating team per phase, cyclical rounds, etc.).
Defining your team size based on your timeframe, budget and quality/content coverage requirements and project phase.
If cyclical, defining how many rounds of QA you’d need and when.
If applicable, defining the coverage requirements per project rounds or phase. (E.G.: Audio and UI not implemented and can’t be checked before Beta, Checking 50% of content per week in Pre-Alpha vs. Checking 400% of content per week in Beta/RC, etc.)
And more depending on your project’s specificities.
Below’s a partly censored Puzzle / QA Strategy I had built a few years ago on a AAA title. All features and feature types on the left, then coverage times and implementation dates, and then % ratio of coverage per week per project phase, from Pre-Alpha to Post Release support and into DLC work. From there, we could know the amount of necessary tester-days per week per phase, and thus average amount of testers per day and the exact amount of QA, time and money necessary for the project.
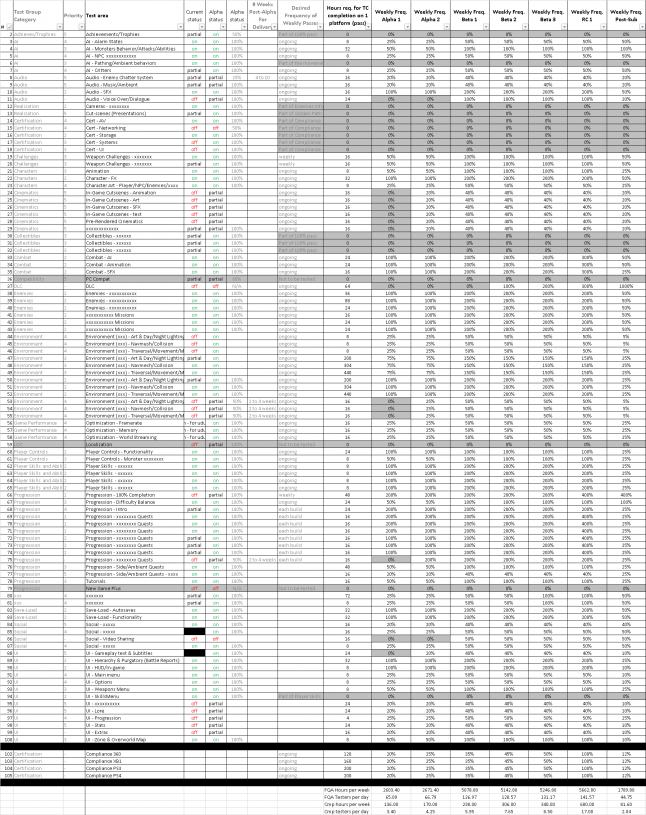
As you can see above, if your game and your development plan is complex, the work for this will get complex as well. Don’t worry, I will cover some of these Next Steps in future entries. In my next post we’ll look at stakeholder management as well as the QA Pareto concept, which helps you decide the quality level of your game as well as when to close a QA project based on pre-defined KPIs. I hope you enjoyed the post and found it useful! And, as always, feel free to leave any comments and questions and I’ll try to answer as best I can.
Also, 2 BIG NEWS for those courageous enough to have read through the whole article!
News #1: For those interested in meeting me and some of my colleagues next week, we will be in Barcelona, Spain for the Game QA & Localisation Europe 2016 Conference from June 28th to 30th AND we have 5 free client passes to give out. Message me rapidly if you’re interested in getting one of these passes!
News #2: My colleagues , Nicolas Liorzou & Stefan Henry-Biskup, will be speaking about Tips & Tricks on shipping a world class indie game: the Publishing-as-a-Service option and Finding “the Awesome” All Day Long at Mexico’s Campus Party next week also. If you have the chance, I’d highly suggest dropping by to see their presentation!
Until next time!
Read more about:
Featured BlogsAbout the Author(s)
You May Also Like


