Daily news, dev blogs, and stories from Game Developer straight to your inbox
Sponsored By
Featured Blog | This community-written post highlights the best of what the game industry has to offer. Read more like it on the Game Developer Blogs.
Simple but effective eyes material in Unreal
We explain step by step how we made a simple, cheap and effective material for the eyes in Life Pictures.
5 Min Read

This article was also posted on Life Pictures official page.
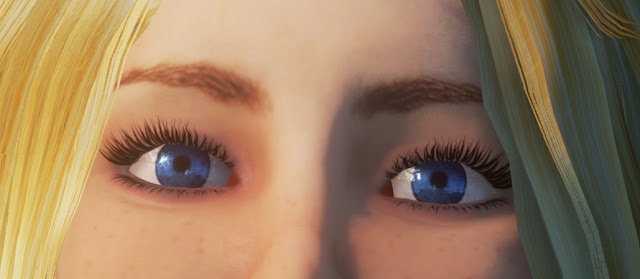
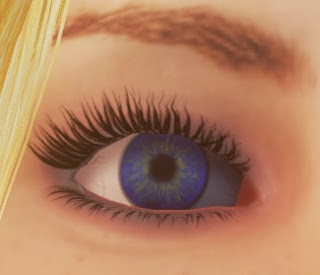
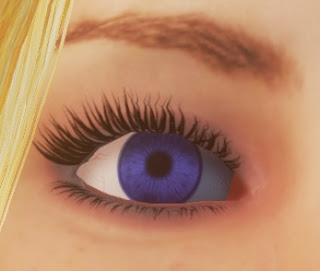
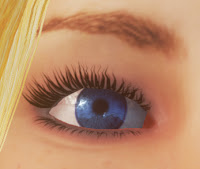
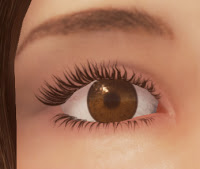
In this article we're going to talk about the Unreal material we use for the girls' eyes in Life Pictures. It's a very simple material, easy to understand, create and use even by beginners, but with a pretty nice visual output. Below you can see the final result. If you like it, then read on to see how we made it!
To get started, let's see what we have when we import a girl model from iClone Character Creator, the software we use to make the girls.
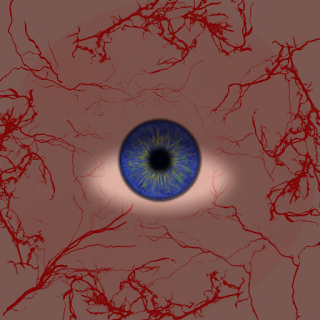
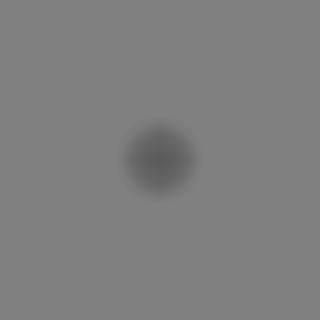
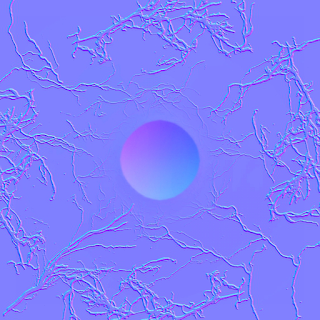
Above you can see the 3 textures: base color, specular and normal. The starting material is a very simple one, using the above textures as input into their corresponding nodes. The result is in the screenshot below, which is not really what we're looking for.
But before we work on the look, let's first improve its reusability. Since we're going to use the same material for all the 3 girls in Life Pictures, we can reuse the normal and specular - we're actually getting rid of the specular but more on that later. However, as it is now, the base color needs to be a different texture for each of the girls, as their eyes colors differ. Since only the color is different and not the actual patterns in the iris, the first thing we're going to want to do is to control the color through a material parameter and convert the current texture into a grayscale. As I'm sure you've guessed, we can't simply multiply the color with the grayscale, as that would affect the entire texture, including the white area and the capillaries. In fact, we're only converting the pupil area into a grayscale and we're also going to use a mask to multiply only that area with our intended color.


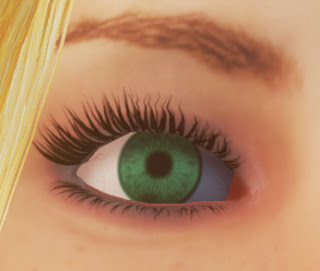
Now we can control the color of our eye from a material instance, tweaking our color parameter. Below you can see two examples of doing that.
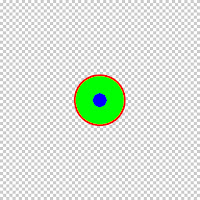
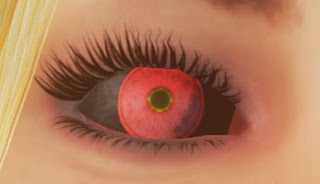
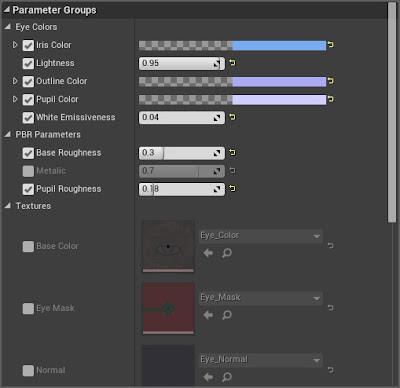
What we have so far is probably good enough in terms of reusability, but we like to have more control than that. So we made a more complex mask, using all 4 channels to separate the various areas of the eye. The red channel colors the outline of the iris, the green channel colors the iris, the blue channel colors the pupil and the alpha channel is used to color the white area. We now have 4 parameters to control all those colors: Outline Color, Iris Color, Pupil Color and Lightness - the last one is just a scalar and is used to make the white area lighter or darker. If you want to actually change its color, it's simple enough to change it to a vector parameter. Below you can see the final mask, the material for this phase and a freaky example that you definitely won't see in Life Pictures, but shows how much variety we can now get.
We're done with the reusability factor of our material, so now it's time to work on the looks. First of all, we add a parameter to control the emissive color of the white area. We do this to make sure the eye doesn't look too dark in a more shadowed environment. To affect only the white area, we use the alpha channel from the mask, just as we did for the lightness parameter. With that taken care of, let's get rid of the specular and switch to roughness. We want to have different roughness between the white area and the iris area, so we can have different grades of reflection. We add 2 parameters to control this, Base Roughness for the white area and Pupil Roughness for the pupil and iris. We again use the alpha channel from our mask to separate the two areas.

Starting to look better, but we're not there yet. We need to tweak the metallic value of the iris area, so we can get some proper reflections. We do that with a Metallic scalar parameter and, once again, multiplying it with the alpha channel from the mask. Don't forget to include a reflection sphere or cube around the character.

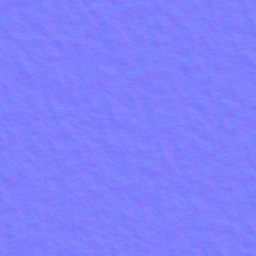
One last thing to do. We're not very happy with the normal map on the eye. To get a nice wet look, we're going to use a different texture and get rid of the one we used so far, as it didn't help much anyway.
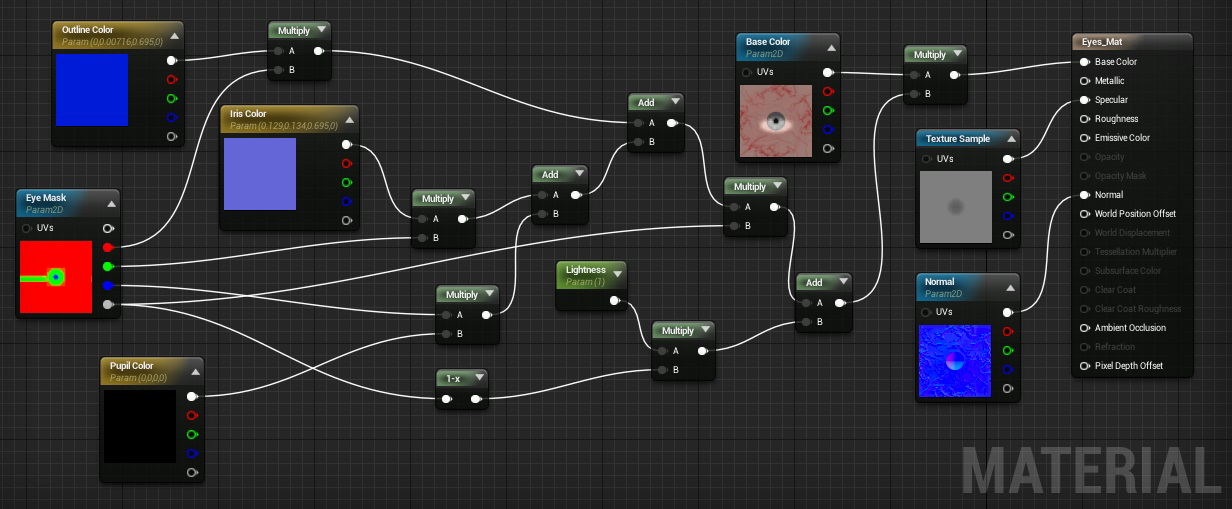
After tweaking the various parameters we implemented so far, we got the final look below. You can also check out the final material and the setting we used.


That's it, a nice, simple, reusable and pretty cheap to render eyes material. Nothing fancy, but we're very happy with the results. We hope you find it useful! You can copy paste it from here and use it in your projects. Thank you for reading!
Read more about:
Featured BlogsAbout the Author(s)
You May Also Like