Developing Mobile VR Games Pt2.
This is the second part of our journey to making VR games. Read about our experience with developing and publishing!

In the first part of we have discussed the tools and the game technical considerations that we at Pocket Games take into a count when developing Virtual Reality games. We presented this using two of our VR games Castaways VR and The Duel VR.
We'll continue where we left off at,
Optimization!
(Péter/programmer)
Serious requirements
“As I mentioned earlier we have to work hard to achieve the frame time that is needed for a good experience. For PC VR like Oculus Rift or HTC Vive, a constant 90 frames per seconds is needed. This gives the developers about 11 milliseconds to completely create a frame. For mobile VR like Oculus Gear VR, which is the most popular mobile VR platform, you need a constant 60 frames per seconds. Which gives the developers around 16 milliseconds to draw a frame. Naturally because we are talking about VR all of these frames have to be drawn twice, once for each eye.
You might think that because 16ms is a much longer time compared to 11ms we have and easy job at mobile VR. But this is not the case at all. The performance of a VR compatible mobile device is incomparable to a VR ready PC.”
Other limitations for Gear VR:
50-100 thousand hexagons
50-100 thousand vertex
50-100 draw call
128 MB texture is recommended(512 MB max)
Dynamic lighting and shadows are a NO
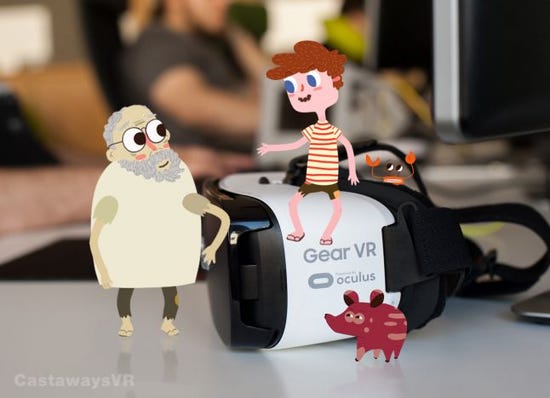
Oculus Framework
“Because our platform is Gear VR we have to talk about this framework. This is behind the entire VR system. Oculus has made a lot of effort to make the life of the developers easier by using this tool. I am going to talk about this and some tricks I learned during the development of two VR games.
Firstly, the layer system. In practice this is like when we look at a computer screen where there are multiple windows and those windows are the components of the entire image. This is basically what happens here, what we see is made from multiple layers. We can control the position and resolution of each element among other things. For example, a higher resolution can be used for labels so they are readable, while using lower resolution elements for the game field work fine
We can use this to display HUD, in Castaways VR we used it to display the loading screen too while everything loaded up.

The other very clever thing is Asynchronous Timewarp, we like this very much because it does not require a lot of work from the developers. The trick is, that we don't display the image instantly, but a plane renders it, and just before displaying it to the user the sensors are set so everything appears where they supposed to appear. This can help prevent lag spikes, and produces a more constant frame rate. However, there is a disadvantage as well, because it moves the frame, if we use any elements which are fixed to the player's vision, those will lag if we did not optimize enough. Everything has a disadvantage I guess.
Asynchronous Spacewarp is the sibling of Asynchronous Timewarp. With this tool, we can do magic! Unfortunately, the complete version of it is not available for mobile. This takes the frame smoothing process further by editing the frame itself. While running, it monitors what content we display, and what animations are present. So, if we have not rendered a new frame it extrapolates it based on the previous data, moves the objects and generates the missing parts. It basically generates us a frame for free. Which means, that we can have a smooth experience with only 45 frames per second. But this magic comes at a cost, the scenes it can generate are limited. For example, very similar looking textures can generate a strange result. So, if we use this tool we still have to pay attention.
CPU & GPU performance limitation is also available in this framework. This enables us to not use more resources than it is necessary. This is very important for mobile device, because we have to keep in mind the battery drainage, but most importantly the heat. If we don't limit the performance the battery can be drained in about 10-15 minutes from a full charge (Galaxy S7). We have to find the fine line between limiting performance and smooth gameplay, this requires some time.
There are a ton of documentation on Oculus's website. I highly recommend reading it, and getting to know this framework before we dive into the development. If the planning procedure is not careful enough, we can miss out on tools like these, which can make your life a whole lot easier if used properly.
Let’s say our game is almost done, we are nearly ready to publish, but we do not have the 60 frames per seconds. How can we achieve this so the game runs smooth enough? We take the entire code, we drag it into 'optimize.exe' and it is all done and the mac OS users are sad because the exe does not run for them. This would be amazing! Sadly, this is not the case at all. This process requires a ton of manual modifications. This is what we are going to talk about, how we optimized Castaways VR.
The fight against draw calls
Simply defined, a draw call is when the CPU tells the GPU 'hey here is something, draw it'. We can do this by taking an object and giving it to the GPU to draw it. The GPU can draw it very fast, much faster than the CPU can give the instruction to do so.
This is where the problem starts. If we constantly expect the CPU to tell the GPU to draw, it takes a lot of time. Meanwhile it has other tasks as well, like to run the game and the operating system, these tasks cannot be halted just because of a draw call. Because it is VR, this problem doubles as we have two eyes so, we have to draw everything twice this doubles the number of draw calls.
There are some solutions for this, but we have to take this to a count regardless. How can we reduce the number of draw calls? How can we fix this problem?
There is a trivial solution, maybe we are drawing too many objects, lets draw less! This can cause problems for a game, like not seeing elements of the level, so we need another solution.
What if we take everything that we draw separately, and we mash multiple objects into one draw call? This might work! But there are problems especially during the early phase of the development. If we mash things together, and the designer goes to tell you that something needs to be changed or modified, a developer might tear his own hair out. So, if we do this, I recommend doing it near the end of the development, and when the level design is final.
Another solution is batching. This takes the objects into a batch so the will be drawn together. This is very similar to the method we would do manually, it is done runtime. However, there are limitations on when we can use this. One kind is static batching. As the name suggests this only works with static objects, which cannot be moved or modify during the gameplay. This narrows it's use case. The positive side is that this only uses memory runtime, which is not a problem now days. Also, it does not really work with transparent materials. The other kind is dynamic batching, which can batch moving objects. But there are limitations on when this is possible. Vertex properties, material properties have to be taken into consideration as it cannot handle everything. Due to this being dynamic, this has to be done in absolute runtime, this causes a big load for the CPU to handle. In very extreme cases it can even worsen the performance. Debugging this is also a huge headache, if something does not work out, it takes a ton of time to figure out why.

Transparent materials
Transparent materials cause awful performance on mobile devices. The reason, is that mobile GPUs use some hardware optimization during the rendering procedure which cannot handle this kind of material. Also, drawing these transparent materials is a hard task for the GPU. This causes performance decrease on all platforms, but most noticeably on mobile devices.
The final sequence of these elements is also an interesting topic, you'll have to answer the question ‘What is in front of what ‘. This is called ‘Z fighting’ by the developers, referring to the z axis. This is when we precisely calculate where the materials are, which look and work perfectly, until we look at them from anywhere else but from the front. When we view these from an angel the edges of the materials bounc on each other. Which looks awful and cannot be published. We try to avoid this entire topic on mobile if it is possible, especially on mobile VR where this effect is even worse. Just don't use transparent materials, if it is not 100% mandatory.
Unluckily we had to use mostly transparent elements.
So how did we do it with Castaways VR?
We used Sprite sheets, which are basically pictures in a 3-dimensional environment. If we have to display something in space, we need to put it on to something. The simplest solution is to take a cube and put the picture on it. The problem with this, is that depending on what kind of picture we are displaying some pixels are transparent. Those pixels give nothing to the game, but still have to be computed making the performance only worse.

Generating a fitting mesh may solve this issue, this is what we did in Castaways VR. Unity generates this mesh for us, unfortunately the results are often disastrous out of the box. For this reason, we used a plugin, which had a ton of settings enabling us to tweak everything correctly. The most important thing is the proportion between the details of the model and the pixel not displayed. We have to find the golden way.
If we generate all of these, there will be a ton of meshes with a ton of materials, so we will end up with a ton of draw calls. Resulting a low performance, we would be back at where we started at this point. To prevent this, we used a plugin called ‘Sprite terminator’ for multiple functions. We made texture atlases, we took several textures and put them together into one image. Going with this method we have to make sure to leave as little blank spaces as possible on the atlases.
We did the same with the meshes. The first level of Castaways VR was drawn by 4-5 big pieces of mesh, instead of the 300 we had originally. We also got rid of the transparent textures, we instead went with the alpha tests. Here transparency is still kind of supported, but there is no such thing as 50% transparent. The disadvantage of this is that we cannot create nicely rounded edges. The result of this was that the textures have these blocky edges, but run the game runs fast.

What to do next?
After we have done all of these things, what more can we do to ensure running smooth? We used even more meshes for sprites. We created even more atlases meshes. We created smaller and compressed atlases. We converted to 'alpha to coverage' shaders this is very similar to 'alpha mask'. It knows a bit more than its predecessor, it has some transparency and can display edges a bit better with the same performance.

Some manual culling was done, which is basically making sure elements which cannot be seen by the camera are not rendered. Because we have fix points in Castaways VR we sat everything that can be seen for each point. Based on those points and what can be seen from them, we sat the performance of the CPU and GPU, giving a bit more power when needed and reduced when it was not in need. An example for this was the underwater scene, where we displayed a lot of effects and we needed more power for that 30 seconds. This amount of tweaking was almost enough to reach our performance/looks goal but not quiet."

(Kristóf/programmer)
Pixel Overdraw
"We are almost at our desired 60 frames per second. Until this point the topic was, about the poor CPU who has too many tasks, lets assign most of them to the GPU. This was our strategy, but after a while even the GPU cannot handle it. How can we make it easier for it?
We can reduce the overdraw for a start. What is an overdraw? An overdraw is how many times a pixel's content is changed until it reaches its final state. Let me give you an example; if there is tree in front of a bush and, we draw the bush and then the tree we wasted the pixels hidden by the tree to draw the bsuh.
How can we eliminate this? Luckily the GPU helps us with early pixel discard technology, this is not fully automated so we have to set some things up manually. We have to manually set the sequence of rendering for example. Here we draw the bushes and trees first, and the ground, hills and skybox at last. We sat this up so the GPU can know that those pixels should not be changed again. This way we could save a bit of performance.
There is yet another VR trick that I would like to share with you.

Hybrid camera system
In VR, each of our eye get a separated picture, with this we can see things pretty accurate, and if something moves around our head it looks good. But if we look at objects far away the 3-dimensional effect does not really work, this starts from around 10 meters of distance. So, was this idea to introduce a 3rd camera as if we had a 3rd eye. With this camera, we only render the objects far away, and then merge the pictures together. This way we can save half of the draw calls needed for the objects further away from us. Unfortunately, this only stayed an idea. We could not use it as our level was made from large meshes in the distance and it conflicted with our camera system. So, we dropped the whole thing. But if you use it for your project let us know, I would love to see it working!"
(Péter/programmer)
"So, we are done developing, phew... good job give yourself a pat on your back.
But how do we publish?
Because we were developing on Oculus' platform it was obvious to publish in the Oculus Store. What do we need to appear in the store? Well there is a pretty long list of rules. For example, on the Gear VR headset there are buttons and for each button there are rules on what functions it can perform. There are also rules for the length of the description found on the store page, the resolution, format and content of gameplay videos and images. All of these can be found on Oculus' website. I recommend reading this as early as possible so you don't put time into something that cannot be published.
The other deal breaker is the performance test. This was the reason for our long procedure of optimization. At this stage, they test the game on multiple VR ready devices to see if the frame rate really never dives under 60 frames per seconds. If it does, the application will be declined. The first couple of times Castaways VR failed the performance test. This is a hard test itself, but results of the test did not make it easier either. The results stated that, the game ran fine except on the devices with the lowest and the highest performance. We really did not know what to think of that. We gave it a few more shots and got it published. Castaways VR was our first VR game. We learned a lot and by the time we made our second The Duel VR, the optimization process was a whole lot faster. It also got accepted to the store for the first try.
A content test also takes place where they carefully go through the game to see if the content is appropriate and the quality is good enough. During this phase, they check the description and the price of the game and also recommend changes if needed. After all these tests, we can get the game into the store! But where? The store has multiple categories to which your game can go. The interesting category is called 'Gallery Apps' this is where the unfinished, early access, unpolished or even short games go. What can be a surprise is that we as the developers have no saying in under what category our game gets listed to. During the content test this is decided buy Oculus. The support team of Oculus is awesome, if we had any questions they replied rapidly to help us. So, if you run into an issue, contact them with confidence.

Make sure you create something unique and innovative. This will make your game stand out and be successful and takes this profession to the next level."
Find us here: pocketgames.eu
Contact me at: [email protected]
About the Author(s)
You May Also Like


