Carryable Torches in Unity Without Shaders
Tutorial for using Unity's SpriteMask component to provide dynamic lighting in a 2D, sprite-based world. In my game, it allows multiple players to hold torches while moving.

Hello, my name is Max and I am afraid of shaders.
(Spoiler alert, this is not a tutorial on writing shaders.)
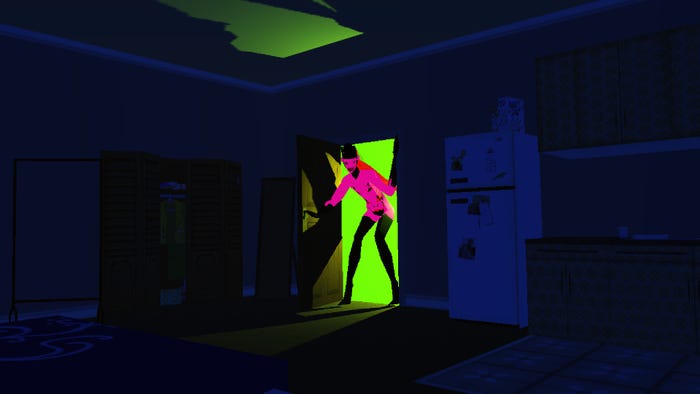
For many months, I've yearned to add torches to my sprite based 2D game. There's a bunch of solutions on the internet for writing shaders for this kind of thing, but I didn't see the exact solution I needed. And I'm a first time, solo dev without a programming background and my schedule has been pleasantly full with just learning C# and Unity and GIMP and Lightworks and making a website and blogging and doing #screenshotsaturday and pestering friends for music...all this without having to write nasty shaders. But! Now that Unity created the Sprite Mask component, I have got my brief candles working. Here's a gif from the final product.
Once I figured out how to do this, it's almost trivial. However, since of course it took me a full day to figure out that trivial solution, and since Visual Studio is updating, I thought I'd write this blog.
MY PROBLEM:
Flock of Dogs is a top down, 2D, co-op game for up to 8 players locally. I wanted multiple, dynamic, light sources. To be specific, I wanted circles of light to emanate from the torch item when a player carried it. Moreover, I wanted multiple players to be able to carry torches and their light circles to play nicely when players moved and the circles overlapped. And maybe in the future, more things will be on fire and will move too. To be determined. This rules out the approach of a sprite overlay with a hole cut out, because as soon as you try to do two overlays, they each cover the hole of the other.
MY SOLUTION:
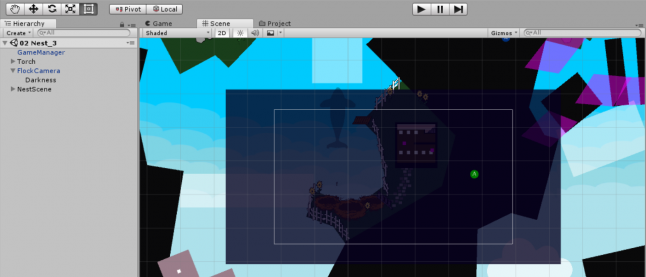
(1) I created Darkness! A screen-sized rectangle attached to my camera, a very deep purple/blue, with a bit of transparency.

(2) I put it on its own sorting layer, which I named Light, because darkness creates light. Right?
(3) Took my torch prefab and created a child on it with a sprite mask. Chose a circle sprite for its sprite. Scaled it up to a 20 radius. This didn't do anything except make a nice orange circle though!

(4) Went back to my darkness sprite, selected "Mask Interaction" dropdown, chose "Visible Outside Mask."

Ta-da.
(5) Now, it looked weird to me that the area that had been cut out from the darkness was perfectly clear and there was such an abrupt transition into the dark. So I duplicated the Darkness and changed its color to a mostly transparent dark yellow. I called it Haze! I set its Mask Interaction to none.

(6) For the fading, I duplicated the Darkness twice. I renamed the objects to DarkShadow and LightShadow and set their transparencies to like 40/255 (still on the Light sorting layer, sill with "Visible Outside Mask" turned on). This served to only darken the the Darkness, since the mask was still cutting through all them.
(7) Back on the torch, I duplicated the sprite mask child twice as well. Renamed them to DarkShadowMask and LightShadowMask. Scaled DarkShadowMask to a 24 radius and LightShadow to a 20 radius.
(7b) I created a child object for my torch to hold the masks, Light.

(8) On the three masks on the torch, I checked "Custom Range" and chose these settings:
For the DarknessMask,
Front Sorting Layer: Light; Order in Layer: 0.
Back Sorting Layer: Light -1, Order in Layer: -1.
For the DarkShadowMask,
Front Sorting Layer: Light; Order in Layer: 1.
Back Sorting Layer: Light -1, Order in Layer: 0.
For the LightShadowMask,
Front Sorting Layer: Light; Order in Layer: 2.
Back Sorting Layer: Light -1, Order in Layer: 1.
This image is of setting the DarknessMask's Sprite Mask custom range.

(9) On the overlays, I set their sprite renderer's sorting orders to the following:
Haze: -1
Darkness: 0
DarkShadow: 1
Light Shadow: 2
.png/?width=646&auto=webp&quality=80&disable=upscale)

Boom shakalaka.
(I also added a script on the torch to make the light flicker)
Read more about:
BlogsAbout the Author(s)
You May Also Like


