

Daily news, dev blogs, and stories from Game Developer straight to your inbox
Sponsored By
Featured Blog | This community-written post highlights the best of what the game industry has to offer. Read more like it on the Game Developer Blogs.
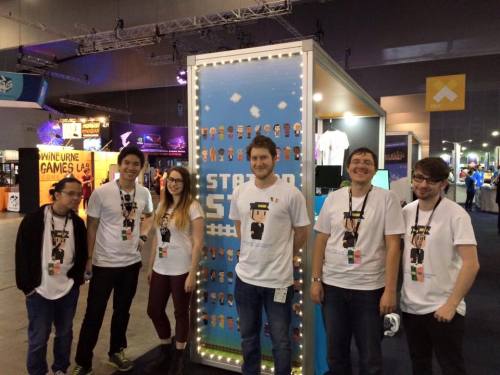
Station Stop PAX AUS 2015 Pins: Post-Mortem
Post-mortem about the process of the Station Stop team creating their collectible badges from PAX AUS 2015.
18 Min Read

The number one question I received at this year’s PAX was: “How did you make your pins?!” Well, dear reader, pull up a chair because I am going to tell you. All of it. Including the mistakes.
I had been to one PAX before (2013) but this was my first time exhibiting. It was as a lover of gaming culture that helped me understand the importance of badges and pins at the convention. I knew we needed to set ourselves apart as our game was unknown to the masses, had very little marketing and next to no social media presence. It was an opportunity to get our names out.
The team was on board as soon as I suggested it. We did some research on the cost but I really didn’t want to do the round metal pins you always see from indies at conventions. A badge that made a lasting impression on me were the wooden Swordy pins. I wanted our pins to have the same memorability.
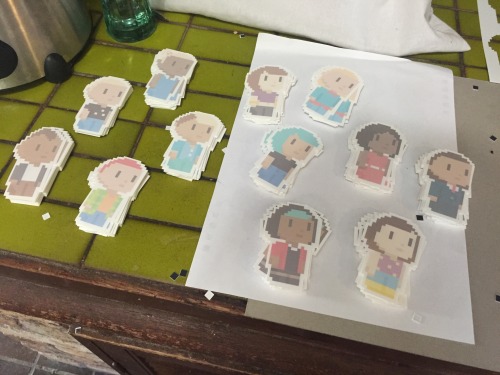
CONCEPT AND PROTOTYPING
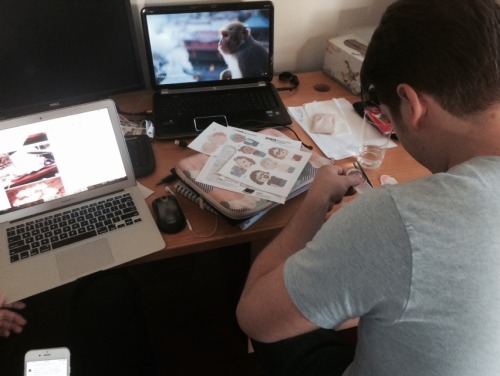
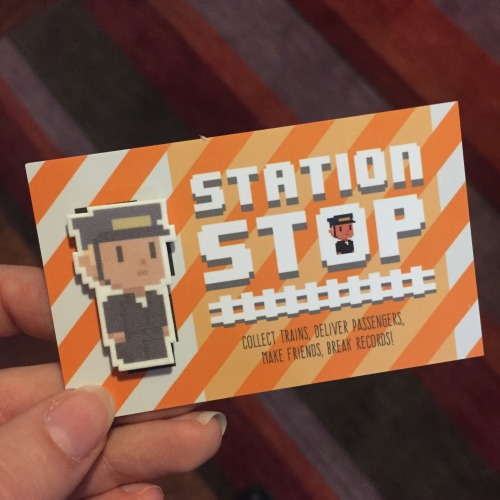
At the same time we were also in the concept phase of our business cards and we realised we could leave a space to pin the badge directly onto it. Since we had no branding on the pins themselves, we needed to make sure we were giving people something to remember our name by. We got a run of 1500 by a local printer.
Once everything was cleared with all parties we were ready to start the huge undertaking of making one and a half thousand of these badges.
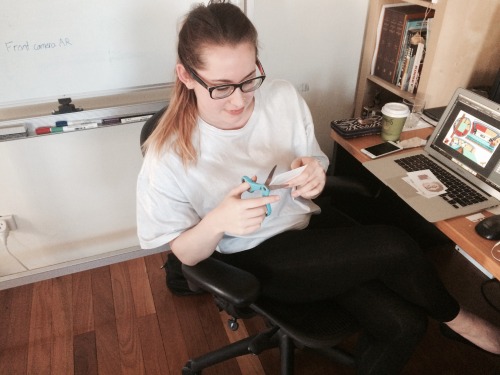
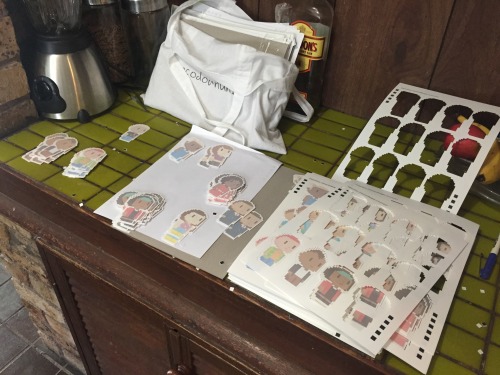
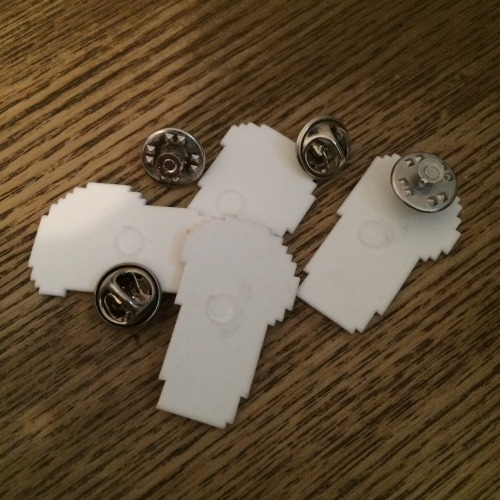
LASER CUTTING

BAKING AND SPRAYING
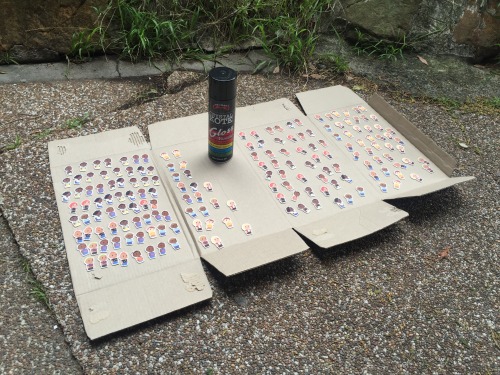
GLUING
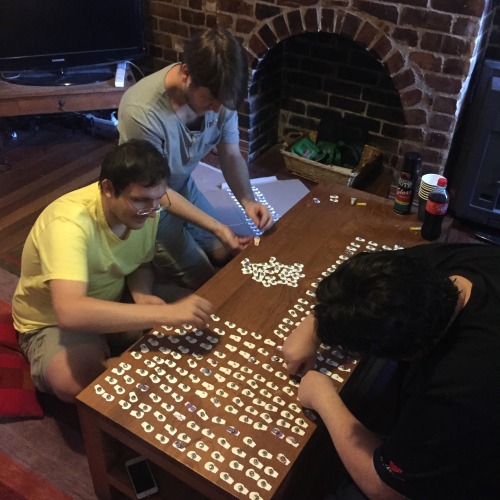
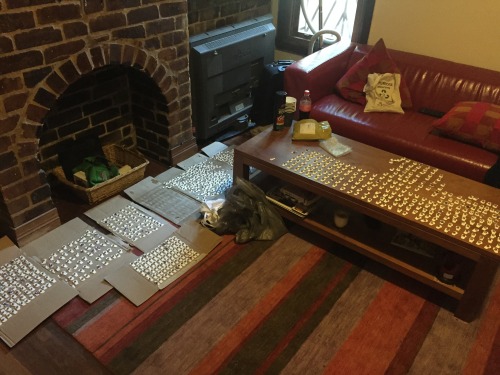
TRANSPORT AND PAX PREPARATION
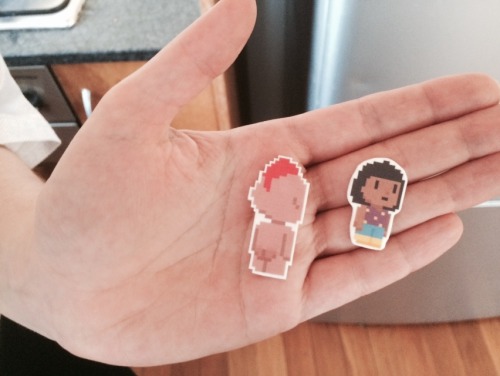
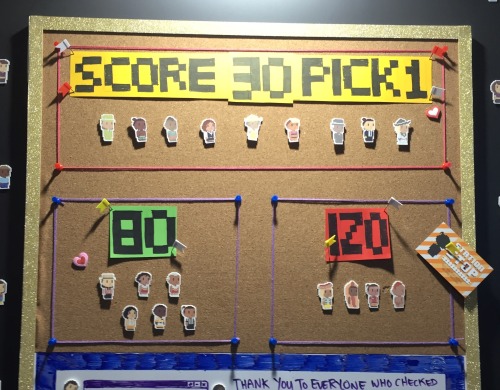
We divided up our ‘common’ and ‘rare’ buds and came up with a ballpark figure at a score in the game an attendee would need to get in the game to receive one of the limited pins. Thankfully, the game was already out on the App Store, so attendees could play the game away from the booth, work on their score and still come back to receive one of the rare pins. It was a way to get people coming back more than once over the weekend.
PAX ROUND-UP
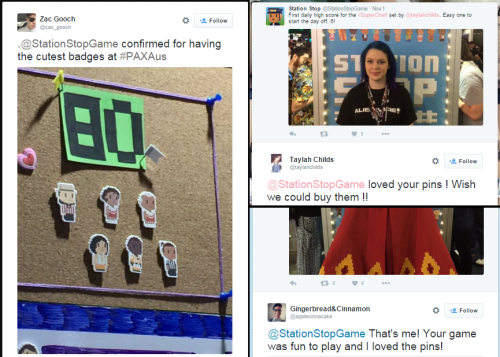
An additional incentive we offered was that anyone who set a high score daily or weekly would have themselves recreated as a bud ingame for the next update. We made sure to get their name, twitter or email, a photo of them and uploaded it to our own twitter. This created a good archive of our high score winners and also gave us more social media presence.
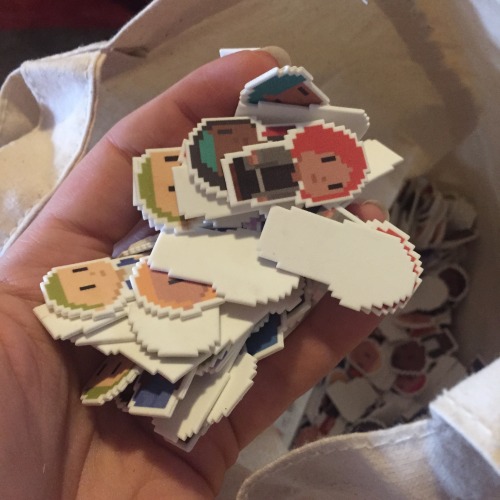
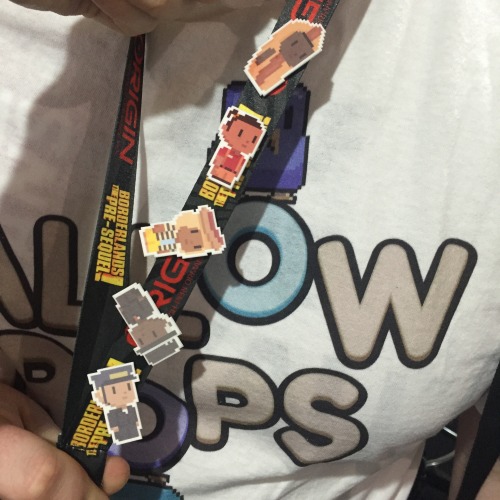
The downside was the glue on the pins. If someone tried to take the badge directly off, the pin would snag on the business card and pop off. We had so many people coming back to the booth with broken pins that we just decided to put it on the attendee’s lanyards ourselves. As I was extremely protective over the pins, this became my job. It ended up being a good opportunity to spruik our twitter details on the back of the business card and tell the attendee that the game was already out.
The bud designs stood out on the lanyards and by Sunday we were having people come to the booth asking where and how to get the “cute character pins”. We received a lot of praise which was reaffirming for all the hard work we put into it. We got asked a lot if they were 3D printed.

We’re already getting tweets and messages asking how and if people can buy them. Once we’re confident they’re completely waterproof and durable, selling them in an online store is an attractive option.
THINGS WE WILL DO DIFFERENTLY NEXT TIME
- Somehow include our branding on the pin itself.
- Better sealant.
- Better glue (or overlap the glue around the back of the pin).
THINGS WE DID RIGHT
- Make 1500 of them.
- Get the shrink paper laser cut.
- Have several designs and separate the ‘common’ designs from the ‘rare’ ones.
Your bud,
Justine, CEO of 2D and Godmother of Buds
Website | Twitter | App Store | Dean’s Twitter | Tima’s Twitter | Justine’s Twitter | Rob’s Twitter
Read more about:
Featured BlogsAbout the Author(s)
You May Also Like
Latest News


Trending


Featured Blogs


