Featured Blog | This community-written post highlights the best of what the game industry has to offer. Read more like it on the Game Developer Blogs.
Creating a Machinima game trailer with Unity
As a one-man indie studio it can be challenging focusing on the non game dev aspects of your game, such as making a trailer. This details the unusual process I arrived at breaking Unity and making a machinima trailer for my audio puzzle game - Cadence.

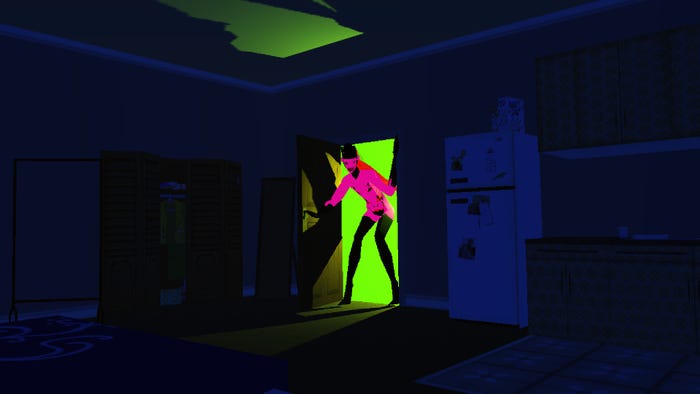
As a small (read: one-man) indie studio, tasks such as "create a sexy and compelling video game trailer" can be quite daunting. The following details some unconventional ways of using Unity, and how I crafted a Machinima trailer for my game Cadence.
The Trailer:
Machinwhat?
What is a Machinima? I’ve only ever had passing contact with the Machinima community, but it’s basically the art of making animated visuals (both shorts and full-length movies) using real-time rendering environments, aka game engines. Given that my skills with more legitimate tools such as Maya and 3D Studio Max are barely survivalist (think programmer art), creating a Machinima with Unity seemed like a compelling way to produce something of high production value while utilising the skills at my disposal.
The premise
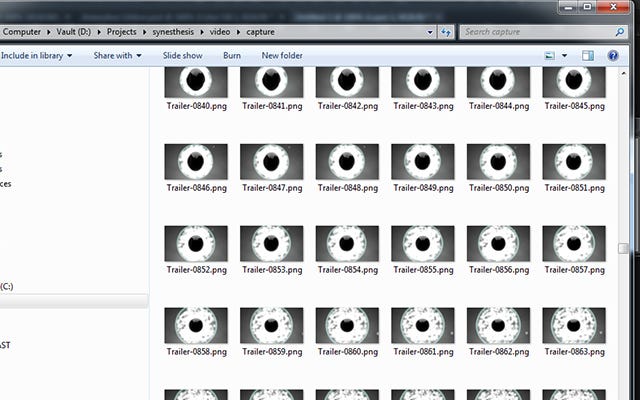
Fundamentally, the workflow is very straightforward. Set up your cameras, objects and animations in Unity. Then simply capture the screen, frame by frame, into a gallery of images. A third party video editing tool make it possible to stitch these together into a seamless video. Where the rubber meets the road, however, things become a bit more challenging.
Setting the scene
The very first hurdle to surmount was effectively creating all the animations in Unity. Out the box there are basically three options: the legacy animation window, Mechanim and scripted animations. The legacy animation editor is basically a key frame editor like you would find in most animation and motion tools. In my limited experience watching real animators at work, it seems good animation is just about getting cozy with this editor and hundreds if not thousands of keyframes.
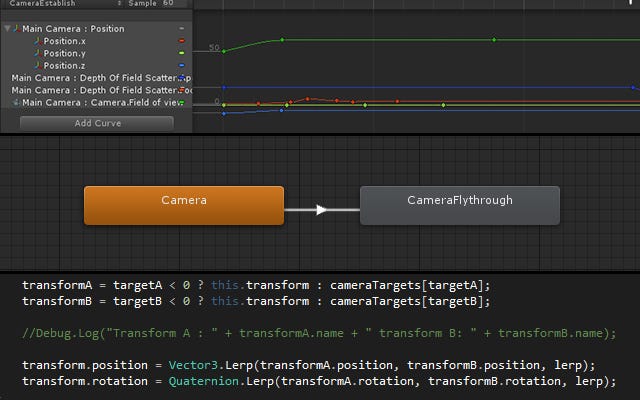
Unfortunately, the built-in editor leaves a lot to be desired, and is horribly clunky when it comes to manipulating lots of keyframes. In particular, trying to chain together multiple animations and sequence-scripted events was a real pain. Mechanim is touted as a newer and better animation system in Unity. It’s a great system - but ultimately designed around importing character animations. Still, I was pleasantly surprised at the degree it was possible to corrupt it to my will and use some of its sexy transition logic.
Rounding out the options was the scripted approach, using code to smooth over the things I couldn’t get right with animation alone (for instance, smooth-sweeping camera motion). In the end, I used all three in a hideous Frankenstein monster approach. I’m not sure if there’s really a way around this (though I guess a more experienced artist might have a better time importing animations from Maya or somesuch).
Render Engage
Getting frame by frame screenshots was surprisingly simple. Thanks to a method in the Unity API and this wiki script, it’s very easy to get your frame by frame render output. The neat-o thing here is that the graphics update is delayed until the frame has actually finished rendering. This means you can take a wonderful break from the tyranny of 16ms per frame and turn everything up to eleven!
Full Power Capt’in
With the ability to render “offline”, I went to town with the image effects, high poly models, particles and cloth physics (use to create torsion on the first sphere). This mostly made my computer cry tears – making previewing animations a definite challenge. As a workaround I turned the time scale way down (normally used for slo-mo effects). This gave the editor a chance to think about life and sometimes keep up. Even so the particle effects were really heavy – so I used the same render frame trick to render them to their own animated texture. (Protip: this is a really great technique for lightening the load in normal games as well!)

Post-processing
Once I had a folder of lovely HD stills, these were stitched together with Premiere Pro using its image sequence import function. I then used After Effects for some extra grunge, mostly noise and grain filters. Not having experience in either program, I actually found it easier to add the titles and logo in After Effects as well.
Sound
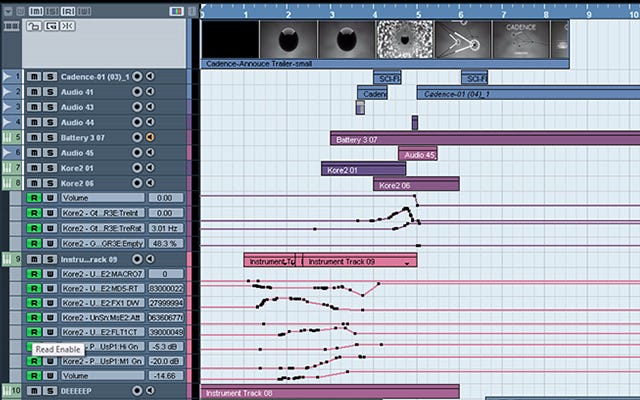
That just left the sound. Seeing as things were rendered semi-realtime, there was no hope of recording audio from the scene. I set up the base track by recreating the level in-game and recording the output. Fortunately, I also have lots of experience as a sound technician and could comfortably create all of the extra ambiance and SFX in Cubase. (It always surprised me just how much sound was created entirely after the fact in the film industry).
Conclusion
In the end it was 3 weeks of hard work, but I was very happy with the result. As a single developer though, 3 weeks away from development was a heavy price to pay. I often asked myself if this was worthwhile and if it actually wasn’t just better to hire a professional. In the end though I think it will be impossible to quantify. I now have a solid point of first contact for my game and Greenlight campaign (votes still shamelessly appreciated). In addition I tackled a lot of areas I had no prior experience in and levelled up hard. I’m positive what I’ve learnt about animation and motion visuals will stay with me and help me make better games.
Read more about:
Featured BlogsAbout the Author(s)
You May Also Like


