Daily news, dev blogs, and stories from Game Developer straight to your inbox
Sponsored By
[Making of] A Ferrari Formula 1 car in 3D
In this article, 3D Environment Artist Aditya Rajani goes in-depth in how he created a Ferrari Formula 1 car in 3D using Maya and Quixel. He shared insights on how to avoid some common mistakes while modeling and texturing and achieve realistic results.
6 Min Read

In this article, 3D Environment Artist Aditya Rajani goes in-depth in how he created a Ferrari Formula 1 car in 3D using Maya and Quixel. He shared insights on how to avoid some common mistakes while modeling and texturing and achieve realistic results.
Background
Aditya is a highly skilled 3D Environment Artist who has worked on some of the
most well-known productions in the nation, among them, CREED: Rise to Glory, CARS 3,
BATTLEWAKE and SKYREACH. Widely in demand across multiple industries for his
expertise, Rajani has served as a Lead Artist for Warner Bros. Games, Survios, Ten O’ Six
Productions, built Augmented Reality e-commerce applications for Vertebrae Inc., developed art
on an award-winning E-learning mobile app for Tiered World Studios, and collaborated with
Moriyama Studios/Visual Homes as a 3D Artist for their cutting edge architectural visualization
designs. Rajani has also shared his expertise and advanced skill set at the flagship industry event
E3 (Electronic Entertainment Expo) as a Survios demo guide in 2018, helping guide hundreds of
attendees to get acquainted with VR technology. He has also led classes at the University of
Utah Summer Camp, teaching 3D Modeling, Sculpting, and creating art using Unreal Engine for
aspiring video game professionals.
Breakdown
Step 1: References
Formula 1 car is a complex machine. The sheer technical aspect of constructing a Formula 1 car is immense. Weight Distribution, Aerodynamics, Engine Power, Hydraulics, Downforce - all these factors change the complexion of the game. And so, to build a Formula 1 car in 3D, collecting reference images is key. It comprises of so many little parts, that having a few good reference images can really help push the realism further.

There are several websites where you can grab reference images from - google, pinterest and most important - blueprints.com. To match the photorealistic aspect of a real F1 car, having orthographic views of a previous model is extremely important. With the help of the front, top and side view images, you can trace the car with the exact size and scale just like a real-world car.


Step 2: Modeling/UV unwrapping
Once you match the overall size and shape with the references, then you can start adding more details to the model by way of subD modeling i.e, by adding subdivisions/edge loops. It's important to stress that by adding too many unnecessary edge loops, the model can become quite high poly fairly quickly and practically unusable. One quick tip that I wanted to share is that with models like cars or other vehicles and weapons, there are so many little objects and keeping track of them can be a bit of a headache. Naming them appropriately can go a long way in saving you time later down the line. It's fair to assume that naming objects is something that can be completely overlooked while modeling or grouping objects, but by developing a habit to name those, it'll save you precious time which can be focused on other tasks. It's also important to plan ahead by looking at textures before you add details. In this case, since the car had different colors on the same part of the mesh (red/white patches), I made the faces/edges follow the color pattern so I can quickly mask it by assigning a material ID to it. Little things like these will save you a lot of time and often times, fixing it later will cost you more time and effort than recreating it so having that awareness can help you grow as an artist.
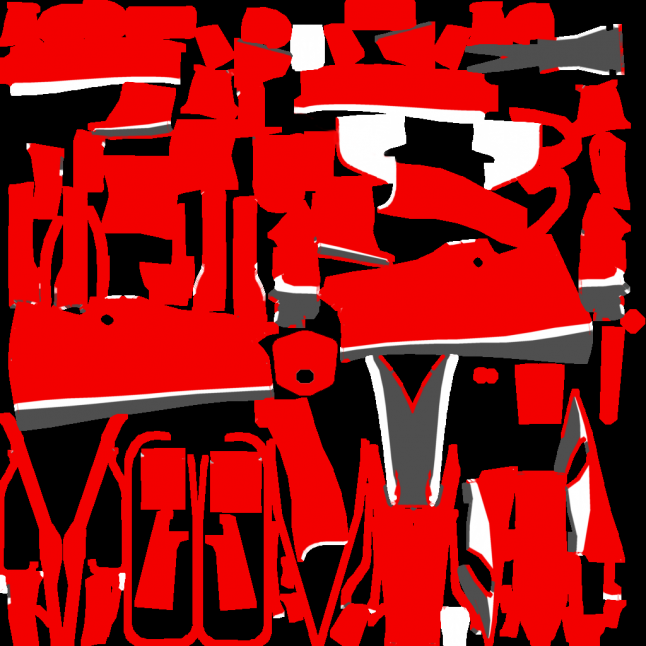

With a model like this, unwrapping everything into a single texture map was going to be impossible because you can lose a lot of texel density by forcing all the objects into one sheet. So, I quickly grouped elements that were similar in material types and assigned them one map. For unwrapping objects, I used standard methods like planar, cylindrical and spherical mapping techniques.
Step 3: Texturing
Texturing is the most fun part for me. It's like a puzzle - trying to piece everything together. An average looking model can look great with the help of awesome textures but a great looking model can get ruined by mediocre looking textures. Establishing proper surface depth of materials is extremely important as it's the first thing people see when they look at a model. Adding small surface details like roughness variation, grunge, dirt, oil leaks, grease etc. can convey a lot of information and storytelling like how old a model is, what type of environment it was exposed to, whether that place is old or new, what type of weather an object went through etc. By adding details via textures, these questions can be answered automatically and gives the environment/object strong personality.
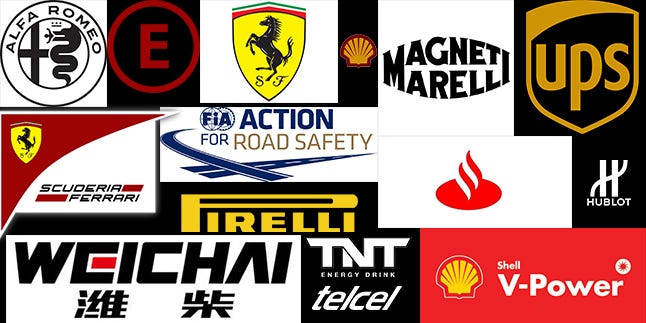
For texturing this car, I used a combination of Quixel Suite and Substance Painter. I feel like both tools can be used to your advantage. Since there were a lot of sponsor logos that I had to put on, Substance Painter was the superior choice because of its easy interface. Quixel had a lot of good metal smart materials in their library at the time so I used it for texturing the main body. When using logos, it's important to make sure that the resolution is set to very high (at least 600 dpi), else the edges might appear jagged and can look very ugly.
For adding normal wear and tear to a model in Substance Painter, smart masks can be a great starting point but it's important to not rely on them too much. It can look really robotic and rigid. For adding things like rust, studying an object that you're making can be really beneficial too. For example, if you're making a helmet, find reference images of a helmet exposed to natural surroundings and study the effects it has on it. If it's a place where it rains a lot, and the helmet was lying on the ground for years, then it's going to have even more wear and tear than usual. Pay close attention to the direction of the rust and try to replicate that on your 3D object.
Step 4: Rendering
Lighting and Rendering plays a vital role in presentation. It's essential to spend enough time presenting your work on your portfolio by choosing different camera angles that are pleasing to the eye. With the help of Marmoset Toolbag, it takes only a few mins to present high quality work thanks to its real-time rendering capabilities. For this project, I'm just using one directional light and an HDRI. For post-processing, I played around with Brightness, Contrast, Exposure and Gamma values until I was happy with the result. Showcasing how your model looks under different lighting conditions is also a good idea. Turntables can be quite effective in presenting the models in real-time. Breaking down your render shots shows an insight into your process and highlights different stages of production. It's always good to post different types of screenshots like AO only, Grayscale only and Wireframe to break it down further.


Read more about:
BlogsAbout the Author(s)
You May Also Like