Daily news, dev blogs, and stories from Game Developer straight to your inbox
Sponsored By
Joel Clark, tech lead and gameplay designer at The Game Band, offers an in-depth look at the "Master Tool" -- the toolset used to create the highly-acclaimed Apple Arcade game Where Cards Fall.
9 Min Read

Joel Clark is tech lead and gameplay designer at The Game Band, the developer of Where Cards Fall.
We built a huge toolset for Where Cards Fall; it continually grew to meets the needs of the design. The foundation of our toolset was the critical piece that allowed them to grow. Here’s a look at what we built and some tips on how to lay out a solid foundation for your toolset.
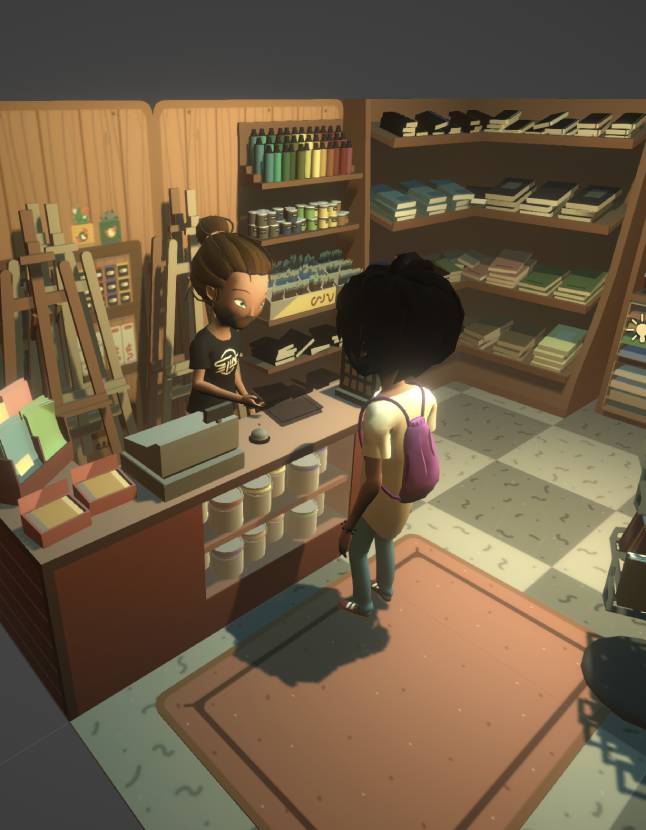
I work at a small Los Angeles-based studio called The Game Band. Our first game, Where Cards Fall, is out now on Apple Arcade. It’s a collection of dreamy spatial puzzles, pulled together by a grounded, heartfelt coming of age story. We aim to inspire people with games about the tension and beauty of everyday life; we’re proud that Where Cards Fall is a big first step in that direction.
The concept for Where Cards Fall was ambitious. It was always going to be a challenge to build; for our studio’s first game it was especially difficult. As with any big idea, we knew that we’d need to make scope cuts in order to make it through. At the same time, we were building a toolset to counteract those cuts. It was a bigger ask than anyone anticipated; the toolset continually expanded to meet the needs of the design.
By the end, we’d built a custom tool for almost everything in the game. It was a rocky road at times, but I believe now more than ever that building creative, efficient tools is a huge advantage in game development. It’s important that you approach them carefully. I’ve extracted several lessons that I learned in the development of the toolset in Where Cards Fall -- I hope that sharing them will help others build tools more effectively.
Lay out a Foundation
After getting a clear view of our deadline and the challenge ahead, our first step was to clean up the tool code that we already had and prepare for the large influx of tools that we’d be building. We started by building a foundation that we call the Master Tool.

The Master Tool
The Master Tool is a single editor window that hosts and manages all of our different tools. It was our one-stop tool shop, each accessible via a tab button. It ensured that, at any given time, only one tool was active. The Master Tool was the core element that made building each of our individual tools easier, cleaner, and faster.
A few basics tenets ruled the Master Tool’s structure:
1. It should be as painless as possible to build new tools.
We built a common sub-class for all of our tool windows and were able to easily insert them into the Master Tool. We abstracted common interactions, like click-dragging or objects selection, into static methods for use in any tool. Then, each tool window simply decides what to display, what interactions are available, and what data gets changed.
2. Cross-tool interactions should be clean and easy.
We separated a tool’s window and a tool’s functionality so that the data & objects of a tool could be accessed regardless of which tool was active. The Master Tool then provided a structure in which any of our tools could ask for the other tools’ information.
The ease of these cross-tool interactions allowed us to make interesting choices in the design of our tools. We could use the level grid to generate the initial level art. We determine which camera view was active for each grid space by selecting a view and raycasting to the level grid. Or we could click on any placed object in the scene to instantly add it to a cutscene. We could do all of this without mixing up the individual tools’ code.
3. Tool code should never overlap with runtime code.
We structured all of our tools in a way that they could export data. Our runtime code then used that exported data to build the game. With that separated chunk of data, it meant that the tool code was never directly accessing runtime code. This kept our structure clean and went a long way towards maintaining clean code.
It’s key to start from a solid foundation for any tool, because your tools are the foundation for the game’s content. Every hiccup in the toolset will fracture outward and ultimately damage the end product of the game. Building the Master Tool as a strong foundation for our toolset encouraged us to build more tools, and helped us build them in a cleaner manner.
Define Each Tool Carefully
The biggest differentiator of what made a quality tool for Where Cards Fall was how much thought went into planning it. We rushed into several of our tools on Where Cards Fall simply because we needed to start building content.
It’s important to know exactly what a tool needs to do before you start building it. Build your tools based on needs, not on ideas. Defining each tool means that you should be able to build the smallest versions of the tool possible, which saves time both in the implementation and in the usage.
Our Platforms Tool is a great example of a well-defined tool. The placement of the platforms was incredibly tedious and was done with a consistent rule-based methodology. At our artists’ request, we were able to take those rules and build a 3d tileset editor for the platform art in the game. This allowed our artist to build the starting point of the levels incredibly quickly, and swap out tilesets if the theme of the levels ever changed.
The Cutscenes tool is essentially a prototype that we took into full production. When we started it, we didn’t fully know what the narrative sequences would be in the game, but we needed to get our designers started on building them. After a few months of painful back-and-forth, we finally landed on a tool that would accomplish everything we needed, but the tool itself was a bit of a mess.
Ideally, we would have restarted the tool once we knew what it needed to accomplish. This sort of prototype/production split is common in the development of the game itself, but it’s just as important to do in the development of the tools. You won’t be able to build a strong tool if you don’t have a clear picture of its intent.
Keep Your Tools Focused
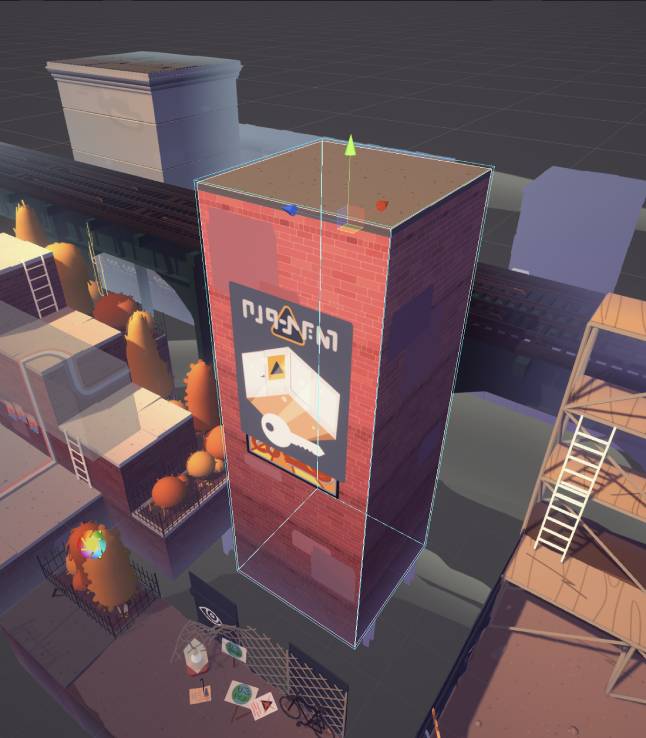
Just like with your game’s design, it’s important to have design goals for your tools. My main goal for our toolset was to keep a focused workflow. We worded it like this: show only what the user needs to see and allow control only of what needs to be controlled. This is an issue I think Unity and other engines run into a lot — there are so many windows and tools scattered all over the place that it can be hard to focus on a task.
This sort of focus was a natural benefit of the Master Tool’s design. Because the Master Tool was a single window that showed one tool at a time, you weren’t constantly juggling different tasks. Ideally, we wanted the users to only see two things — the Master Tool and the Scene View. Or, to put it a different way, the data being edited, and the visual representation of the data being edited. Everything else is just noise.
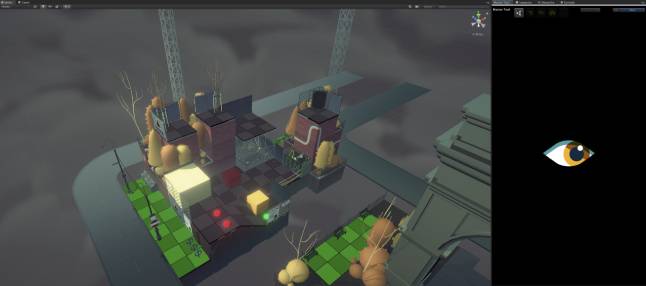
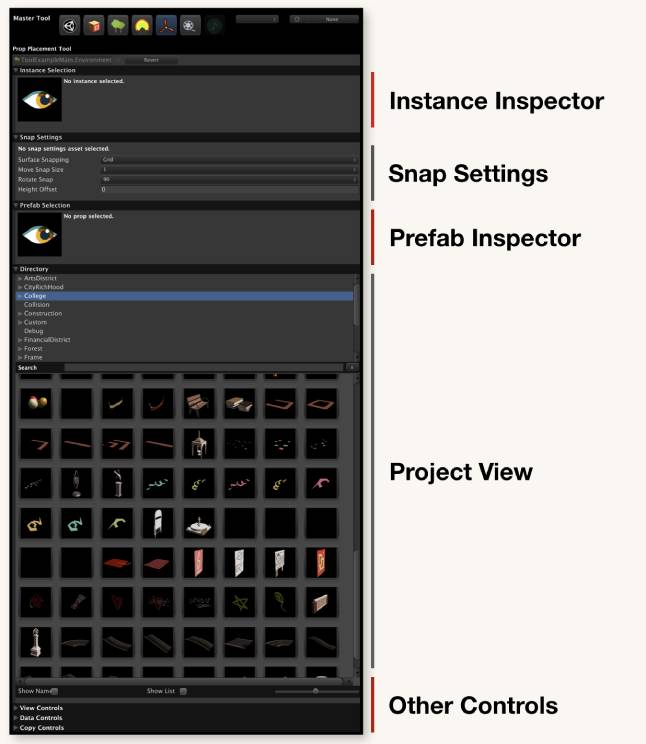
Taking that stance required us to subvert several windows that are a heavy part of Unity’s workflow — the Project, Hierarchy, and Inspector windows. Each of these are incredibly robust tools, but often require you to take too many steps for a simple task. We figured that for each task, you may only need a few objects from the Project and a few points of data from the inspector. If we take all of that information and push it all together into our custom tool window, you can hide the other three windows almost entirely.
The idea of focus also applies to the interaction of the tool — only allow control of what needed to be controlled. If there are extra controls or interactions in the tool that aren’t necessary, then you may waste time with distractions. The best example of this in our toolset is object selection. Out of the box, everything is selectable in Unity’s scene view / hierarchy. But because we knew exactly which tool you were using at any time, we were able to disable selection of all irrelevant objects, saving users tons of misclicks and frustration.
There’s more principles that I could add in here. Preventing user error should always be on your mind when building your toolset. Designing a solid user experience will make your team happier and get them to buy into the toolset more. Knowing how to leverage and extend existing tools is a skill all on its own.
Ultimately, it all comes down to efficiency. Every decision you’re making in your toolset should center around what will make development of the game more efficient. Something that I really absorbed in the development of Where Cards Fall is the impact that mindfulness can have on that efficiency.
Every small decision in the development of our tools had a greater impact down the road. When we took the time to plan better or think more deeply about our tools, we were rewarded. Whenever we sped through things, it cost us time later on. The toolset is the bottom layer in your house of cards -- take the time to make it solid.
Here’s some information, if you’d like to know more about our game or team:
Where Cards Fall trailer
Where Cards Fall website
The Game Band studio website
About the Author(s)
You May Also Like