Daily news, dev blogs, and stories from Game Developer straight to your inbox
Sponsored By
Featured Blog | This community-written post highlights the best of what the game industry has to offer. Read more like it on the Game Developer Blogs.
This article is a detailed walkthrough of how we make character promotion art for a FPS game: Zula
5 Min Read

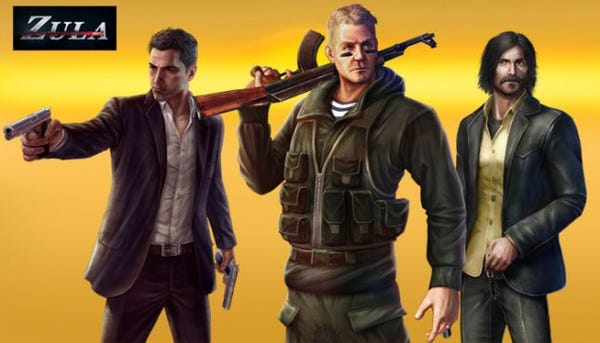
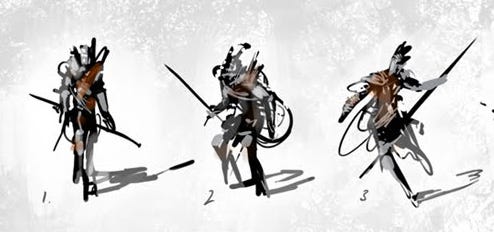
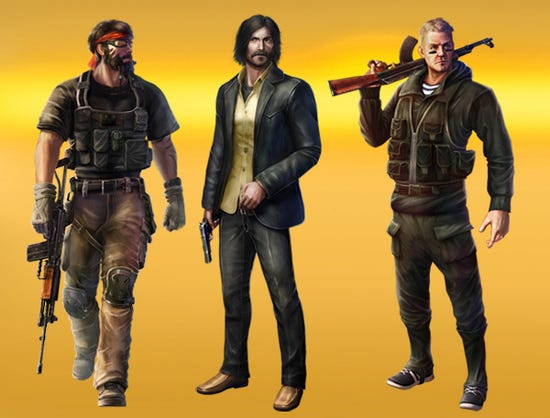
We had made some full body character illustrations for the FPS game Zula, which is developed by Mad Byte Games. Those illustration are used as promotion art, they must have enough details to be printed as posters.
The procedure is like this, as this is a FPS game for PC, there’re already rigged 3D models of the in-game characters in stock. So our client provides 3D models, we pose them, render an image, then ask 2D artists to overpaint the image to production poster quality.
The required picture size is 3024 x 4320 pixels, which could be enough for printing on A4 paper, dpi 300.
You would think this is a non-brainer work(actually me too): you already have the 3D image, that everything is there, you perhaps only need a few betterment by the brush. After investigate into the procedure a bit, I find that it would take a lot more to achieve production level character art. Here I would like to share the procedure with you.
I think if you’re making a game which has in-game 3D characters, this would be a good way to produce high quality 2D character art.
3D stage:
As I said, first the client would provide the 3D character rig. In this case it’s a 3ds max file, we can pose the character freely. And the client gives a few instructions of what pose they want, sometimes a simple draft attached.
The benefit of using 3D character rig as the start point, rather than drawing the figure from scratch, is easy to make adjustments: On the contrary, if draw the figure from scratch, the very first step is to make 6~9 character thumbnails, to let the client choose. They would choose 3 from them, and ask us to develop them one step further, then they would choose a final one. By 3D we can save those steps (they are eventually paid by the client though:)
About the placement of the camera, as we need a full body portrait, aiming a 85mm lens camera to the waist would be good, just as we do in real life photography, that the upper and lower body would have the least distortion.
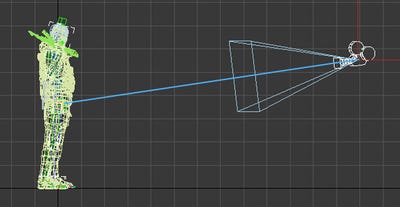
After the pose is done, we snap a screenshot out of the 3ds max viewport for the client, that is fast. When the pose is approved, we make a final render.

The Character rig comes with a few texture maps, color, normal, etc. We map those textures to the corresponding channels. And the light setup is simple, just two point lights in front and at the back of the character. The purpose is to get a evenly lit character, no bright and dark spots. We would add the drama in the 2D overpaint stage.
This is a render image:
2D stage
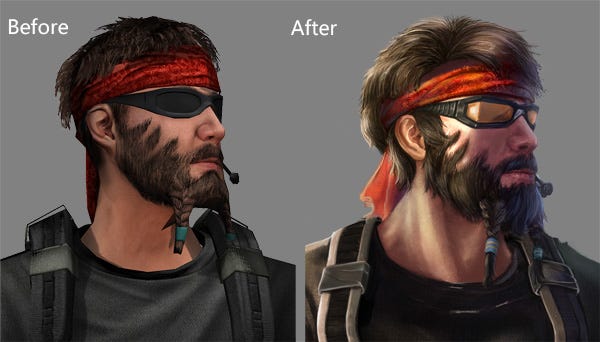
Generally speaking, the 3D character model and textures we get are those used in the game. They’re not as high detailed as those in a PS4 game. So we made a lot of efforts to make the character more organic and add lots of textures.
The lighting:
The client would use these full body illustrations in many places, with different backgrounds. That they specified a general lighting condition for all the characters. That is a warm key light coming from the up left, and cooler fill light.
The face:
Typically, due to the low polygons nature, the facial features are not well defined enough, not much a character, that the face almost needs remake.
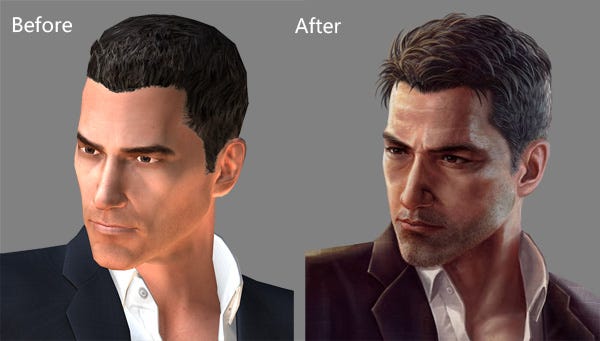
This game is adapted from a TV drama, so the client would give us lots of photo reference, of how the persons actually looks like.
The hairs:
The hairs are made of rough polygon patches, need to redraw to make them organic.
Body parts:
Need to make them smooth, organic, eliminating the low poly trace.
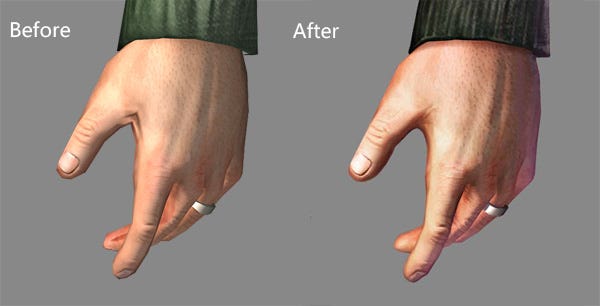
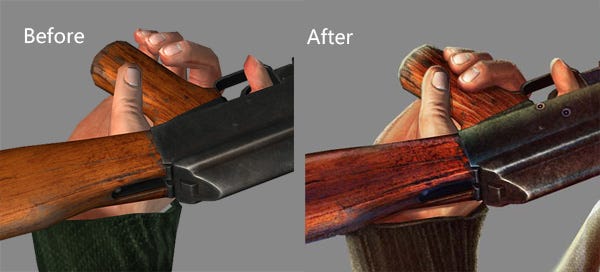
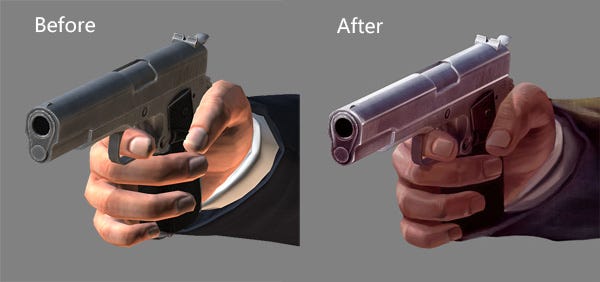
Hand grabbing:
On the 3D rig, the fingers are skinned by only two bones, apparently to improve performance. That it’s impossible for the fingers to perfectly grab the gun. We need to fix this in 2D.
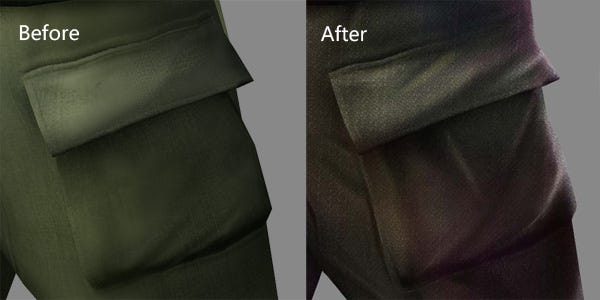
Clothes:
The low poly clothes are made soft and more organic.
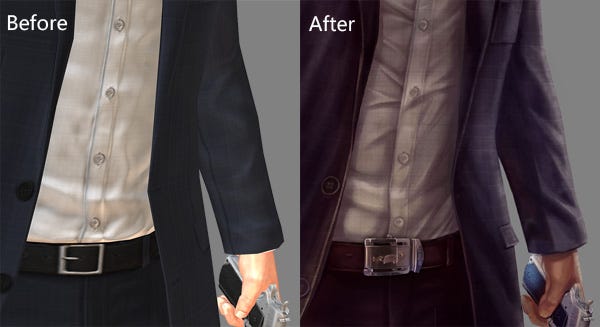
Textures:
The old textures are too low resolution for a poster, so we add a layer of textures on top.
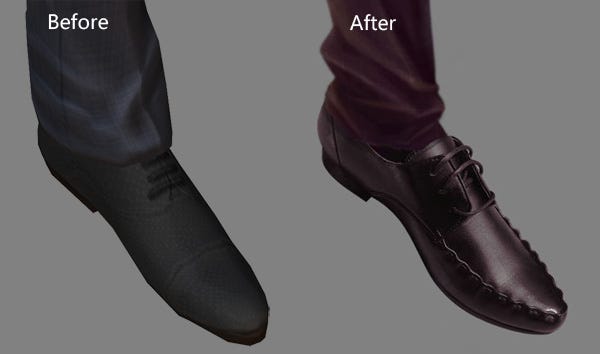
Replacement:
For some things we replace them completely, for the 3d assets are too low quality.
Guns:
For guns, we would first ask the client that what type of the gun they would like. Then we ask them for the 3D model and textures. For they’re making FPS game, they would have no shortage of these things.
In 2D stage, we generally add higher resolution textures, and brighten the highlights.
At last, a big thanks to our client Mad Byte Games, that we can post this walkthrough.
If you like this post, please see more of my articles and follow me here...
I would post regularly--one article every two weeks, about game art production.
Read more about:
Featured BlogsAbout the Author(s)
You May Also Like