Daily news, dev blogs, and stories from Game Developer straight to your inbox
Sponsored By
Featured Blog | This community-written post highlights the best of what the game industry has to offer. Read more like it on the Game Developer Blogs.
Working as a single indie I've had to develop a quick, efficient, process for designing and creating my levels. Maybe my methods could help you too.
11 Min Read

Being a dev team of one means I need to work quickly and efficiently. I’ve developed a process for producing my levels that will hopefully be useful to someone else out there. I first developed it back when I was a tester on Shogun 2, when the QA team got to do some map designs for multiplayer and custom battles. I found it helps me quickly produce levels with viable gameplay, for Shogun 2 it took me a little over an hour to design and create a 2km² map this way. There might not be anything for an experienced level designer to learn here. But if you find yourself having to design a bunch of levels and you haven’t done it before, or you’re just interested in how I design my levels, I hope this is useful.
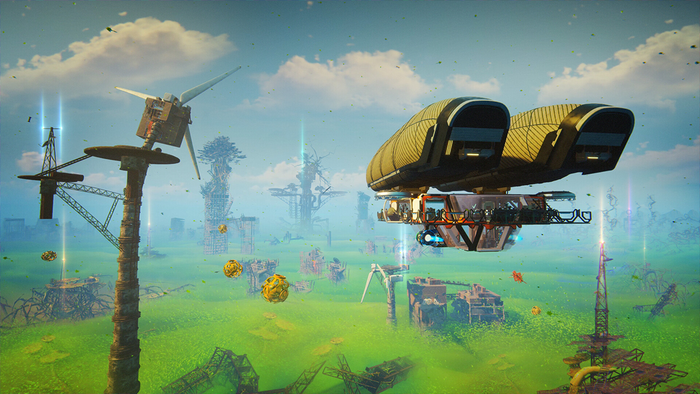
If you’d like to see the fruits of my level design labours you can have a go on the Alpha build of Captain Kaon, there is a download link to the latest version on my Greenlight page available via the web, or on the Steam App.
Get Some Rules

After I had made a simple prototype of the game that would become Captain Kaon I made a ‘first playable’ level. This is a vertical slice of the game that tries to represent the potential final game. There are lots of reasons why a team does a ‘first playable’ level, but for this blog there is only one thing to focus on. It’s better to work on one level and concentrate on making it good, than to juggle several levels at once.
Once you figure out where the fun is and spot problems, you can then then iterate and expand on this level. If you’re building several levels at once you will have to waste a lot of time just maintaining them. Every time you figure out something with your level design, a new rule that needs to be applied, you will have to go through all your levels and apply it. It could be something simple like not placing two objects of the same type within a certain distance of each other, or having a minimum corridor width that allows enough space for gameplay. It’s better to figure out all these rules on one level first, otherwise you’re just redoing every level all the time.
Using my first playable I was able to establish a set or rigid rules and flexible guidelines for creating levels. These would be important things that I would have to bear in mind when designing the levels, otherwise there was a risk that playtesting would expose basic problems I would have to waste time fixing. For example
The edge of the room must have a border of three tiles to ensure the camera does butt up against the edge of the room.
Areas where the player is expected to fight drones should be at least 2x2 tiles in size to allow the player to manoeuvre.
In addition to this I was able to create a checklist document of technical requirements for the level to function in the game. These were steps I would go through to ensure the level ran first time. They were mostly obvious things that were easy to forget about, such as:
Place a player spawn object
Set the physics properties
Add the briefing and hook up to the frontend
Once you’ve determined your guides and rules you have something to iterate within to produce variations of working levels. So far Captain Kaon has 42 levels across 19 missions, each one different and fun. But the best part, creating them was a fluid and painless process.
Building a component palette

Along with your rules for building a level you need a palette of components to build it from. A game is a series of escalating challenges, each built with a different combination of these components. Imagine a series of rooms, each one has an enemy in. If you only have one enemy type to place in your rooms, your game will rapidly become repetitive. Enemies are one type of component you use to build your levels. By taking different variations of enemies, in different quantities and mixes, you will be able to build different gameplay experiences. You can then take other gameplay components, such as obstacles and power ups, and mix those in to create further variations in gameplay.
A game is also a visual experience. You need to break your ‘first playable’ level up into different visual components and create variations of these as well. In the end you’ll have a nice little component palette from which to build your levels.
The evil of spreadsheets

I created a spreadsheet with level information, it allowed me to keep track of which stages of designing and creating the levels I was at. It also allowed me to see what kinds of levels I was stringing together, which was important in preventing repetition.
Whatever types of levels you have in a game it’s important that they aren’t all the same and that no two of the same type are consecutive. I have several different mission types in Captain Kaon. In some you are destroying key targets, some are sneaky recon missions, and in others you could be carrying stuff to or from your base. Within each of these there are sub-mission types. When I planned out my levels I ensured that no two missions of the same type followed each other. I also set which visual environment the level will take place in, too prevent too much visual repetition.
It’s important to take this kind of macro-level look at your game sometimes. You need to think about how the experience changes from one level to the next. Keeping track of it in a spreadsheet is a great way to do this. It also allows you to tackle the levels in any order you like, or spread them around the team, and ensure they all still come together when they’re finished.
Paper planning

Whenever I start designing a level I get a basic feel for what it needs to do from my spreadsheet, then I get a pencil and paper to draw out the basic plan. You don’t need to use a whole A4 sheet for this, the more space you have, the more you will try to fill it. When I designed Shogun 2 battles I started by drawing a one inch square for a map that would end up 2km across.
I start by using a light coloured pencil (usually pink) to draw an abstract flow line, essentially it’s a wiggly gesture line. This path forms an underlying skeleton to the level, going from the players spawn point to the levels objectives. There are four important things with this flow line:
It can’t be too straight, straight is boring.
It can’t be too wiggly, windy, and over-lapping. It needs to flow.
It mustn’t look like one you’ve already drawn. You’ll just be repeating a level.
It can’t double back on itself, the player could get lost.

Once you have an idea of the direction the player will be going in, you can start marking points on the flow line for key features of the level. In an abstract sense a level is a series of decisions that the player makes. Walk left, pick up key, climb ladder. You need to think about what, and where, these will be on your level. Mark these out evenly on the flow line.

With the framework in place you can start to think about which components you’ll put together in each section of the level. How will they be arranged, how will they interact with each other? Using a nice 2B pencil you can draw in these components and then draw the wall outline around them.

This will give you the basic plan that you can sit in front of an editor with. But before you do that, you should run through the level in your mind. Look at your piece of paper and try to visualise how it will play, based on how the ‘first playable’ level played. Try and spot problems. It’s a lot easier to erase a pencil line than delete a bunch of level content.
Tiles and blocks and other things

When you first create a level it’s important that you not try to create the entire thing before you run it for the first time. You’ve got your plan on paper and you should be confidant of it producing a functioning, playable, level. At this point it would be easy to just plough on and create the whole thing. But remember, great ideas on paper aren’t always great ideas when you execute them. You need to build you level in stages, checking each for functionality and fun.
I’m making Captain Kaon in GameMaker, for the levels I’m using the internal editor. Some people have used GameMaker to create a level editor for their games, which seems like a pretty smart thing to do. If I’d thought of that I might have tried doing it as well.
I build the background from a tileset and then use invisible physics objects as collision. I follow the paper plan and construct the level placing only the most basic components required; this gives me the bare bones of a level. At this point you need to start thinking, again, about how the player will play the level. If you’ve played your ‘first playable’ level enough you should have a feel for how the player character and enemies move. You should be able to look at the level you are constructing and build a picture in your mind of how it plays. This will give you an idea of potential problems and improvements. But don’t make them yet. Write your thought s down on a pad, you need to run the level and confirm them.
Test and Tweak

Once you have a basic version of a level you can see how it plays. How do the potential problems pan out? Are all the components hooked up and working correctly? You need to do this early so you can find and fix any fundamental problems. I usually like to reduce the spawn rates of the Ai and slow down the speed of the hazards when I do this. I then dial it back up once I’m ready for playtesting.
If you’re happy that the functionality works and that the level can be completed, you can think about how the level logic holds up. Does the sequence of actions the player has to go through to complete the level still make sense? Is there any point they might become confused or disoriented?
With a functioning level you can begin a cycle of playing and tweaking. Find little ideas to tease out improvements in the players’ experience. Sit some friends down and watch them play the game, see if they do anything unexpected. You’ll probably still be tweaking the odd thing right up until release.
Polish it up and plug it in

Once you’re pretty happy with how the level plays and feels you can finally worry about how it looks. Polish is an important step in creating a level which is alive and engaging, without it your levels will be sterile. Unfortunately it will also massively increase the amount of time it takes to create your level. In my case it doubled the time a Captain Kaon level took from 2 to 4 days. This can mean you’re creating a rod for you own back. The more you polish one level, the more you have to polish the rest.
Factoring polish time into your game is an easy thing to forget or underestimate. As a general rule for planning a task you should divide it in two. The first part is planning and executing, the second is fixing and polishing. Figure out how long it will take you to plan and execute and then add it again for polish.
Once your level is done it needs to be properly plugged in and accessible in the game, for the sake of the rest of your team and their valuable feedback. I’ve worked in situations where levels needed to be manually copied and then executed by fiddling with scripts. This creates a barrier between your level and the first people who can give you feedback. Your level needs to be immediately and easily accessible to everyone on the team.
I hope you’ve found this rambling helpful. If you have and you’d like to support my adventures in indieland you can give Captain Kaon a vote on Greenlight here, or click here to open your steam app.
Read more about:
Featured BlogsAbout the Author(s)
You May Also Like