Daily news, dev blogs, and stories from Game Developer straight to your inbox
Sponsored By
Featured Blog | This community-written post highlights the best of what the game industry has to offer. Read more like it on the Game Developer Blogs.
This article is about the planning and art production of isometric assets.It starts from the project definition and planning, covers tips in 3D render setup and 2D post production.
6 Min Read

We know isometric graphics have wide application in various types of games, that in these years, our studio have made lots of them for our clients. And in the making, 3D+2D method is prevalent, that is, to model and render the buildings and objects in 3D, then add some 2D retouch or overpainting to get the final assets.
Here I have a few points about this particular production method to share. Meanwhile our studio does make isometric by pure 2D approach, no whatever 3D elements is involved. I think we may discuss that the other time.
Two things to decide before start:
The art style and quality
Take a look of these popular games.
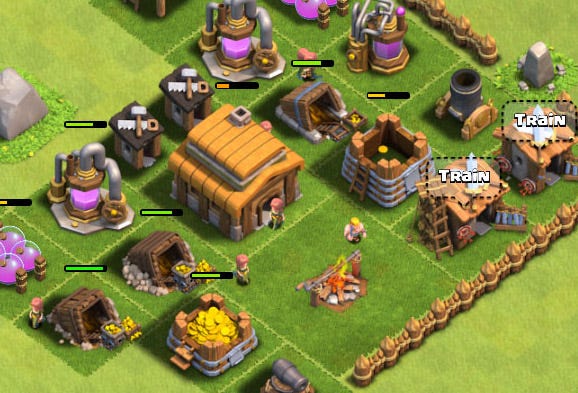
This first sample looks cute and very 3D, and in the production line, the 2D work is employed only to fix small errors, and do some betterment.
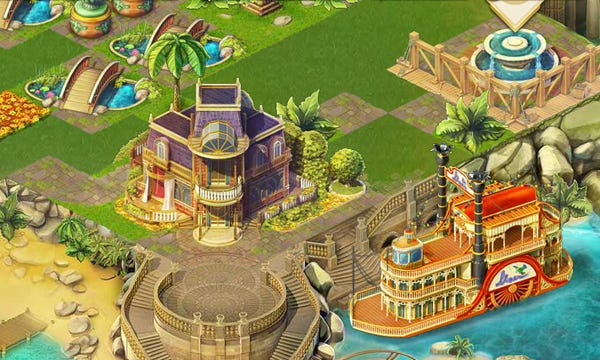
The second one also has very good 3D render work, delicate shading&lighting. And it has finer 2D retouch.
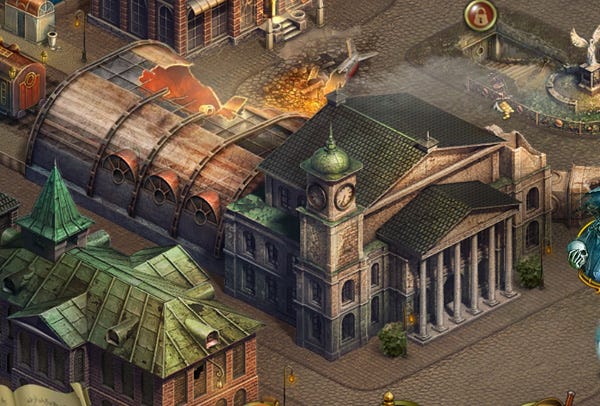
And the third sample feels very hand painted. Only that the structure and perspective is very precise, that we may know in fact it’s painted based on 3D models. For the final output relies heavily on the 2D work, the 3D render don’t have to be very fine.
So your project definition of art style and quality determines how much 3D and 2D work should be done respectively.
Grid setup
Here are some typical grid setup. In A & B, the unit length of two grid directions are equal, but their camera height are different. In C, both the angle and length of the two edges are different.
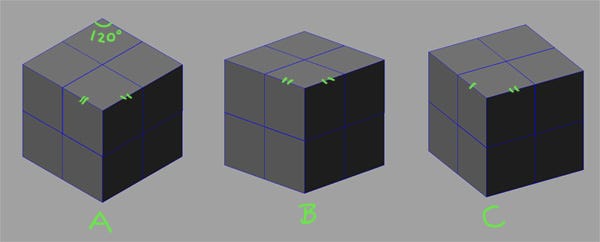
For games like Clash of Clans, there’s lots of fight going on, you don’t want the buildings block the eyesight, so the camera is high; While in Pearl’s peril, the map shows your quiet estate instead of a busy battle field, you want to see more of the elegance and beauty, so the camera is lower.
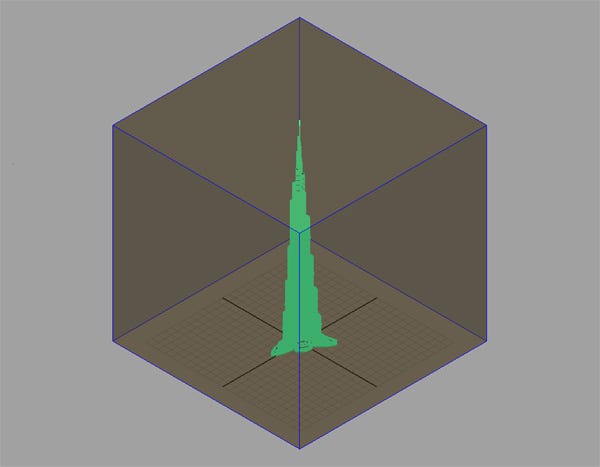
If you’re pursuing the visual illusion like that in Monument Valley and Diablo II, Type A is the best. The unit length of 3 axis are all equal, in this setup boxes at different depth of field can overlap and connect perfectly.
Setup the 3D render:
Typically, every building is rendered separately, for both static maps or build-up maps. You can setup a rendering template file, that you can render all the buildings with the same camera and light settings.
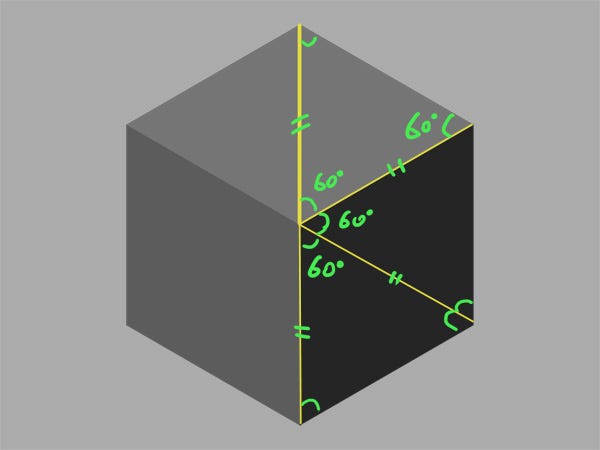
Put a box in the scene, don’t make it very small, otherwise the sampling would go wrong for some light and shadows effects. For example, we make each edge 30 meters in length.
And put a camera in the scene, check its “Orthographic” box. In both Max and Maya, there is such setting. Which essentially gives you parallel perspective with no vanishing points.

If you do want some slight perspective, don’t check this box. Instead, use a large focal length value, for example something larger than 200mm.
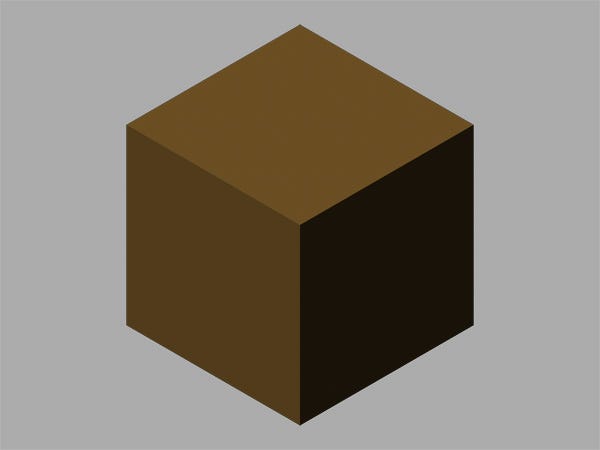
Then set the position and angle of the camera, let the box lie in the desirable grid direction(I think it’s simple trigonometric calculation), and let it occupy a good portion of the picture. Hit render, and see if the picture is right. Here is the render of the box of Type A setup.
Ok, when you get the right camera setting, don’t forget to bookmark it, or key frame it, do whatever you can to record its position. Then later if you move it by accident, you can restore it.
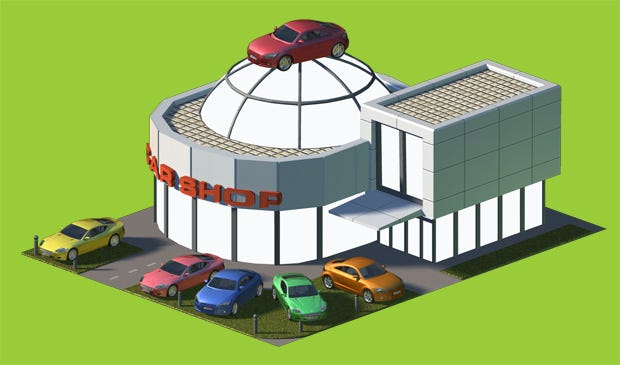
To do the actual render, put your building inside of the box, scale it to fill the space as much as you can. Regardless the actual size of the building, always use this fill-box trick.
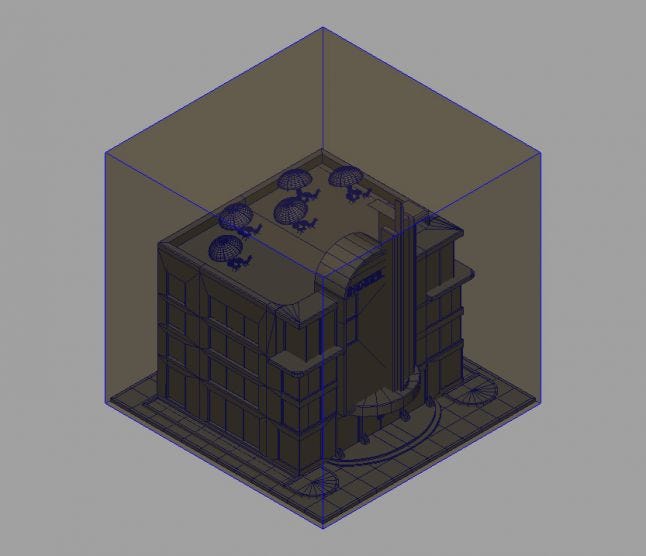
If the building is a tall tower, also use this trick. Just crank up the render output resolution accordingly.
About render output resolution, always render at triple size of that you need. For example if the building is 400x400 px on map, render it at 1200x1200 px. If you render x3 size and scale it down, the image quality would be much better than rendering x1 size outright. x3 is enough for most production; If the final building on map is less than 150 px, render it at x5 or x6 size. If you need to make HD version of your game on a later date, having x3 size graphics would save your day.
Do the render:
For all the buildings are on the same map, under the same sky. So make those parameters constant for all the buildings:
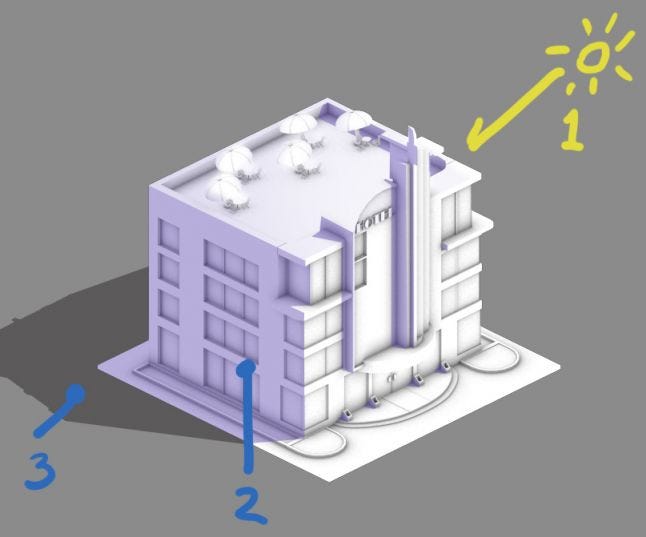
Key light color, intensity, direction;
Fill light color, intensity;
Shadow direction, color, transparency;
You may share a same rendering template file across all the artists.
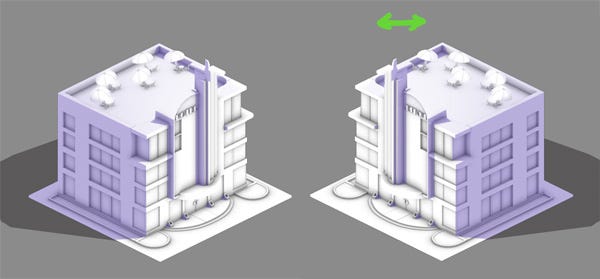
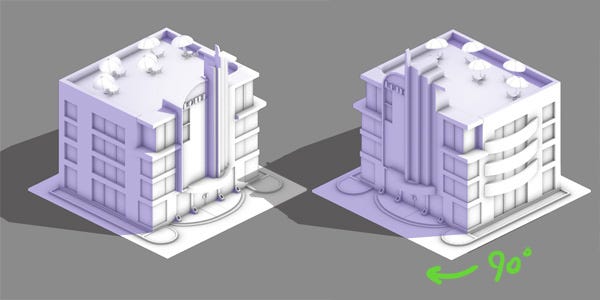
Sometimes you need more angles of the same building, rotate the building and do a render again. Don’t flip the final render image, the light direction would go wrong. You can see the difference below:
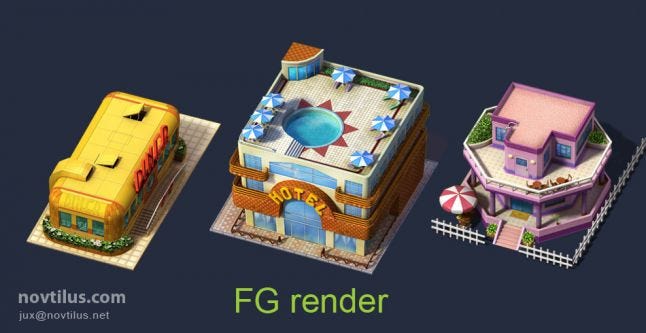
There are two typical render tactics:
Render the color pass by simple lighting setup, and render an ambient occlusion image(AO), then compose the two images in 2D. It takes minimum rendering time. And you can do a lot things in 2D, quite flexible;
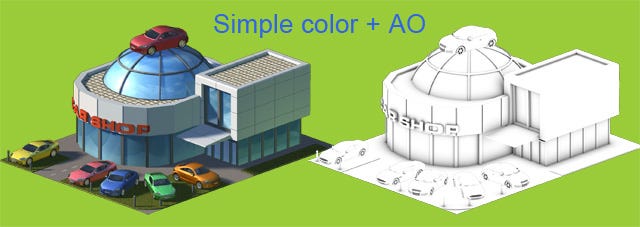
Final gather (FG) render and Global illumination. This method can produce very nice picture, very soft lights and neat ambient occlusion. The downside is taking lots of time to setup and render.
And Render a mask for all the glasses. They are reflective, this mask is very useful for later 2D treatment.
2D works:
Jobs to be done in 2D stage:
Overpaint the hard edges, to give bevel edge feeling;
Add more light source, create better warm&cold contrast;
Add reflections on glass, glossy surfaces;
Improve the feeling of materials, for example make metals more shinny;
Add plants;
General play of contrast, colors;
General overpaint, to get hand paint looking.
More of my articles about games & art production:
http://gamasutra.com/blogs/JunxueLi/940564/
Follow me on twitter...
Read more about:
Featured BlogsAbout the Author(s)
You May Also Like