Daily news, dev blogs, and stories from Game Developer straight to your inbox
Sponsored By
Let’s talk about blood in video games, and the 2D pixel bloodstain system developed for a weird narrative experience called NetherWorld.
10 Min Read

DEVELOPING A PIXEL BLOODSTAIN SYSTEM
Hey! Hungry Pixel team here. Today we’re gonna talk about violence in video games and how our helpless children are deeply influenced by tHahaha Just kidding. Now we have your attention, let’s talk about BLOOD in video games, and the 2D pixel bloodstain system developed for a weird narrative experience called NetherWorld.
Traditional Blood Systems
If we write about blood in video games, Mortal Kombat has to be here. Probably, it was one of the first games that started to spread blood everywhere in the scenario. Considering its 90s console technical limitations, blood looked quite good.

Where's the heart? HERE'S THE HEART!!
Bloody fatality in Mortal Kombat.
What an awesome fatality, huh? If you look close to it, there’re blood splashes on the floor that start their animation when the blood stream is still in the air (left of the screen). Besides, the stains disappear quite fast. There isn’t much to comment here; they had more important worries in that time (and Twitter didn’t exist, so it was difficult to be a hater).
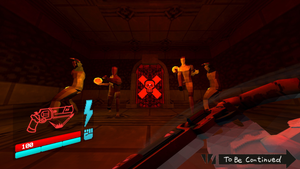
Do you remember GTA III? WHO DON’T? Let’s pay attention to the stain in the green frame below. We’re shot, blood drops hit the ground and a blood-drop-textured plane is instanced just there (Did they use a blood pool? If they did, we find it convenient). With this method, it isn’t possible to have infinite bloodstains, so they disappear progressively. The stains are also removed when the police car hides them from the camera (and hits us dramatically).

Ouch!
GTA III.
Okay, Hitman 2. We’ve just killed our target and left some bloodstains in the wall and floor. The method used here is different from the one in GTA III, and allows showing the stains in the scenario permanently. How do they do it?

Killing the badass version of Prof. Quirrel
Hitman 2.
Hitman 2 modeling has textures that can be modified in real time, and there’re previously-painted bloodstain images ready to appear when we decide to shoot anyone who deserve it (everyone).
Once the bullet goes through a body, the script calculates its trajectory. If there’s an obstacle behind the potential corpse, it’s time to determine the point where the bullet is gonna collide into the texture. Then, a bloodstain will be added on that texture’s exact location (GIF’s green squares).
What’s the problem here? Look at the orange squares. Textures are designed to wrap the 3D model in a natural way, but while a bloodstain looks fine in a 2D texture, things change in a 3D model. As seen in the GIF above, there’s the possibility (SPOILER: It’s gonna happen) that visual errors ruin the beauty of the scene (beauty in terms of graphics, not all the blood and killing people stuff… Just saying).
Moreover, having lots of previously-painted bloodstain images doesn’t seem to be the best way to solve that problem… or at least not the most efficient one.
Problems
As seen in the previous examples, most of traditional bloodstain-painting methods show two main problems:
1) Visual bugs tendency.
2) Performance problems (unless stains disappear)
How can we fix these problems in a 2D pixel art game like NetherWorld?
When talking about pixel art games, it comes to our minds a kind of game you could run in a calculator. Well… We’re in the 2019, not the 80s!
NetherWorld has scenes with high levels of illumination, shaders (e.g. grass movement), and also a varied particle system.
The more these particles collide and splash the scenario with cool blood streams, the better will be! MUAHAHA! (We’re not psychos, promise)
Nowadays, there’s a lot of stuff to consider if you want to develop a modern 2D pixel art game and make it feel visually attractive. From now on, we’ll call this stuff “firework resources”.
Here’s a NetherWorld scene comparison with firework resources and without them:

Oh, c'mon...! Turn on the bloody filter!
Well, one would fit perfectly as a set for school play… But we prefer the bloody one. Oh, did we said school play? Let’s talk about performance.
This Unity Forum’s thread shows how important is to have an optimized “Blood, blood everywhere” system in our game. If we create a bloodstain every time we kill an enemy, there’re tons of them and we also use “firework resources” in the scene, we’ll have fps drops. (As said before, GTA III made the stains disappear for the same reason).

Blood? What blood?
Game screenshot from Unity Forum question "Combining multiple sprites".
Once both scenes are full of blood, we observe 3 differences between them: With NetherWorld system, we don’t create objects, blood overdraw is reduced to 0, and the number of tris doesn’t increase.

+ So… You want to make a pixel art game.
- Yep.
+ …With massive blood levels, including quartered enemies and other kinds of bloody violence in several scenarios...
- Aha.
+ …and permanent bloodstains.
- Eeexactly.
+ …
It’s time to take advantage of pixel art.
NetherWorld pixel texture painting system
(We’ll focus on bloodstains, but this system can be used for dirt or other stain materials.)
“Pixel” is the most important word in this whole section. If we applied this texture painting method on an HD model, calculations would go crazy.
This method forgets about painting blood on textures by hand, and uses an algorithm that decides which pixel should (and shouldn’t) be dyed red in a particular radius. How does it work?
BLOODSTAINING TEXTURES (I): The grandma
Imagine you’re walking down the street in a dark and cold night. Suddenly, a wild old grandma appears and tries to rob you holding a knife. Poor granny… She doesn’t know we always carry a 9mm handgun called “Retirement”.
What should we do? Shooting her in the head, of course. This article is about blood, not mercy.
From now on, the place where granny’s blood is splashed will be the point (a,b).
Sayonara, granny.
BLOODSTAINING TEXTURES (II): The Bloodstain Pattern
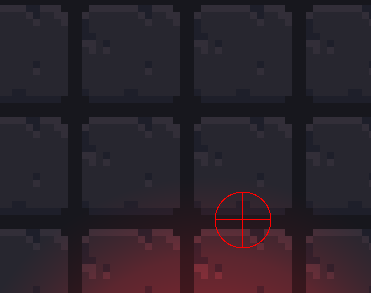
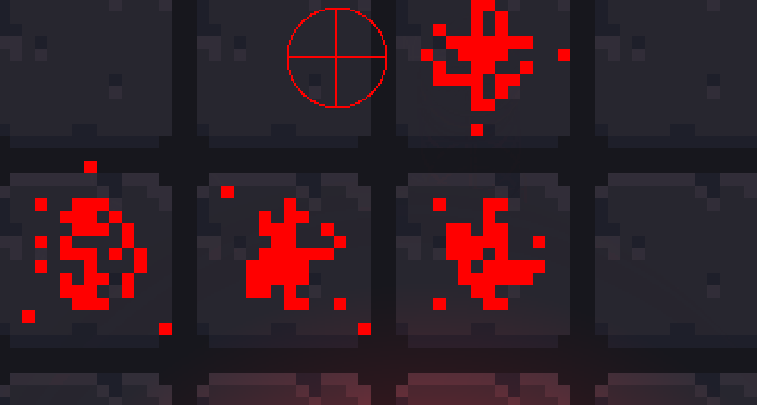
First of all, we designed a simple pattern: An X-pixel-radius circle in (a,b) position. This circle has a concentric rhombus inside, and several vectors go through it perpendicularly. This vectors are the traces or blood drops that will appear around the main bloodstain.
Unless you’re color-blind, you’ll see the pattern is divided by 3 areas: A red rhombus, a green circle and outside vectors.
Each area has different staining probability values:
Red = High
Green = Low
Outside Vectors = Medium
In terms of quality, we think this pattern allows us to obtain acceptable bloodstains. However, we don’t discard to go a little bit further and work on a more variable pattern, for example.

Implementing NetherWorld's bloodstaining pattern.
We have a bloodstain pattern, cool. Let’s use it!
BLOODSTAINING TEXTURES (III): Which textures can I stain?
All textures inside the radius will be suitable to be stained. This way we fix the “traditional method” problem of not staining parts from other object textures, even if they’re involved in the blood splash.
We love to get things complicated, so let’s try to stain a surface between 4 textures.

Bloody Moses into action!
Bloodstaining different textures simultaneously.
BLOODSTAINING TEXTURES (IV): Getting dirty
Okay, we know how to create a bloodstain, and where to splash it. But blood looks different depending on the texture that has underneath, right? How do we manage bloodstain colors?
While our texture painting algorithm is working, it finds a pixel that needs to be colored (following the staining probability values explained before). Once found, it reads the texture color in that pixel and obtains 4 numbers (RGB+A). This “A” value (Alpha Channel / transparency) will be very useful to determine if that pixel belongs to the texture (or group of textures) we wanna paint or not. If the “A” value is 0 or close to 0 (e.g. beyond texture’s edges), the pixel will be ignored.
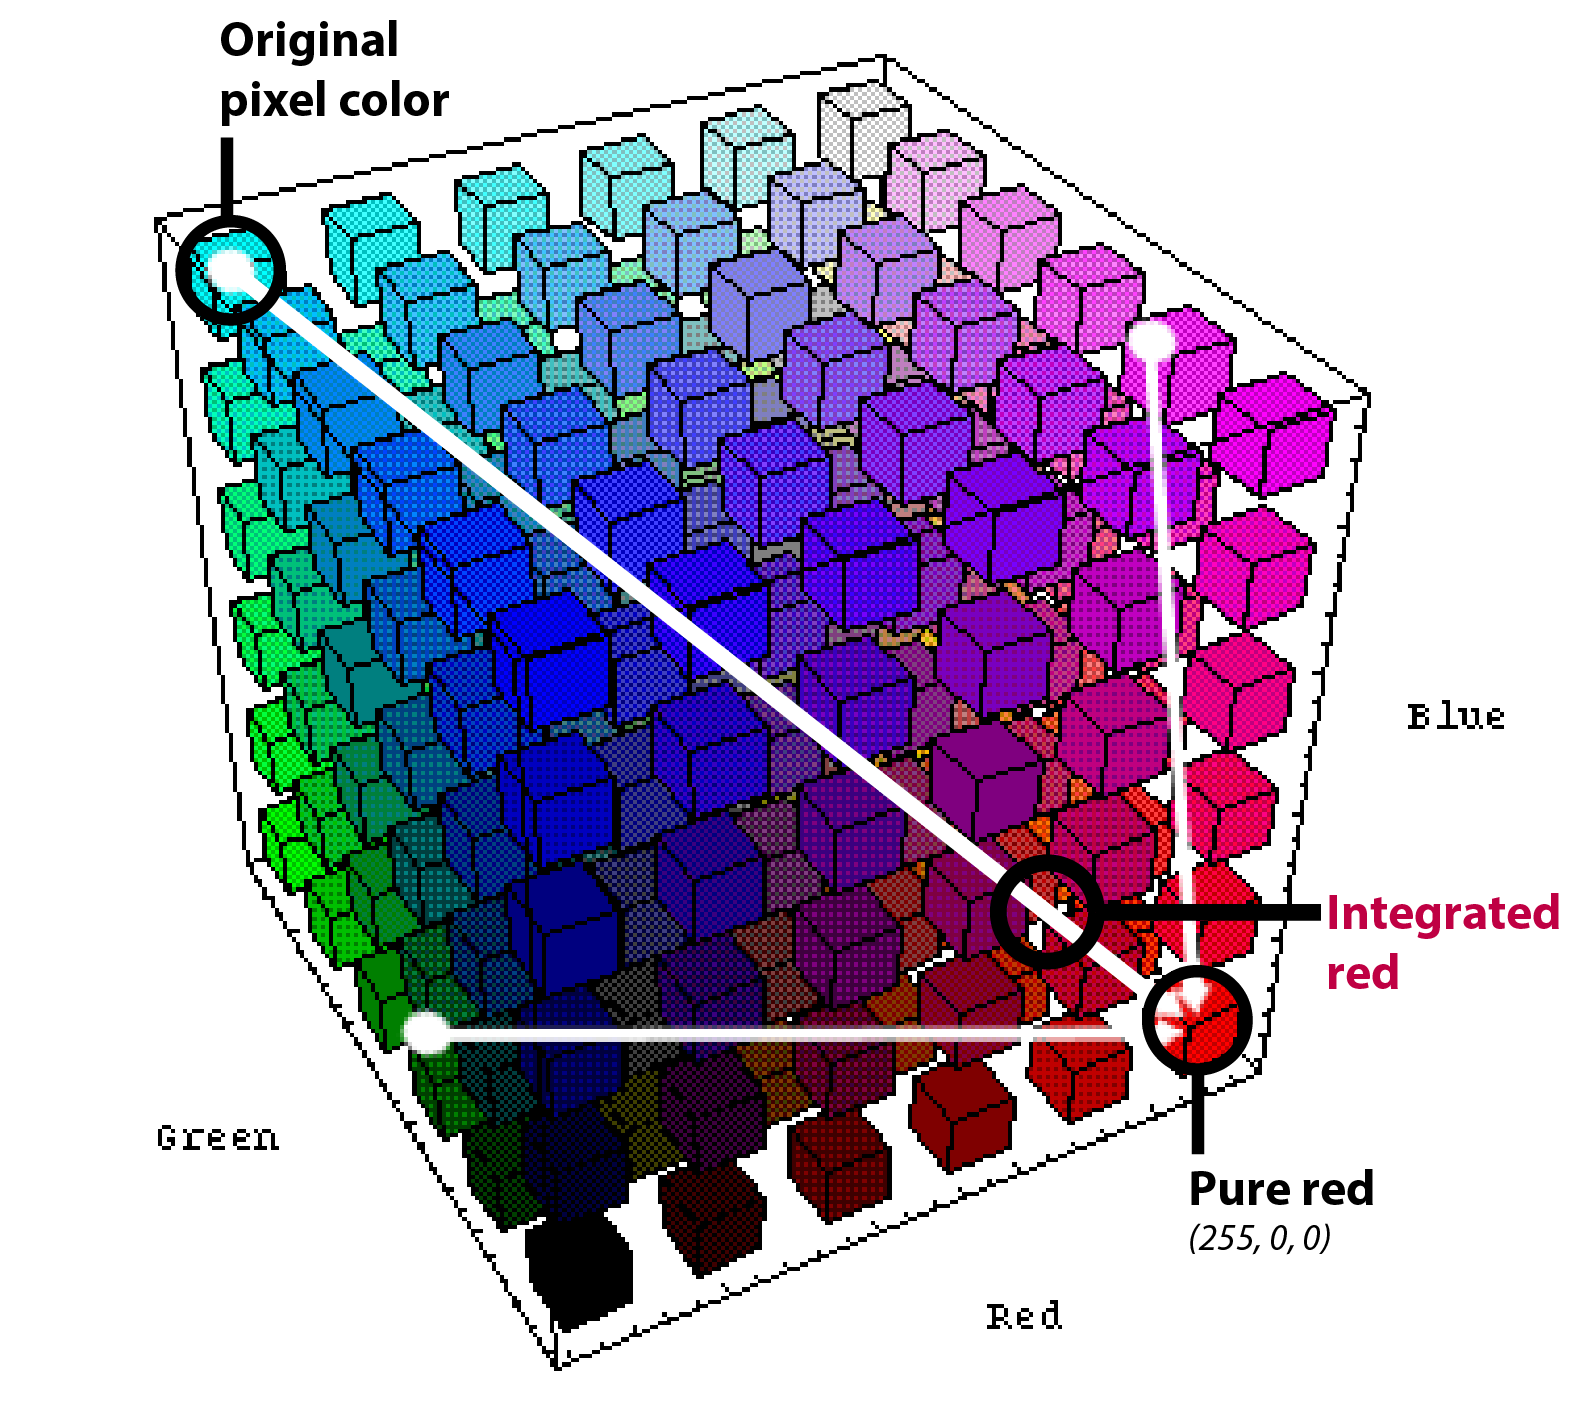
“Wait… What’s RGB?”

This Rubik's Cube is insane...
RGB tridimensional color model.
RGB is a color representation space through a vector with 3 elements: Red, Green and Blue. All 3 are quantified in levels from 0 to 2^ (Pixel Depth)-1. If we’re working with 8 bits, we’d be talking about the Standard Dynamic Range (SDR) [0 – 255]. If 10 bits, it’d be a High Dynamic Range (HDR) [0 – 1023].
One of the advantages of this tridimensional vector space is the possibility of drawing a vector from one point to another. I you wanna change the color, you just have to move between the points.

Original pixel color - pure red vector.
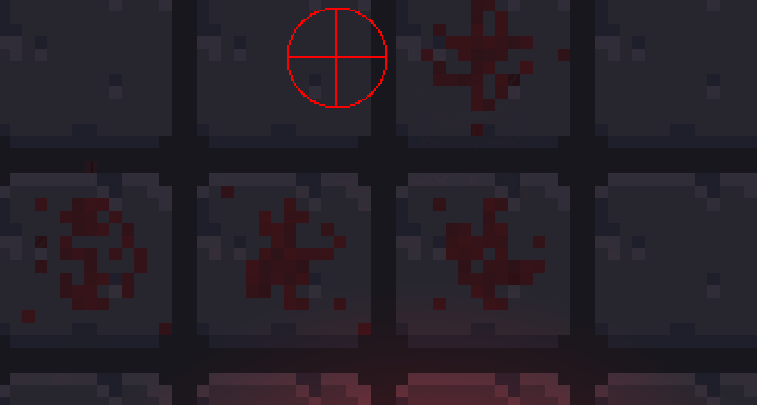
We want to bloodstain a pixel. This pixel has already a color (its color texture), and we want to stain it a red. With our pixel texture-painting system, we’ll draw a vector from the pixel original texture color, and we’ll set the “pure red” value (255, 0, 0) as the end of the vector. Let’s see if it works:
Well… Is that blood or radioactive ketchup?
Okay, now we know 2 things:
1) Bloodstains are red.
2) But not THAT red.
In other words, we need this red to be more integrated in the original color texture. To get that, our system will look over the vector to find a color value close to pure red.
Much better now, don't you think?
Having all that explained...
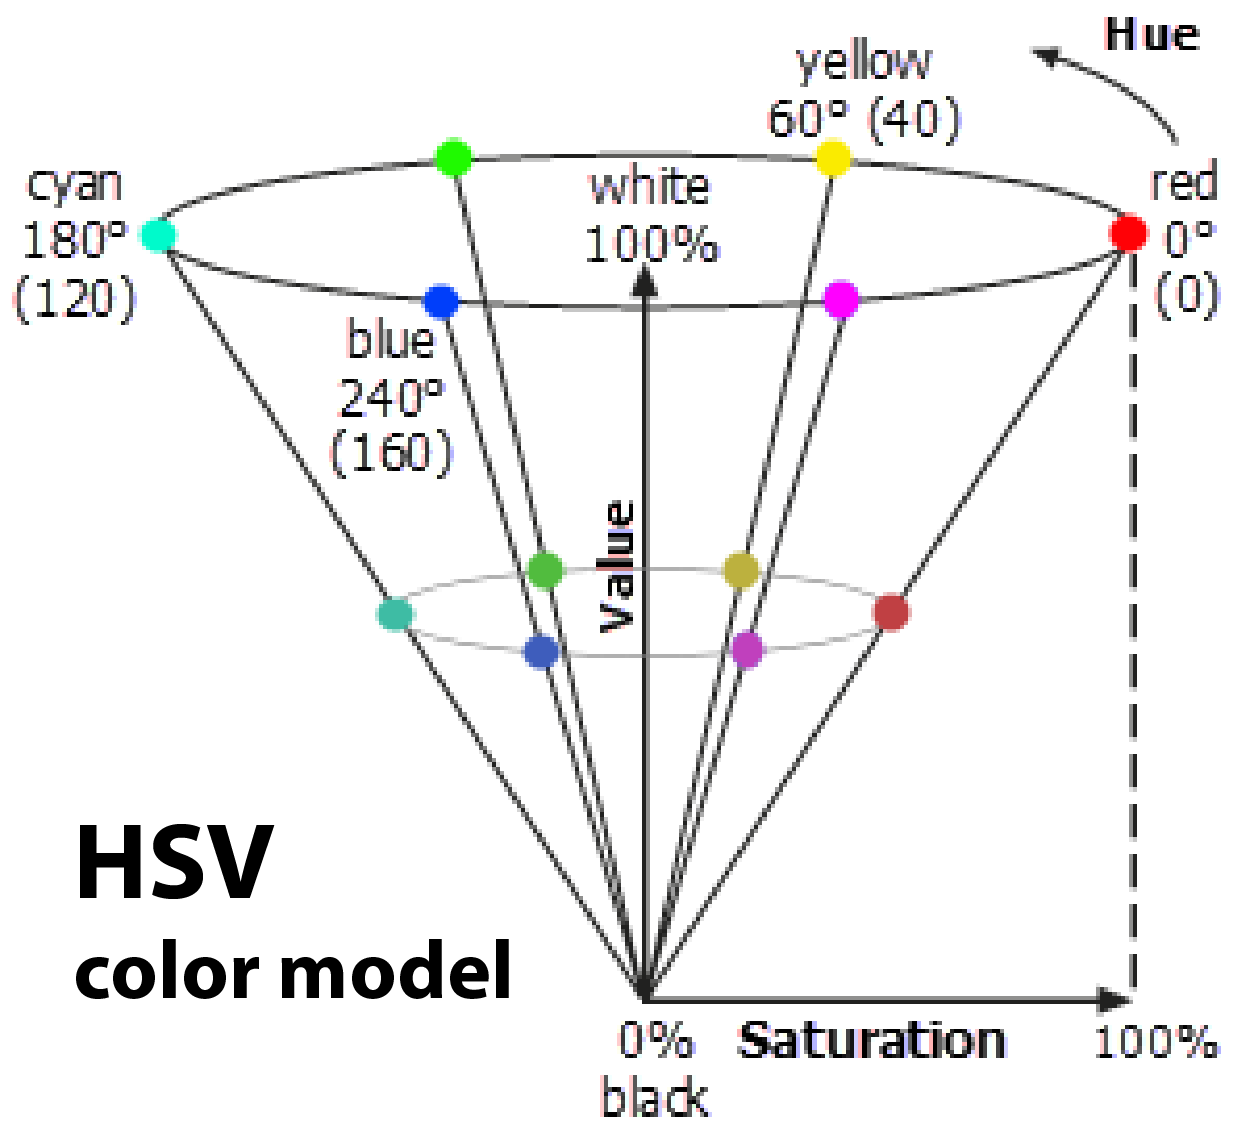
Is RGB the best color system for our Texture painting method?
No, it’s not. In fact, HSV color model would probably work much better. However, we didn’t want to add more calculations for color space model conversions, and RGB results are good.
BLOODSTAINING TEXTURES (V): NetherWorld in-game examples
TEST Nº1:
The best way to show how a bloodstain system works, is killing a bloodball enemy.

TEST Nº2:
Hitting several enemies in the same area + shadows + extra illumination effects applied to the whole scenario.

Wow, this article has been pretty intense! Let’s sum up the most important points of this pixel bloodstain system.
Summary
1) Select textures (objects) to stain.
2) Apply bloodstain pattern and define the pixels to stain.
3) Read the selected pixel color and move it through its RGB space to the desired blood color following your own parameters (“pure red” would be out of reach).
4) Apply the new color to the original pixel.
Hope you enjoyed the article!
We love video games and everything related to them. That's why we really hope you enjoyed this article. Give us your feedback in the comments!
We're also doing all our best to develop NetherWorld and spread the word about it. And we're happy to announce that NetherWorld has been nominated in the 3HM Awards! If you want to support us, you can vote for NetherWorld here!
Website: netherworldgame.com
Read more about:
BlogsAbout the Author(s)
You May Also Like